In the fast-paced world of e-commerce, strong visuals are no longer a nice-to-have, they’re a must. Especially on Shopify, where every second counts, optimized product variant images can make the difference between a bounce and a conversion. This blog will guide you through how to enhance both the speed and impact of your product images, using proven techniques and tools. You’ll also learn how to set color swatch and variant images in your store to streamline this process and improve your store’s visual presentation, load times, and ultimately, its conversion rate.
Step 1: Set Up Smart Color Swatches & Variant Images
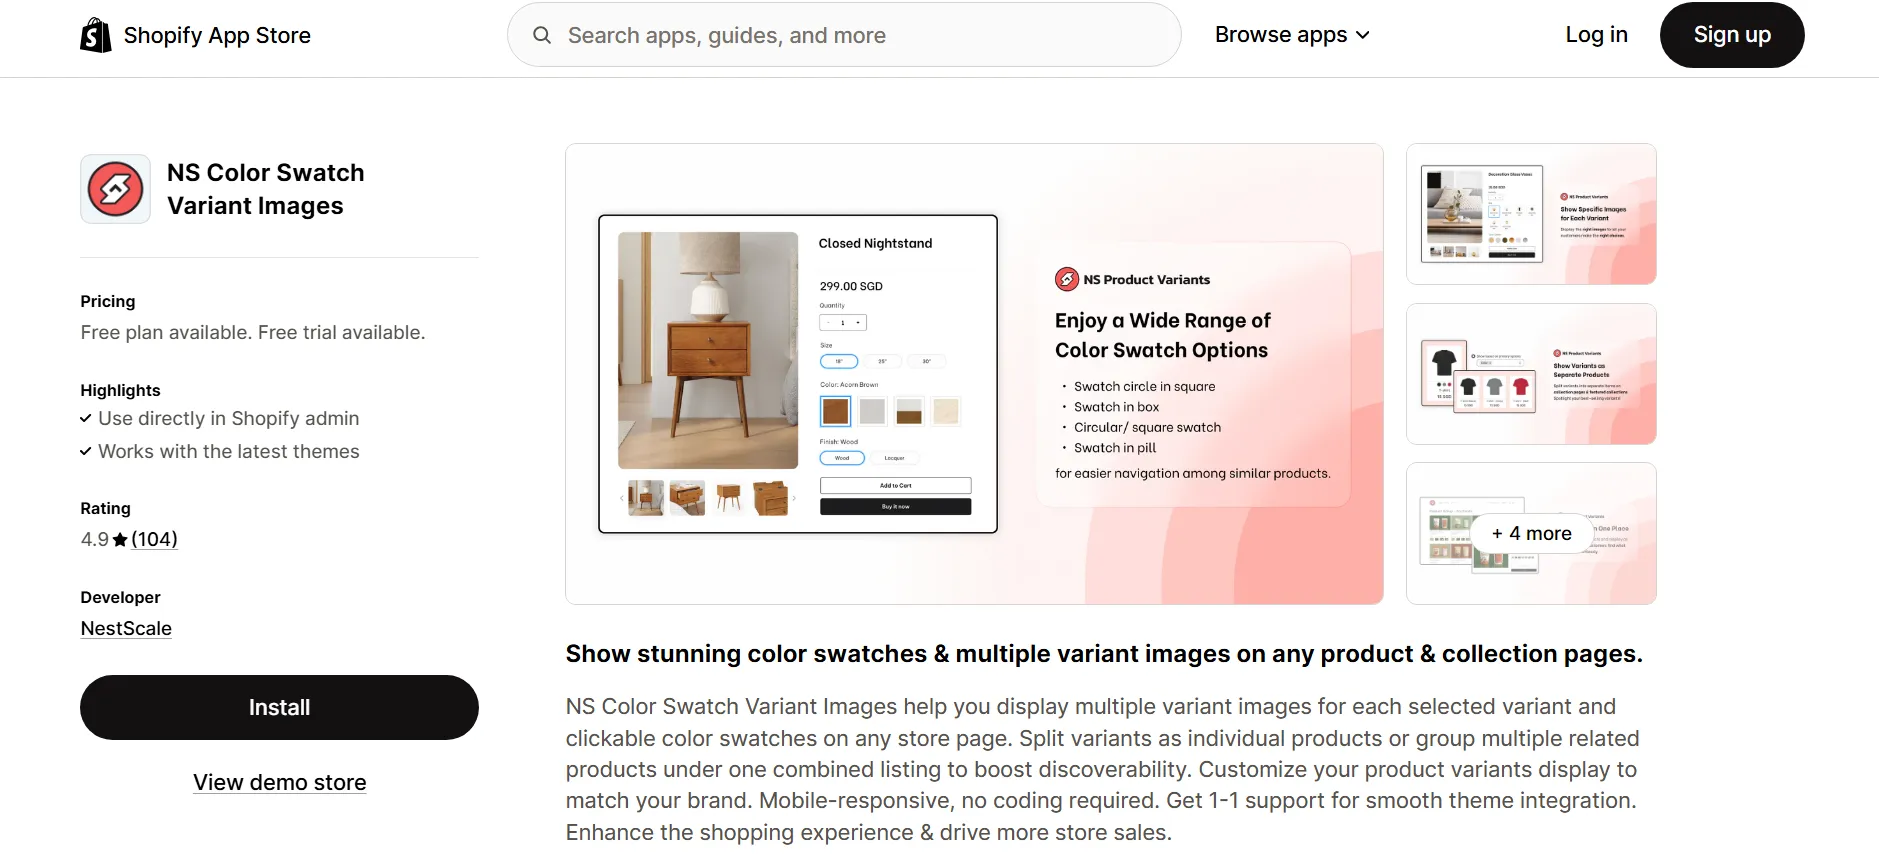
This app turns your product options into clickable, customizable swatches while automatically linking the correct variant images, no code required.
Here’s how to set it up:
1. Go to the Shopify App Store and install NS Color Swatch Variant Images.
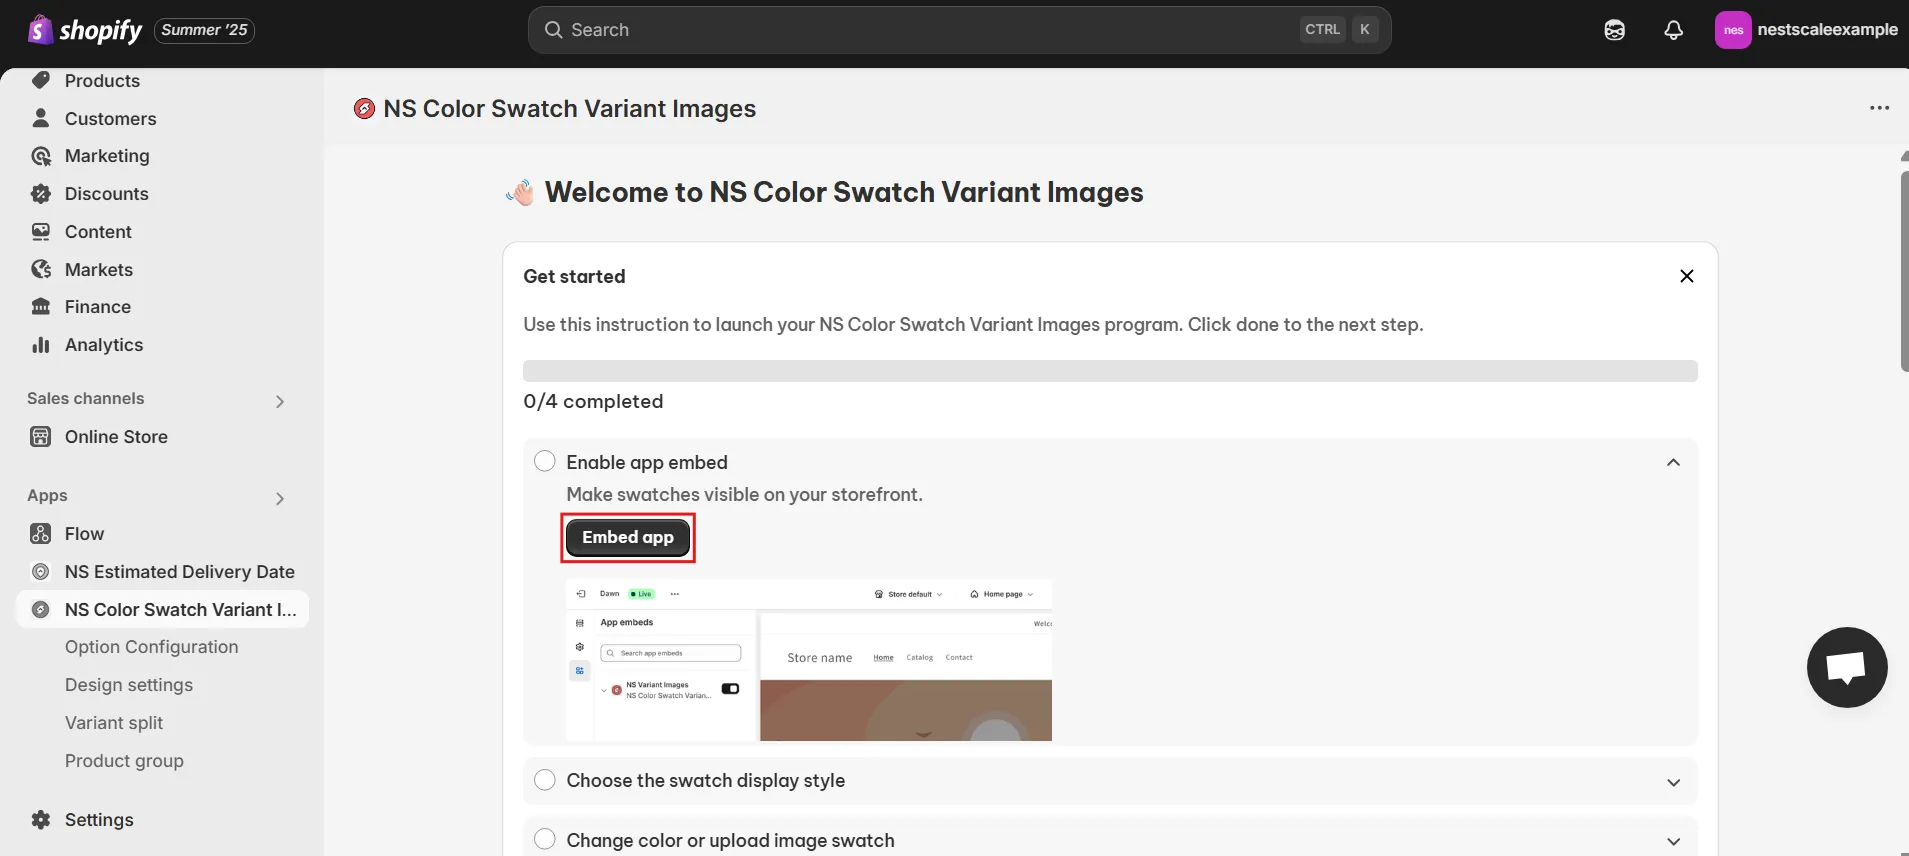
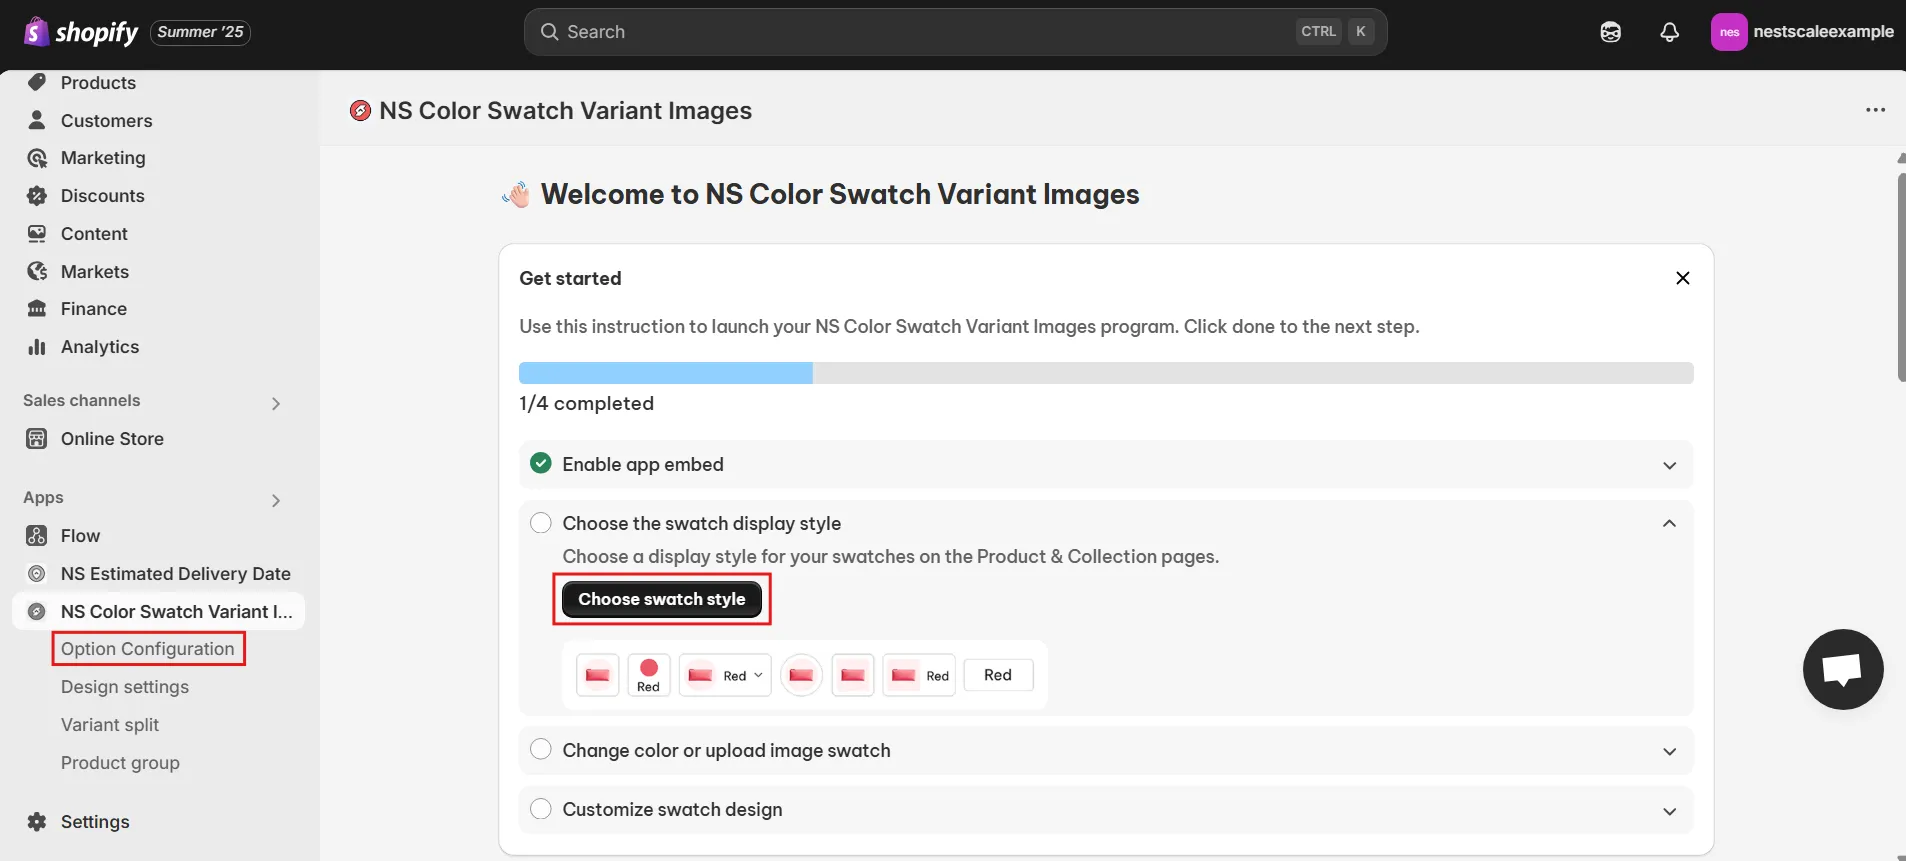
2. Open the app from your Shopify admin and complete the Get Started guide.
3. Click Embed App, toggle the app ON in your theme editor, and click Save.
Once enabled:
- The app auto-syncs your 100 latest products.
- You can apply swatches to both product pages and collection pages.
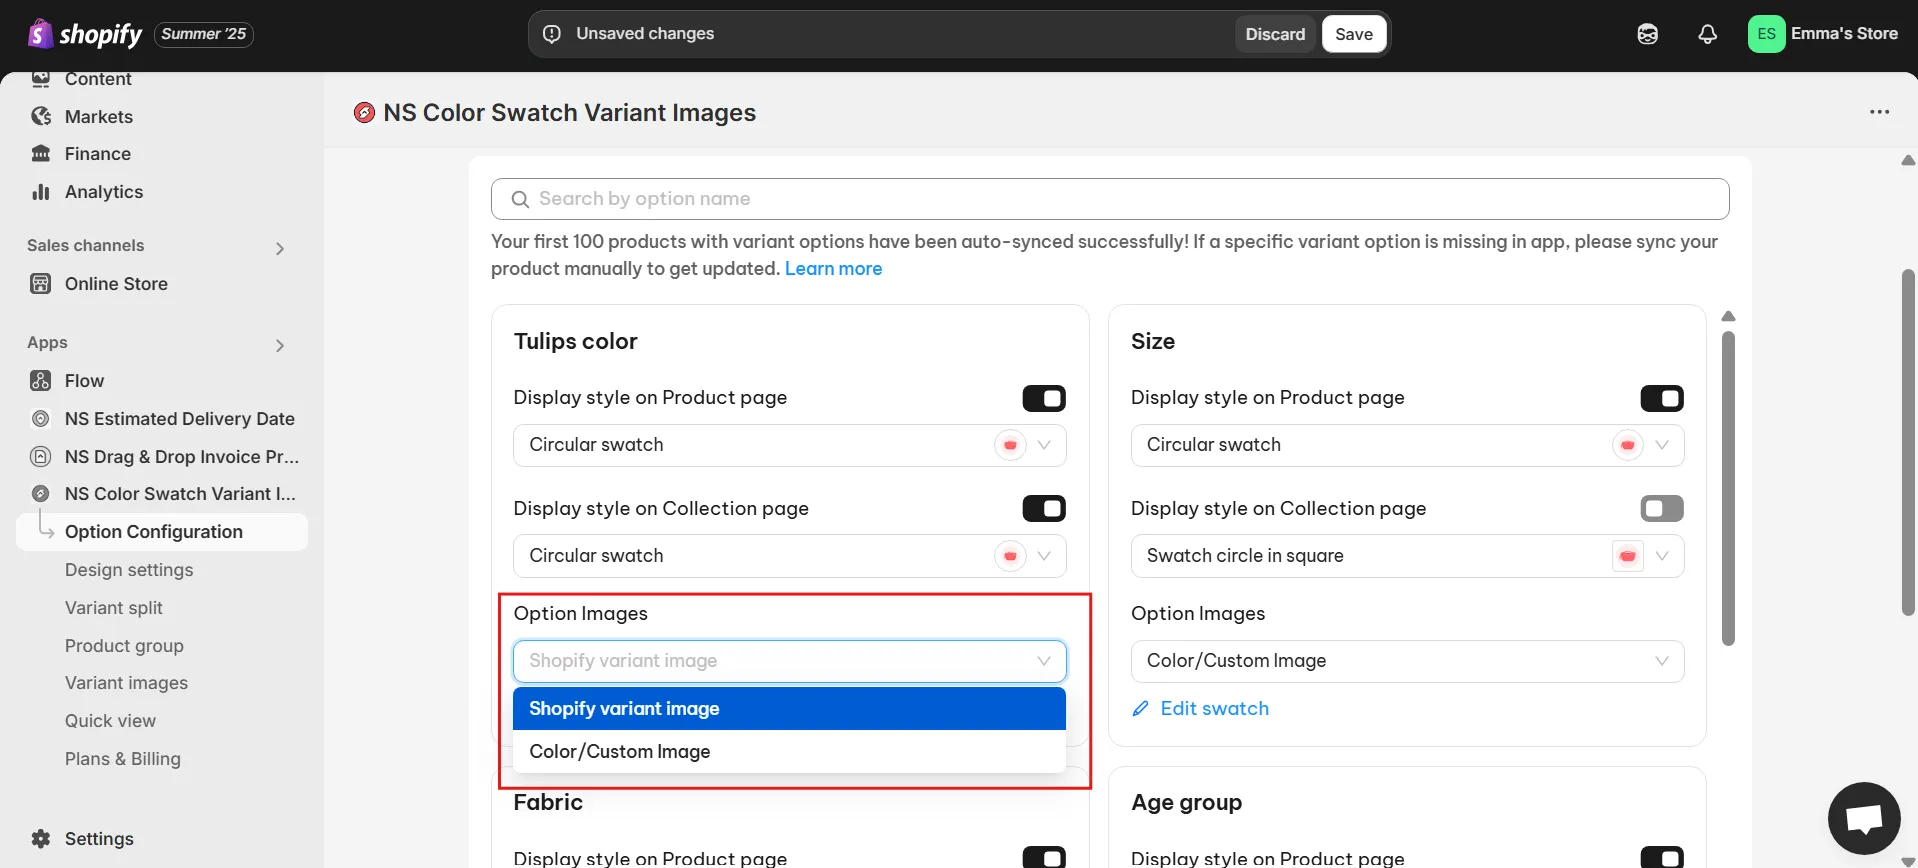
- You can choose to display swatches using:
- Variant images already uploaded to Shopify, or
- Custom colors and images using the color picker, HEX codes, or uploads.
Selecting Image Format and Size
Large, uncompressed images are one of the most common causes of slow-loading Shopify stores. To ensure fast performance and clear visuals, you need to choose the right format and image size before uploading.
Best practices:
- Use WebP for modern browsers (best balance of quality and speed).
- Fallback to JPEG where necessary for compatibility.
- Ideal dimensions:
- Main product images – 1200 × 1200 pixels
- Swatch images – 400 × 400 pixels
- Compress images using tools like:
Proper formatting ensures your product galleries load quickly while still looking sharp across devices.
Display Swatches on Your Storefront
Now it’s time to style and configure how those swatches appear on your product and collection pages:
1. From the dashboard, click “Choose Swatch Style” or go to “Option Configuration.”
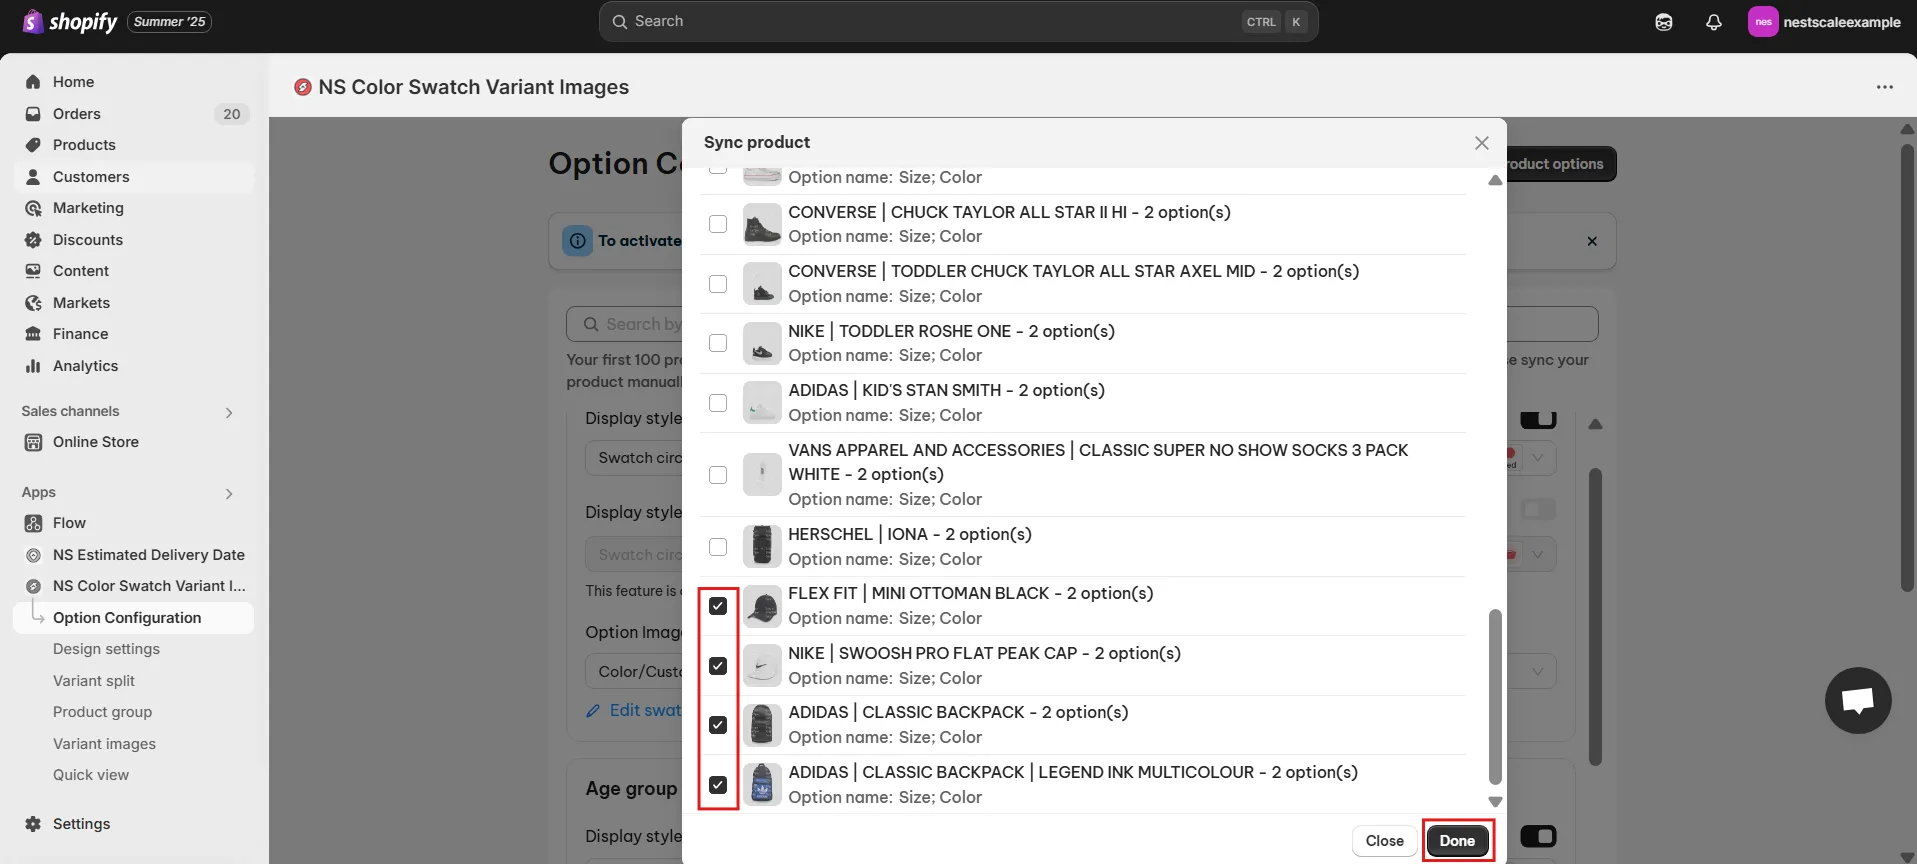
2. The app will auto-sync your 100 most recent products. Can’t find the one you want? Click “Add Product Options” to select it manually.
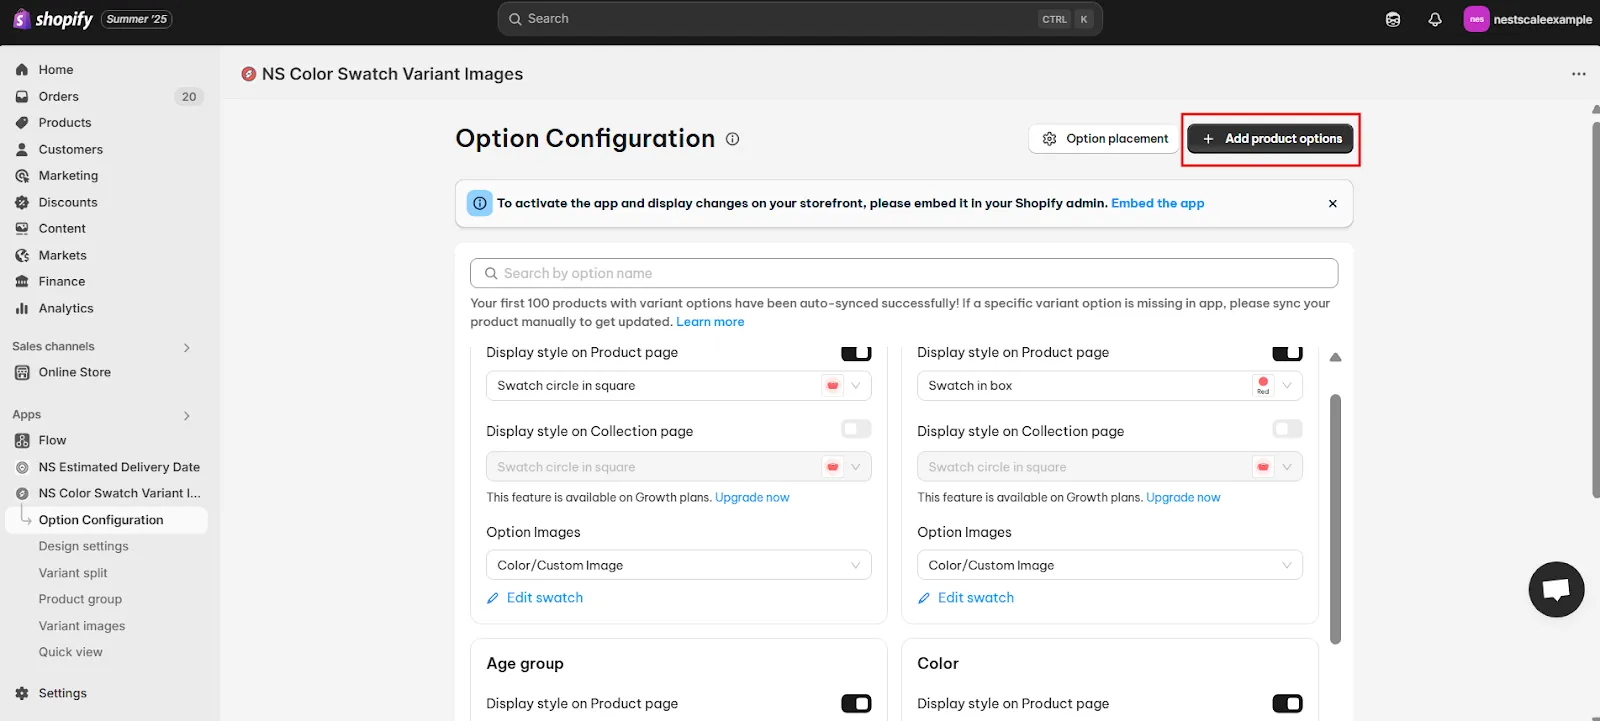
3. Choose the products you want to enable swatches for and click Done.
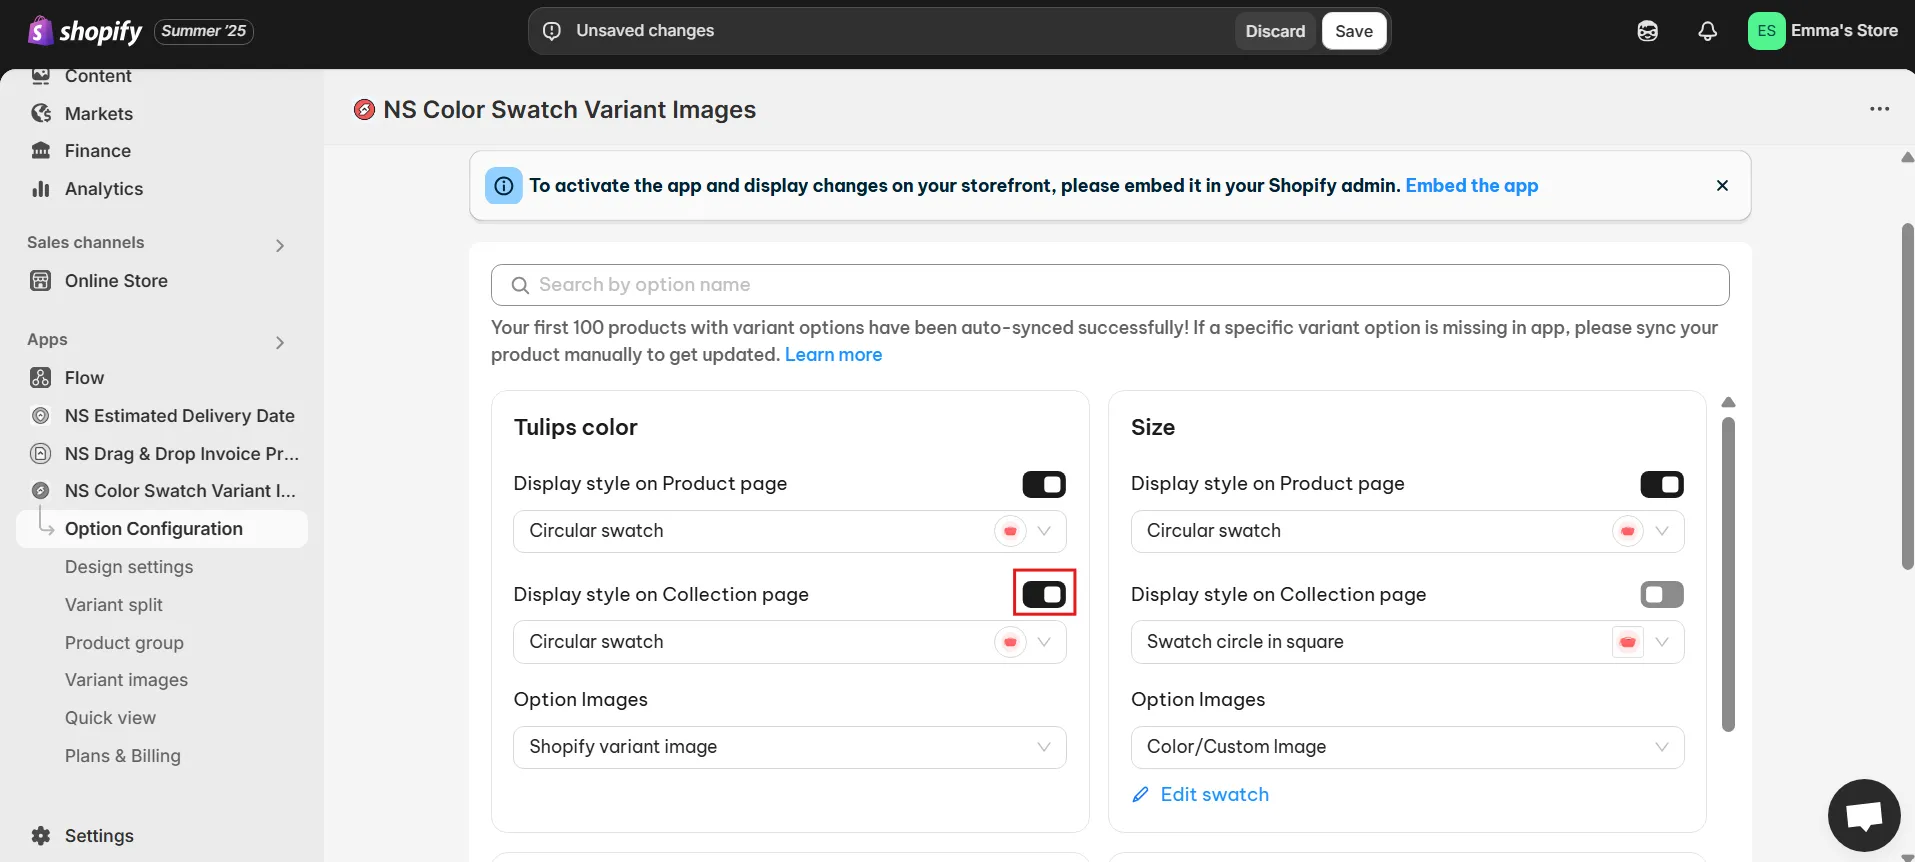
4. Toggle ON “Display Style on Product Page” for the option you want to convert into swatches (e.g., Color).
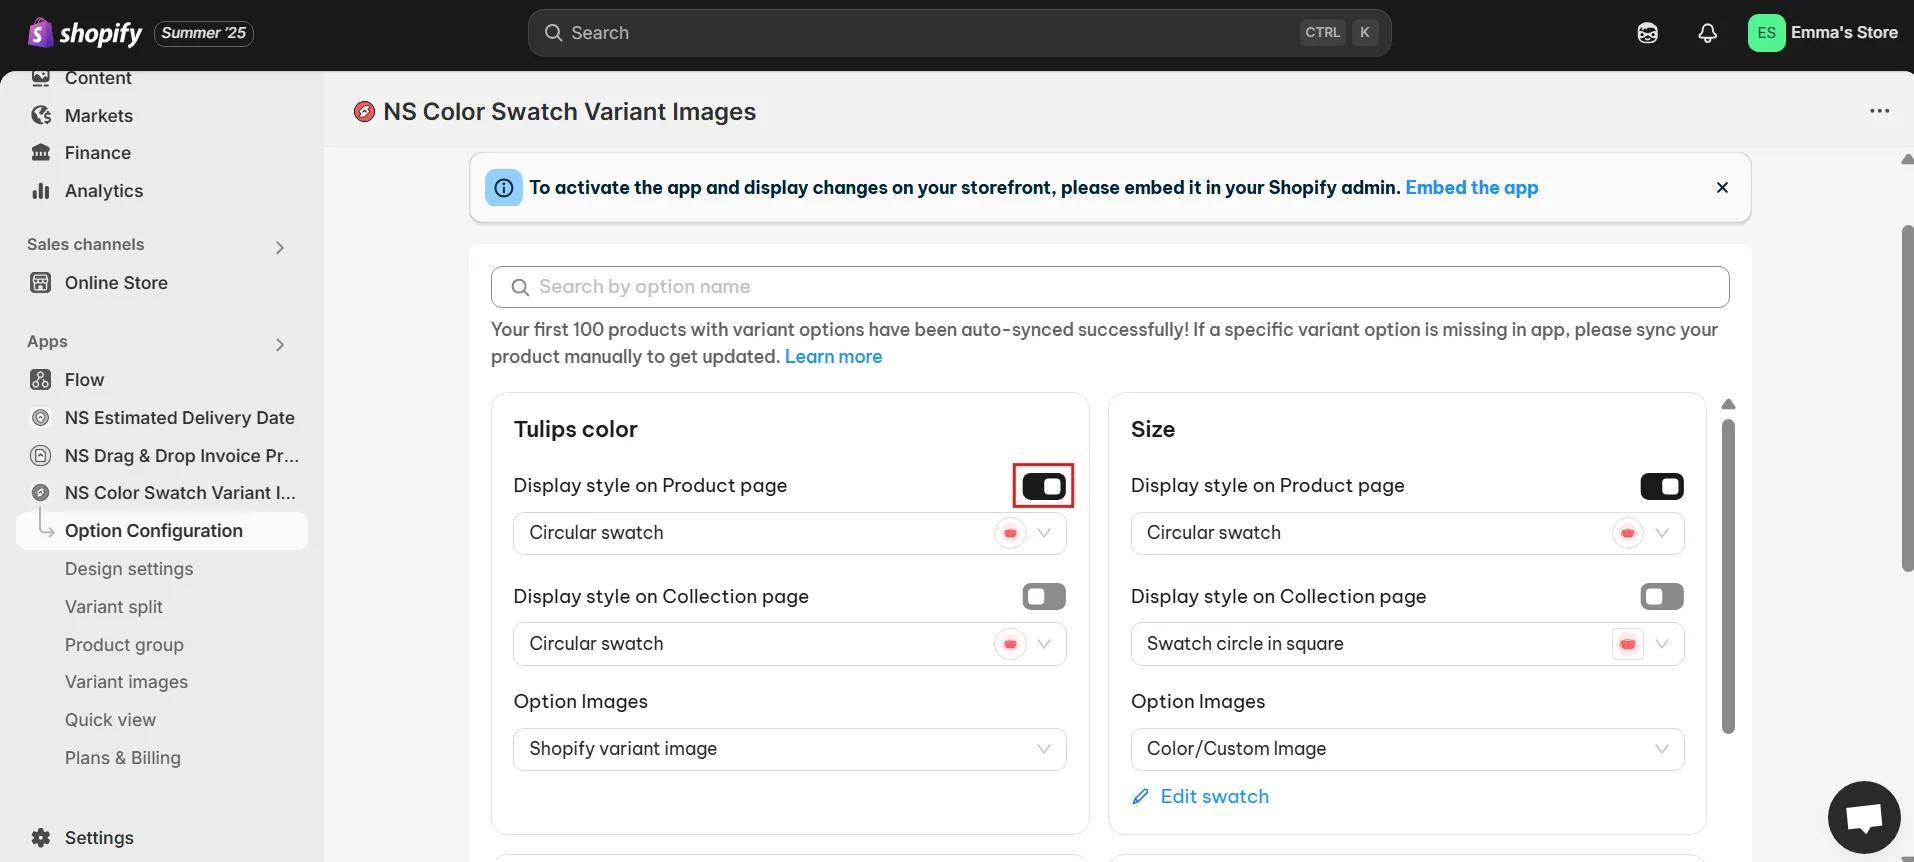
5. Want them on collection pages too? Toggle ON the second switch.
6. Select your swatch shape — square, circle, pill — and preview how it looks.
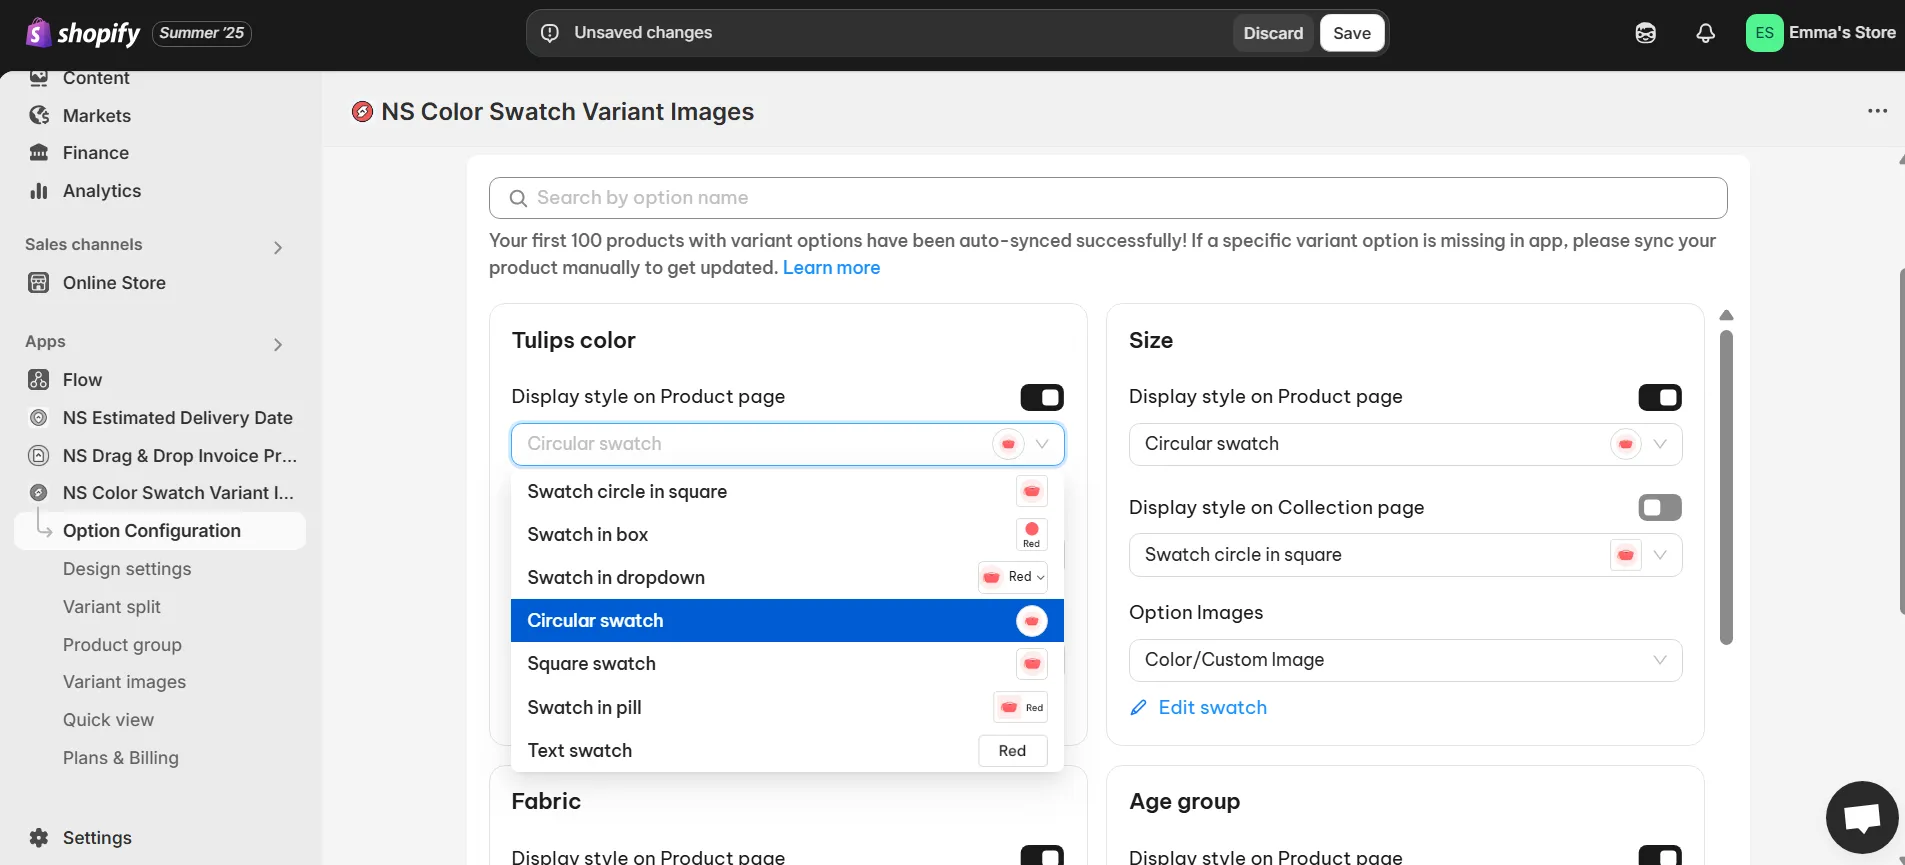
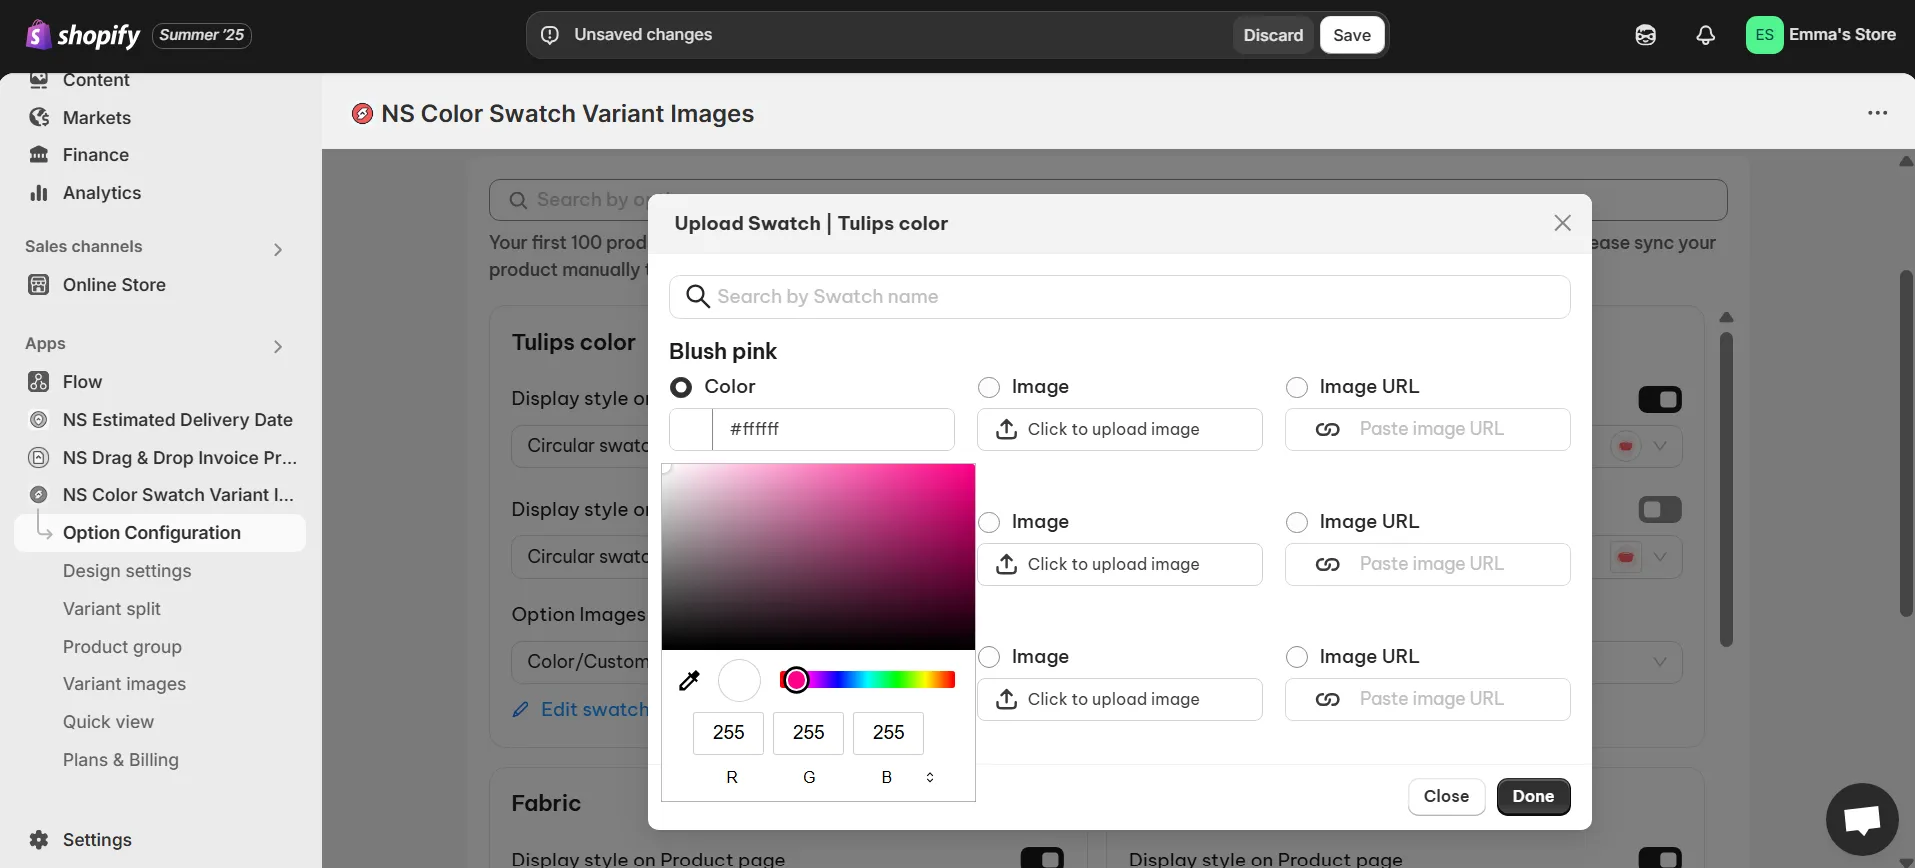
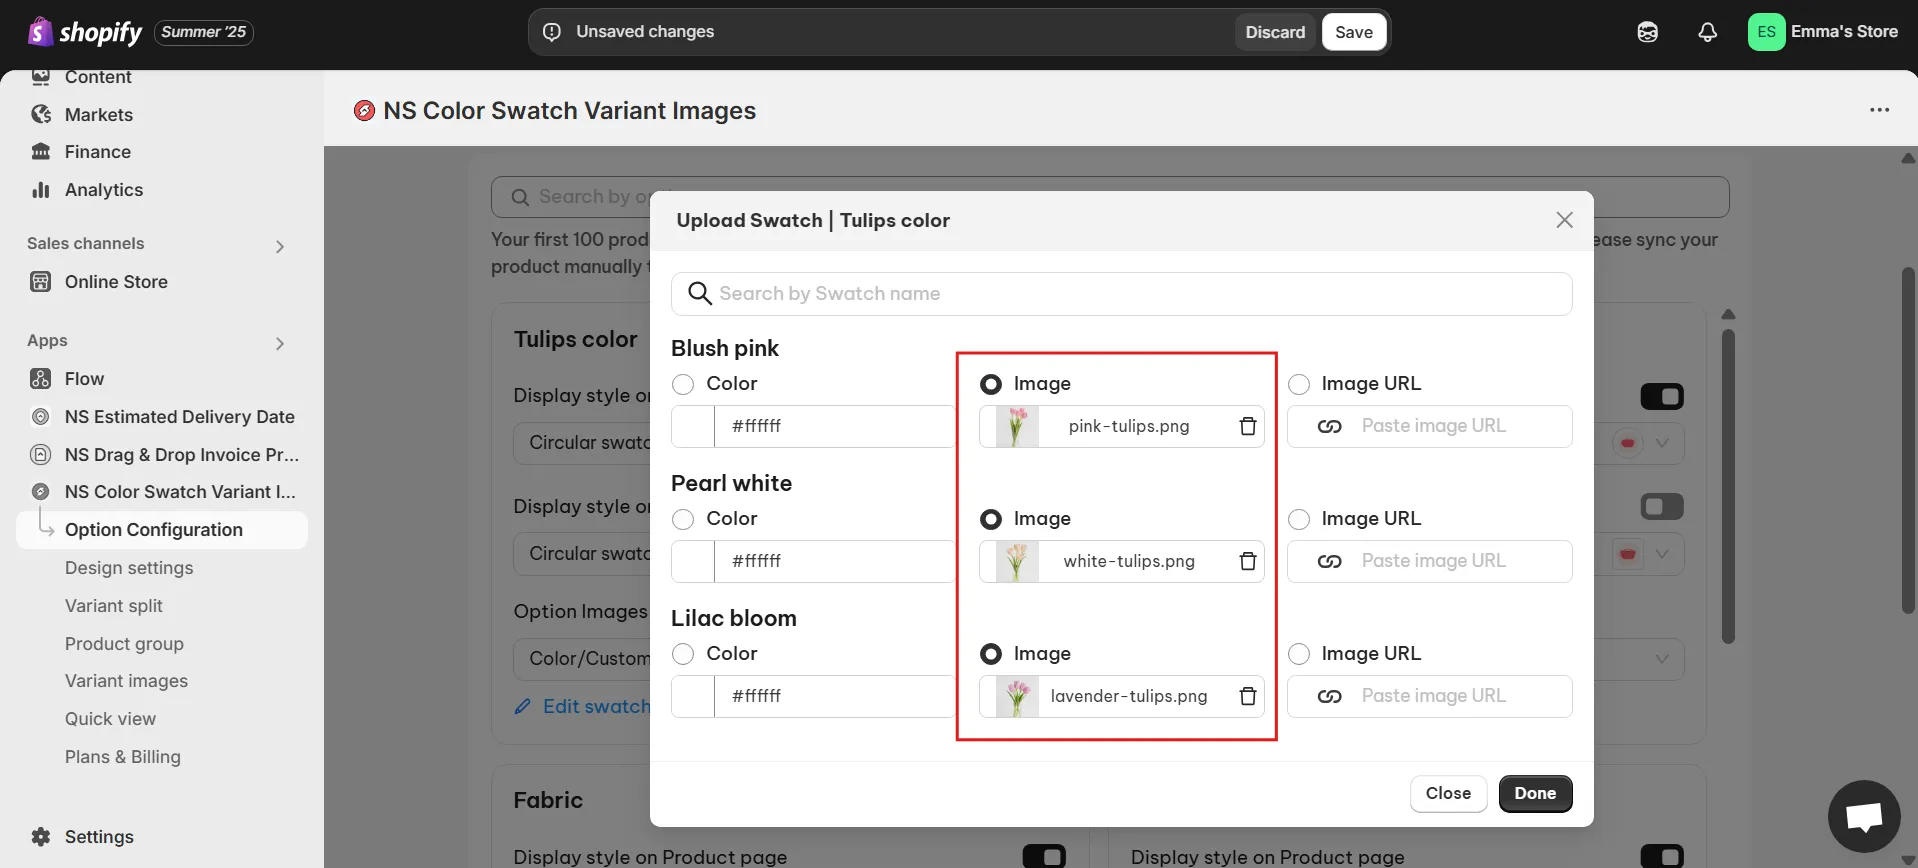
7. Choose how to display the swatch:
8. Click Edit Swatch to assign each option its own color/image.
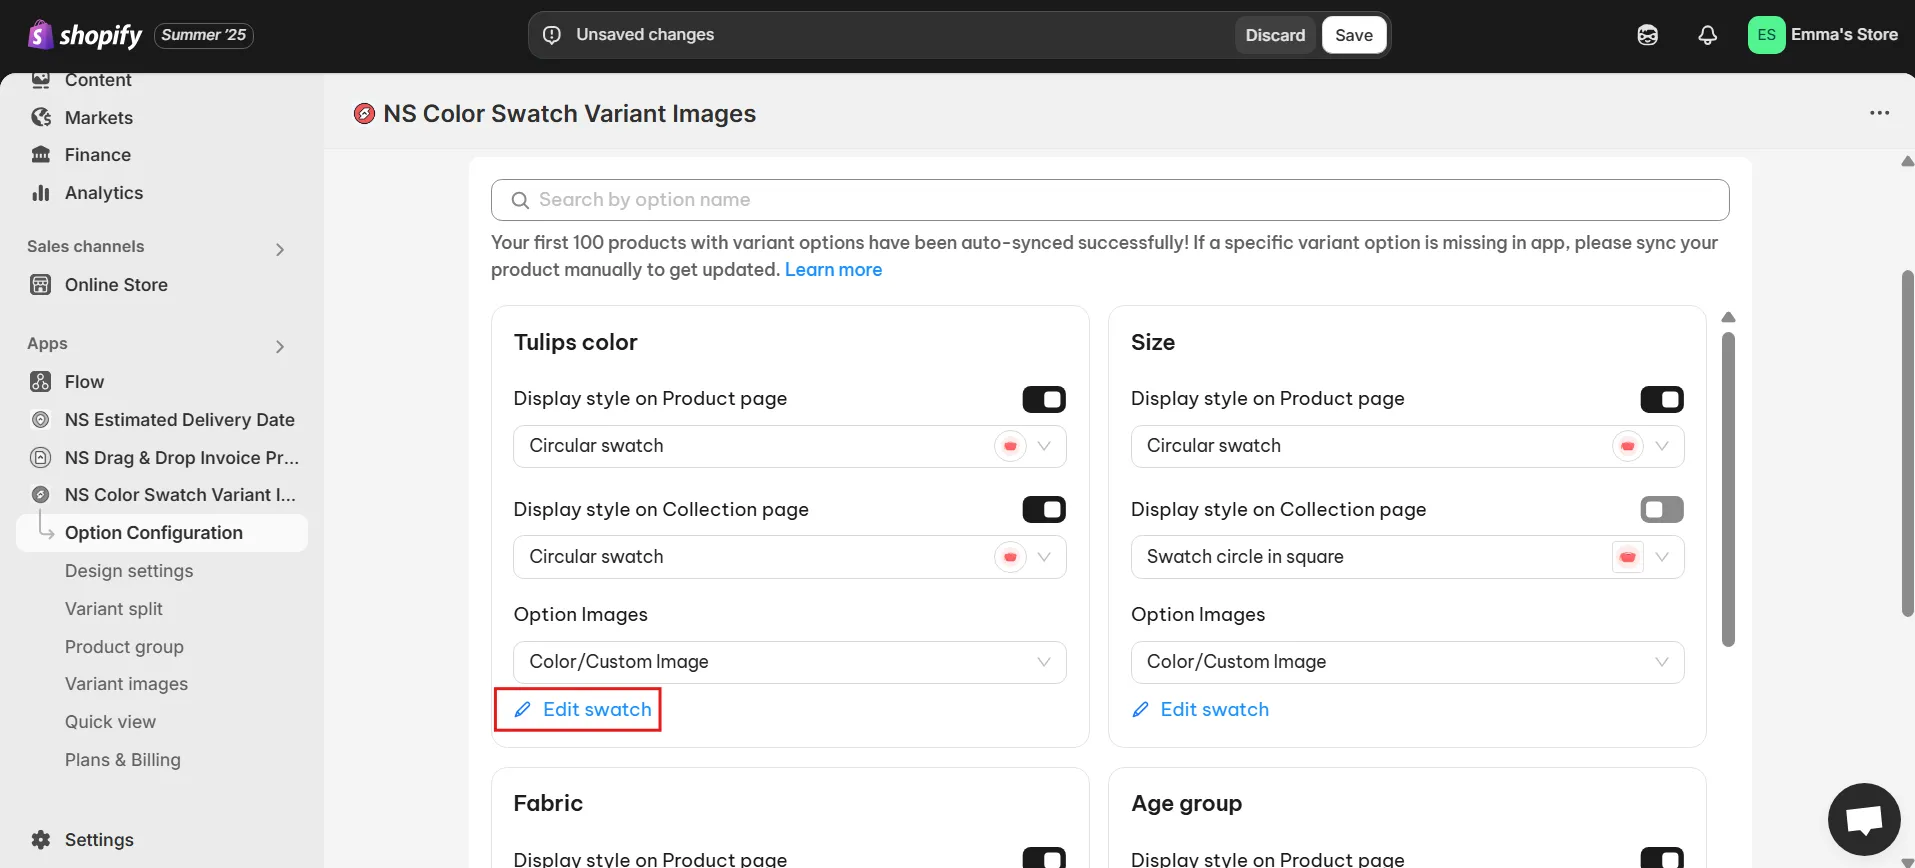
9. Once done, hit Save, and your store now has dynamic, professional swatches live.
Customize the Swatch Design
Make the swatches match your brand style:
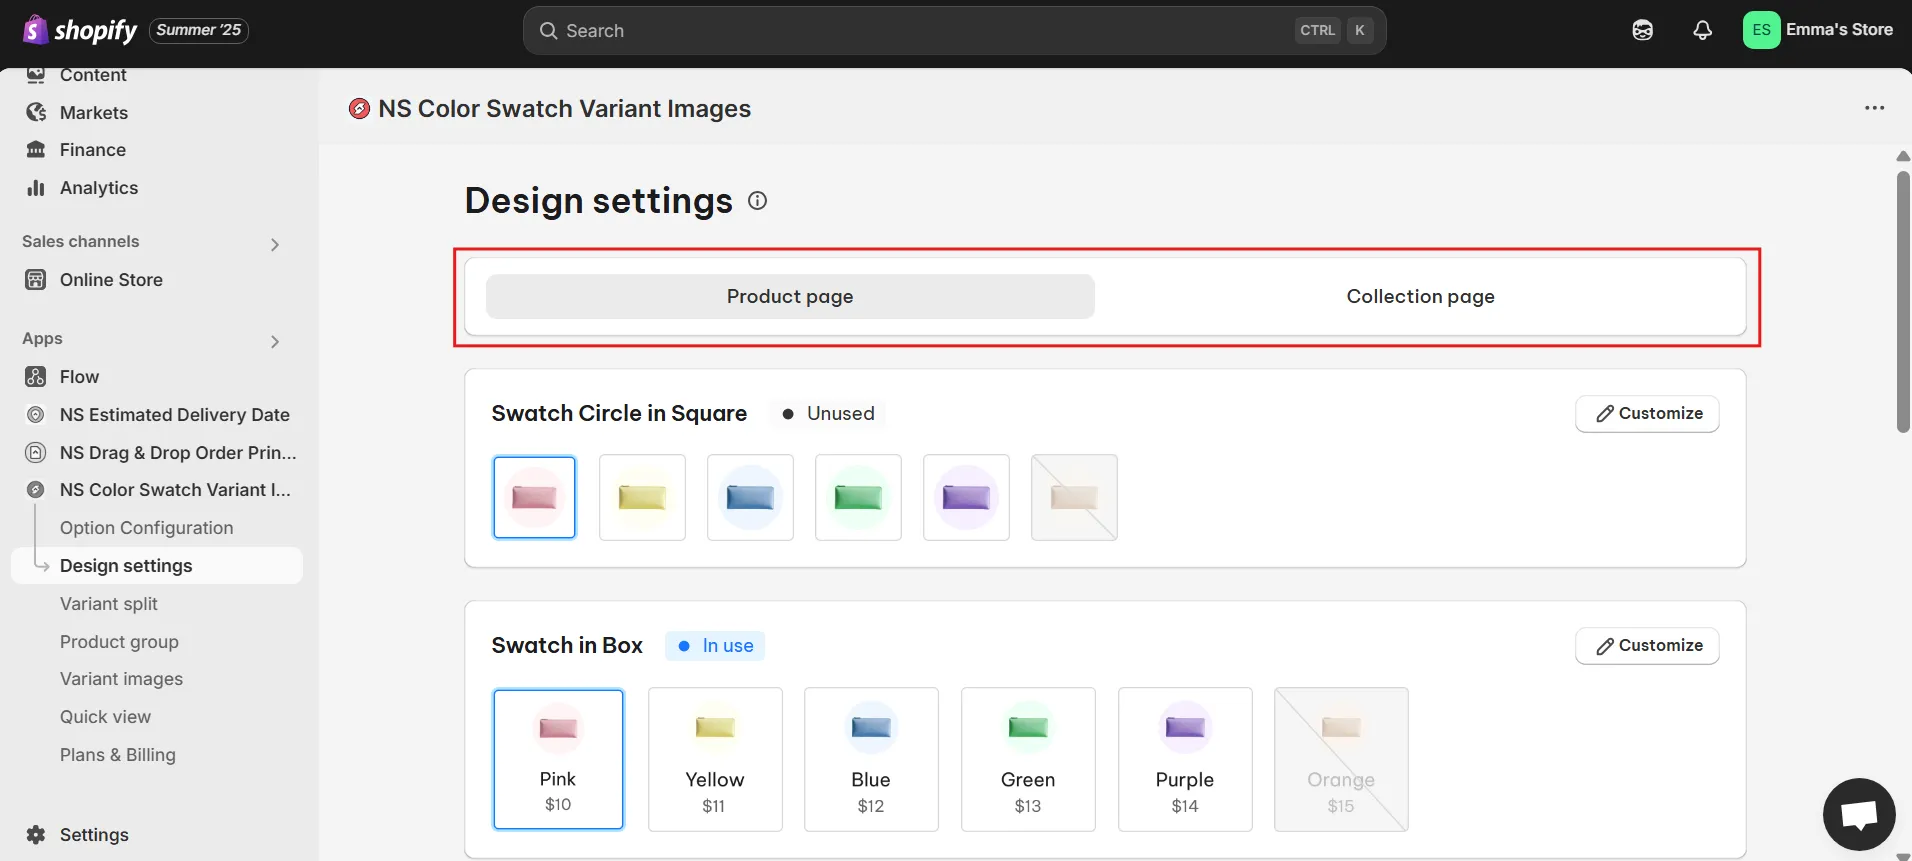
- Customize separately for Product Pages and Collection Pages.
Enhance UX and Drive Faster Conversions with Quick View Swatches
A slow or clunky shopping experience can turn even the most interested visitor away. One simple yet powerful way to streamline your store’s user interface and boost conversions is by enabling color swatches in Quick View mode. This feature lets customers preview variant images and color options directly from the collection page, without having to click into a separate product page.
By giving shoppers immediate access to key product visuals, you’re removing unnecessary steps from their journey and reducing friction in the decision-making process. The result? A faster, more seamless path to purchase.
How to Enable Quick View for Color Swatches with NS Color Swatch Variant Images
1. Open the app and navigate to the Quick View section from the main menu.
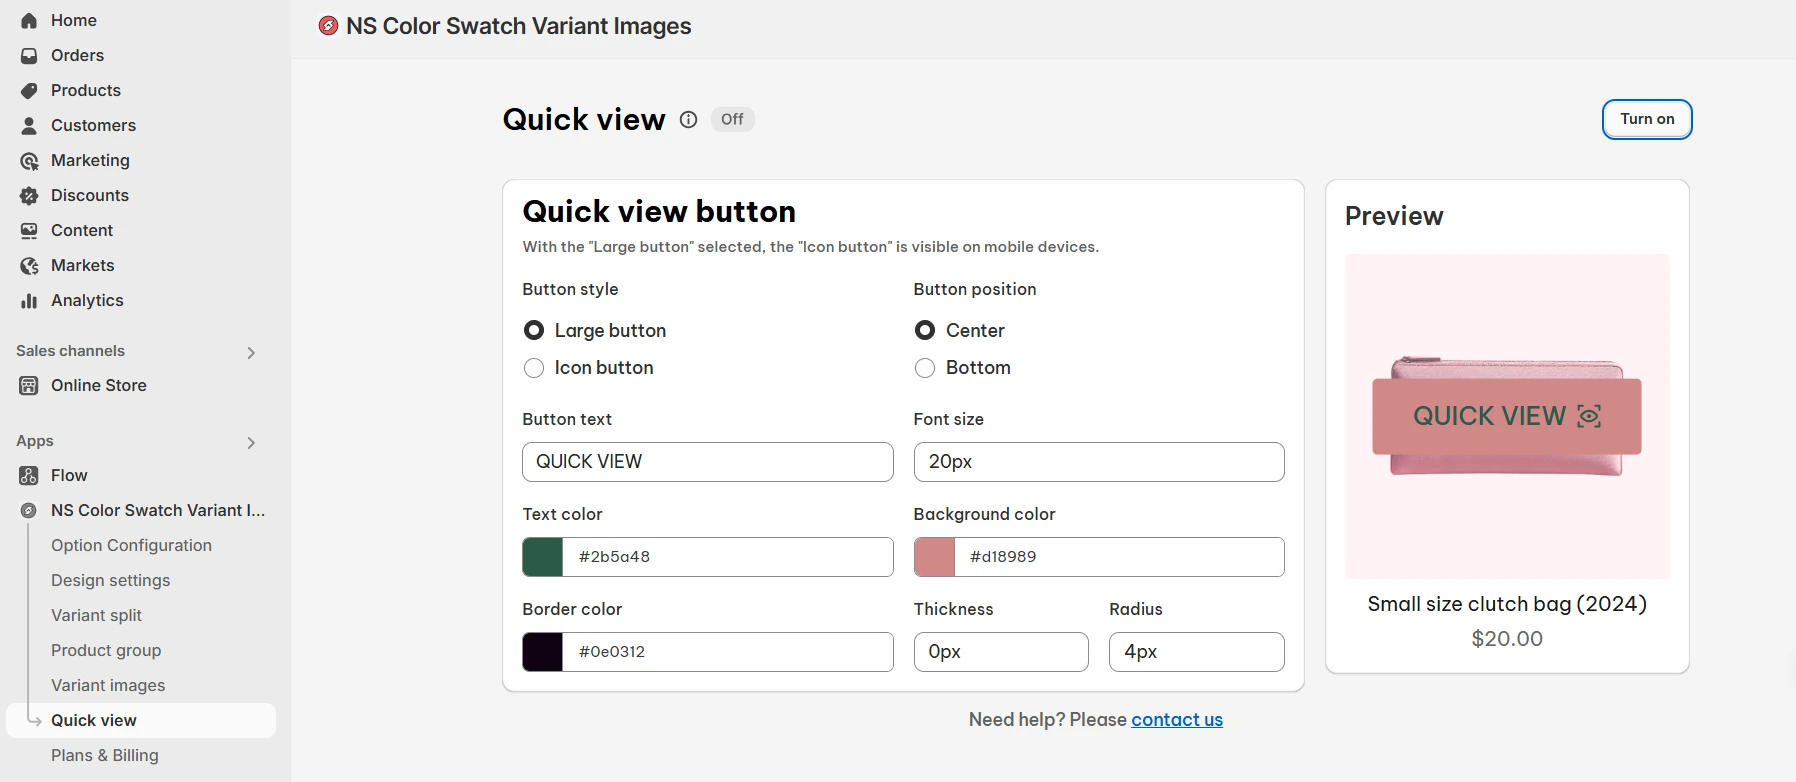
2. In the Quick View Settings, you’ll be able to:
- Customize the button style (e.g., outline, filled)
- Set the position of the button on the product card
3. Choose the button text color to match your store design
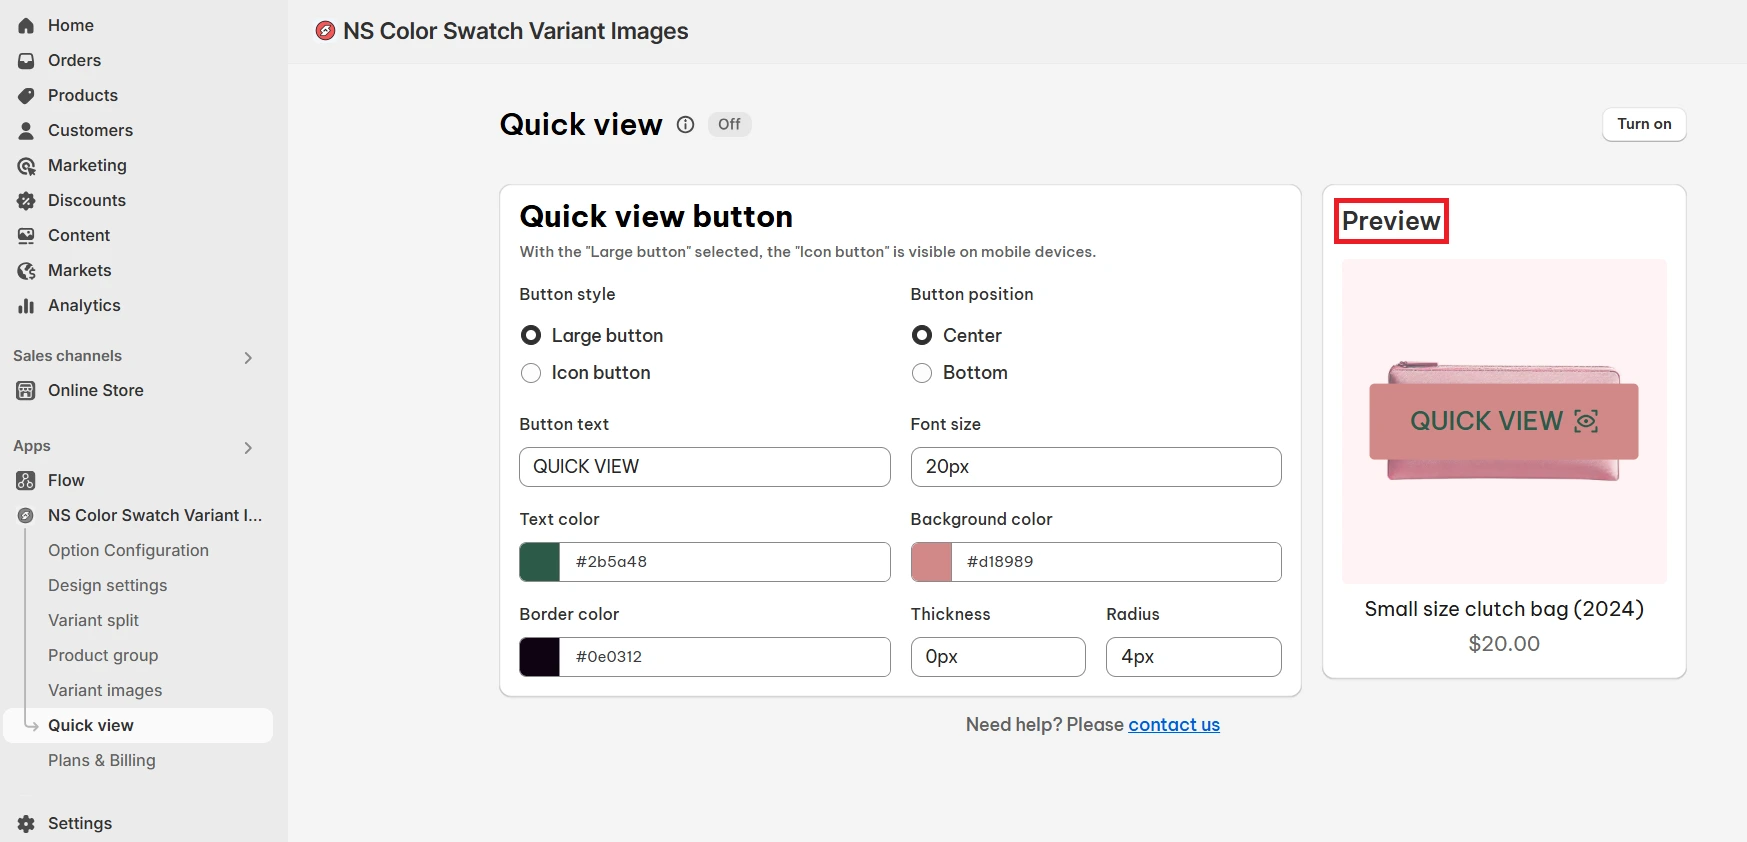
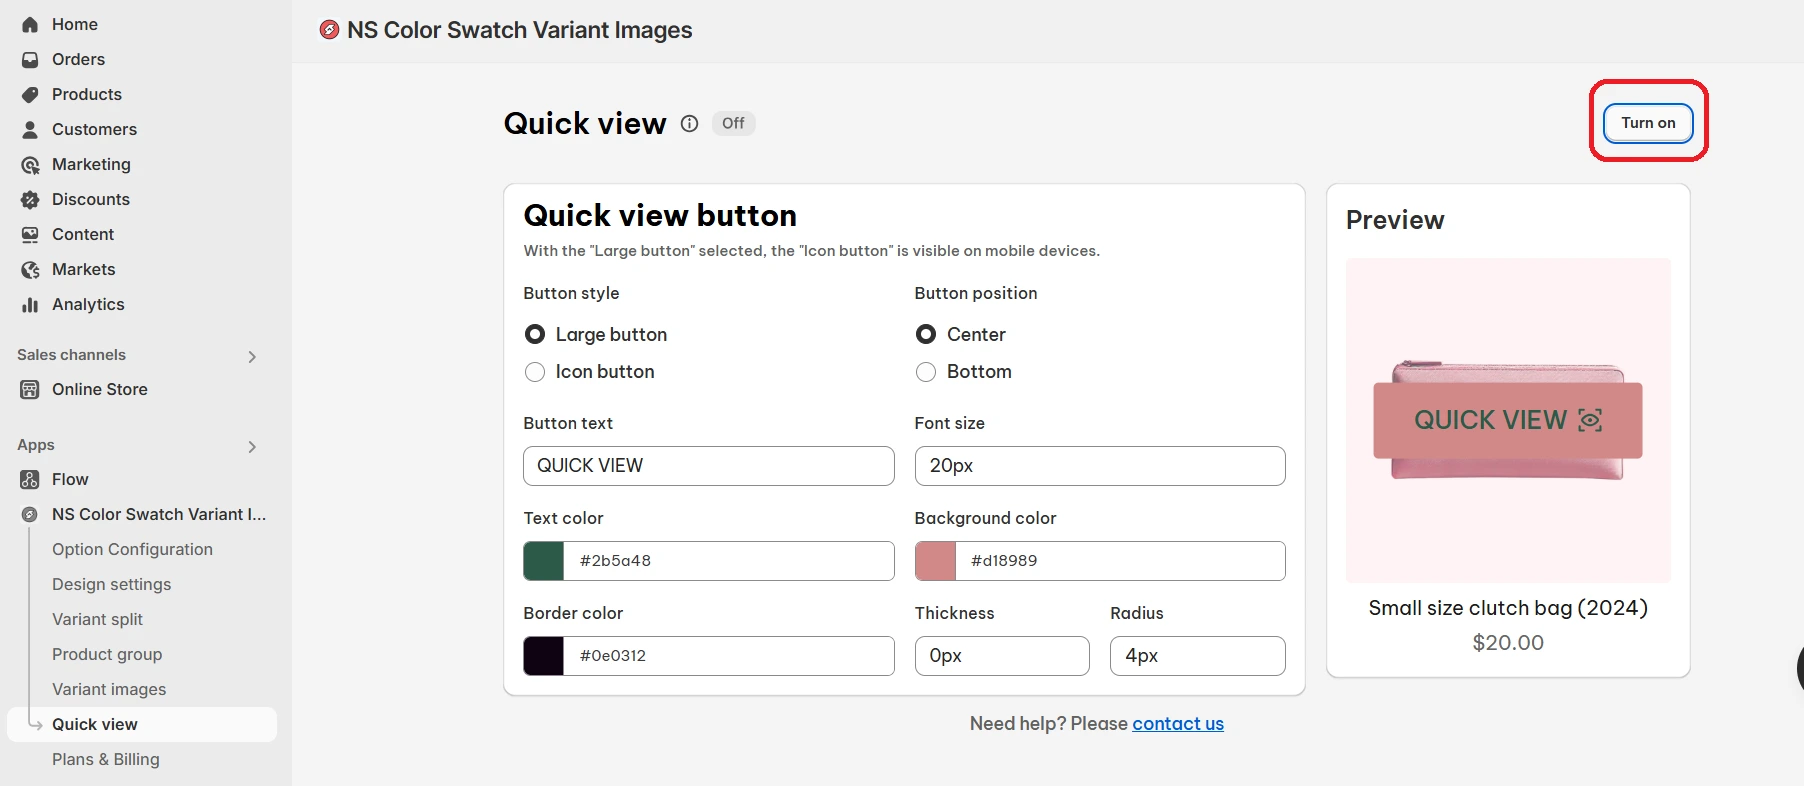
Use the Preview panel to see how it looks before publishing changes.
3. Once you’re happy with your settings, toggle the feature ON and click Save.
Now, your store visitors can view variant options, including swatch-driven image previews—directly from product grids. This not only improves the overall shopping experience but also speeds up product discovery and increases the likelihood of a conversion.
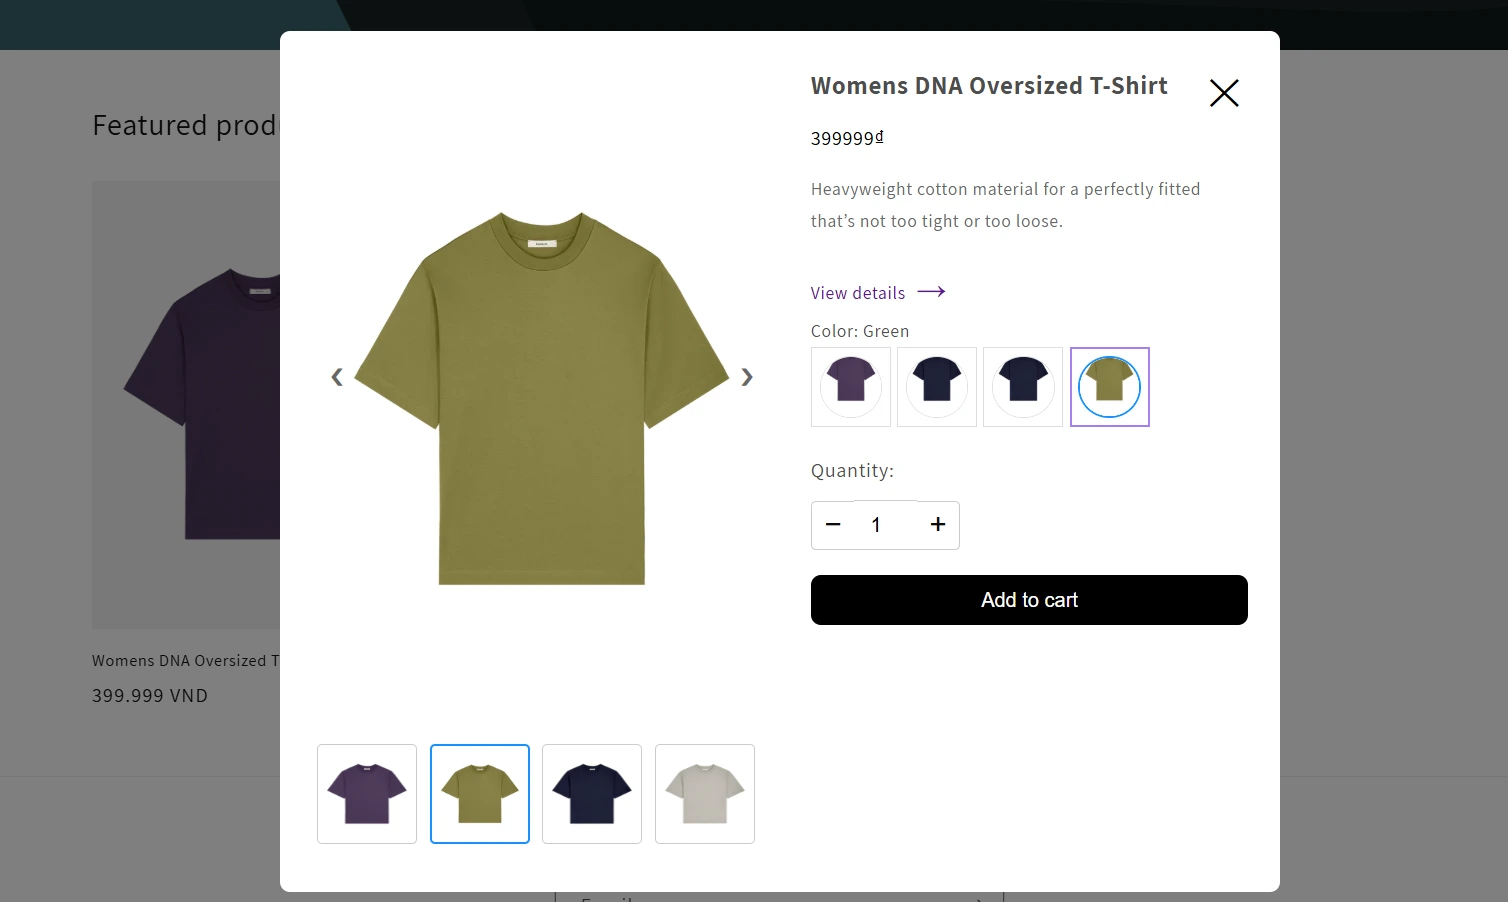
💡 Pro tip: Pair Quick View with variant-specific image galleries and swatches to give customers all the information they need, instantly.
The NS Color Swatch Variant Images app includes this Quick View functionality as part of its Growth and Professional plans, making it an ideal upgrade for merchants who care about performance, UX, and conversions all at once.
Step 2: Speed Up Image Loading
Slow-loading product pages lead to higher bounce rates. Optimizing image delivery ensures your customers have a smooth browsing experience.
Improve load speed by:
1. Relying on Shopify’s built-in CDN to distribute your images globally.
2. Testing your performance regularly using:
These steps reduce time-to-interaction and keep customers engaged with your products.
Step 3: Optimize Alt Text and Variant URLs for SEO and Discoverability
Visual optimization isn’t just about how your images look, it’s also about how they’re indexed and found online. Adding SEO-friendly alt text and unique variant URLs can significantly improve your store’s visibility in search results, boost accessibility, and enhance the overall user experience.
Why Alt Text Matters
Alt text (alternative text) serves two key purposes:
- It describes your product images for users relying on screen readers, ensuring your store is accessible to all shoppers.
- It helps Google and other search engines understand the content of your images, improving your rankings in image search results and increasing organic traffic.
Tips for Writing Effective Alt Text
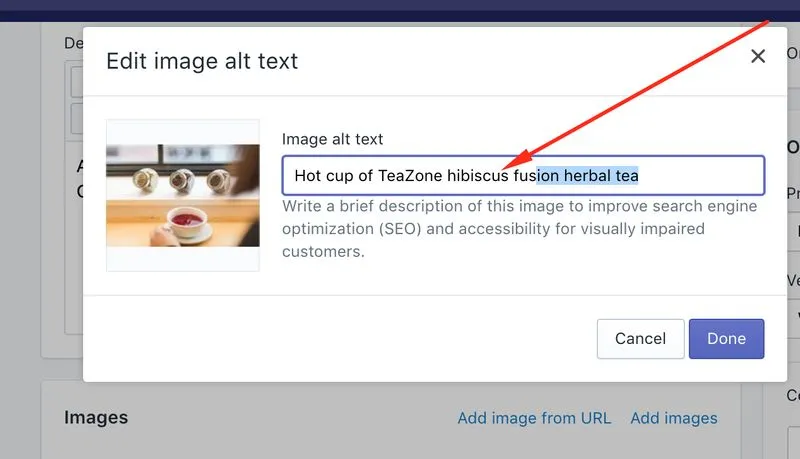
1. Be specific and descriptive about what the image shows:
✅ “Red cotton hoodie front view”
❌ “product image”
2. Use natural language with relevant keywords, avoid keyword stuffing or vague labels.
3. Apply alt text to all image types:
- Main product images
- Swatches (if using image-based swatches in NS Color Swatch Variant Images)
- Gallery and zoomed-in images
These small details help your product pages become more discoverable and accessible, which positively impacts conversion and trust.
Create Unique URLs for Each Variant (Optional SEO Boost)
Shopify doesn’t natively allow each product variant (like color or size) to have its own URL. However, this functionality can be extremely useful for SEO, ad campaigns, and social sharing, especially when showcasing a specific product style or variant.
With the NS Color Swatch Variant Images app, you can unlock this capability. The app lets you:
- Link each variant to a unique URL
- Share direct links to a specific color or style
- Optimize these URLs for ad targeting, influencer campaigns, or localized search
This added flexibility makes it easier for customers to land directly on the product variant they want, shortening the conversion path and improving user experience.
Step 4: Track Image and Swatch Performance
Once everything is set up, it’s time to measure what’s working—and improve what’s not.
What to track
1. Swatch interaction:
- Are shoppers clicking on swatches?
- Which variants are clicked the most?
2. Add-to-cart behavior:
- Do swatch clicks lead to conversions?
- Is there a variant preference?
3. Performance by layout:
- Compare click-through rates on product vs. collection pages.
- Test swatch styles and placement using A/B testing.
Tools to help
- Shopify Analytics for basic insights.
- Hotjar or Lucky Orange for heatmaps and visitor behavior.
- NS Color Swatch app’s support for multi-language labels, variant split layout, and hover effects, where you can display variant names, apply subtle shadows, activate informative tooltips, or enable image zoom functionality.
FAQs
How does Shopify optimize images by default?
Shopify automatically compresses and resizes your uploaded images, delivering them through a global CDN. It also serves responsive image sizes and formats like WebP when supported by the shopper’s browser. This helps reduce page load time and ensures your store runs efficiently across devices..
What are the best practices for naming and organizing color swatch images in Shopify?
Organizing your swatch assets might seem like a small detail, but it plays a major role in optimizing your store’s loading speed, clarity, and ease of setup. Clean naming conventions and logical file organization improve both performance and productivity.
Best practices to follow:
- Match image filenames to variant names exactly. For example, if your variant is “Light Blue,” name the swatch image light-blue.png. Use lowercase letters, hyphens instead of spaces, and consistent formatting.
- Store swatch images in a dedicated folder, such as assets/swatches/, to keep your Shopify theme organized.
- Use image formats like PNG or JPG for swatches if needed. Keep the file size small and dimensions around 100x100px to ensure fast loading.
- Alternatively, NS Color Swatch Variant Images eliminates the need for manual uploads and naming in many cases. The app can automatically generate swatches using variant images or HEX codes pulled directly from your Shopify product data.
- You can also mix swatch types, color pickers, custom images, or text, depending on what best represents the product.
Well-organized swatches ensure that your product variant presentation is clean, fast-loading, and easy to manage. This reduces visual clutter and increases the likelihood that customers will interact with variant options and complete a purchase.
What’s the best way to optimize image size and format for fast loading and good appearance in swatches and variant galleries?
Image optimization directly impacts how quickly your store loads and how effectively your visuals convert shoppers. Especially on Shopify, where variant-rich product galleries can become heavy, the key is balancing quality and performance.
Follow these image optimization strategies:
- Use WebP format for smaller, faster-loading files that maintain excellent image quality. Fall back to JPEG if needed for compatibility.
- Ideal image dimensions:
- Main product gallery: 1200×1200px for clear detail and responsive scaling.
- Swatch images: 100–400px, depending on how prominently they appear.
- Always compress images before uploading using tools like TinyPNG or Squoosh to reduce file size without visible quality loss.
- Avoid uploading unnecessarily large files this slows down load times, increases bounce rate, and affects mobile performance.
- Leverage Shopify’s built-in CDN and responsive image delivery, which helps ensure fast loading across devices.
- The NS Color Swatch Variant Images app supports lazy loading for all swatches and gallery elements. This means images only load when needed, keeping your initial page speed lightning-fast.
When your variant galleries and swatches load quickly and look sharp, shoppers are more likely to interact with them, leading to higher engagement and better conversion rates.