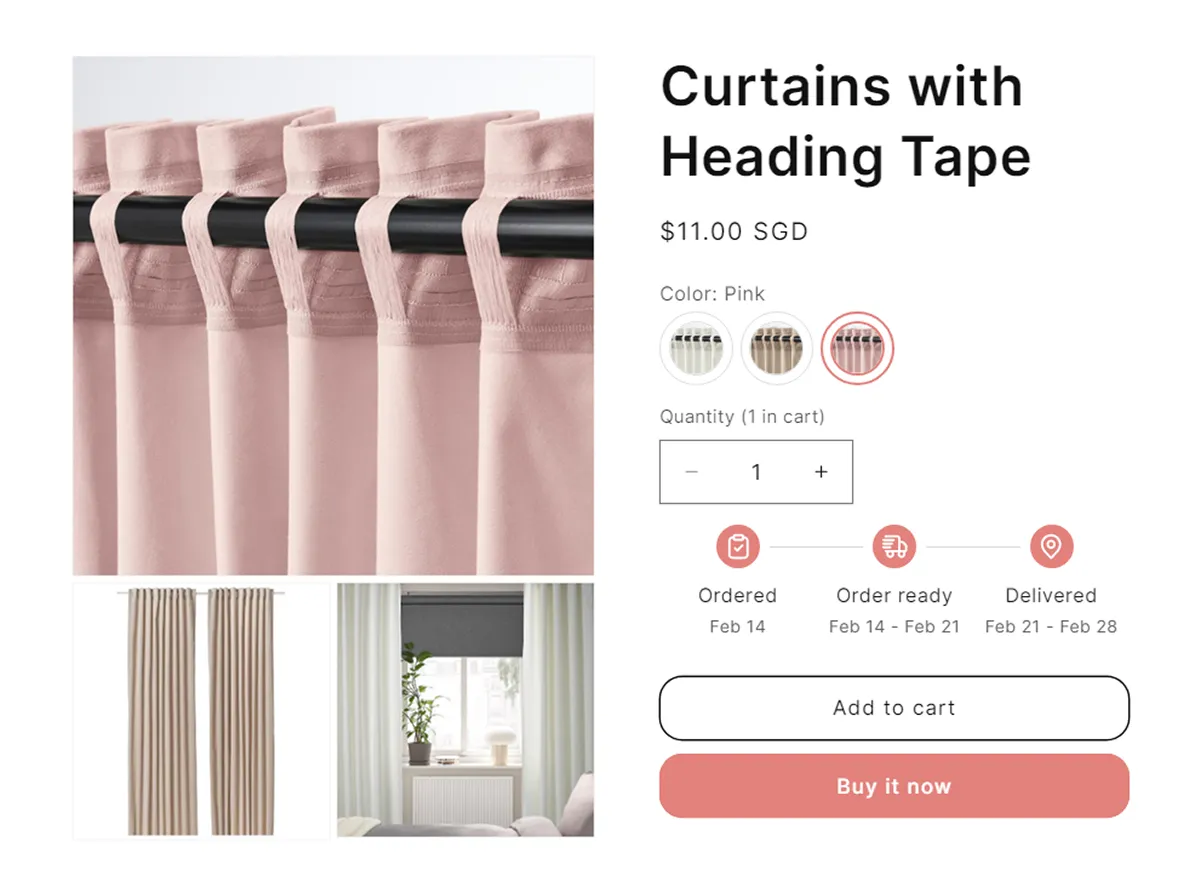
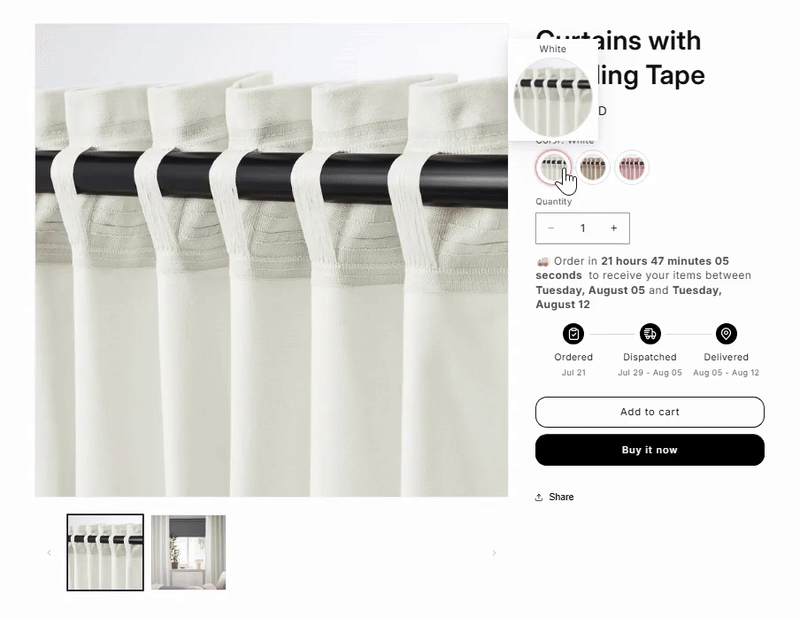
When a customer selects a variant, they expect the product images to update and show only what’s relevant. But on many Shopify stores, every single variant image stays in the gallery no matter which variant your customers choose.
It’s frustrating for them and not great for conversions either. So in this blog, we’ll walk through why this happens, what’s getting in the way, and how you can fix it so your store shows the right images at the right time, just like your customers expect.
What’s causing this in your Shopify store?
Even when a specific option is selected, your Shopify store is showing every variant image in the gallery. It’s likely due to one, or a mix, of these common issues:
- Shopify’s native setup limitations: Shopify’s default behavior is to display all images in the product gallery. Selecting a variant might change the featured image, but it won’t hide the others unless additional logic is added.
- Your theme doesn’t support dynamic image filtering: Many themes, especially older or non-2.0 ones, aren’t built to filter the gallery based on variant selection. So even if your images are assigned properly, the theme will still show everything.
- You’re not using an app that controls variant image display: Shopify doesn’t give you full control over image behavior without custom code. So you’ll need a third-party app to do so.
How to fix it and only show images for the selected variant?
Now, we’re going to fix that. Lemme show you!
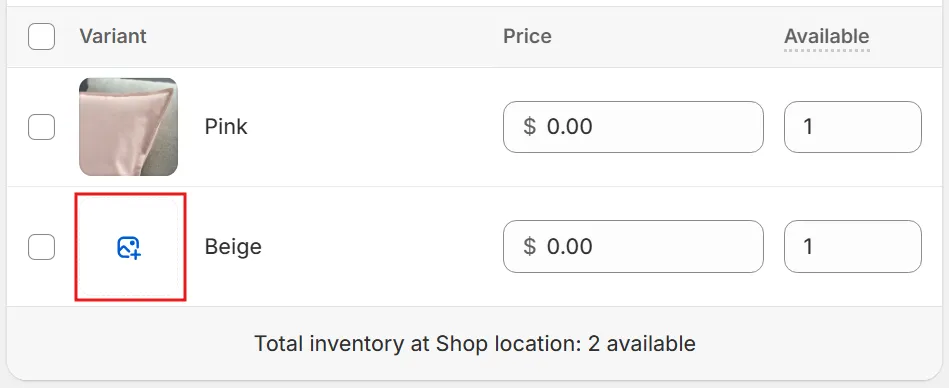
Step 1: Check and assign variant images properly in Shopify Admin
Wait! Before anything else, double-check if each variant has the correct images assigned in your Shopify product settings.
- Go to your product > scroll to the Variants section.
- Make sure each option (like color or size) is linked to its specific image.
This step won’t automatically hide unrelated images, but it’s essential groundwork. Apps and some themes rely on these assignments to know which images belong to which variant.
Step 2: Assign specific images to each variant in NS Color Swatch Variant Images
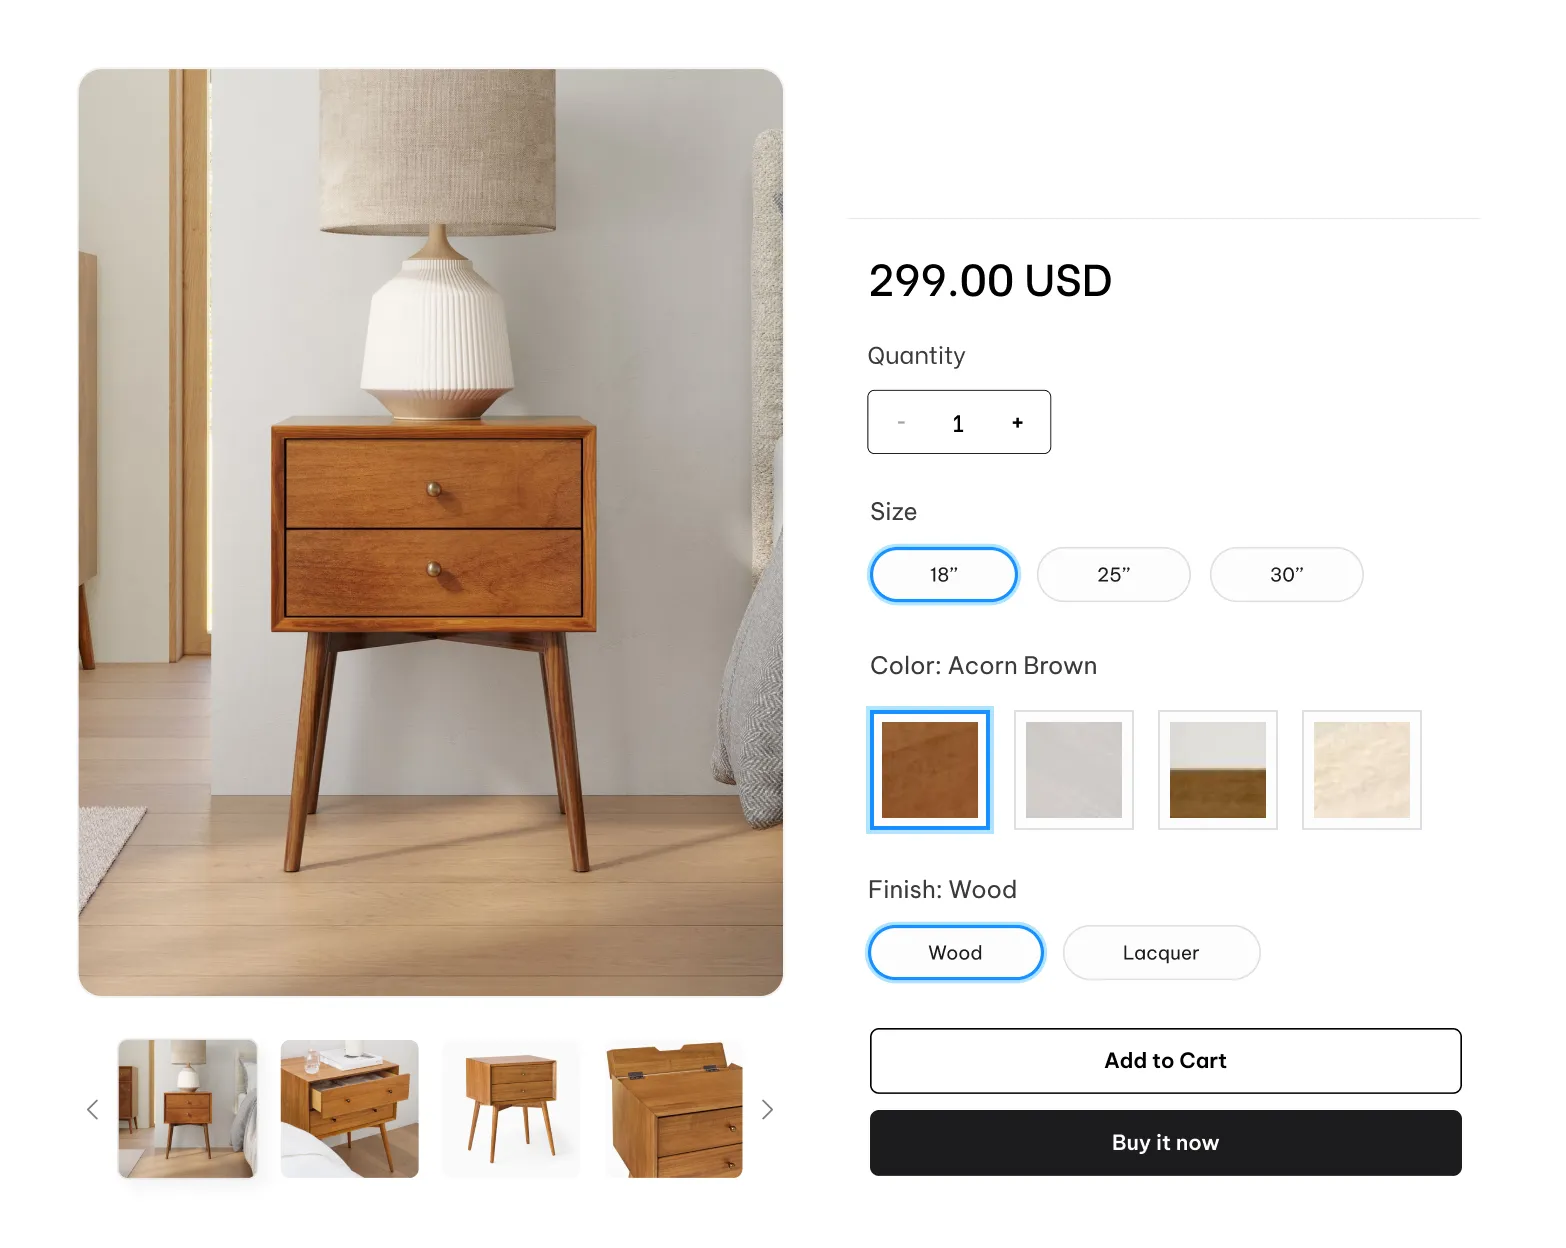
Once that’s in place, the next step is to actually display correct variant images. So, customers only see what’s relevant to the variant they select.
Install and enable NS Color Swatch Variant Images
1. Go to the Shopify App Store, search for NS Color Swatch Variant Images, and click Install.
2. Open the app from your Shopify admin and follow the Get Started setup.
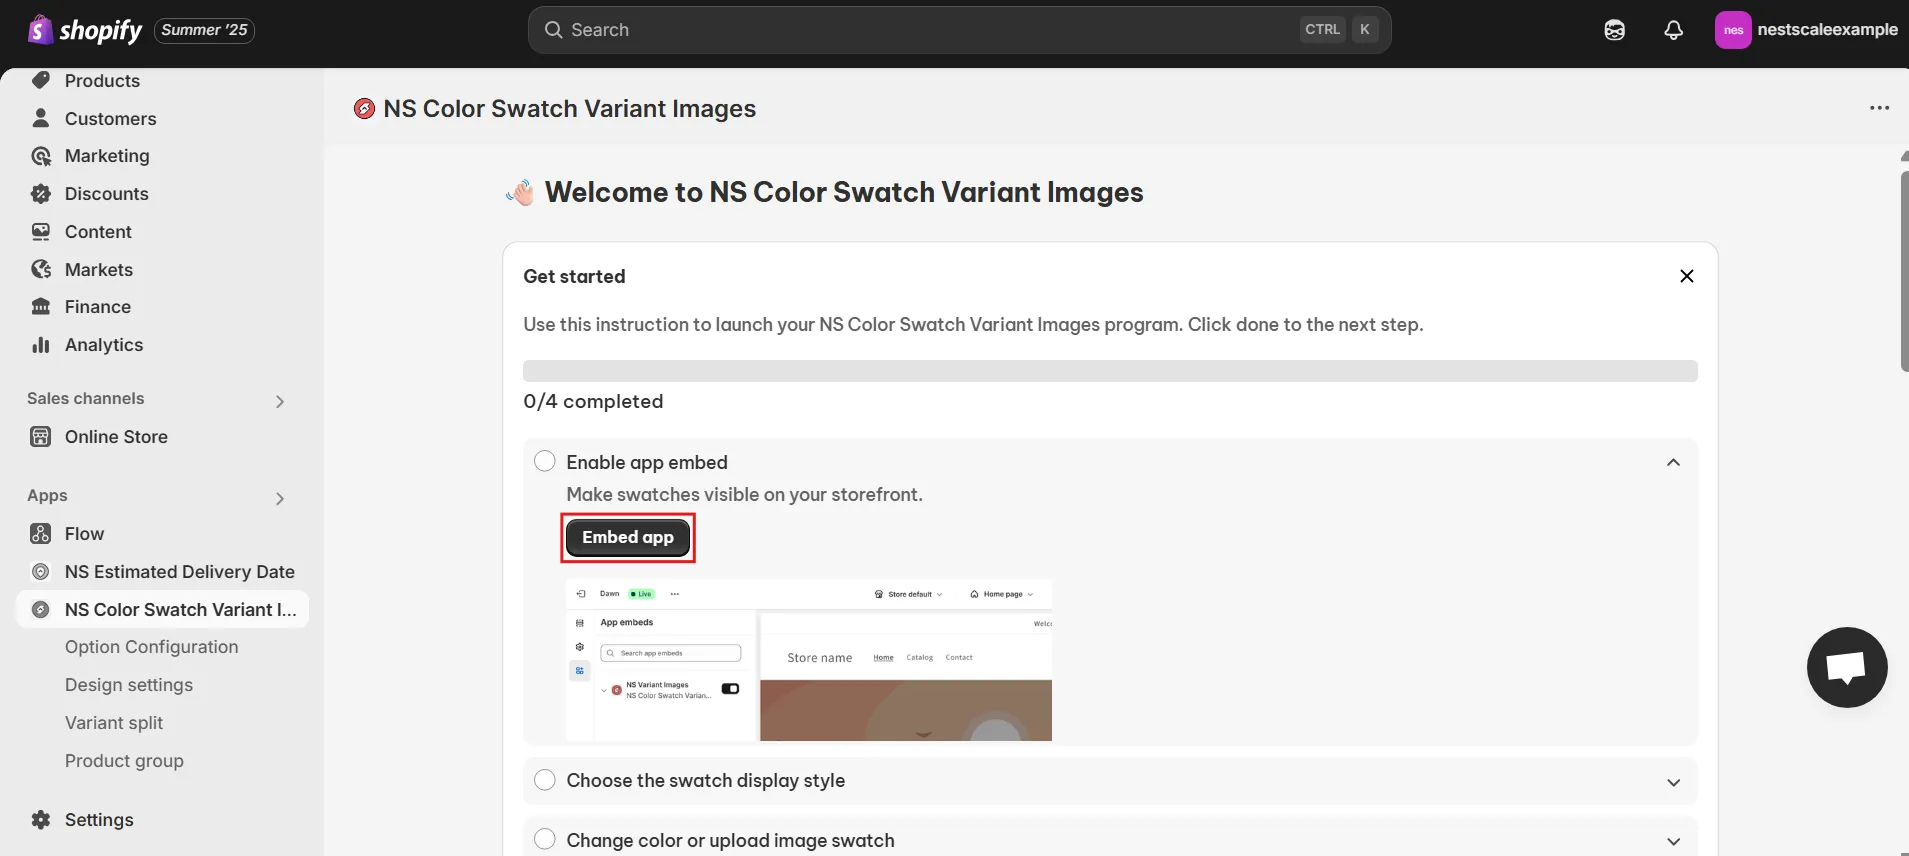
3. Click Embed App, and in the Shopify theme editor, toggle ON the app to activate it.
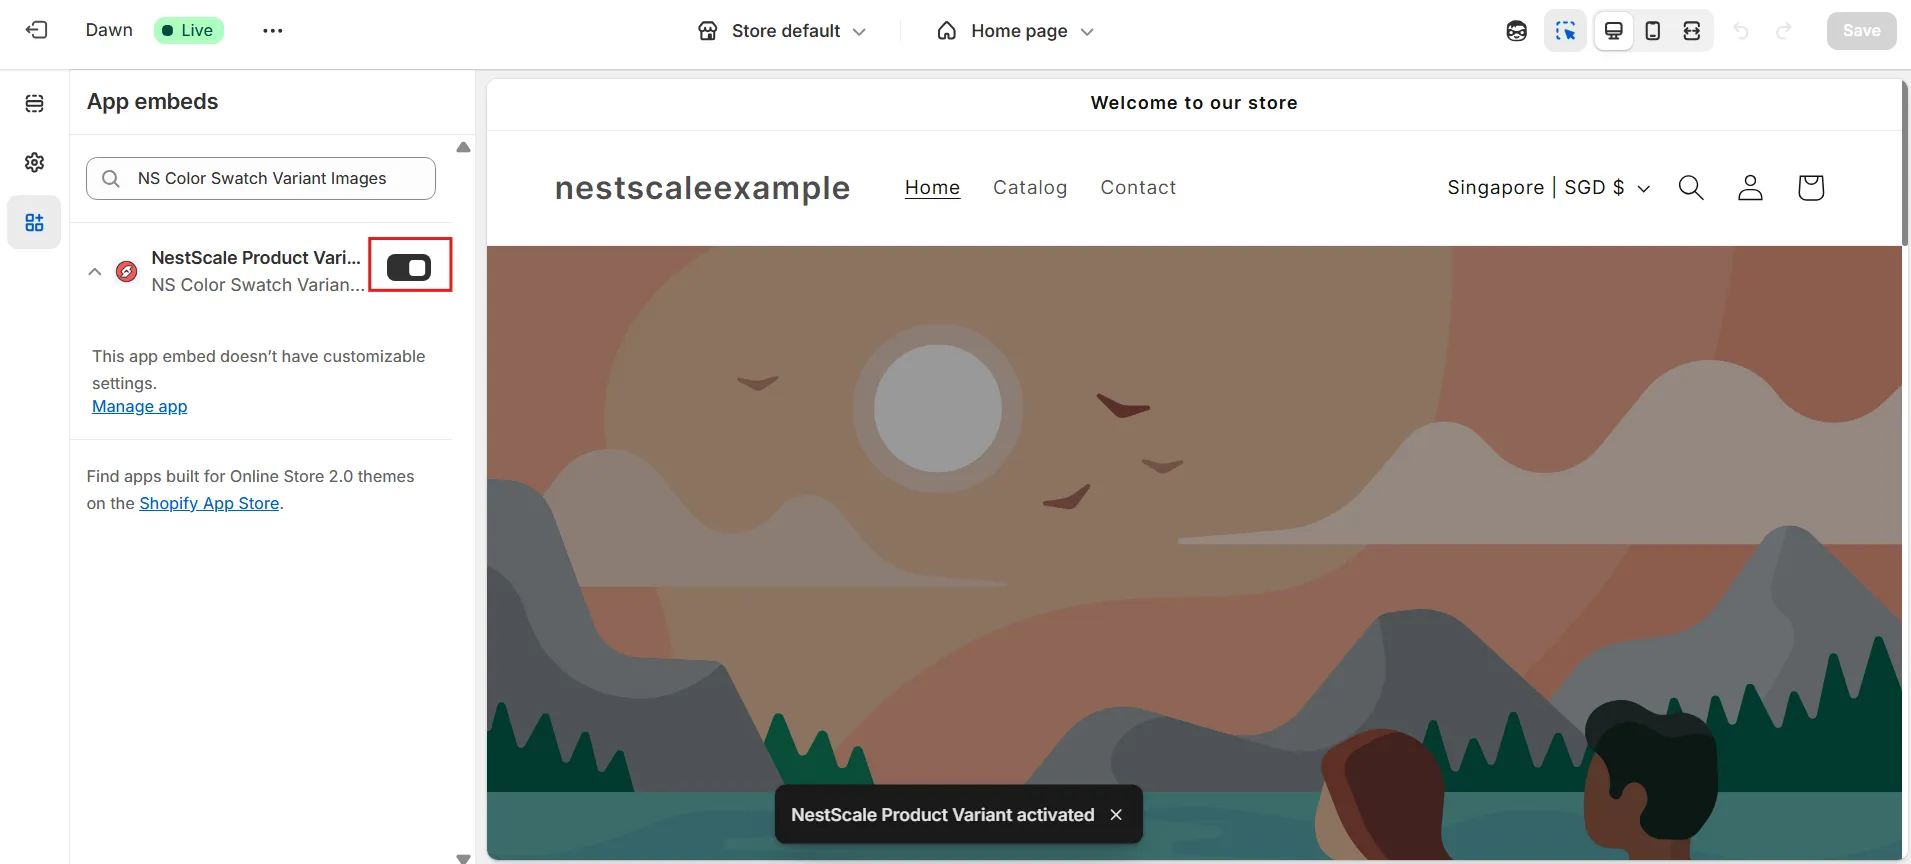
4. Hit Save and the app is now live.
Assign images to variants
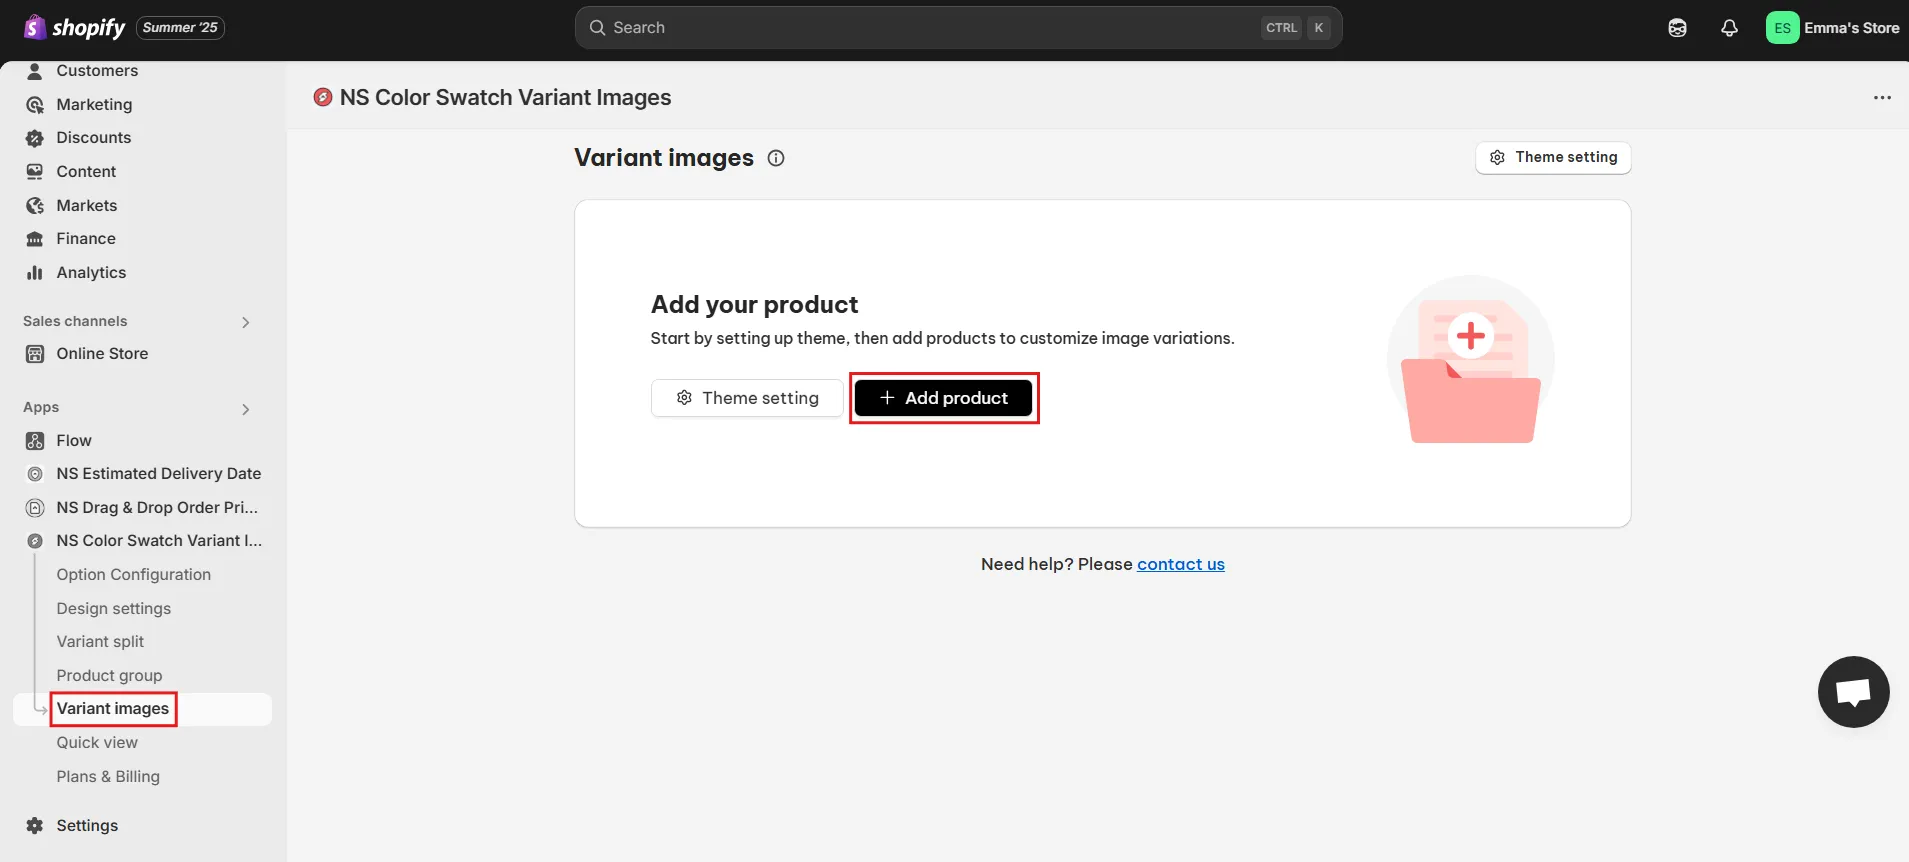
1. In the app, go to the Variant Images tab.
2. Click Add Product and select the product you want to edit.
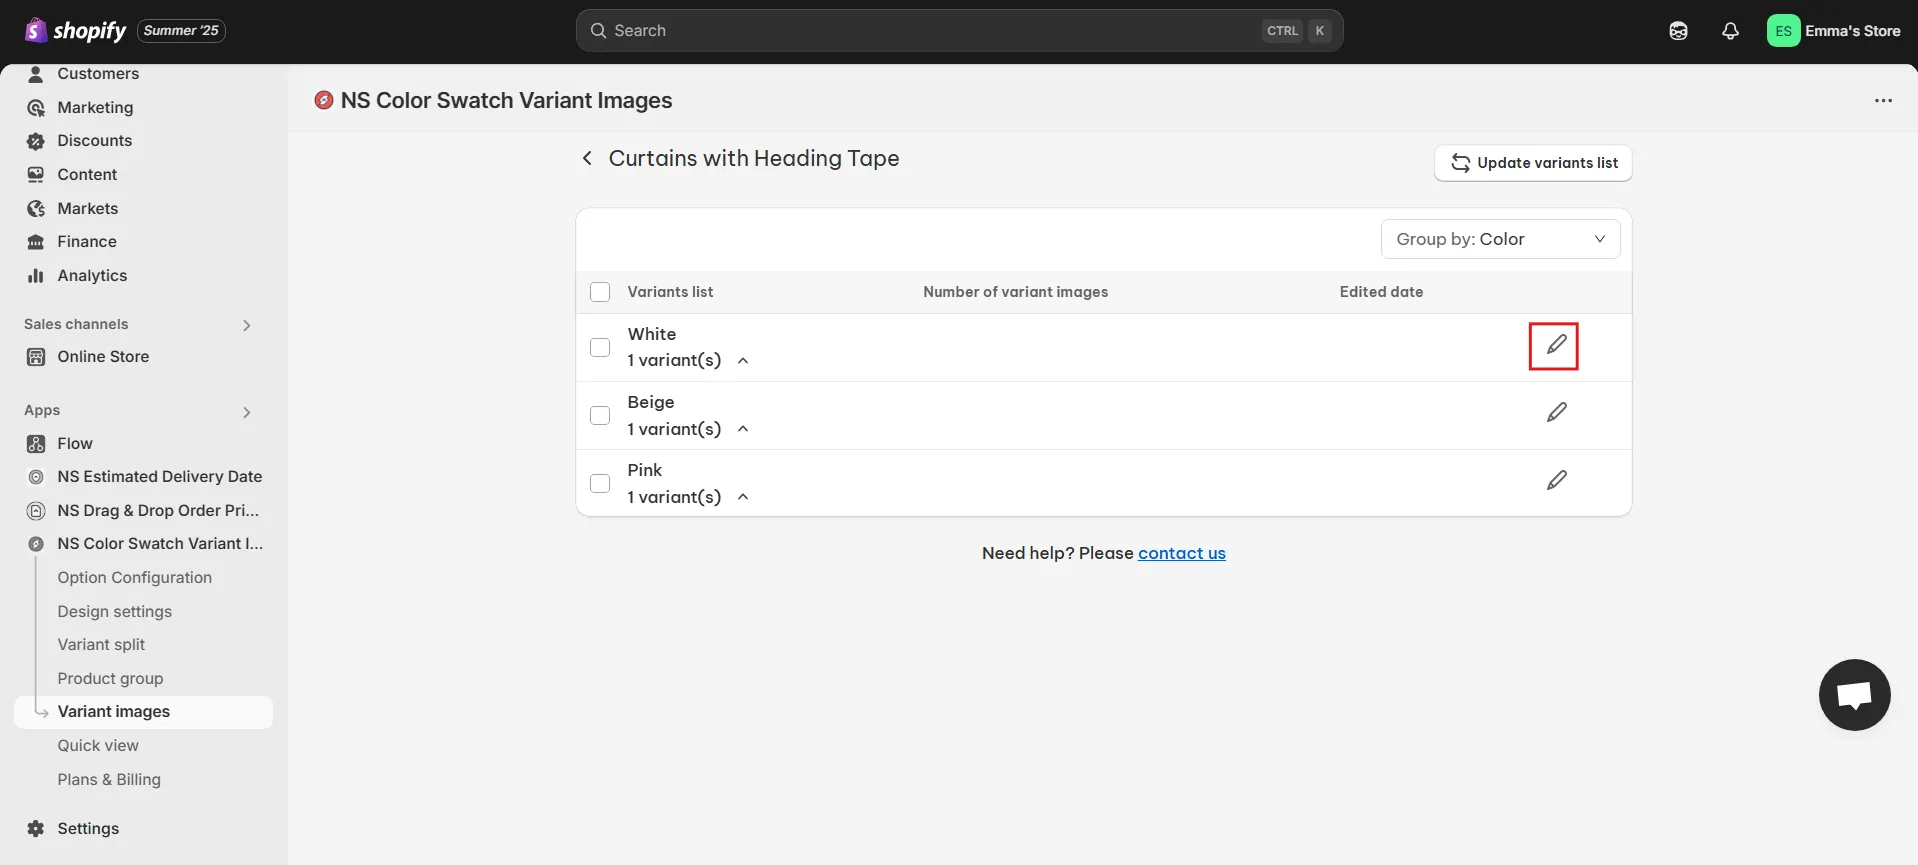
3. You’ll see a list of its variants. Click the pencil icon next to each one to assign specific images.
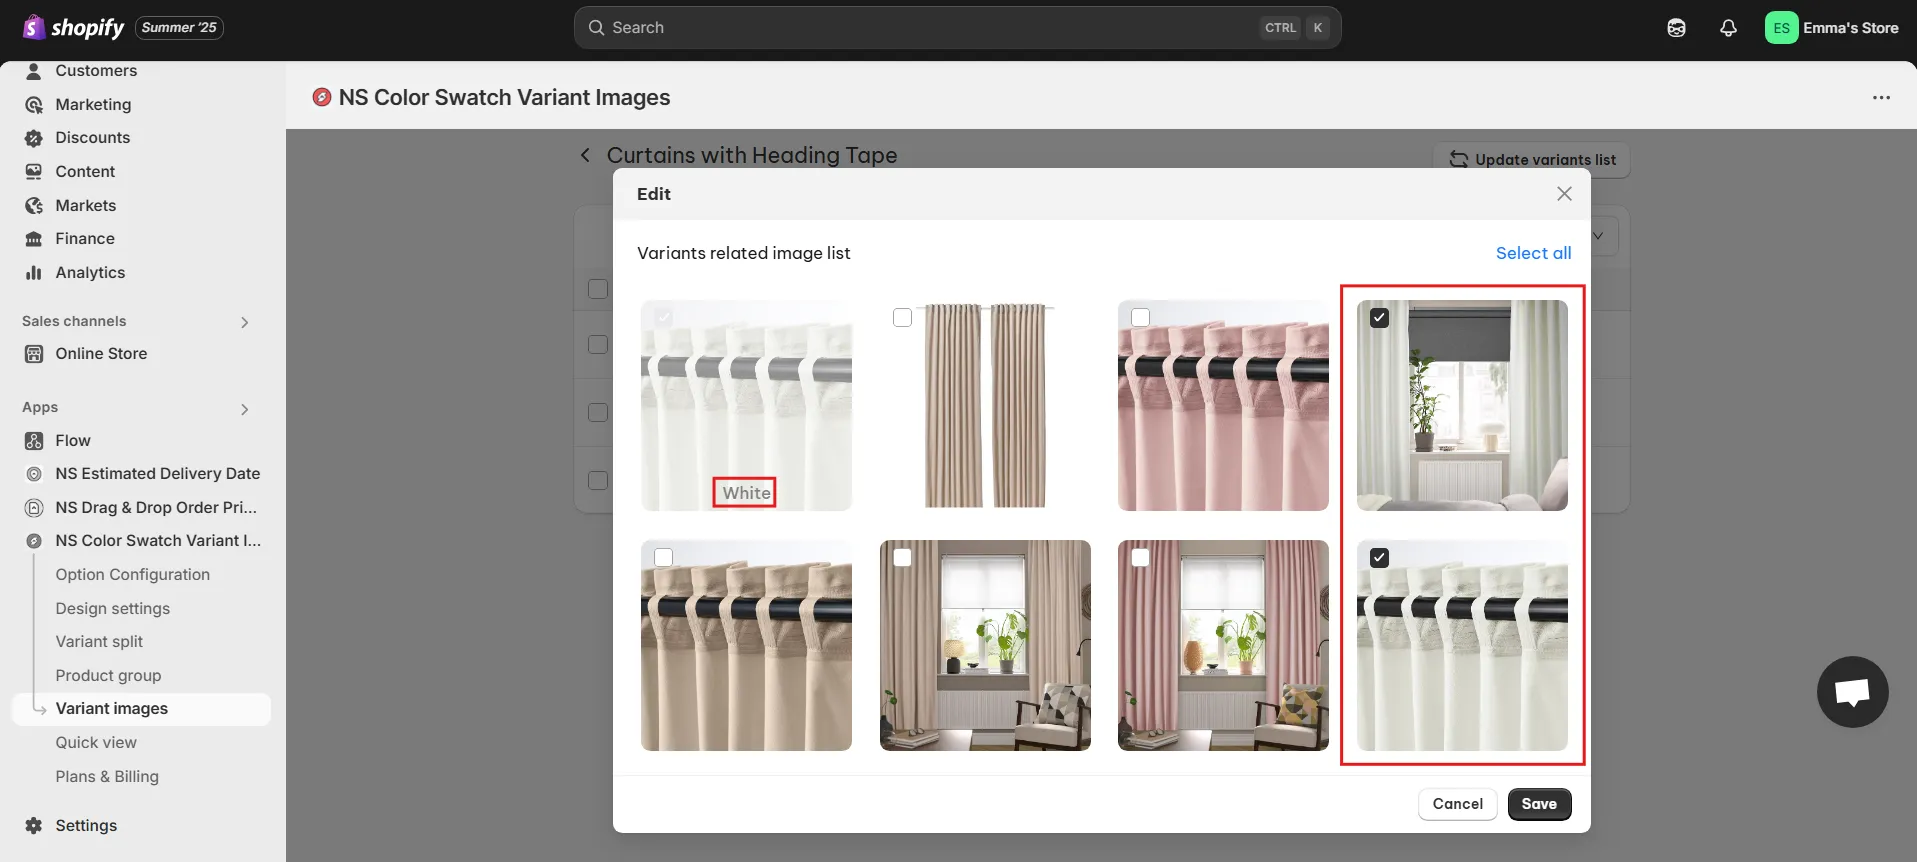
4. Once done, click Save.
Repeat for other products as needed.
Note: If you add new variants later, click Update Variant List to sync them.
Let’s check the final!
💡 Watch the full video tutorial here! – Show Only Relevant Variant Images on Shopify in 3 Minutes
Nice bonus tips for variant images
Now your variant images are showing correctly. It’s worth going a step further to create an even better experience for your customers.
#1 Use image swatches or thumbnails that match each variant
When swatches visually reflect the actual product (especially for colors, prints, or textures), shoppers instantly know what they’re selecting.
#2 Show a gallery preview with key angles or lifestyle shots per variant
If each variant has its own unique look, don’t just show one front-facing image. Include 2–3 photos that highlight its key details, fit, or use in context. This helps customers get a full picture of what they’re buying.
#3 Test across devices and browsers
Sometimes image switching works smoothly on desktop but not on mobile, or vice versa. Regularly test your product pages to ensure a consistent experience for all shoppers, no matter how they browse your store.
FAQs
Why are my color swatches or variant images not updating when I select a new option?
This usually happens when variant images aren’t correctly linked to each option, your theme doesn’t support image switching, or there’s a conflict with custom code or apps.
Here’s a quick checklist to troubleshoot you should try:
- Assign images to each variant in your Shopify Admin. If images are only in the main gallery and not tied to specific variants, Shopify won’t know which one to display.
- Use a theme that supports image switching, like Dawn (v13 or newer). Some older themes don’t have the built-in logic to update images on selection.
- Use a swatch app with image logic, such as NS Color Swatch Variant Images, to link swatches to the right variant images.
- Clear your browser cache or test in Incognito Mode to rule out cached issues.
- Check for app or custom code conflicts by testing your product on a clean theme like Dawn with no customizations.
How to display variant images when hovering over color swatches in Shopify?
To show a small preview image when someone hovers over a swatch, you can use the tooltip feature in the NS Color Swatch Variant Images app.
Just head to the app’s Design Settings, and you’ll find an option to enable tooltips with mini variant images. When turned on, customers will see a small image popup on hover so they can preview colors or styles.