Are you looking to make your Shopify store more visually appealing and user-friendly?
One of the best ways to do this is by linking colour swatches to different products, allowing your customers to easily switch between variants like colours or styles.
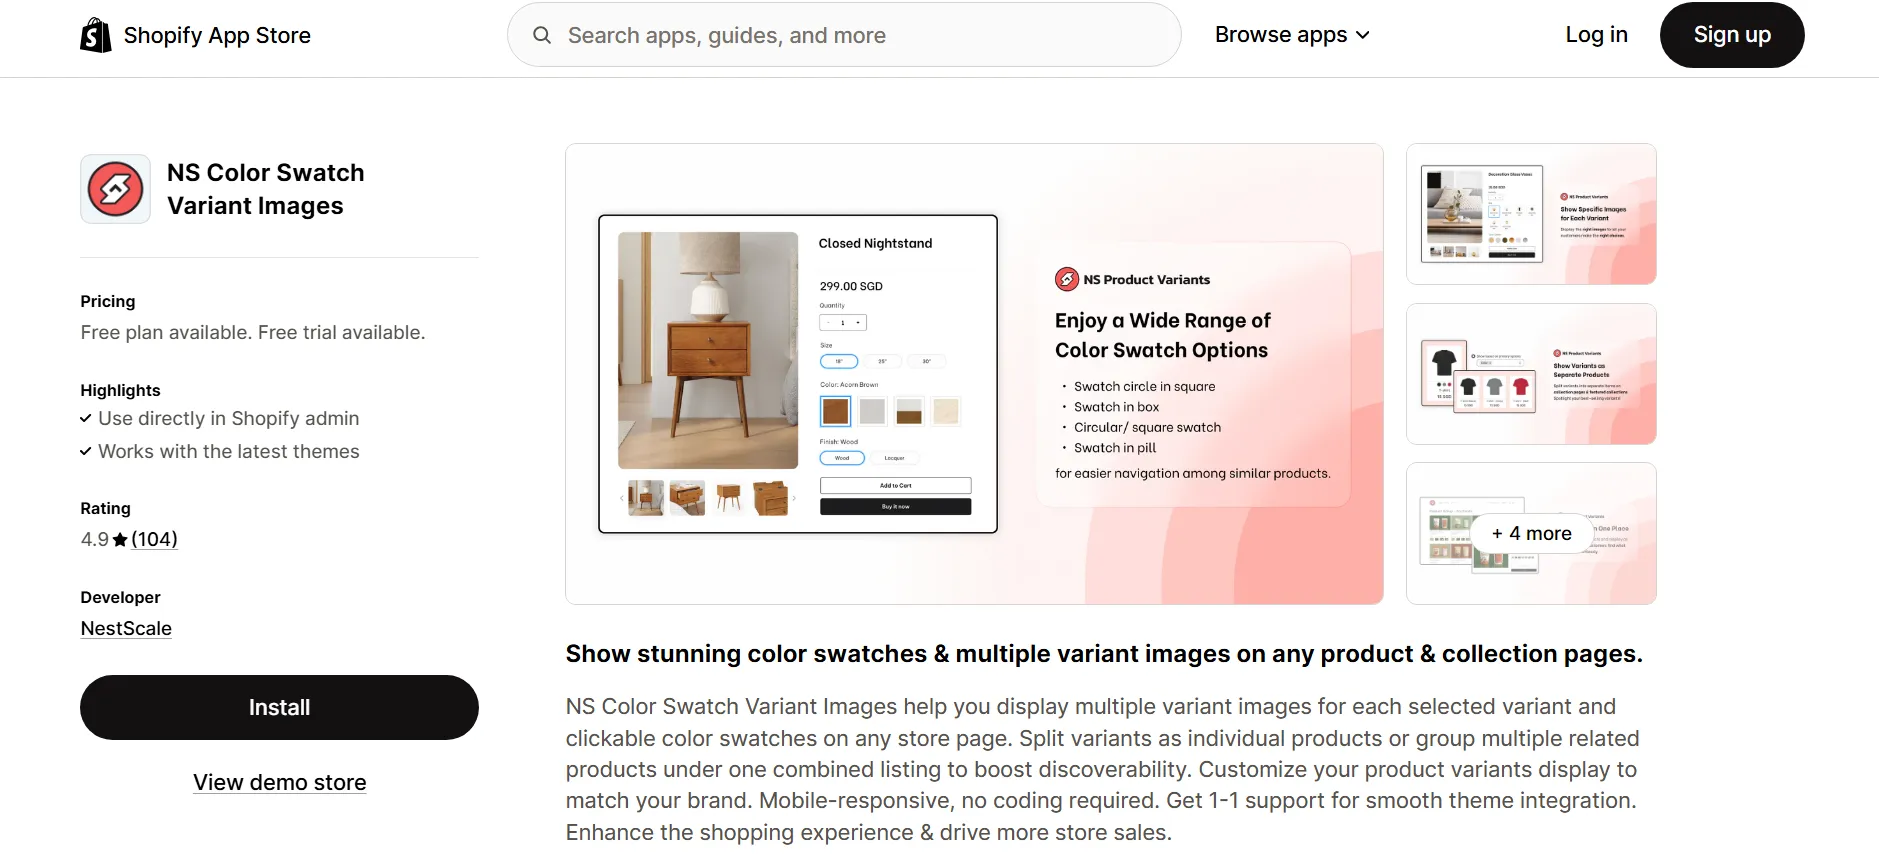
With the NS Color Swatch Variant Images app, you can seamlessly link colour swatches to multiple products, improving product presentation and making the shopping experience smoother for your customers.
In this guide, we’ll walk you through the process of linking colour swatches step by step, ensuring that your store looks polished and your customers have a hassle-free shopping experience.
Let’s dive in and transform the way your products appear on Shopify!
Step 1: Install the NS Color Swatch Variant Images App
To get started, ensure the NS Color Swatch Variant Images app is installed on your Shopify store. Here’s how:
1. Visit the Shopify App Store and search for NS Color Swatch Variant Images and click “Install”.
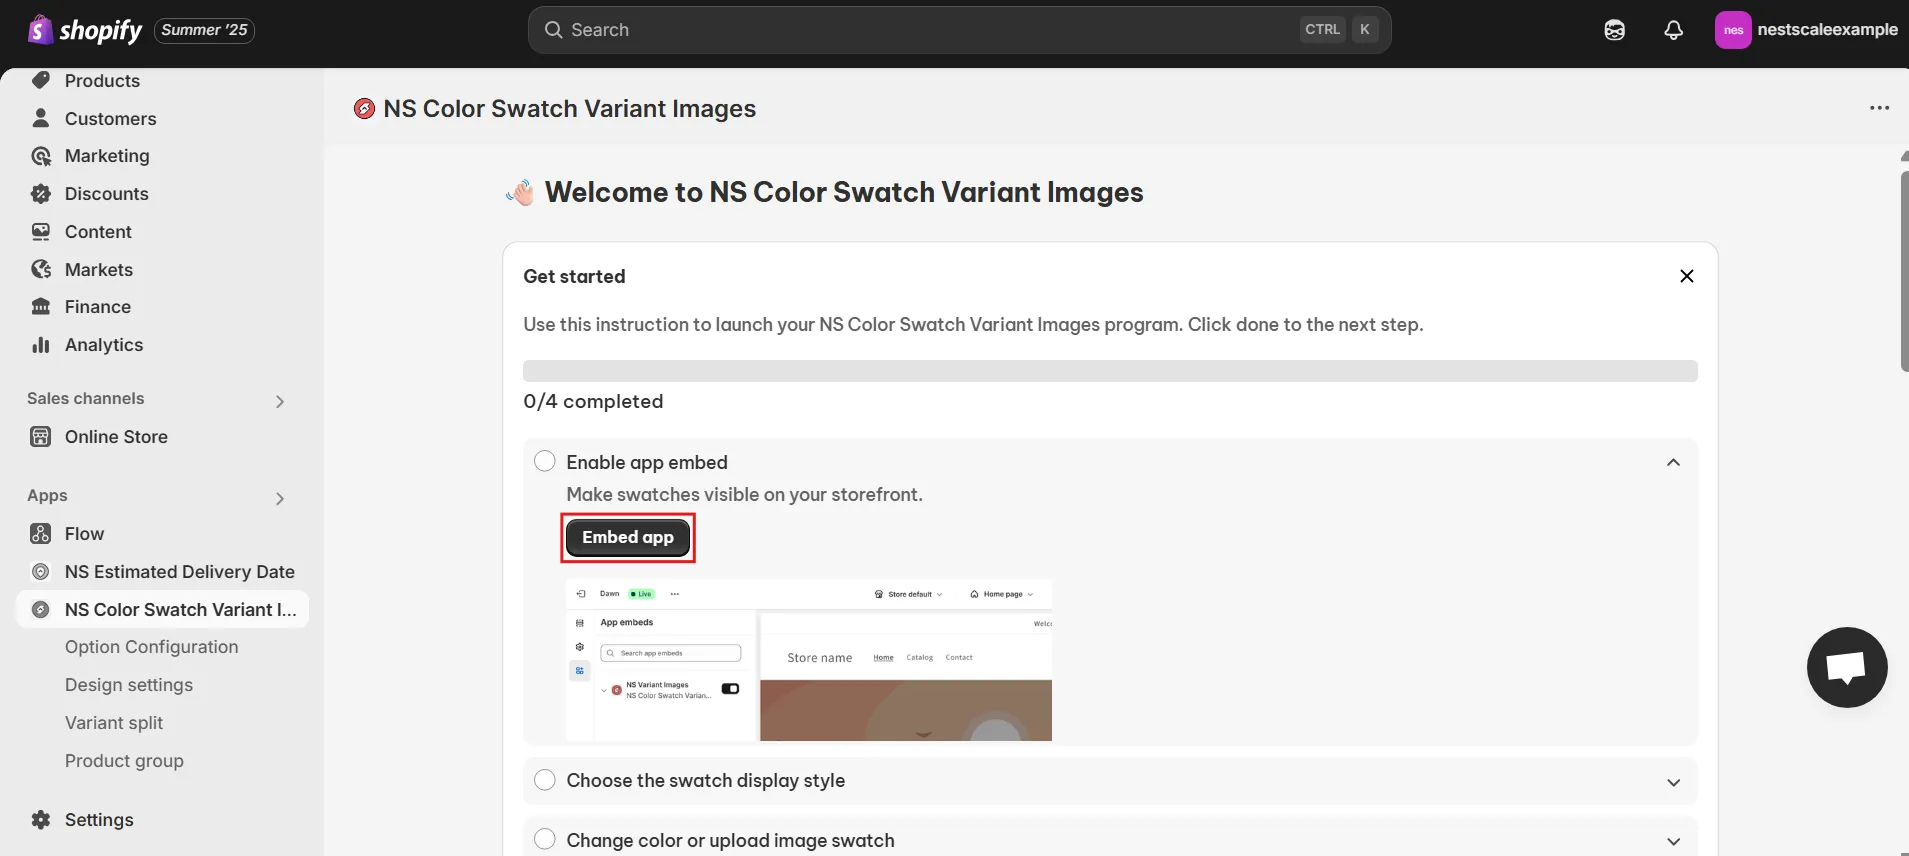
2. Open the app from your admin and follow the Get Started guide.
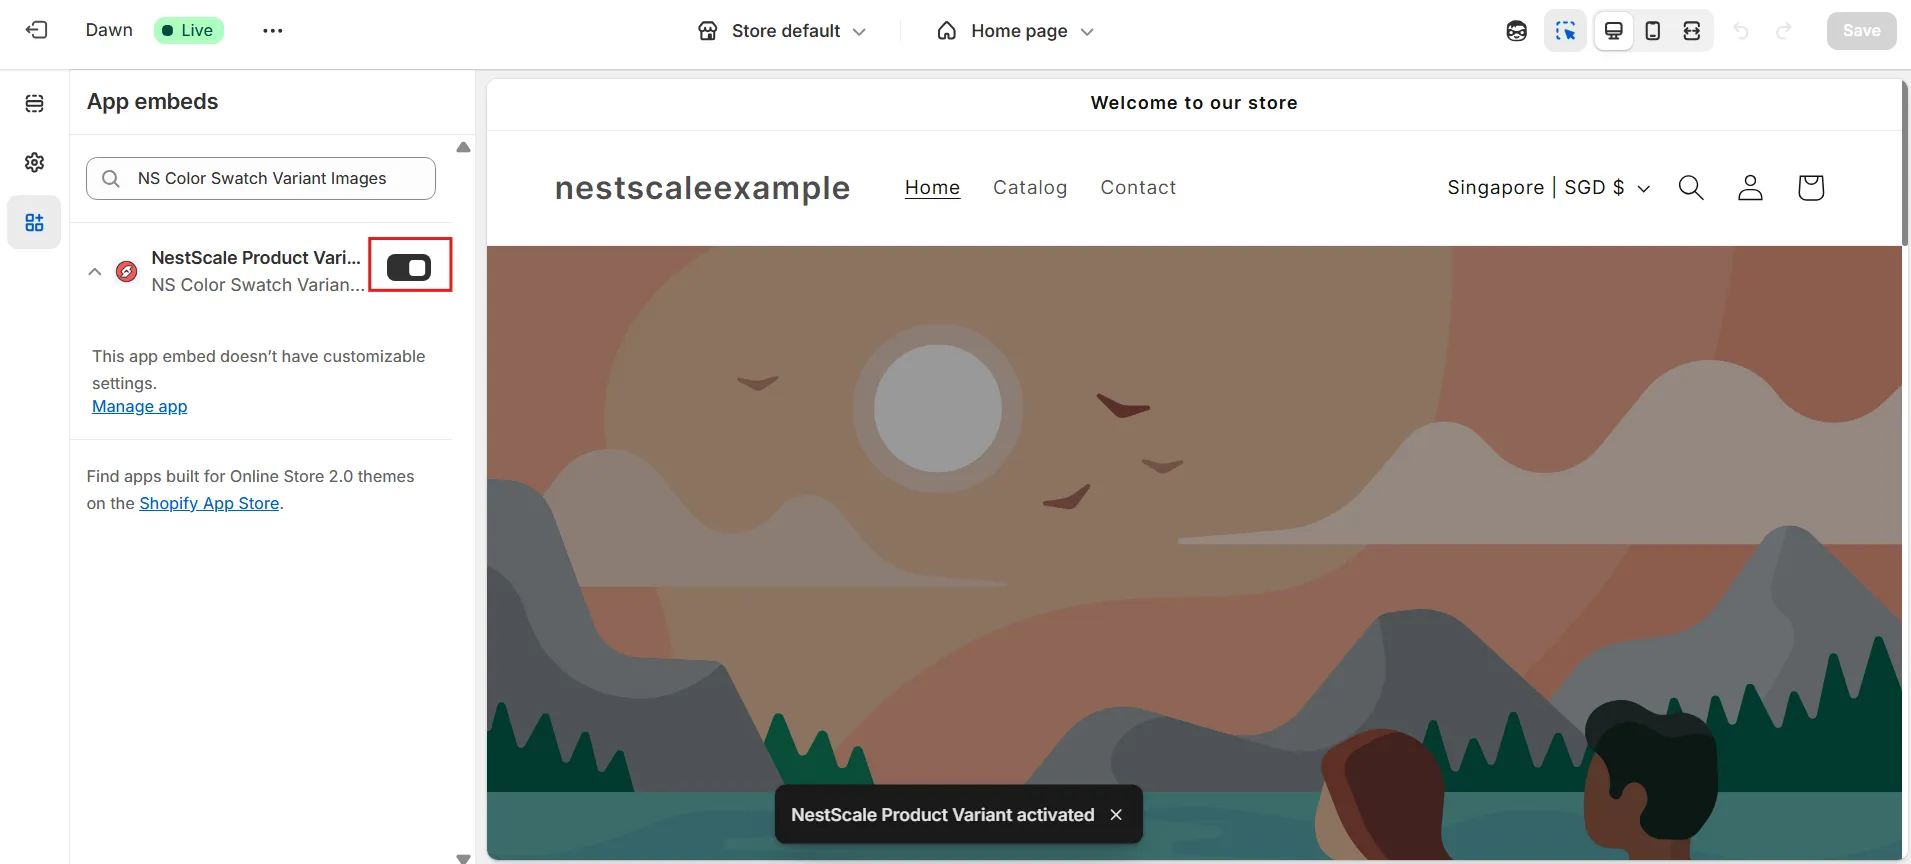
3. Click Embed App, toggle it ON in your theme editor, and save.
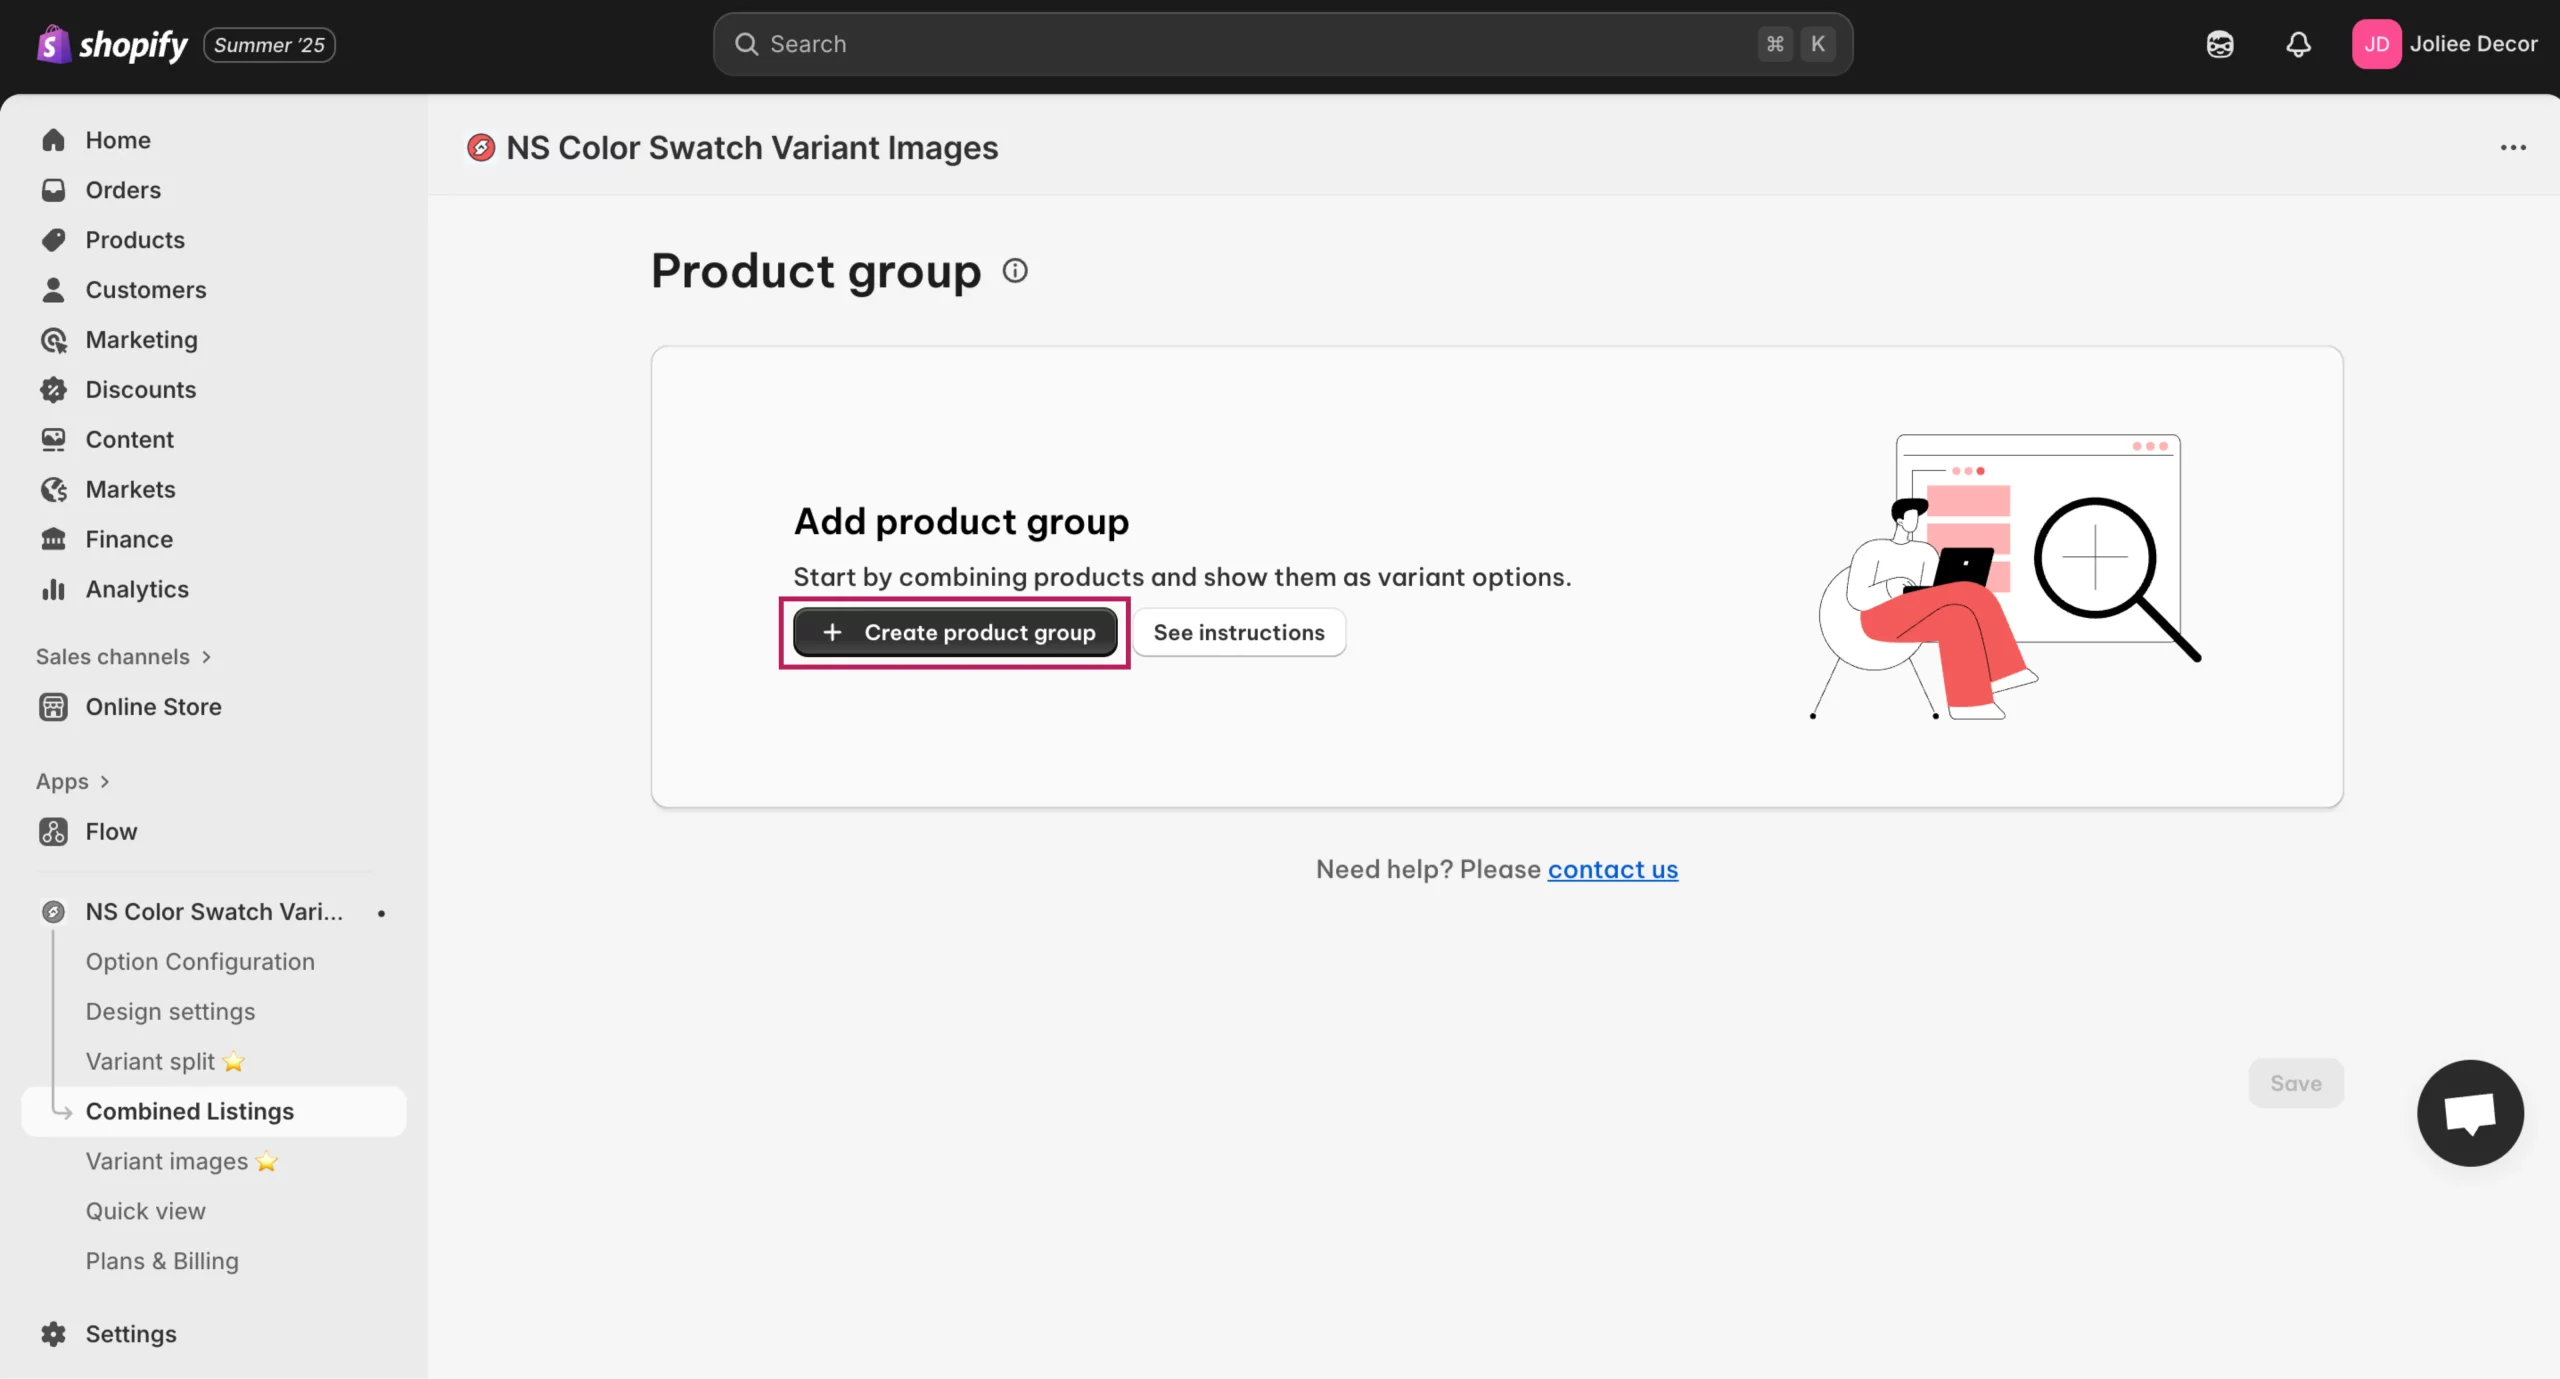
Step 2: Create Product Group in the app
1. After installing the app, go to the NS Color Swatch Variant Images dashboard in your Shopify admin.
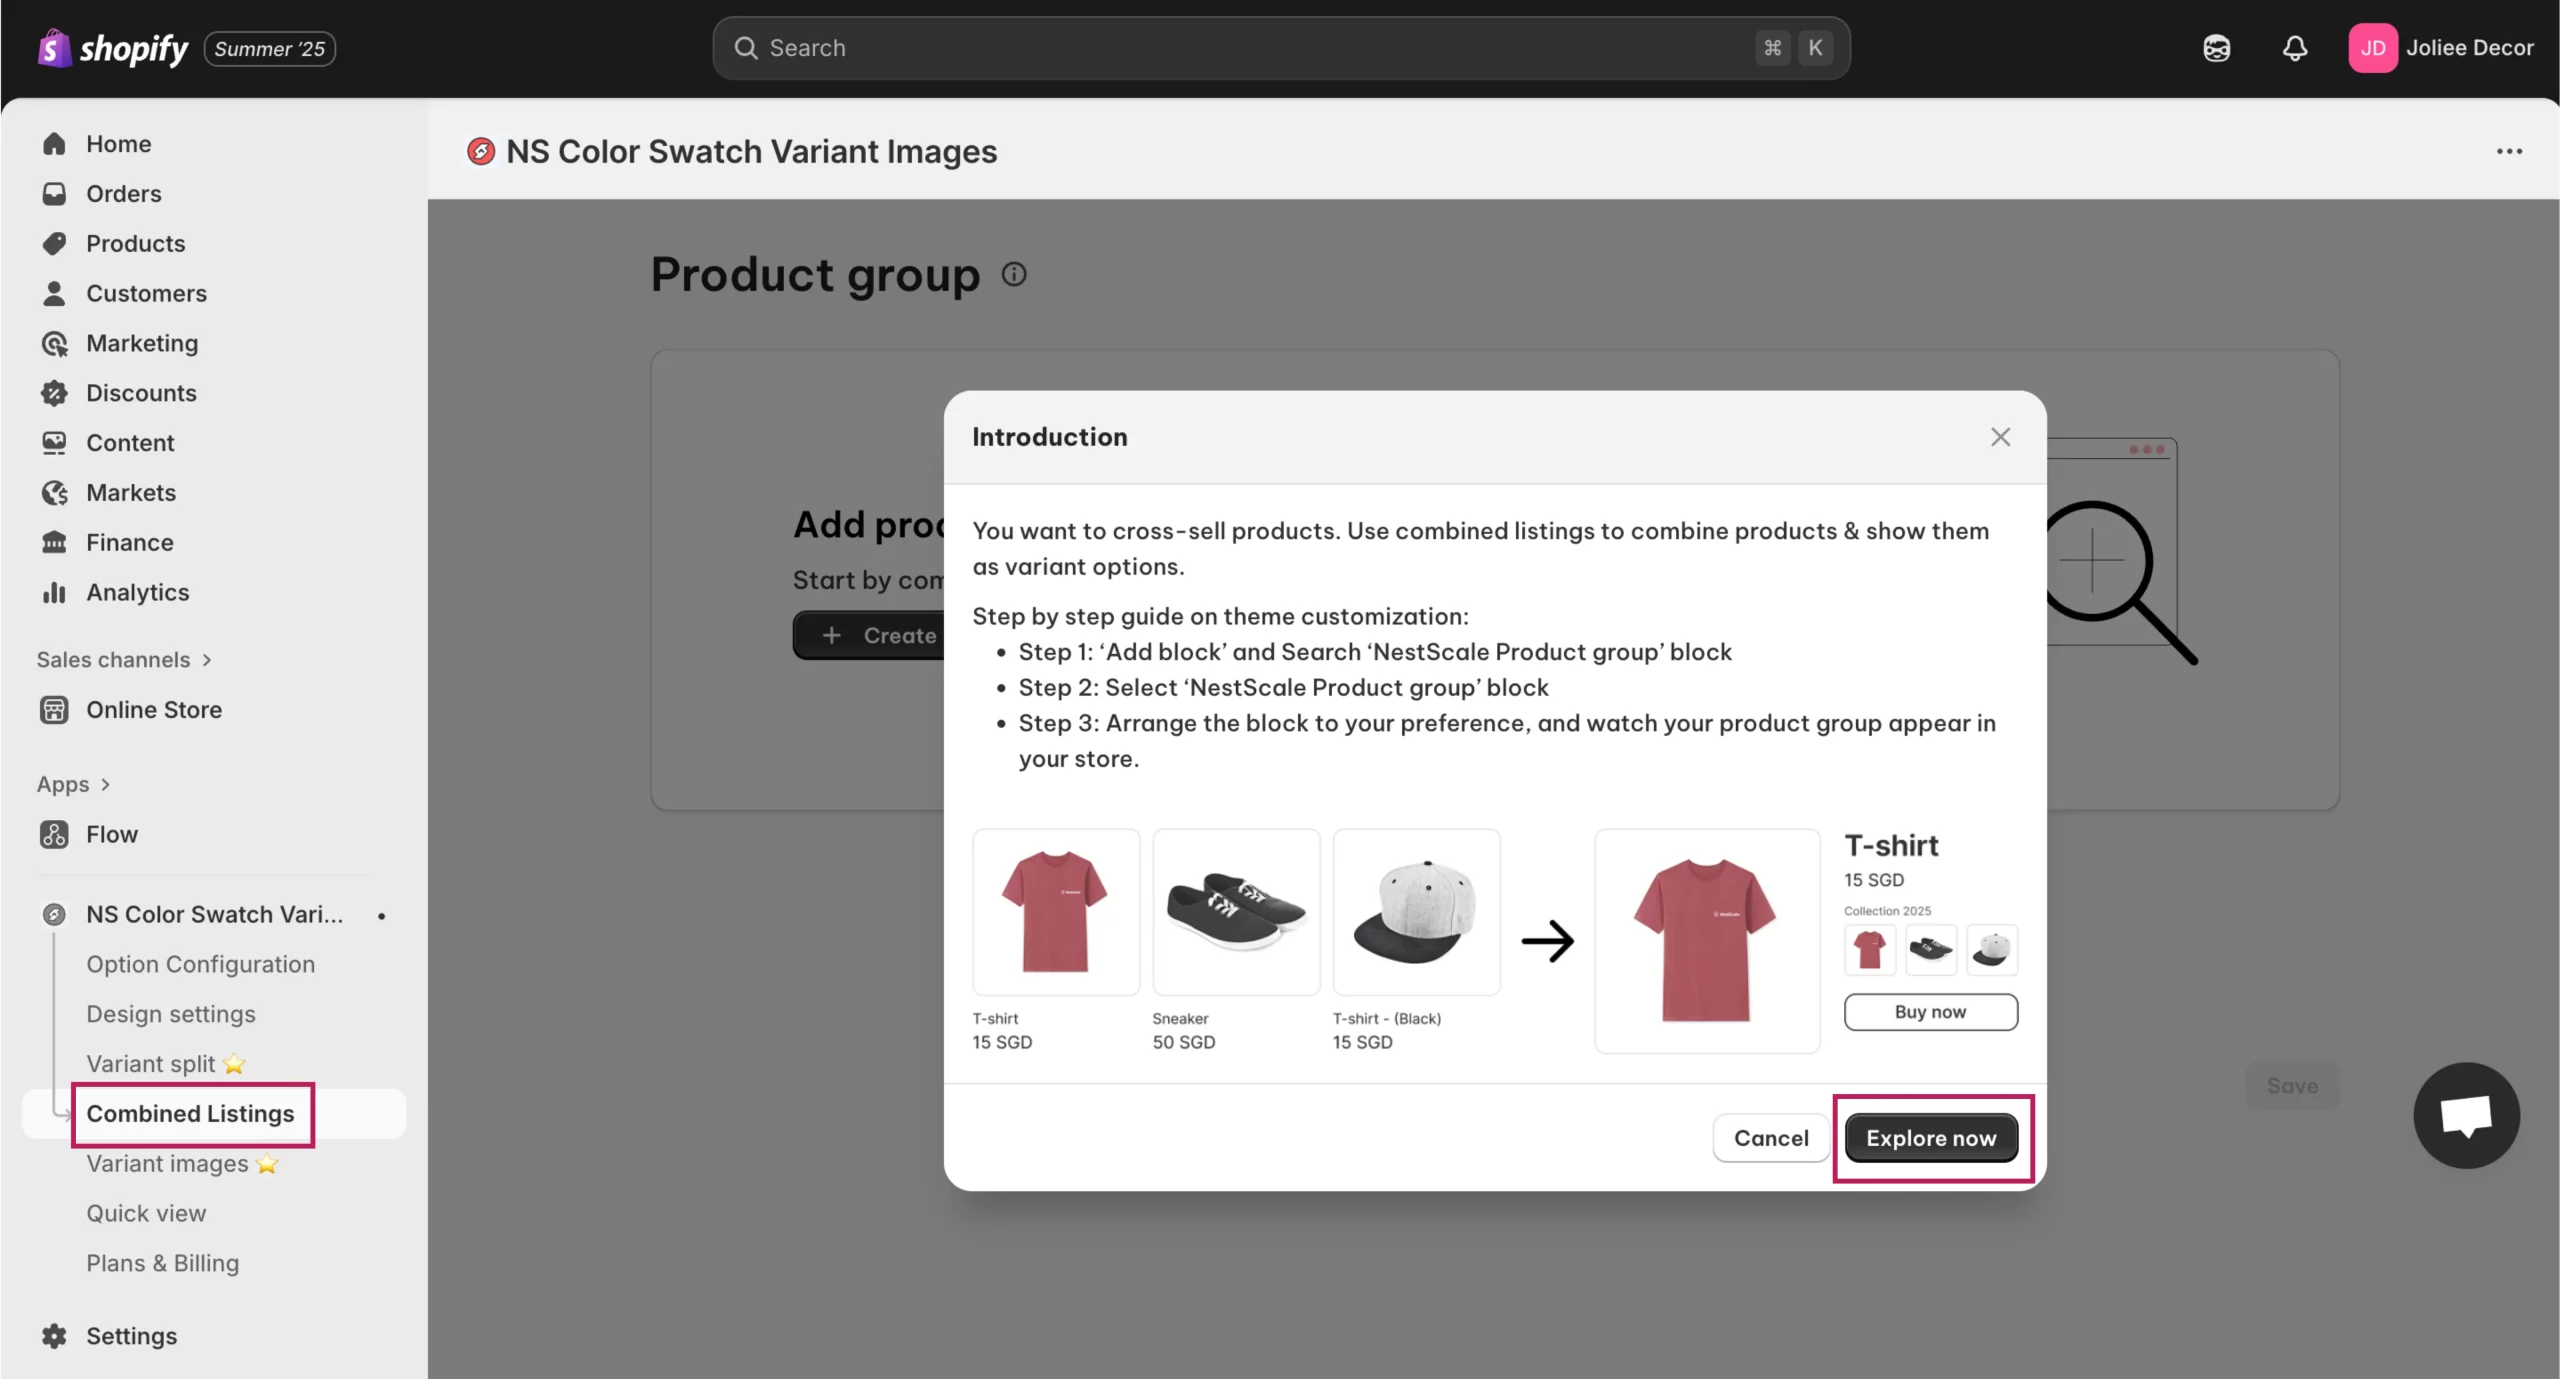
2. From the left-hand menu, click on Combined Listings and Explore now. This section allows you to group products and show them as variant options on your store.
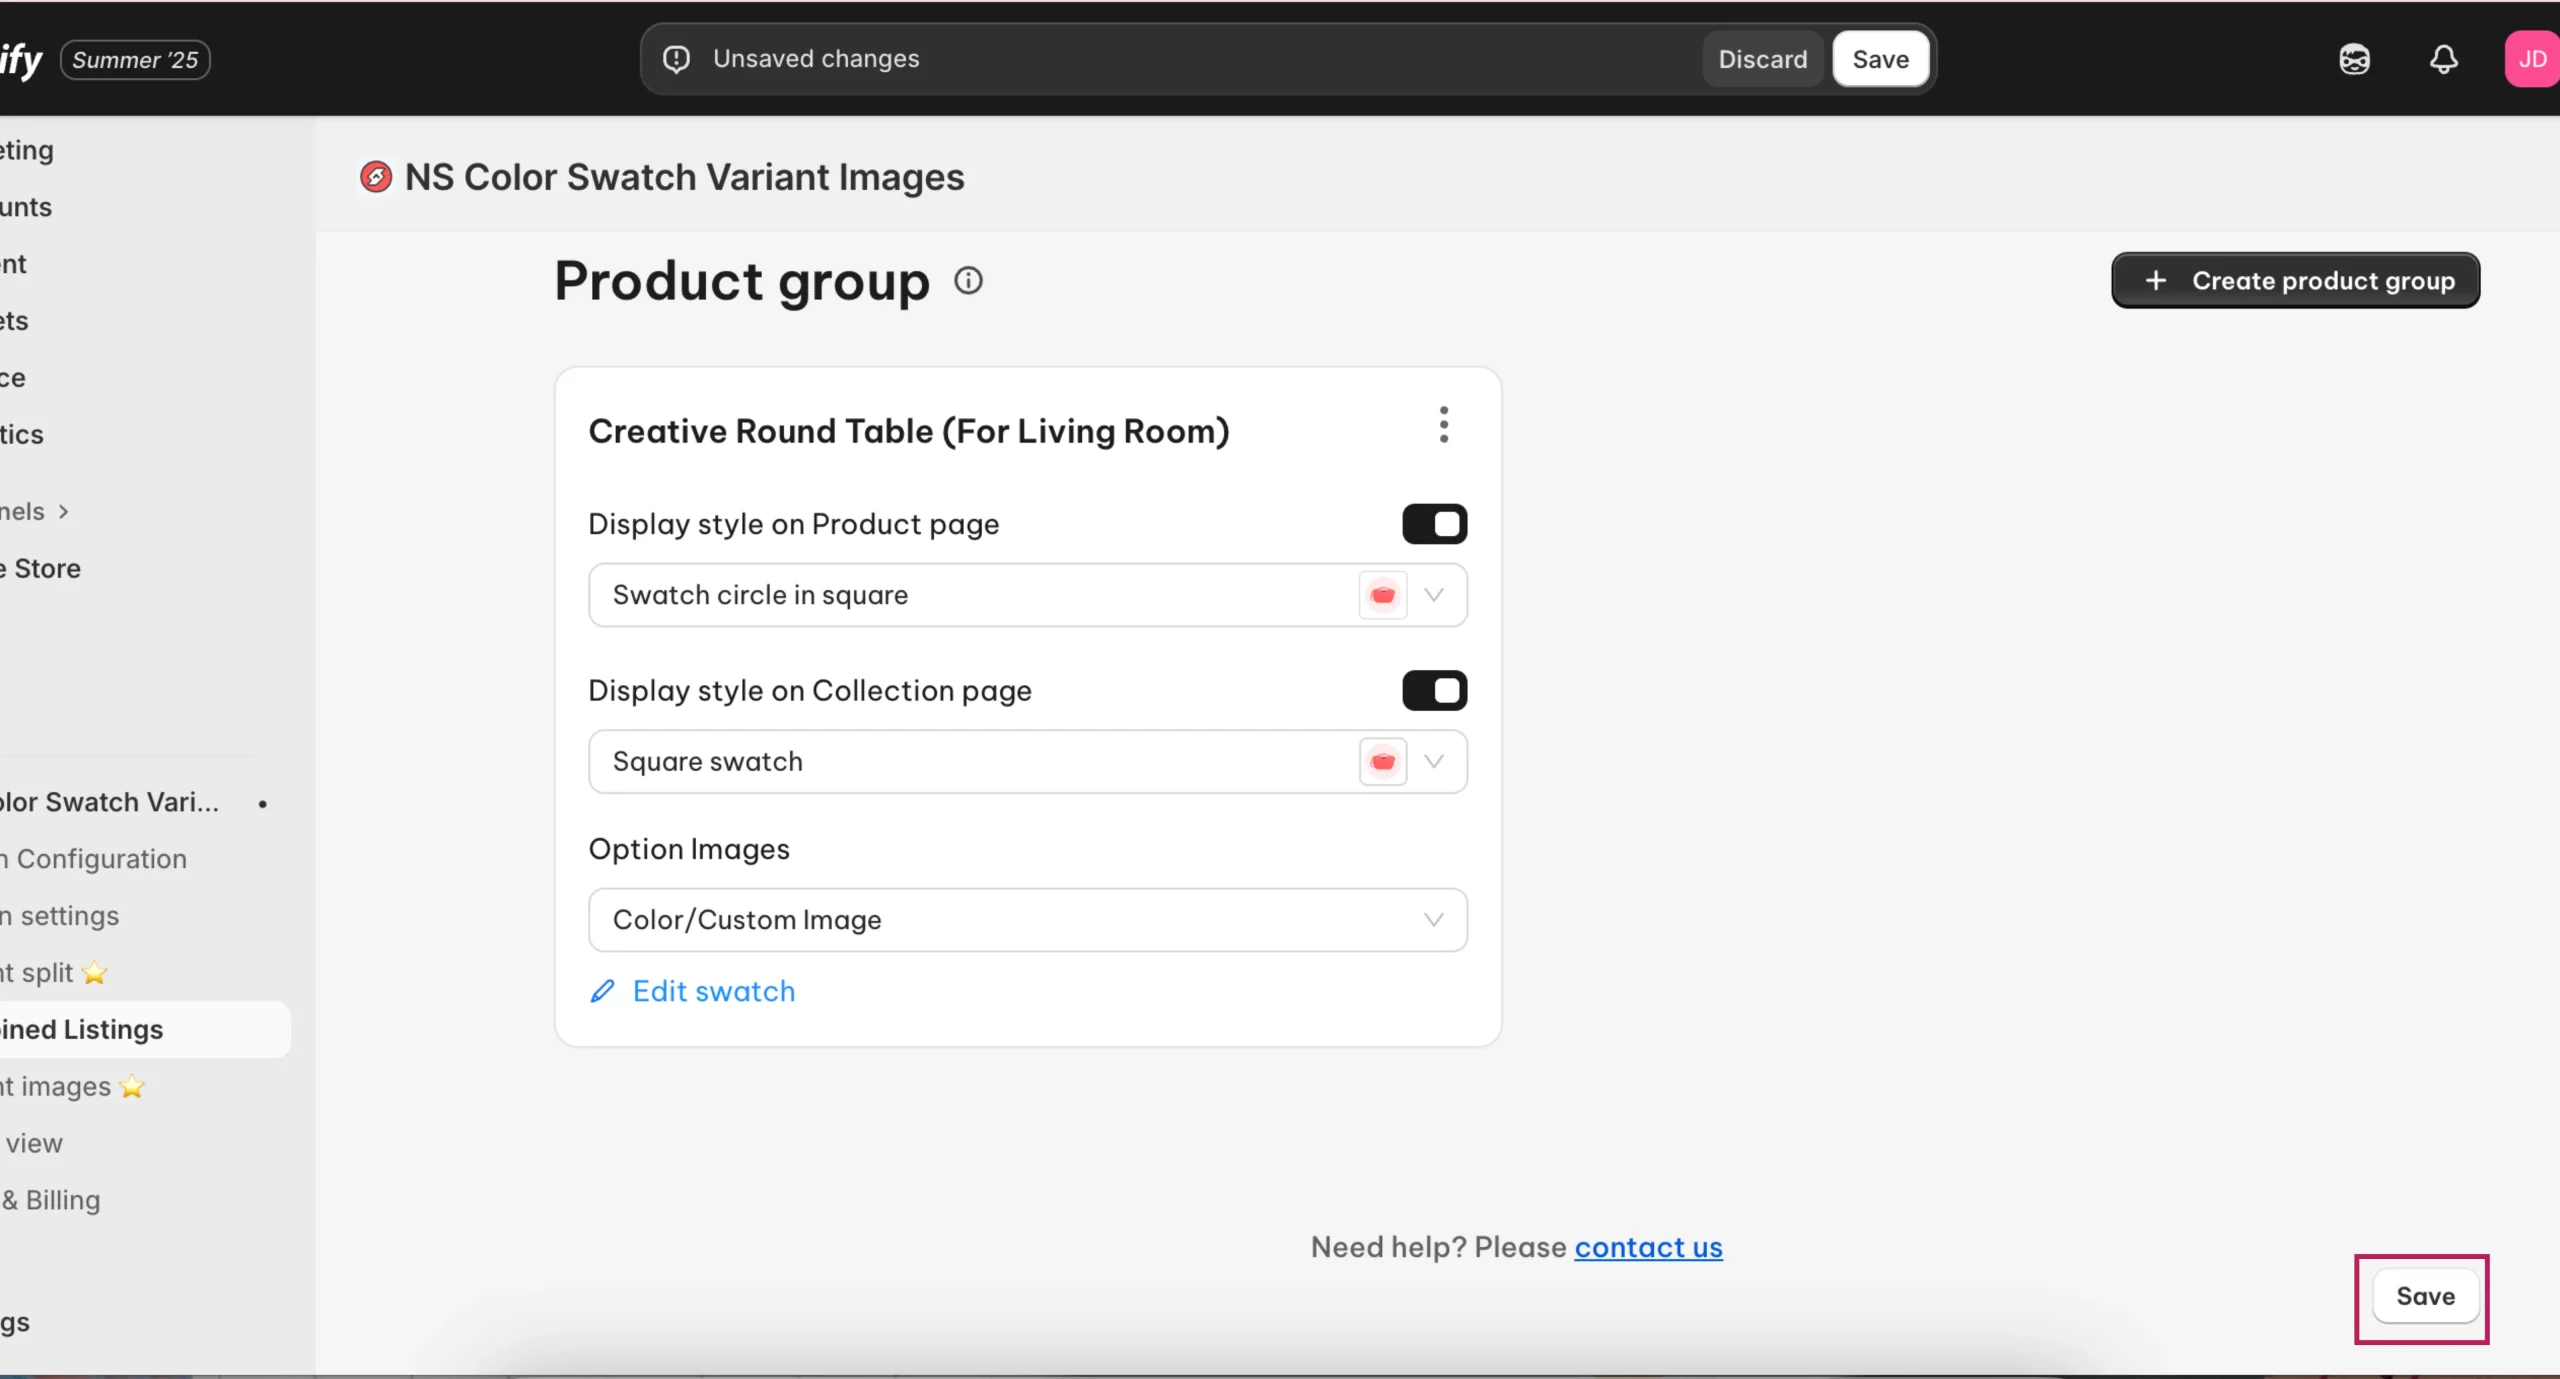
3. Click on the Create product group button.
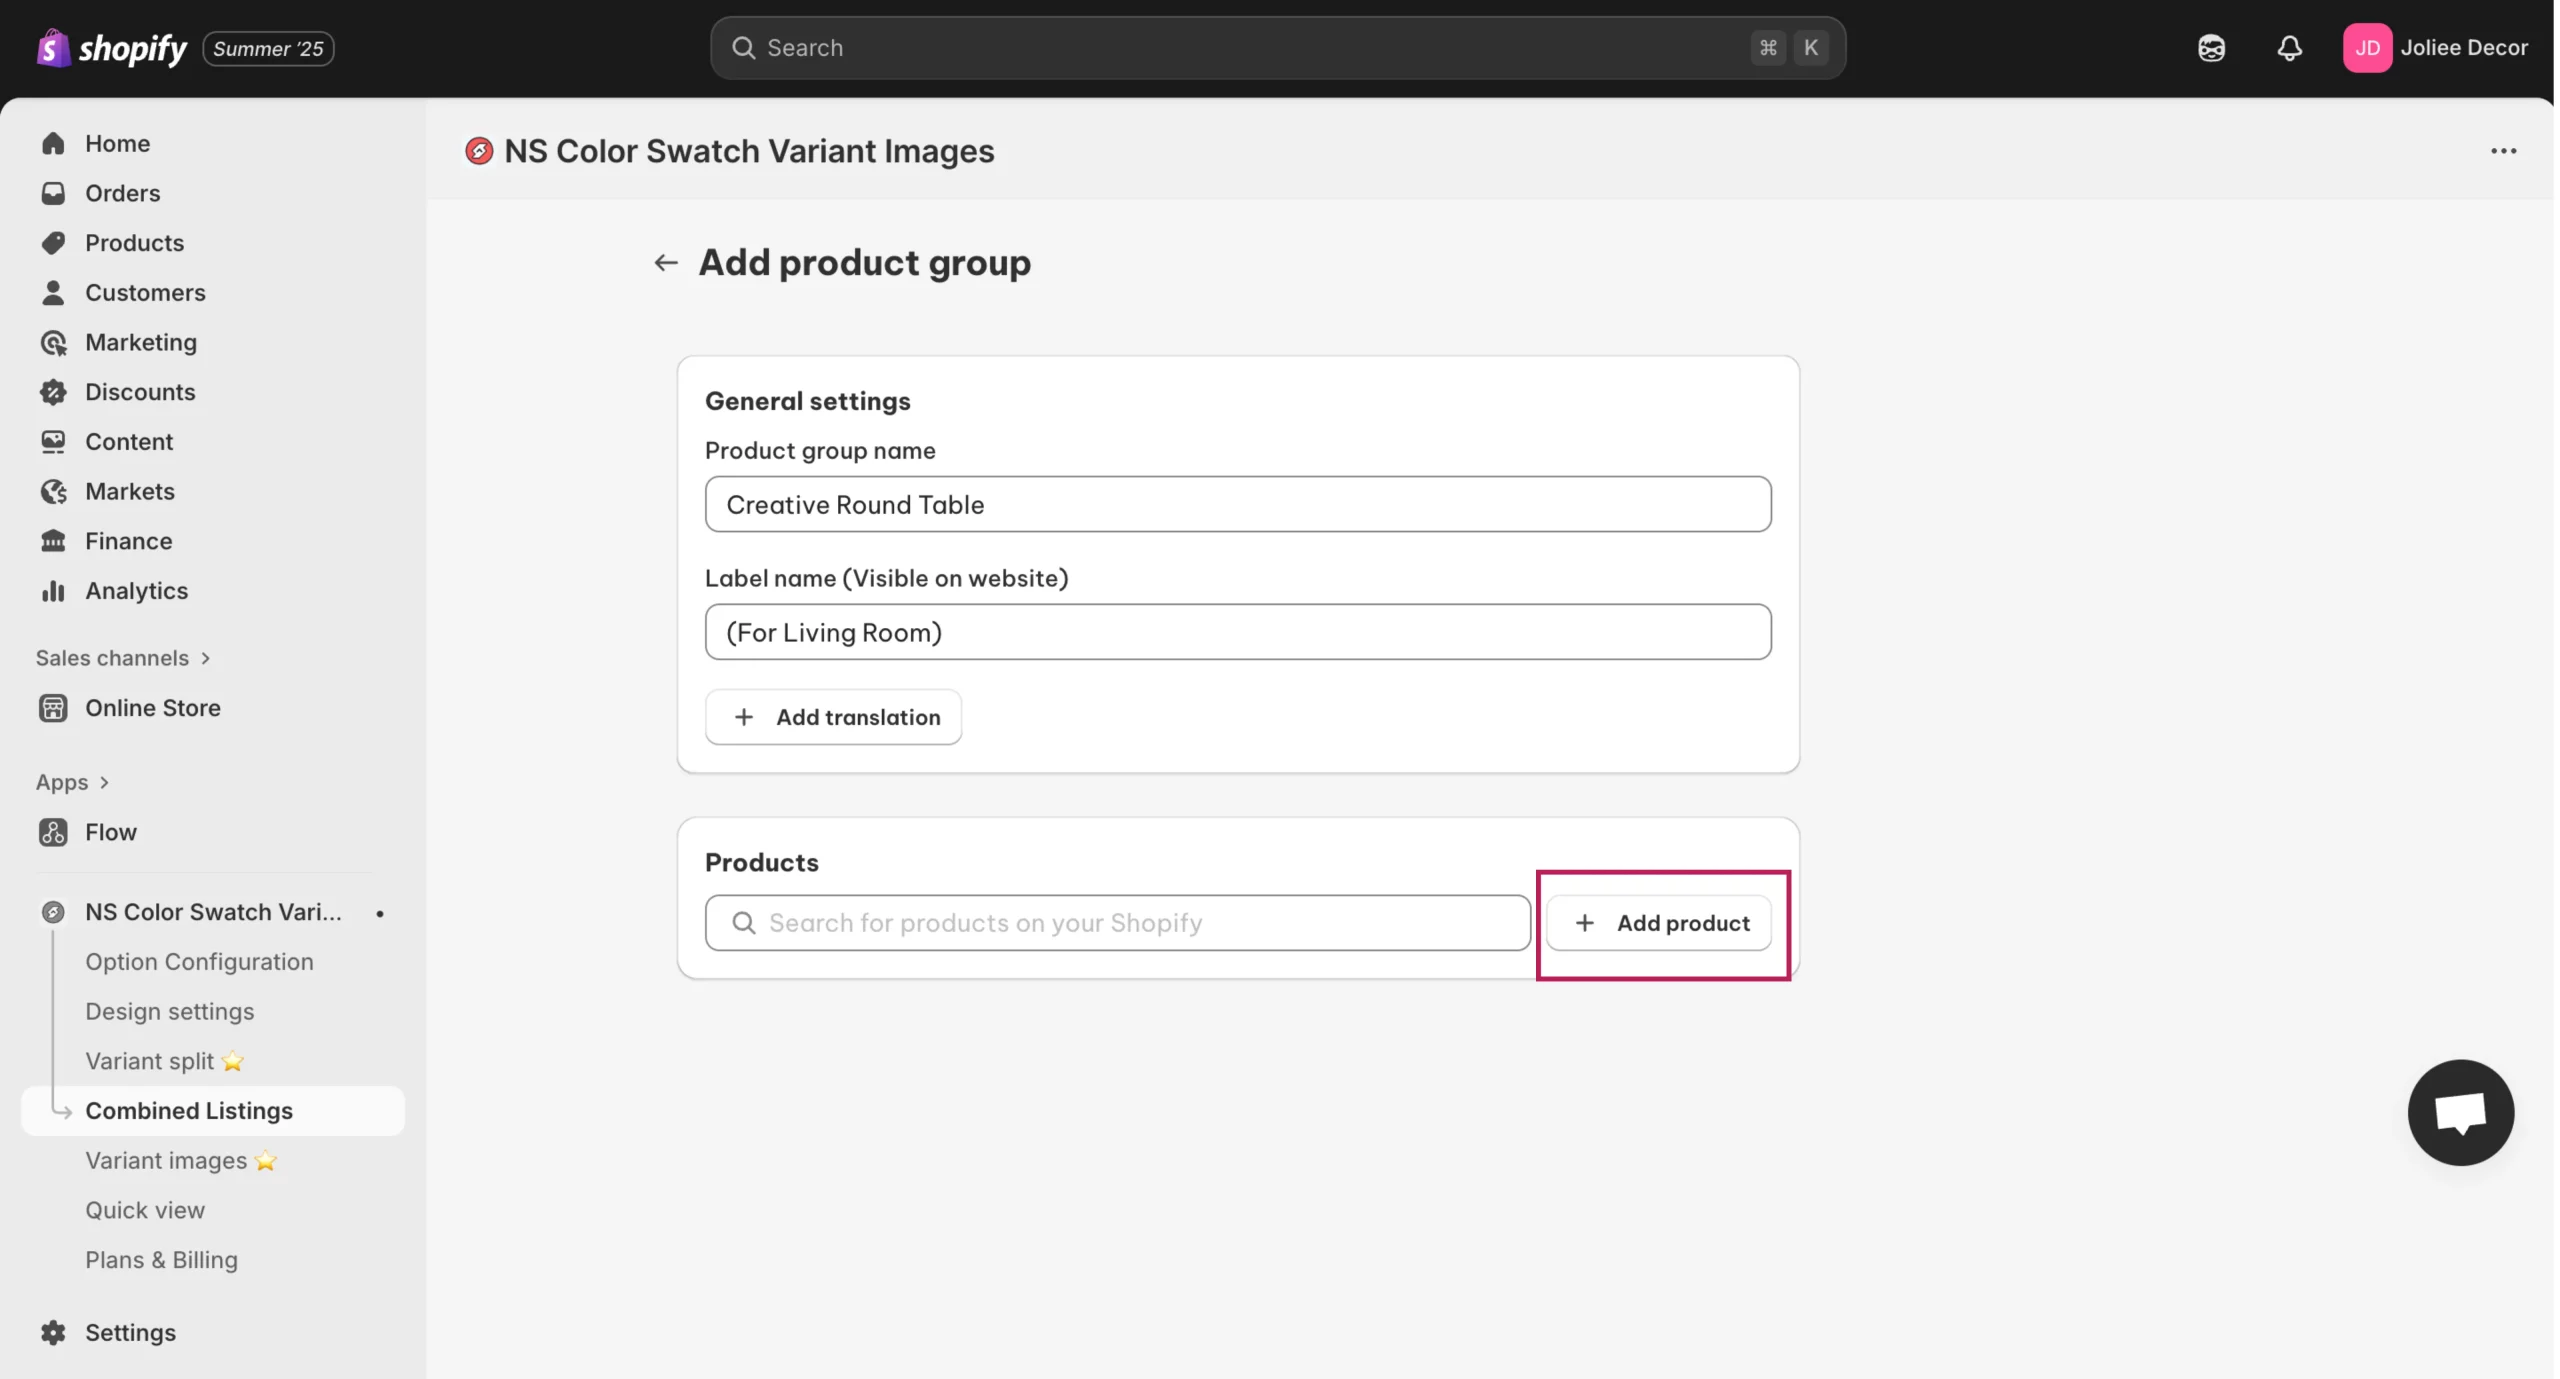
4. Enter a name for your product group, such as “Creative Round Tables” (as shown in the images).
📍Note: Users can change the Product group name and label name at any time they wish and can also add translations.

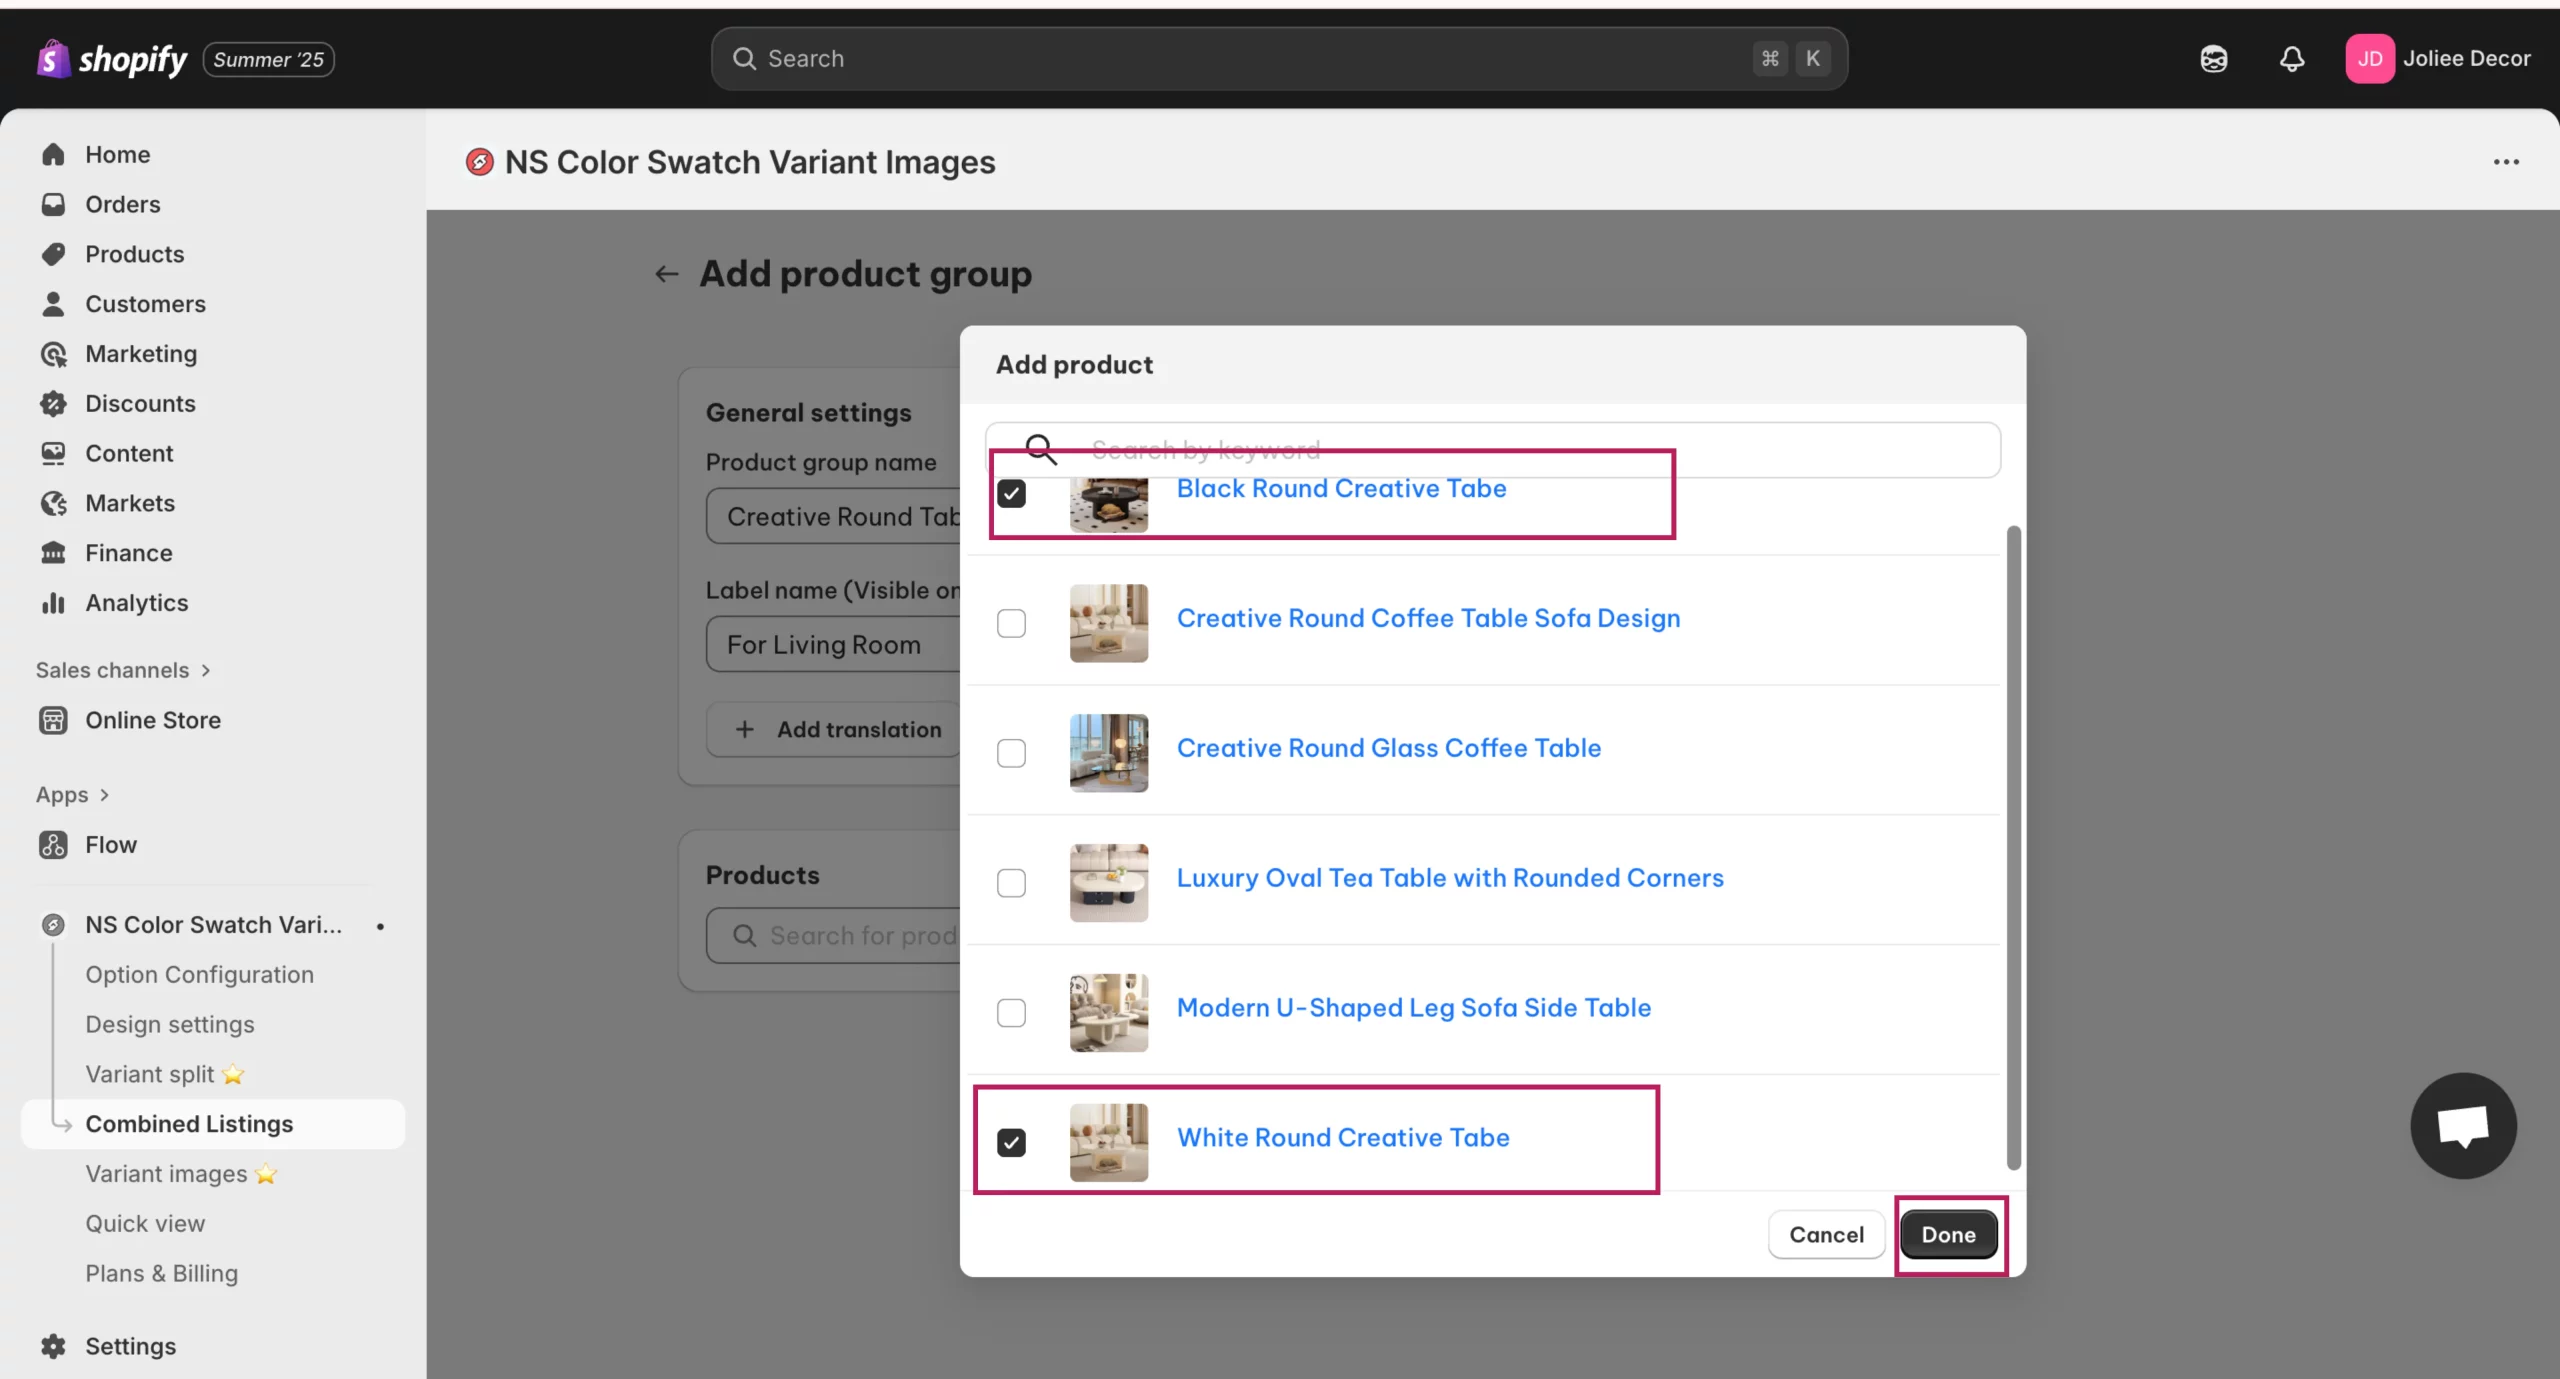
5. In the “Products” section, click Add product to select the products you want to group together.
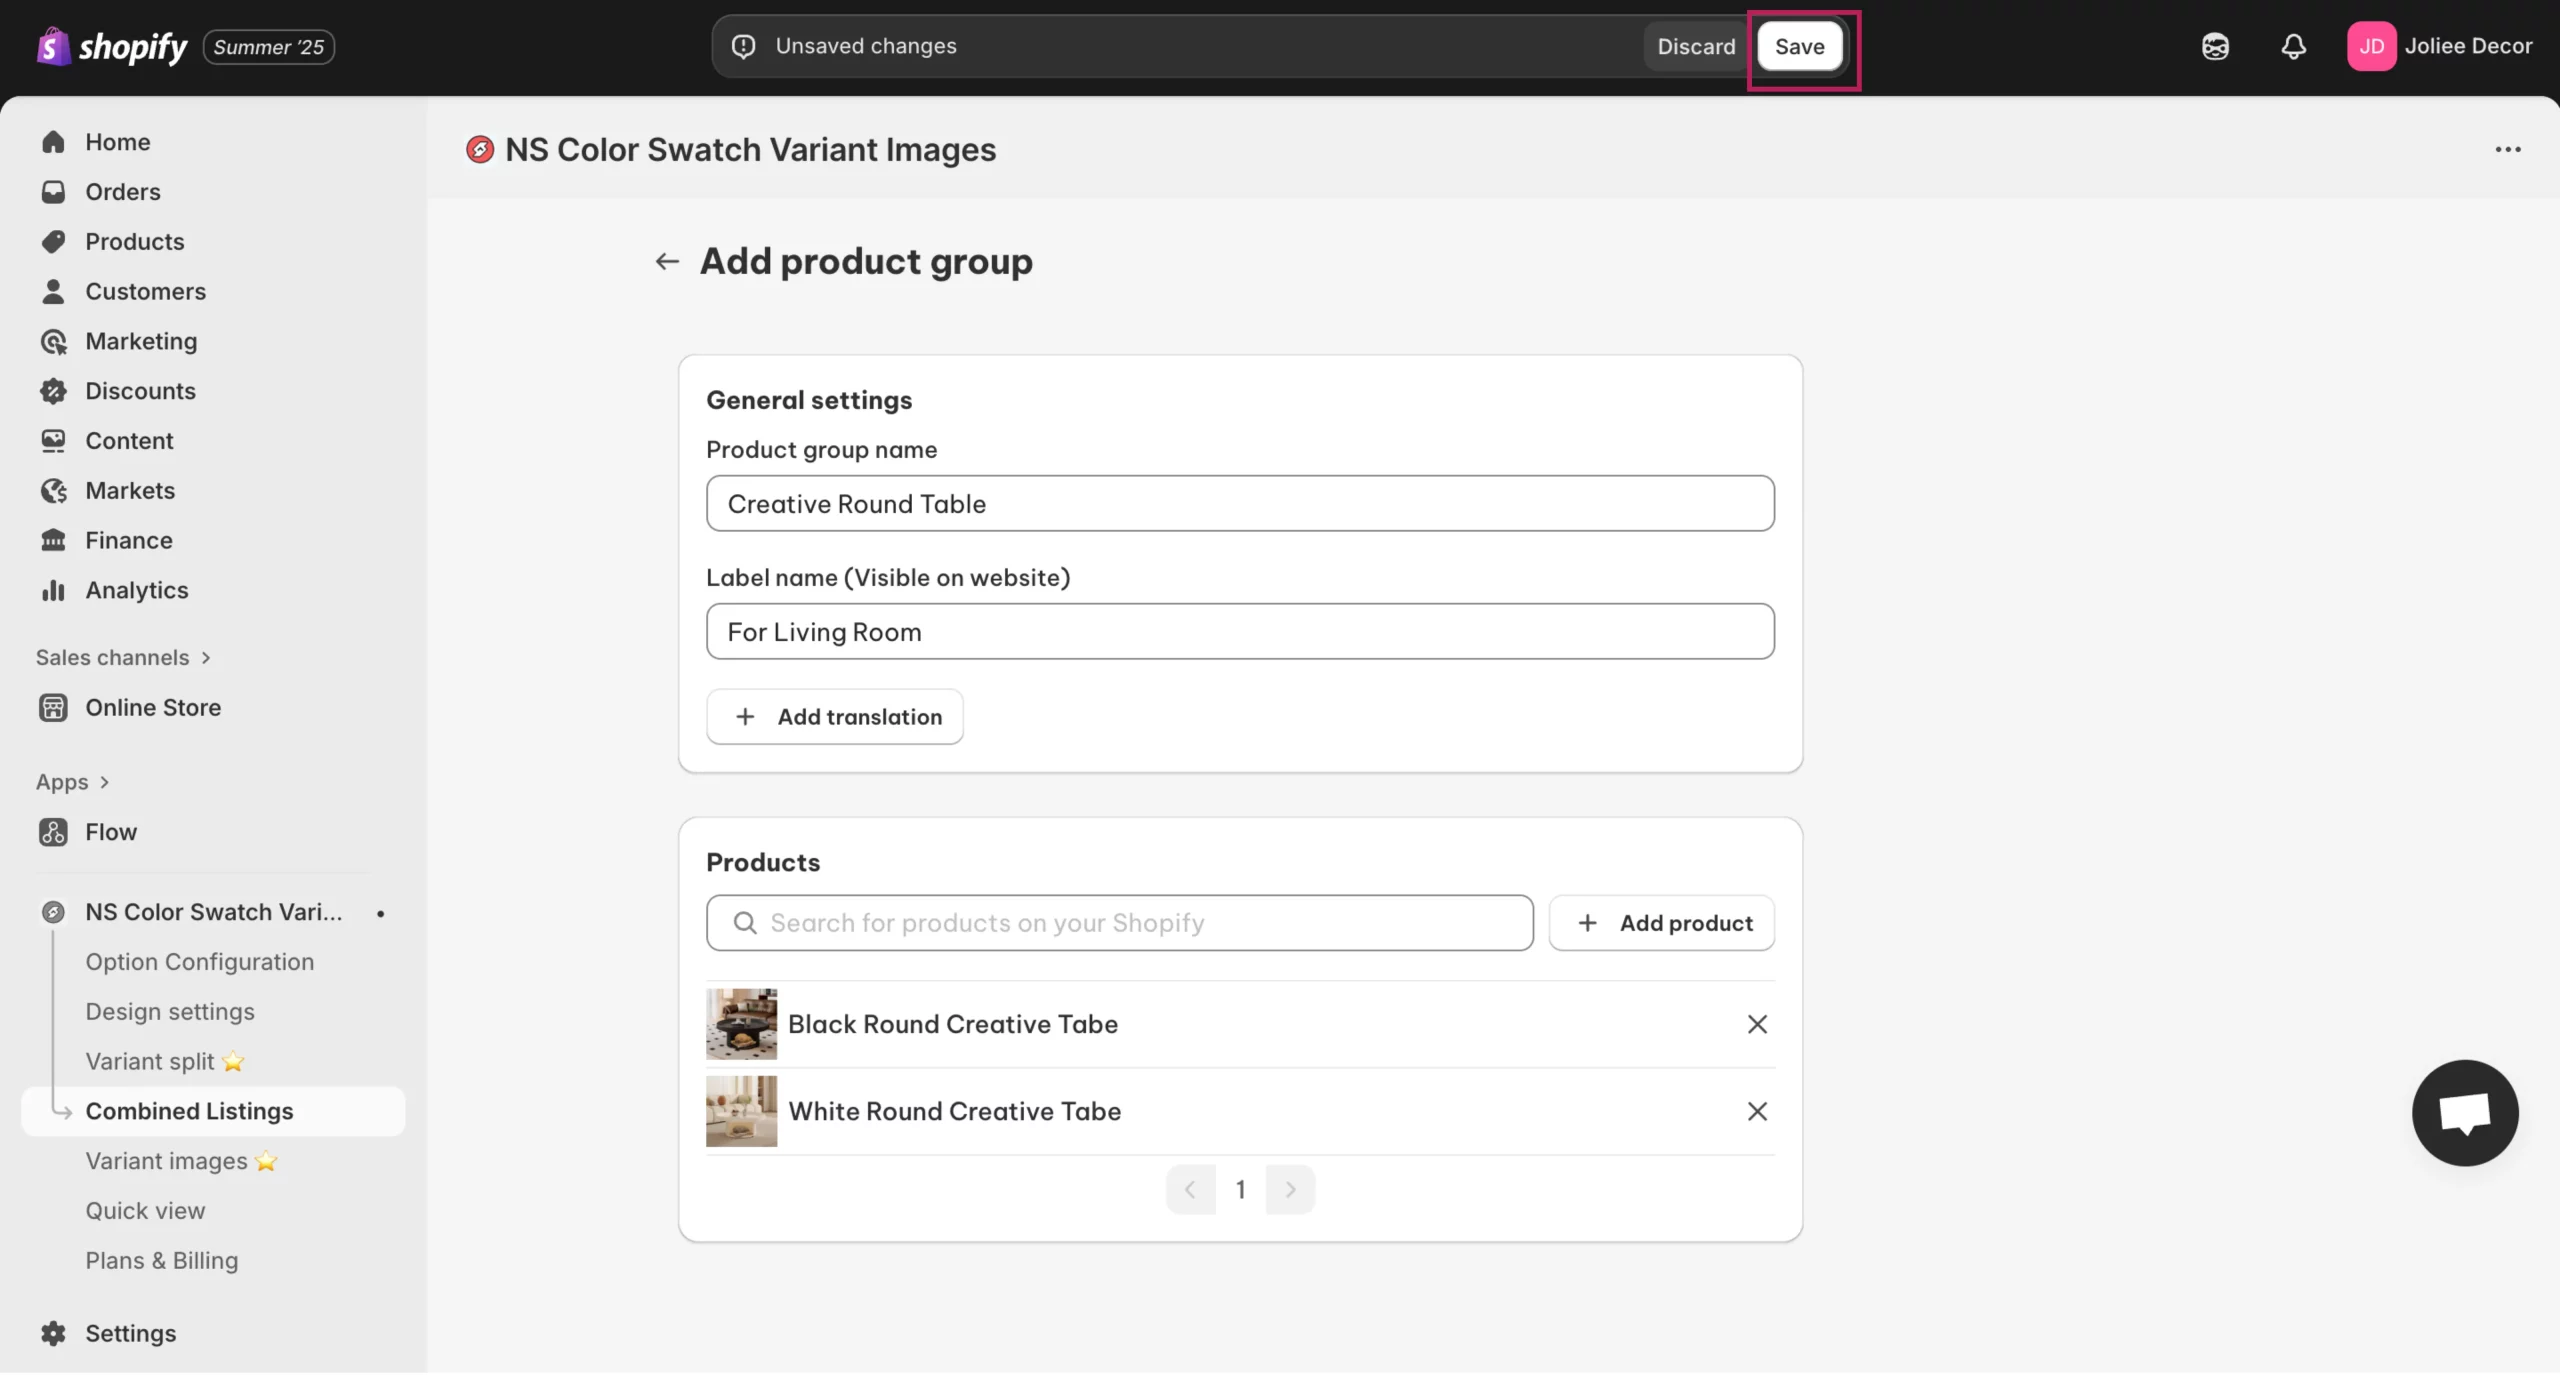
6. Add multiple products, such as different variants of tables, to the group and click Done to finalize the group.
7. Don’t forget to click Save.
Step 3: Customize the Display Style
Now that you’ve created a product group, it’s time to customize how the swatches will appear on the product pages.
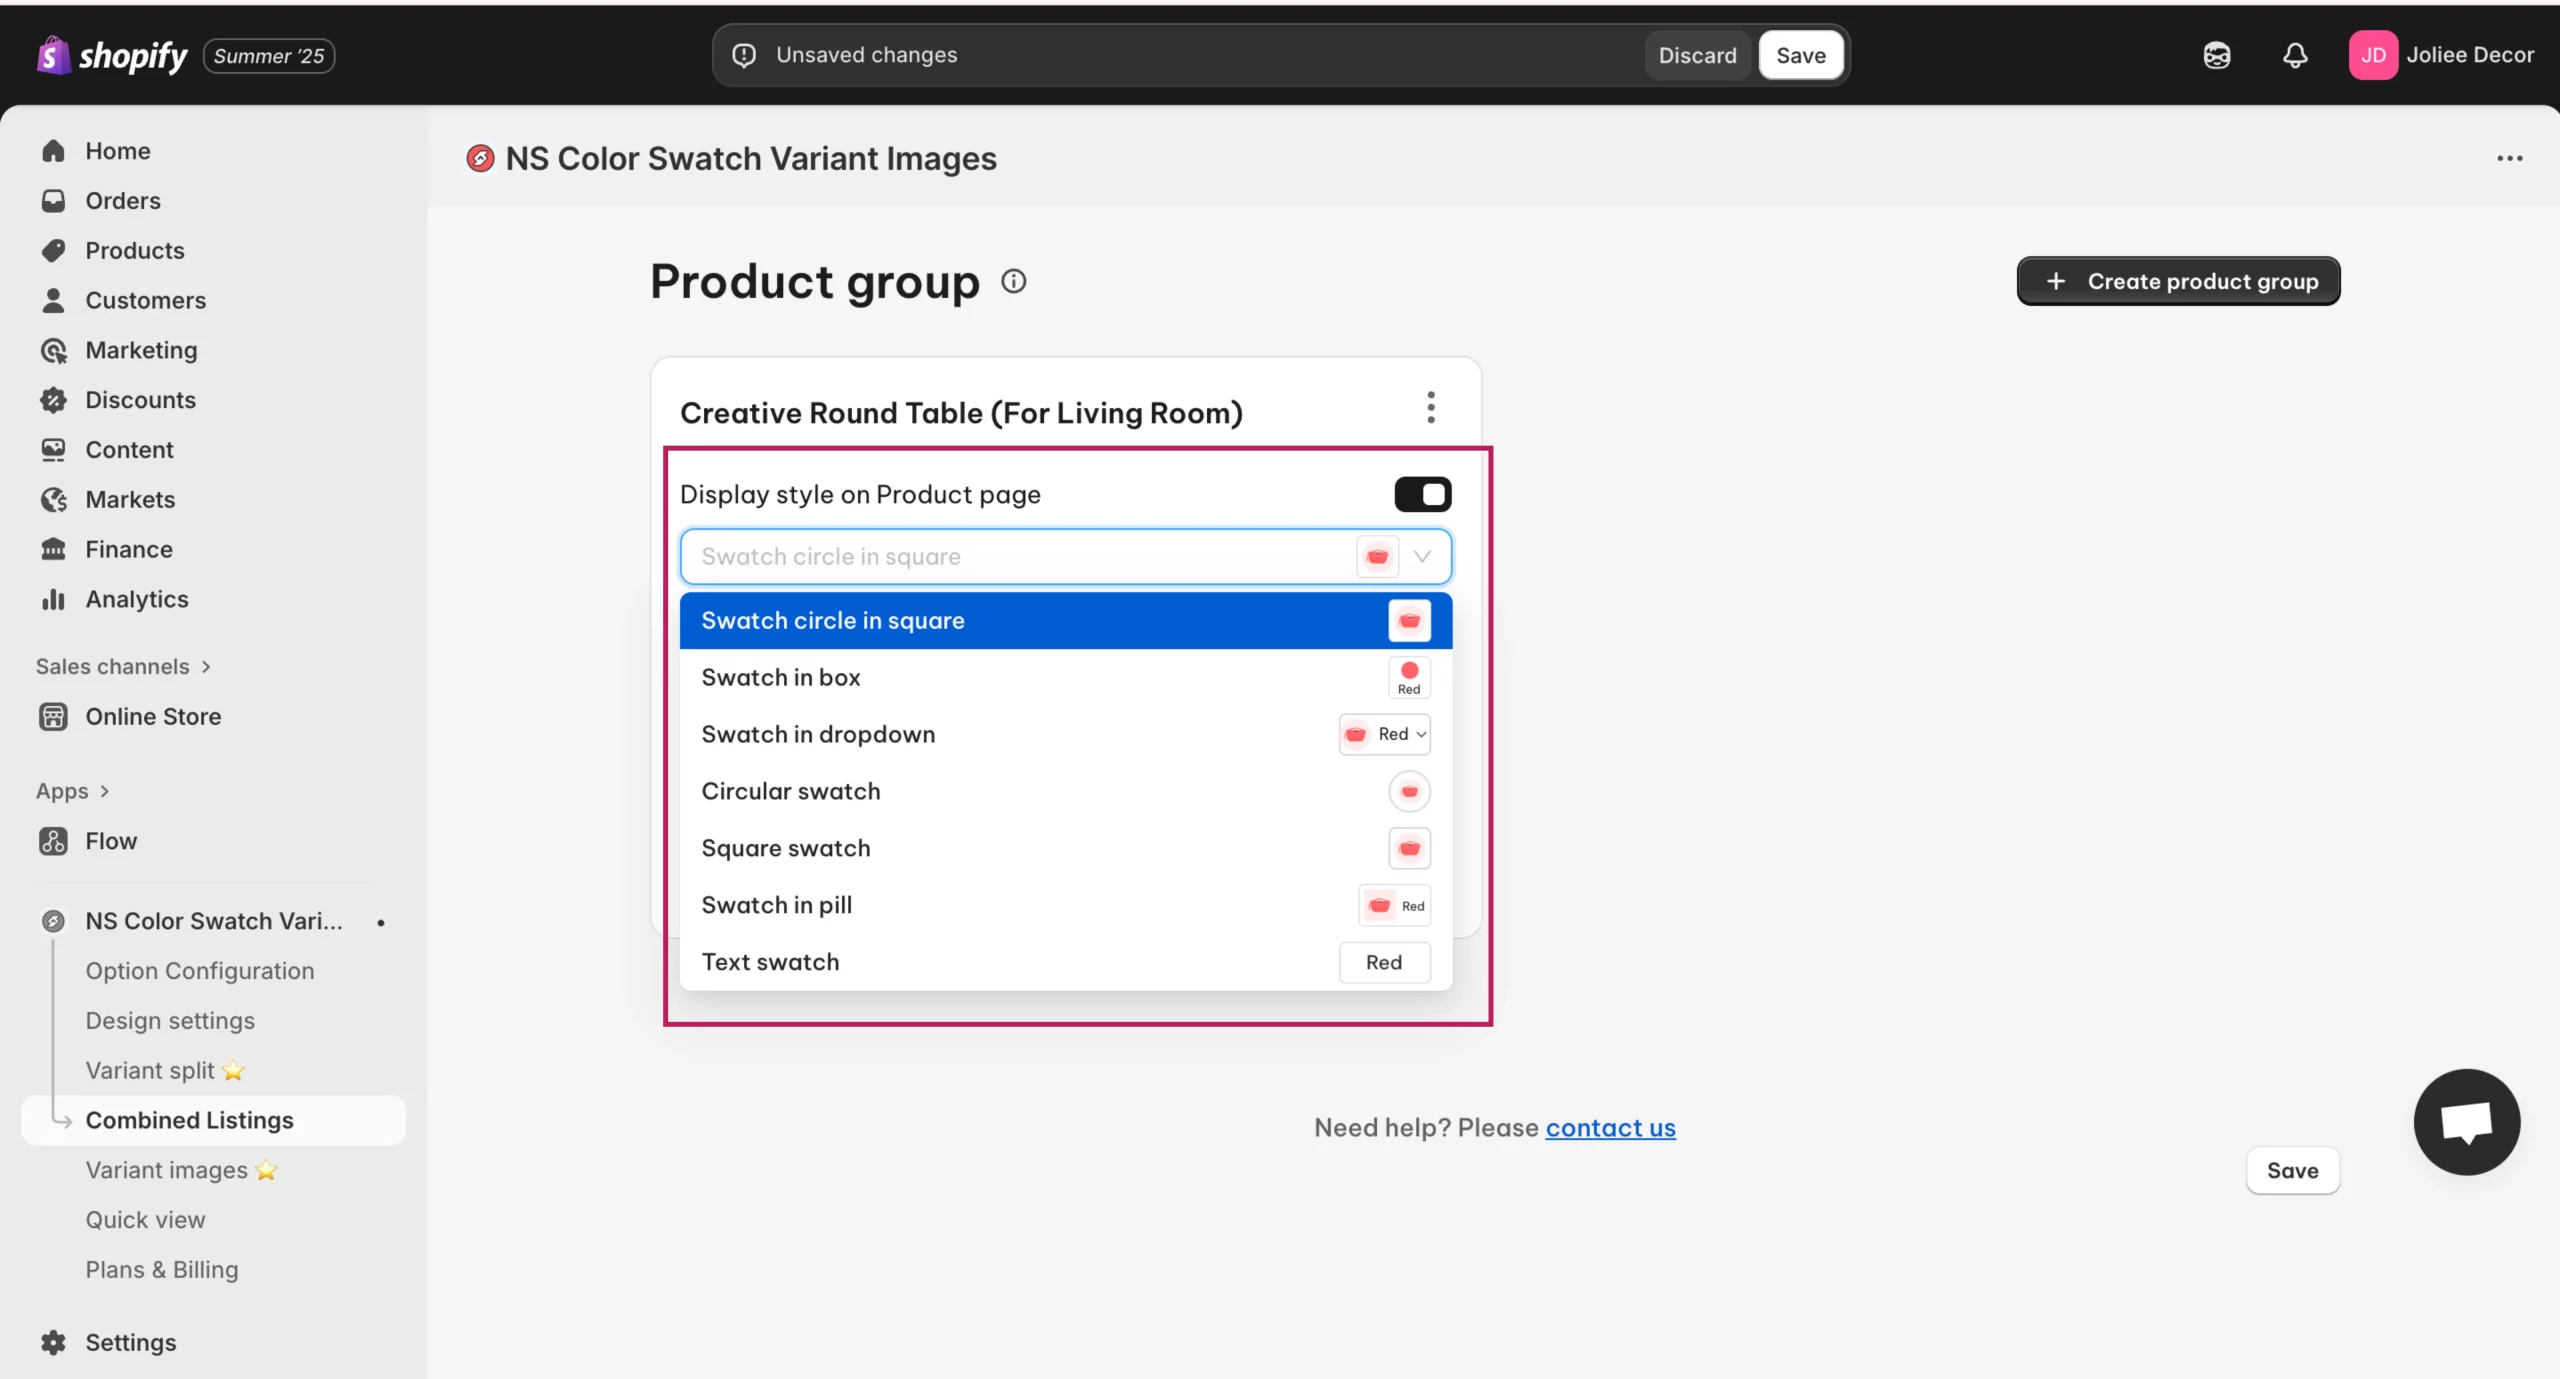
1. In the Product Group Settings, under “Display Style on Product Page” choose how you want the swatches to appear.
👉 For example, select Swatch circle in square for a clean, modern look.
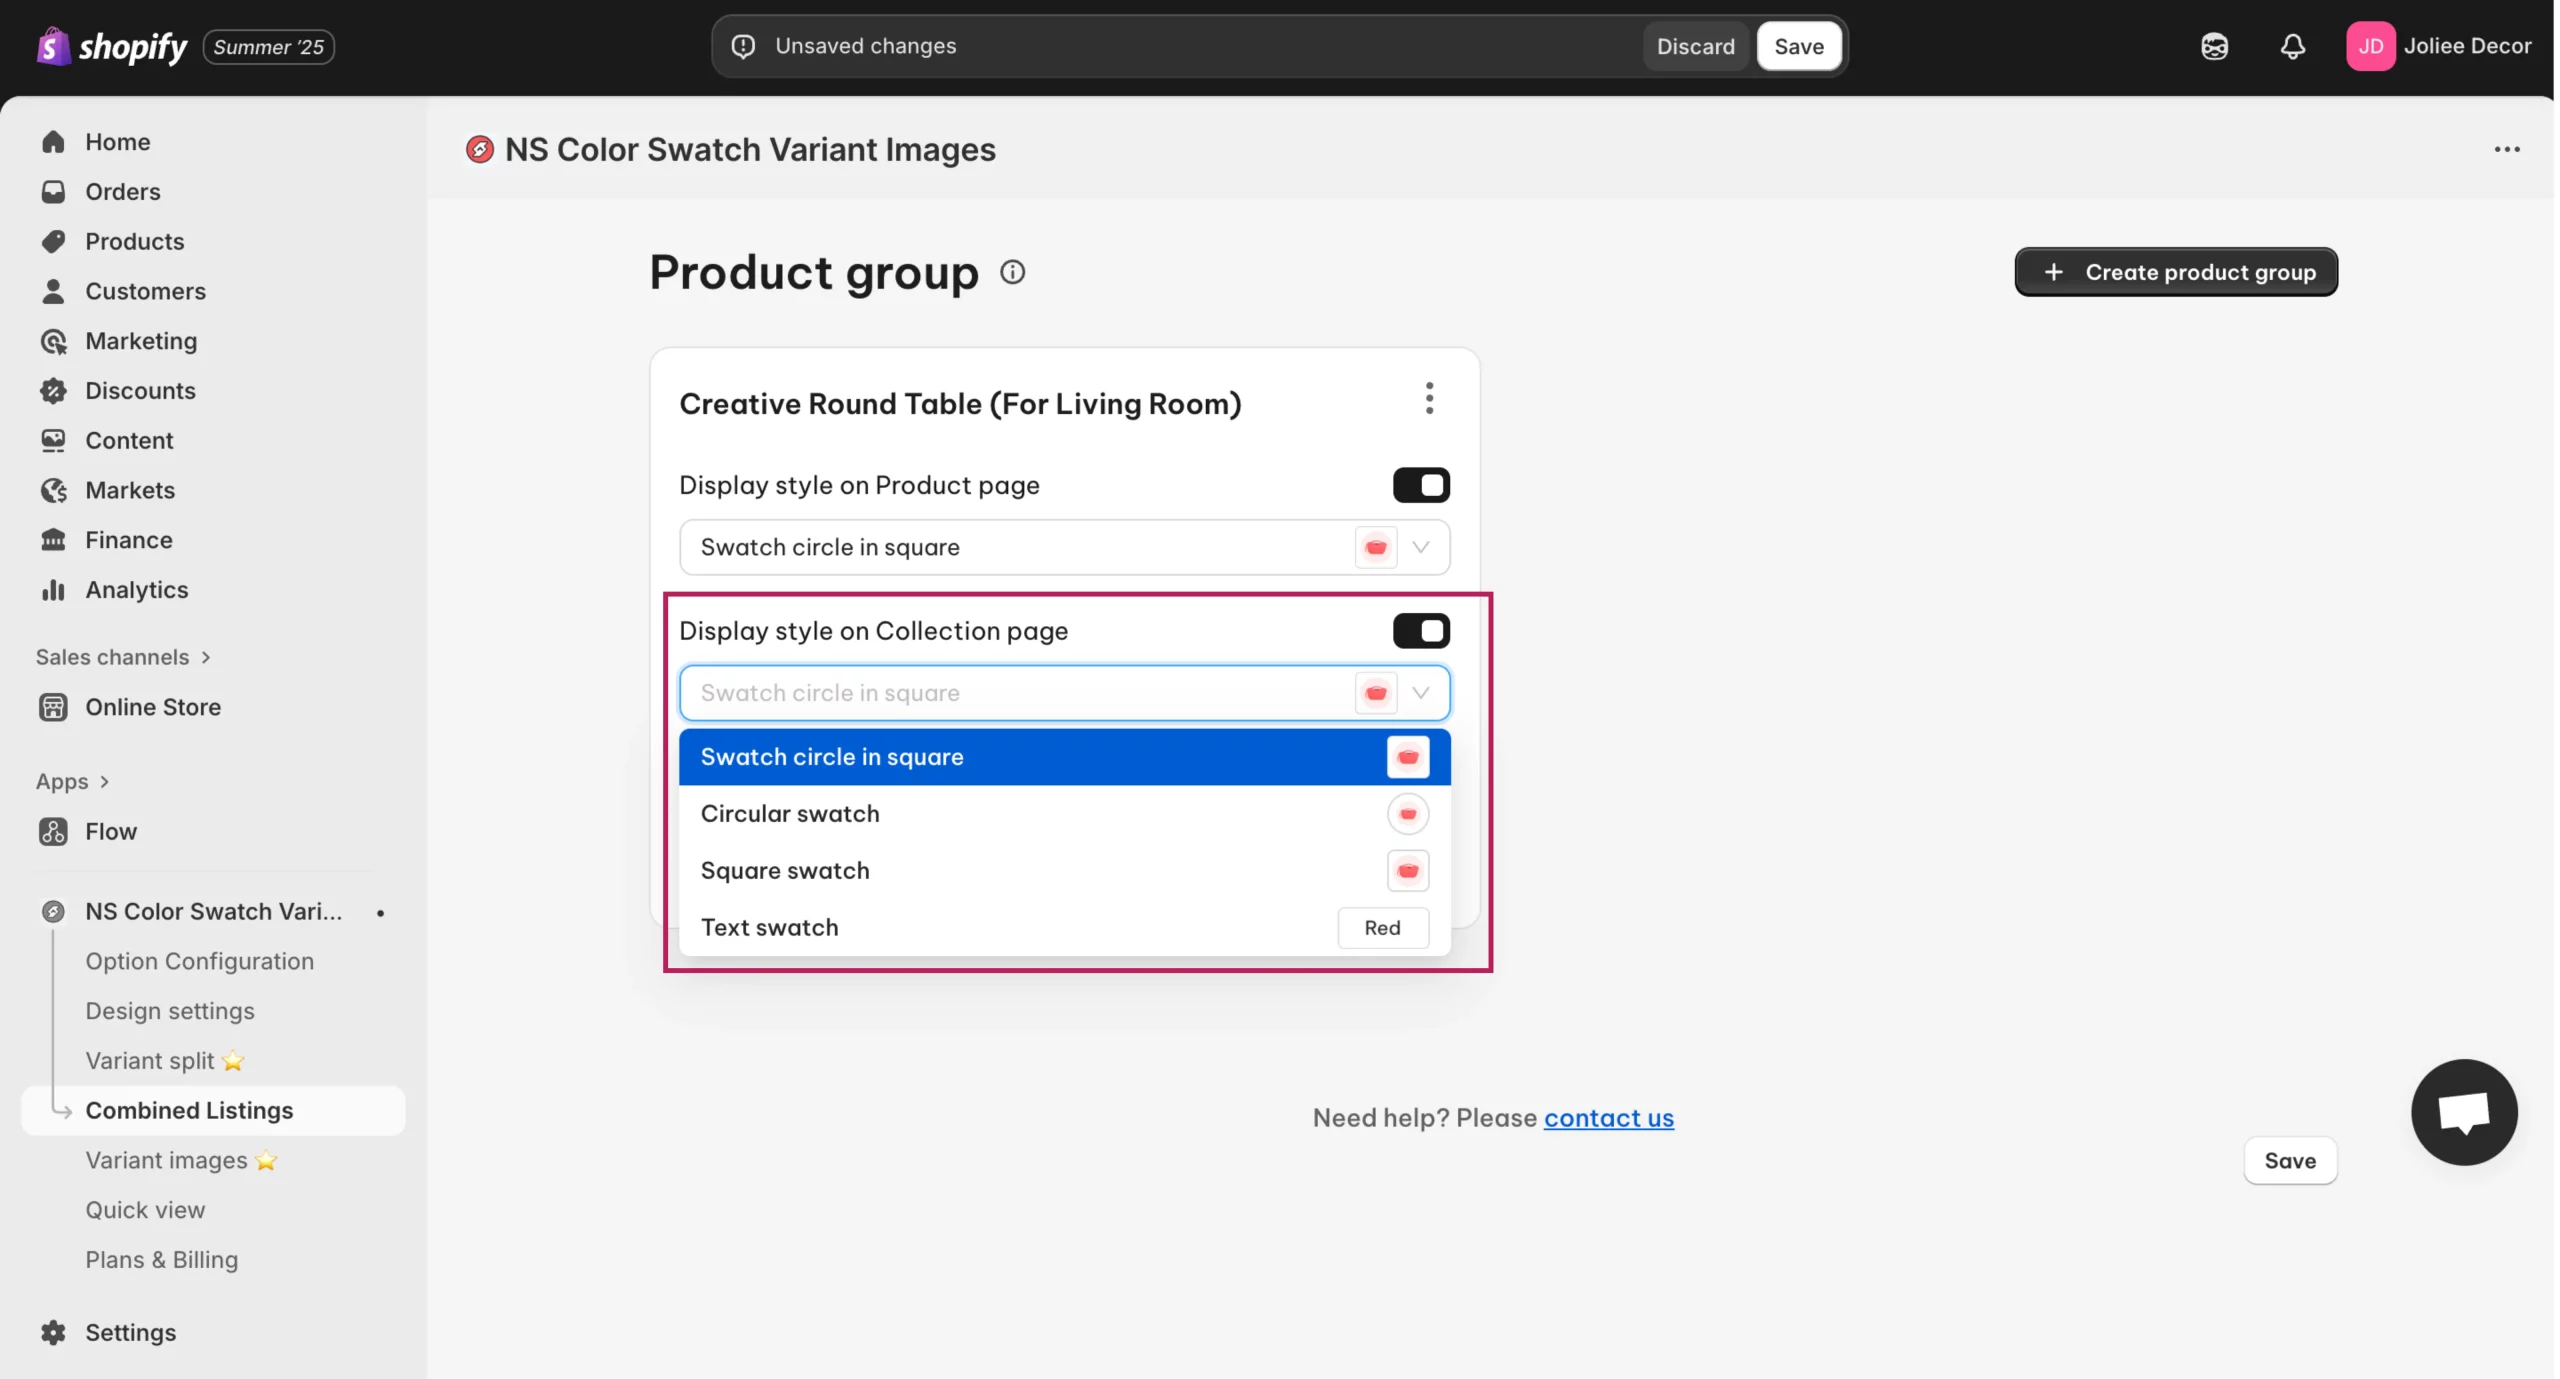
2. Next, go to the “Display Style on Collection Page” and select your preferred swatch style, like Square swatch, Circular swatch or Text swatch.
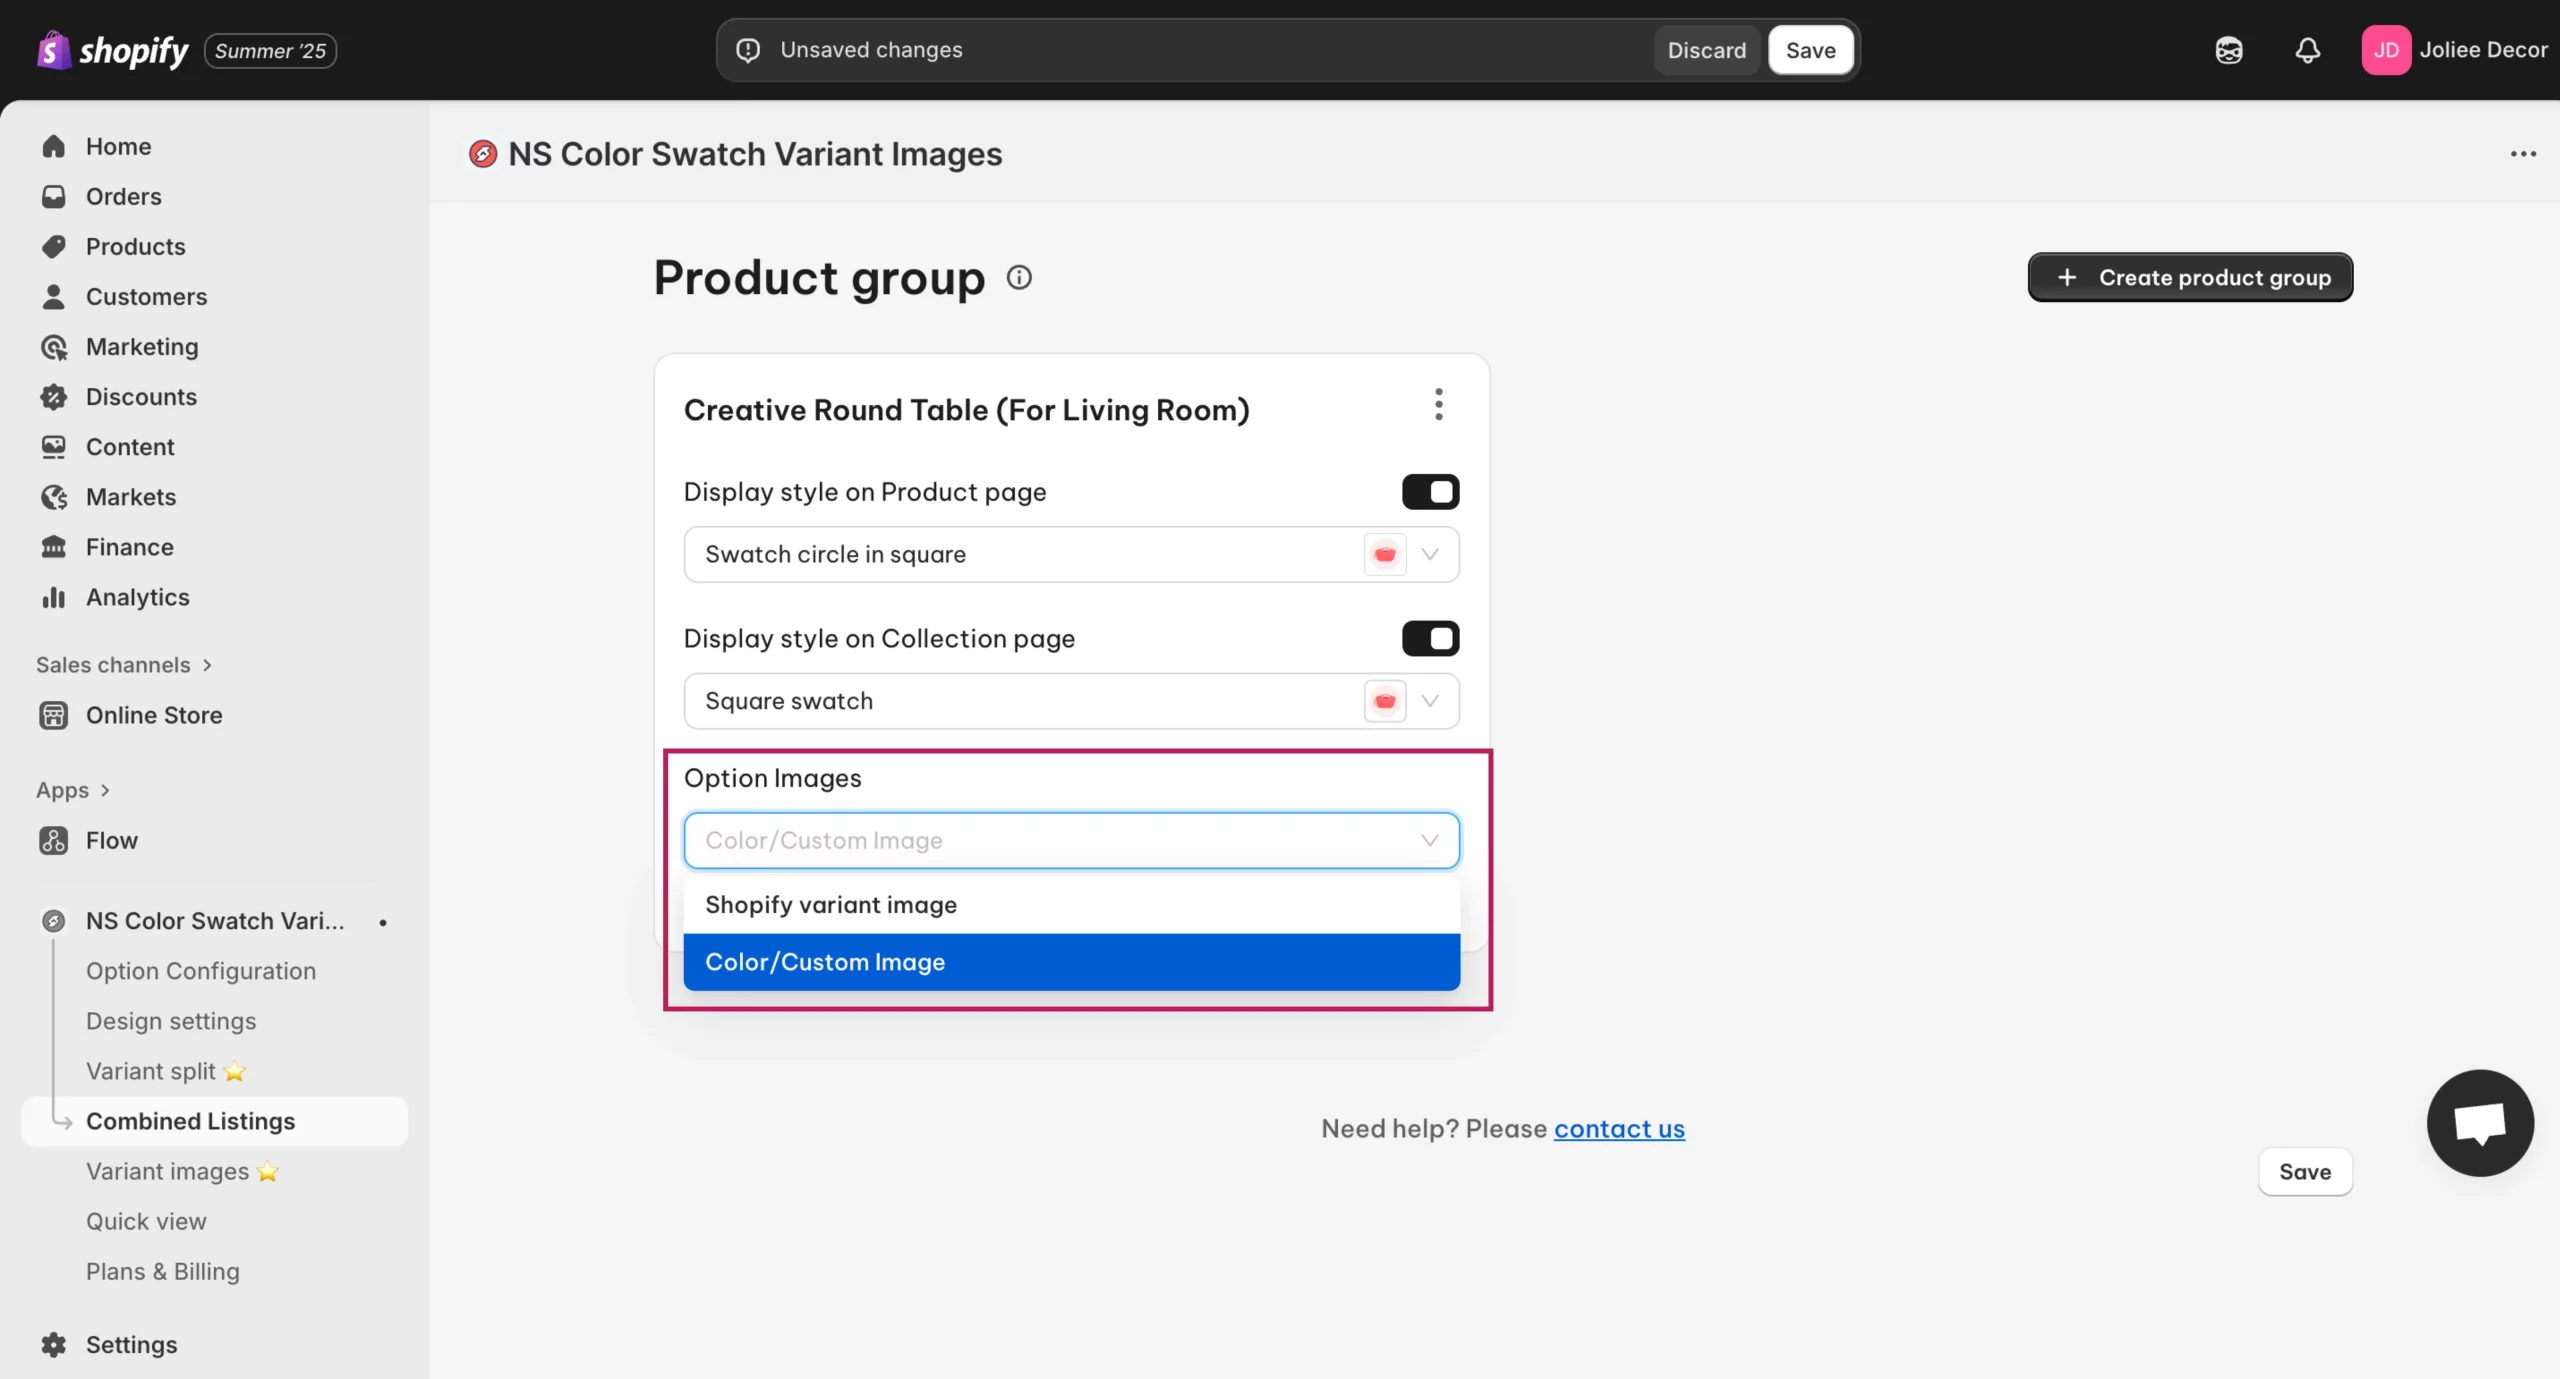
To link colour swatches to different products using custom images:
3. In the “Option Images” section, select Color/Custom Image from the dropdown. This allows you to assign a unique image for each swatch.
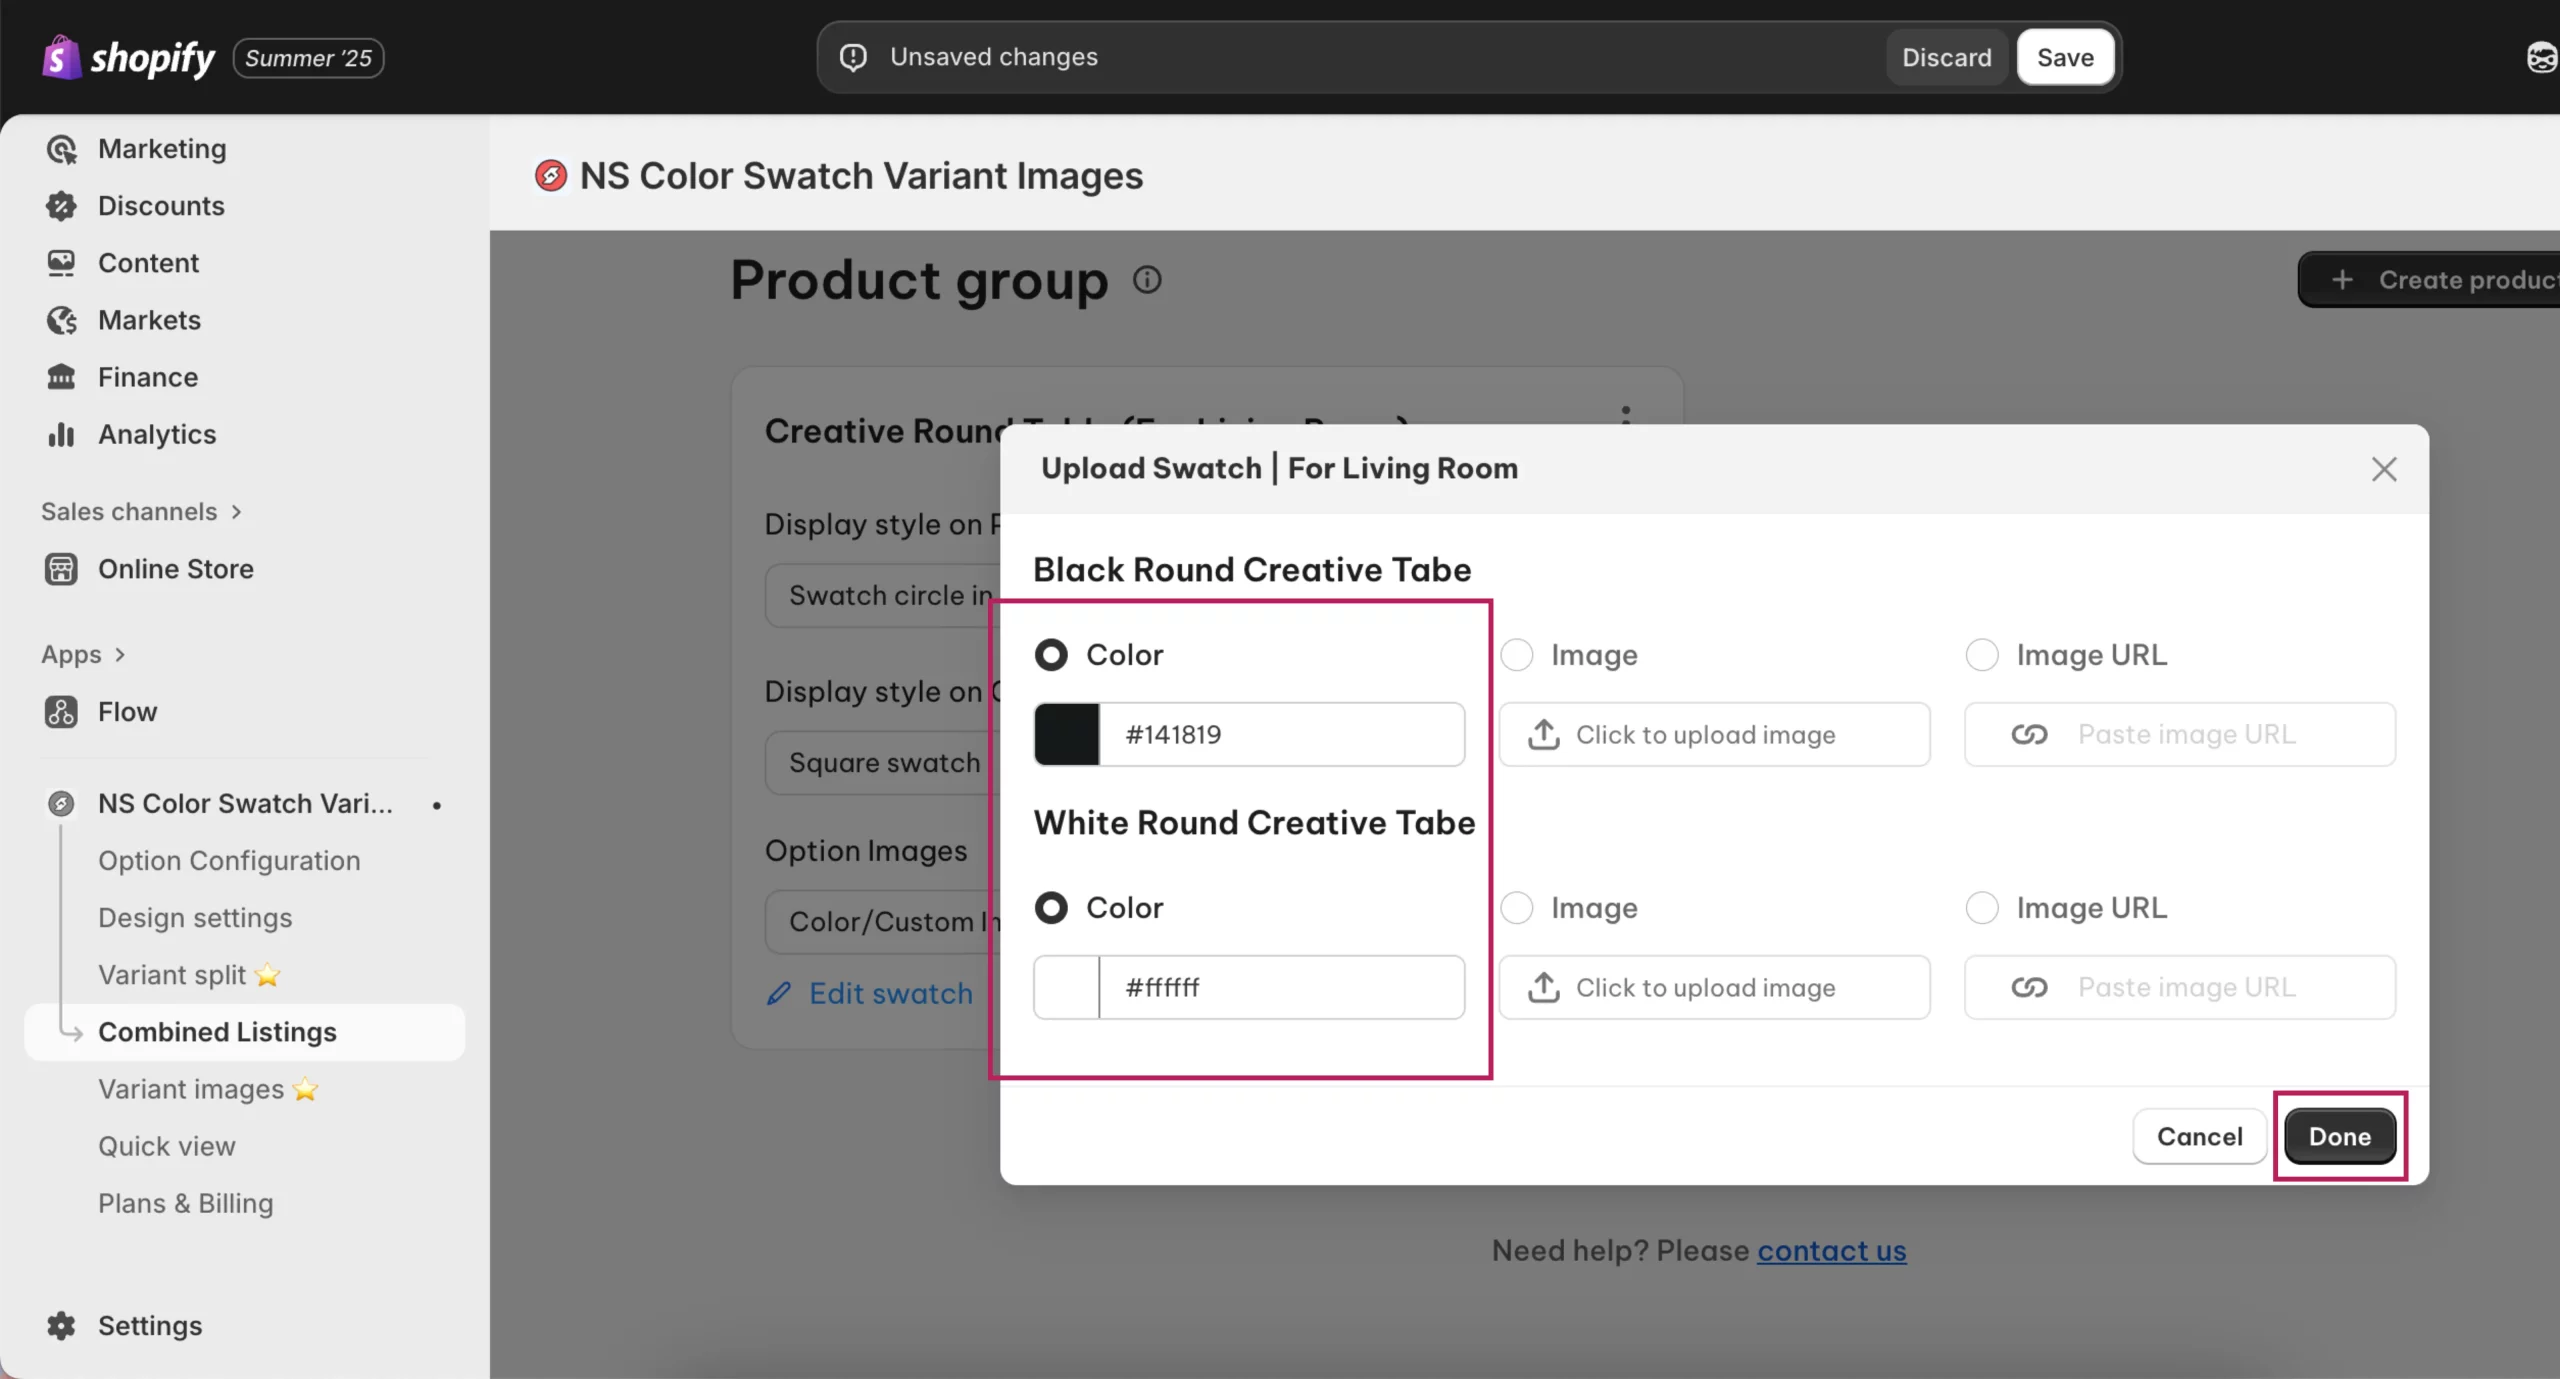
4. In this step, upload custom colour swatches for each product variant by entering the hex colour code or uploading an image. Then, click done.
5. Click Save.
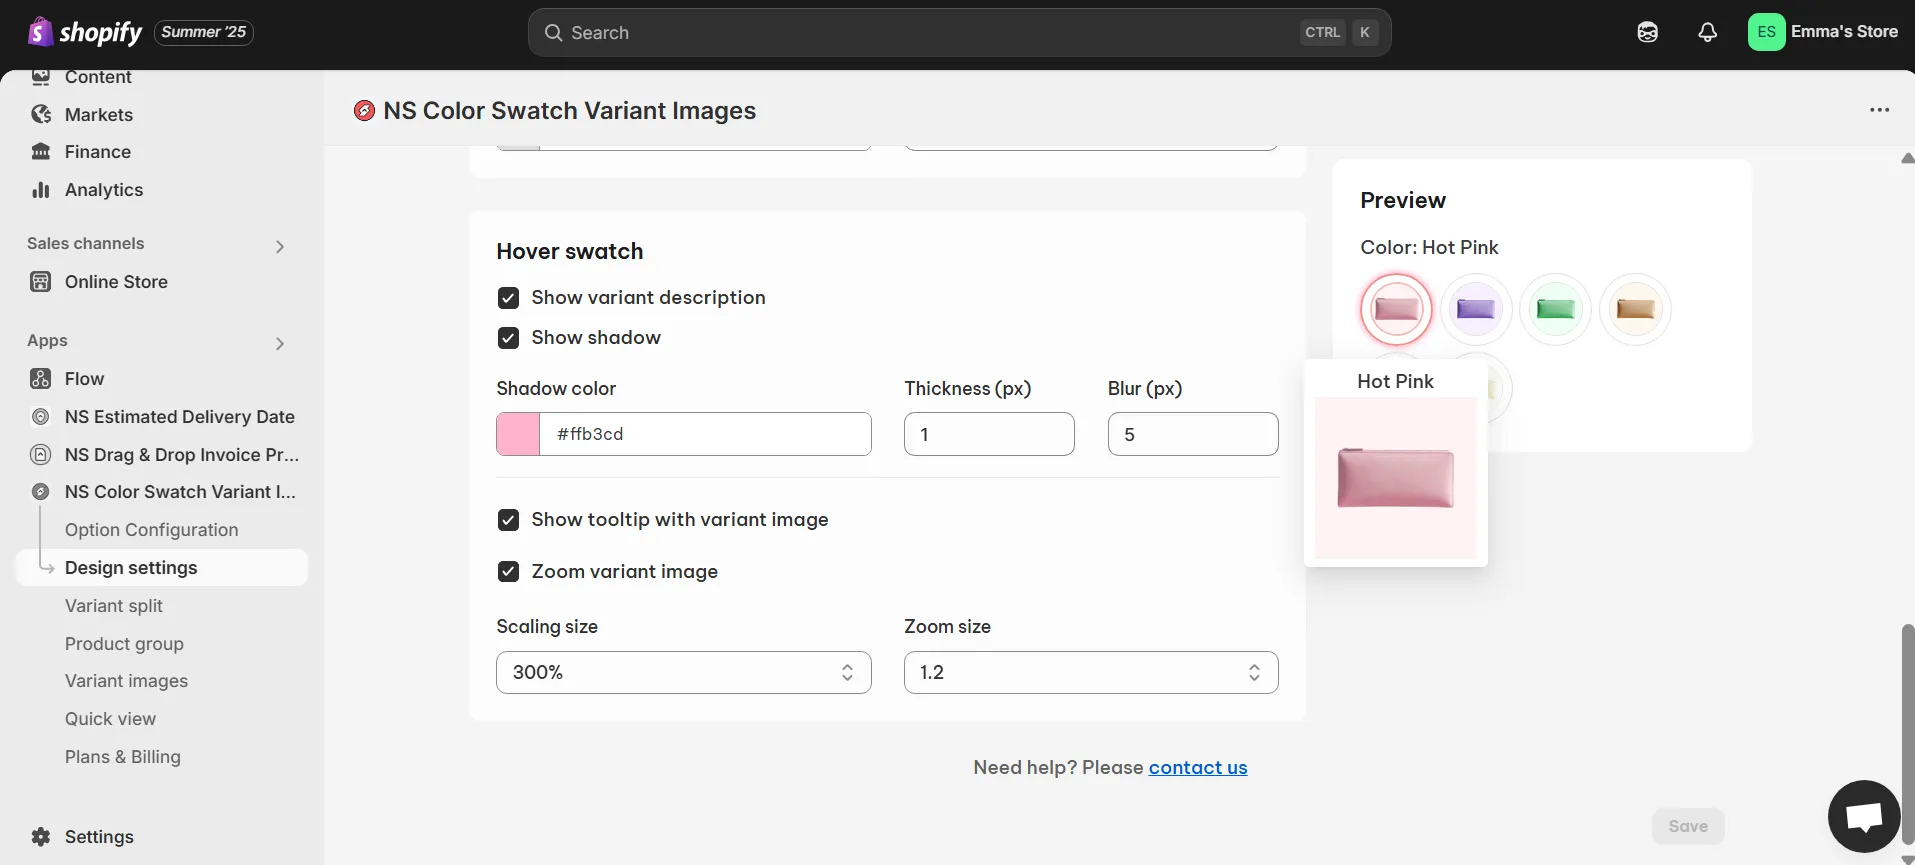
6. To make sure your color variant buttons align with your store’s design, you can adjust various visual elements. In the app’s sidebar, go to Design Settings and find the swatch style you selected earlier and click Customize.
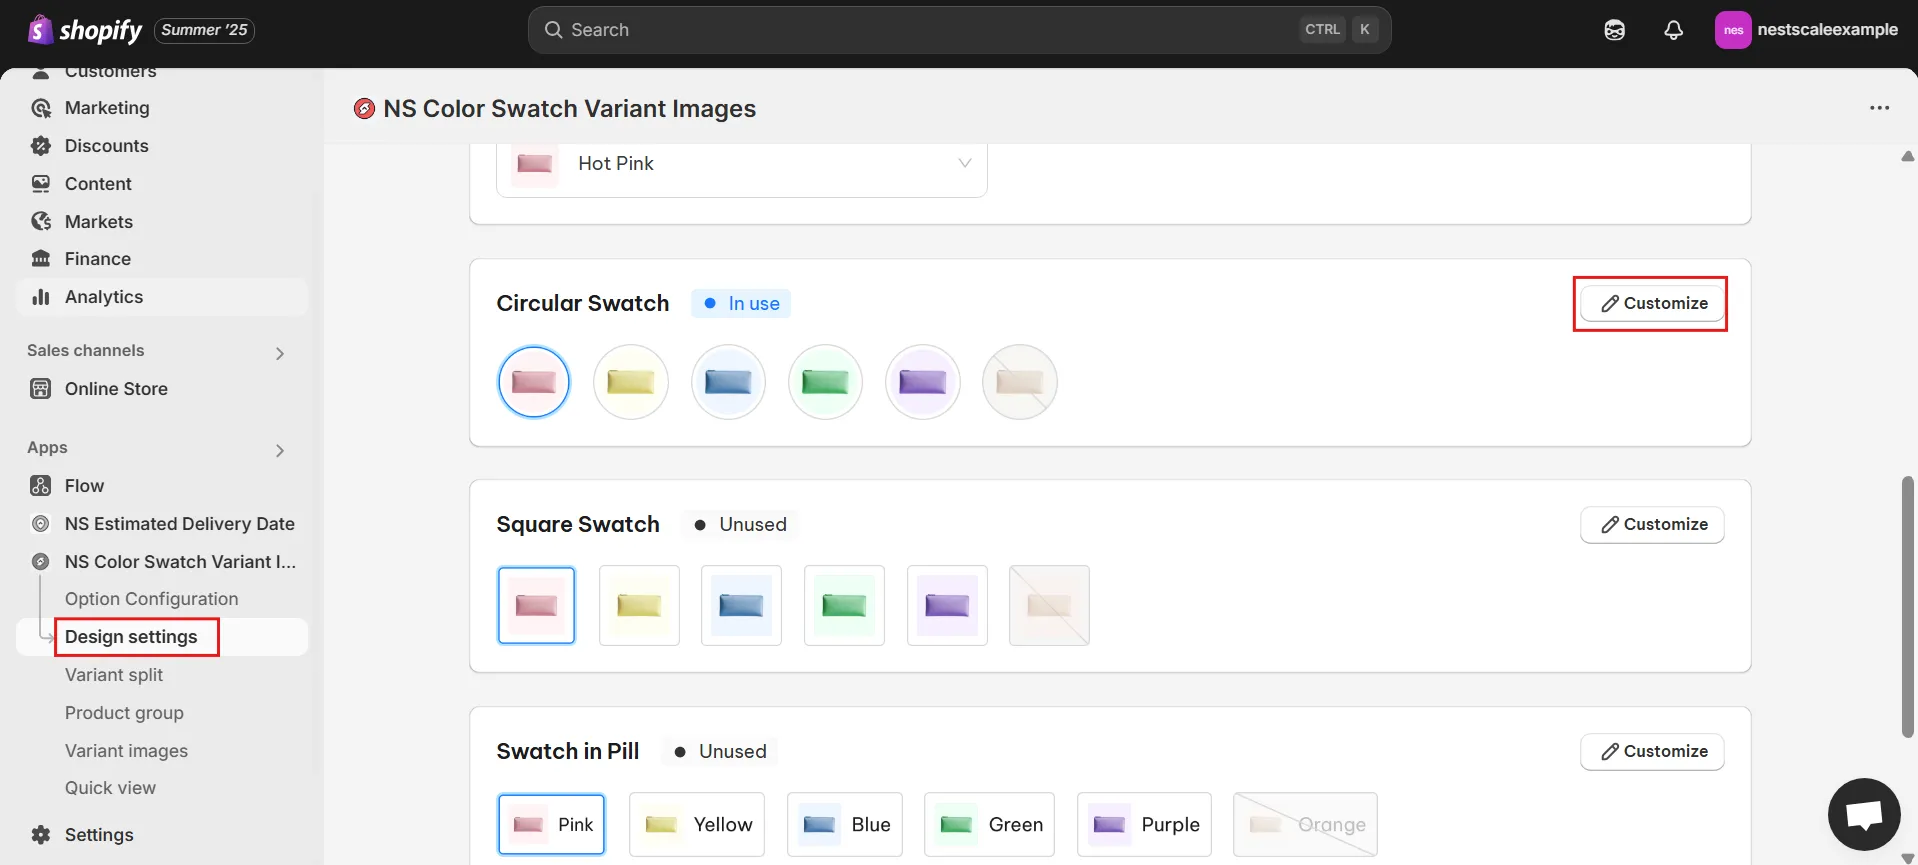
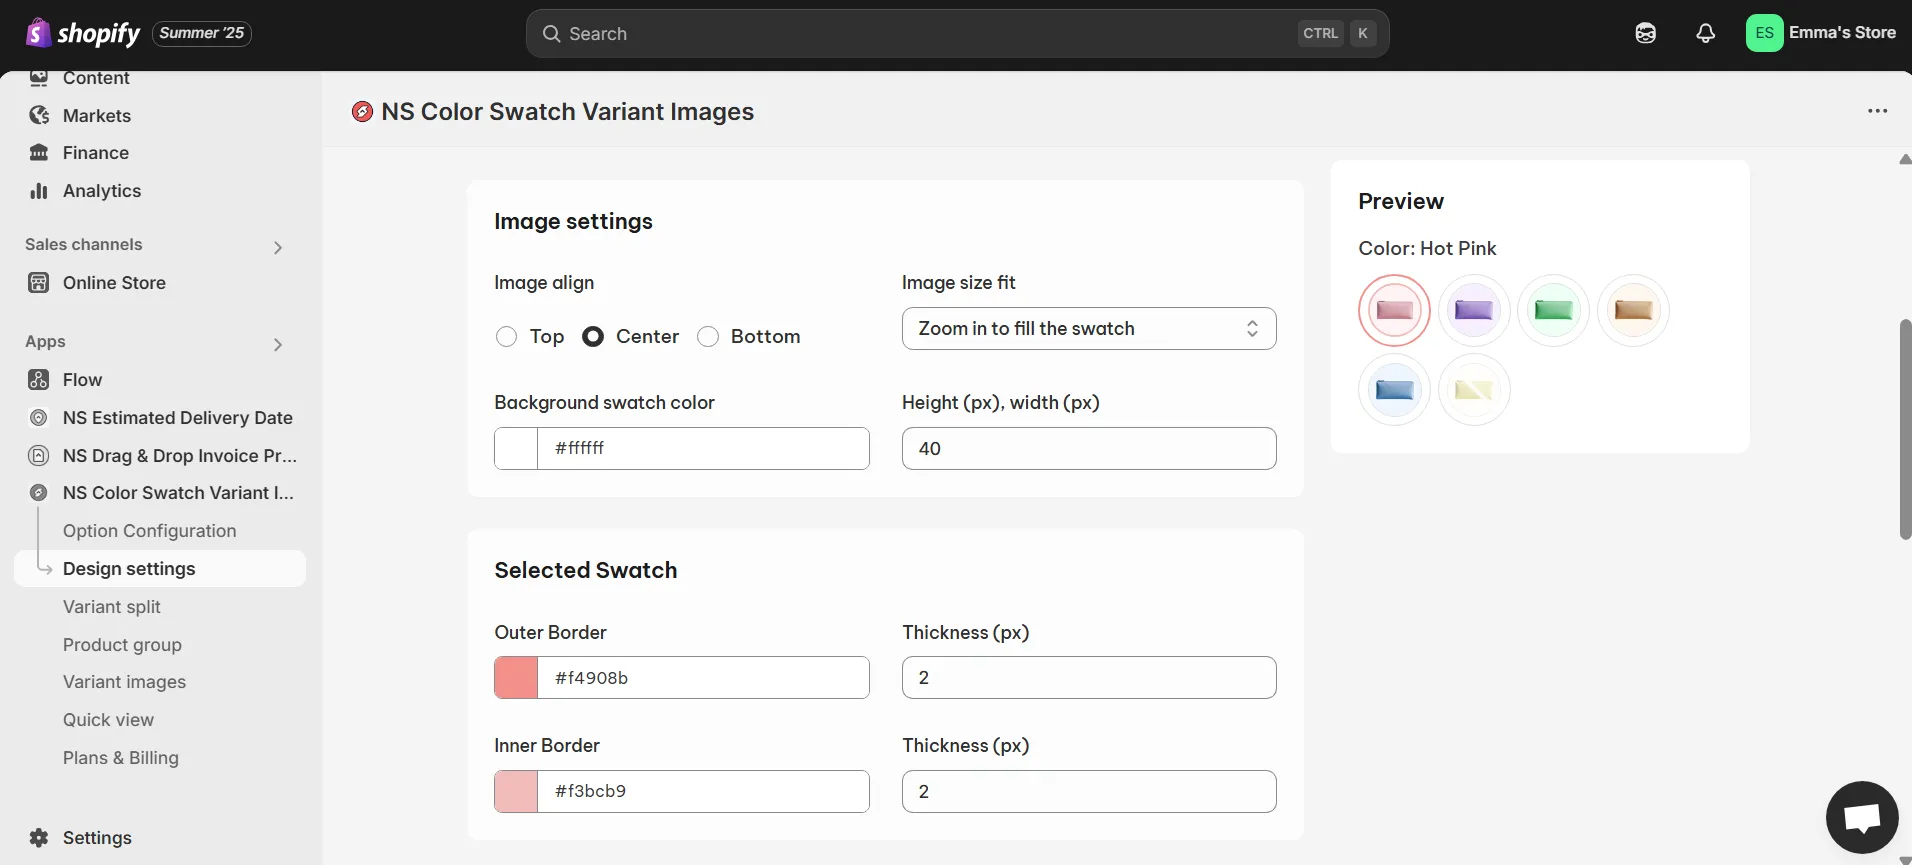
7. You’ll find five design sections:
- General Settings: Adjust swatch size, spacing, and border thickness

- Image Settings: Set hover effects like zoom-in/out or image positioning.
- Selected Swatch: Customize the selected swatch’s border color and thickness.
- Unselected Swatch: Define how unselected swatches will appear.
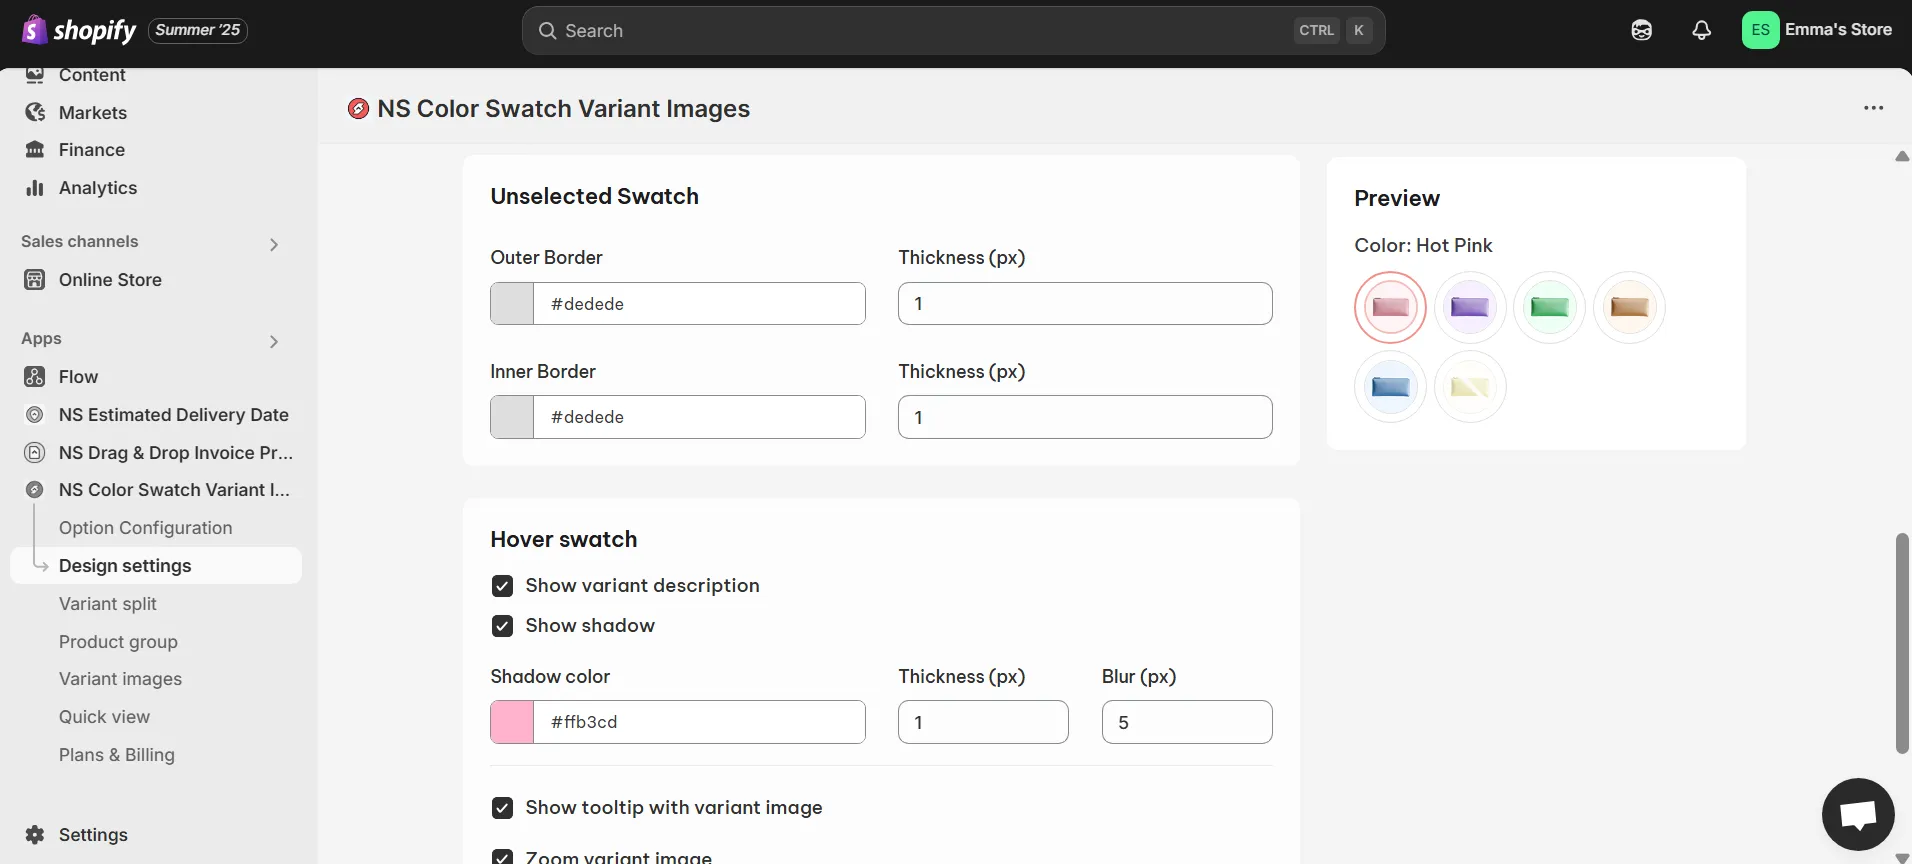
- Hover Swatch: Add effects like variant names, shadows, or zoom on hover.
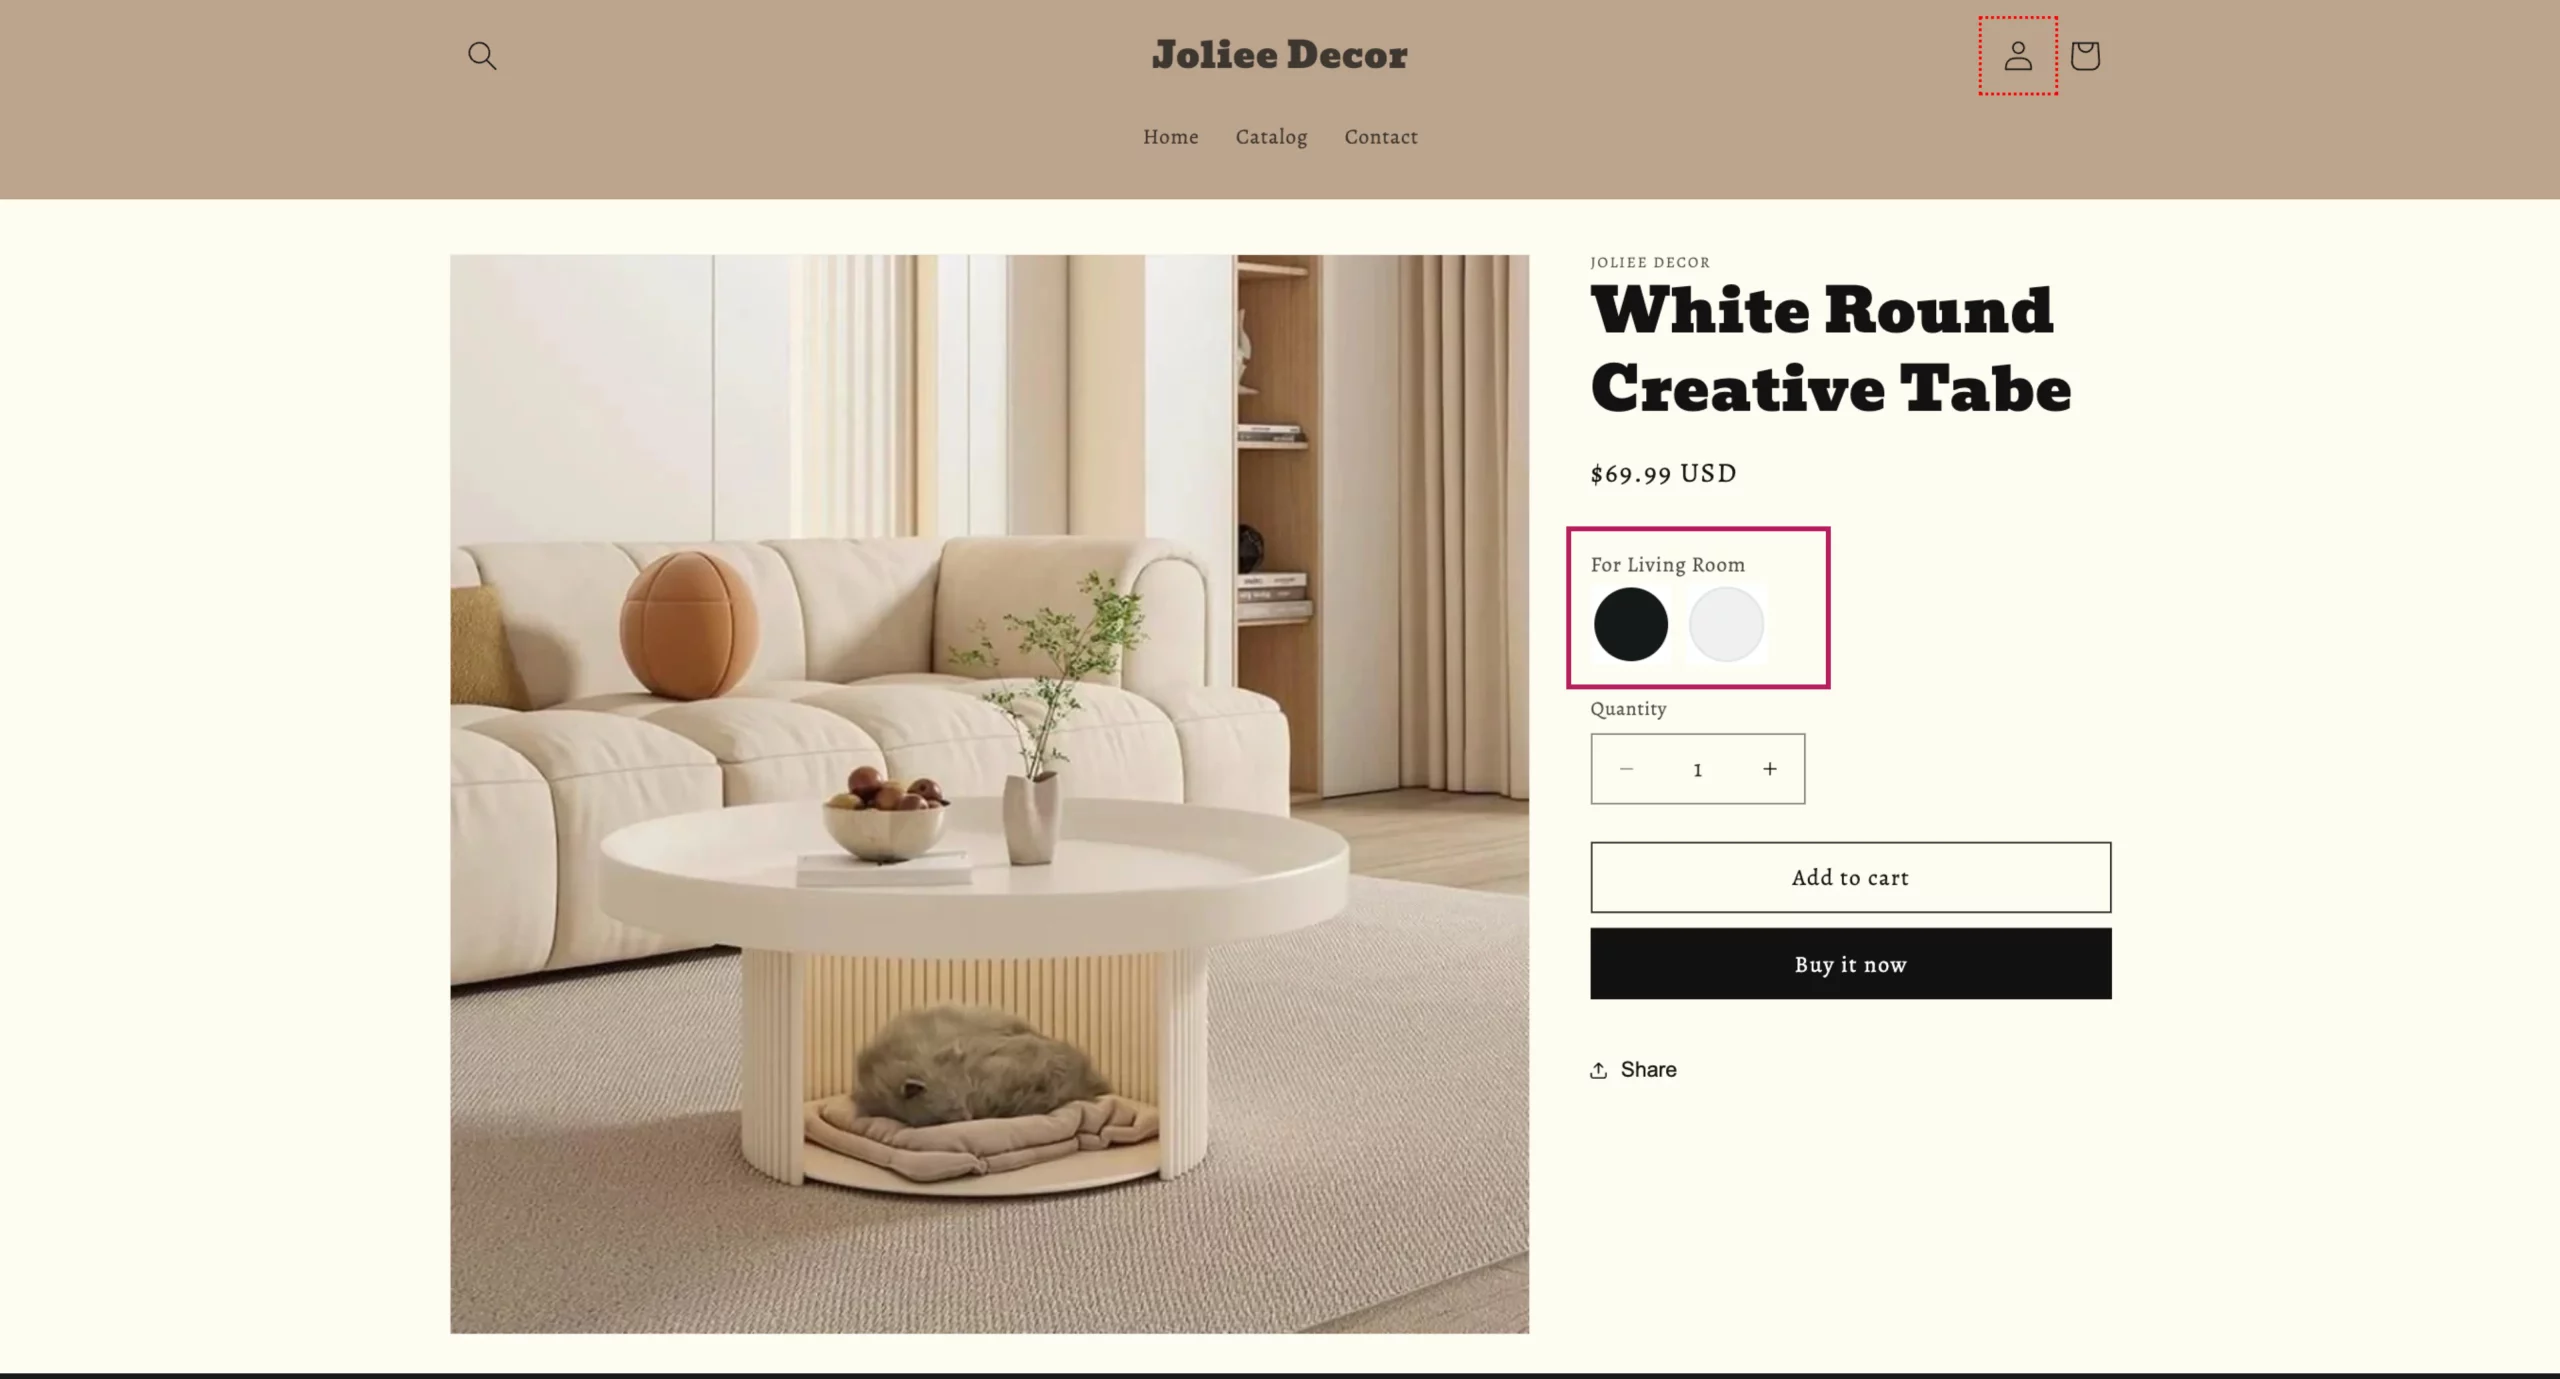
8. Once the swatches are linked and displayed, it’s time to preview them on your store:
You’ll see the linked colour swatches for the different products, allowing customers to easily select variants and switch between them seamlessly.
FAQs
1. Why don’t color swatches work or show up?
Color swatches may not appear for various reasons, including:
- Swatches not showing up on Product or Collection pages
- Swatches are visible but not clickable
- Selecting a swatch adds the wrong variant to cart
- Swatches stopped working after a theme or Shopify update
- Third-party apps interfere with your swatches
2. Is it better to list colors as separate products or variants?
The answer depends on your store’s objectives and how you want customers to interact with your products.
- One product with multiple variants: This option helps keep your store organized, avoids duplicate content, and creates a smoother shopping experience by allowing customers to compare options on a single product page. It’s also better for SEO when each variant is linked to a unique, crawlable URL.
- Separate listings per variant: This can give each color more visibility, especially if customers are searching for a specific color or style. However, it may create clutter and duplicate content, which can be managed with proper SEO techniques such as canonical tags.
Ultimately, choose the approach that fits your catalog size, SEO strategy, and customer shopping behavior.
3. How can I customize the swatch appearance and placement?
While Shopify allows you to display color variants as basic color circles or dropdowns in product listings, the platform’s built-in tools are limited for further customization like changing swatch styles, uploading custom images, or adjusting swatch placement on product or collection pages.
To fully customize the swatch appearance and placement (such as using circular, square, or custom image swatches), you’d typically need a third-party app like NS Color Swatch Variant Images.
This app provides advanced features like custom images for swatches, better control over swatch placement, and more styling options beyond Shopify’s default settings.