







 Marketing Attribution
Welcome back to our comprehensive series on server-side tracking for Shopify merchants. Having explored the intricacies of Facebook Conversion API and TikTok Events API in our previous blogs, we now turn our focus to the most common channel – Google Ads.
In this guide, we’ll delve into how to set up Google Ads server-side tracking which is necessary for Shopify merchants aiming to optimize their advertising strategies effectively. By leveraging Google Ads conversion tracking server side, you can achieve more accurate data collection, enhanced security, and better compliance with privacy laws – all of which are crucial for maintaining competitive advantage and building trust with your customers.
What is Google Ads server-side tracking?
Google Ads server-side tracking is an advanced method of collecting and sending user interaction data directly from your server to Google Ads, rather than relying solely on client-side methods like browser cookies. This method is particularly advantageous for Shopify merchants who want to ensure their advertising data remains robust against the challenges posed by cookie restrictions and improve the overall effectiveness of their Google Ads campaigns.
While client-side tracking sends data directly from the user’s browser to Google Ads, making it highly vulnerable to ad blockers, cookie restrictions, server-side tracking routes data through a secure cloud server first. This intermediary step makes server-side tracking far superior: it bypasses browser-level blocks to ensure maximum data accuracy, protects user privacy more effectively, and boosts website performance by removing heavy tracking scripts from the browser.
Further reading: Server-side Tracking vs Client-side Tracking: Key Differences
Benefits of Google Ads server-side tracking for Shopify
Choosing Google Ads server-side tracking for your Shopify store offers several compelling advantages, particularly in today’s rapidly evolving digital landscape where privacy concerns and browser restrictions can significantly impact traditional client-side tracking methods. Here’s why you should consider implementing server-side conversion tracking:
Enhanced privacy and trust
As digital privacy regulations continue to evolve, server-side tracking positions your business advantageously for the future. Server-side tracking doesn’t rely on cookies, which are often blocked by privacy tools or restricted by browser settings. This approach respects user privacy preferences, fostering trust and enhancing the reputation of your brand.
Improved website performance
By shifting the tracking workload from the user’s browser to the server, server-side tracking Google Ads contributes to faster page load times. This enhancement can lead to a better user experience, potentially increasing user engagement and conversion rates.
Greater control and accuracy
- With server-side tracking, your data is stored and managed on your server, giving you full control over its security and management. This control allows for more strategic decisions about what data to share with Google Ads, enhancing your campaign’s privacy and integrity.
- Server-side tracking provides a buffer against browser limitations and data loss, leading to more accurate and reliable conversion data. This accuracy is crucial for optimizing your ad campaigns, as it ensures that your decisions are based on the most complete data set available.
How to set up Google Ads server-side tracking for Shopify stores
There are two main ways to set up Google Ads server-side tracking on Shopify:
- Through Google Tag Manager (some technical skill required)
- Through NestAds (one-click activation, available for multiple ad platforms)
Prerequisites for setting up
Before you dive into setting up Google Ads server-side tracking for your Shopify store, it’s essential to ensure you have everything needed for a smooth and successful implementation. This section outlines the prerequisites that you must have in place.
- Google Ads account: Having an active Google Ads account is fundamental. If you don’t already have one, you’ll need to create it.
- Shopify admin access: You must have administrative privileges to your Shopify account. This access allows you to make necessary changes to your store settings and install any required apps or custom code snippets.
- Google Analytics account: Linking Google Ads with Google Analytics enhances your tracking capabilities by allowing you to use enhanced e-commerce analytics features, providing deeper insights into user behavior on your site.
- Server access: You need access to a server where you can configure the endpoint that collects and sends data to Google Ads. This could be your own server or a cloud function provided by services like Google Cloud Platform.
Method 1. Setting up GTM for server-side tracking
Google Tag Manager allows you to set up and manage tags from various Google products and third-party services.
Step 1: Installing GTM on Shopify
Begin by creating a Google Tag Manager account, which serves as the highest level of organization for your company.
- Go to Google Tag Manager.
- Create an account if you don’t have one, and set up a new container for your website.
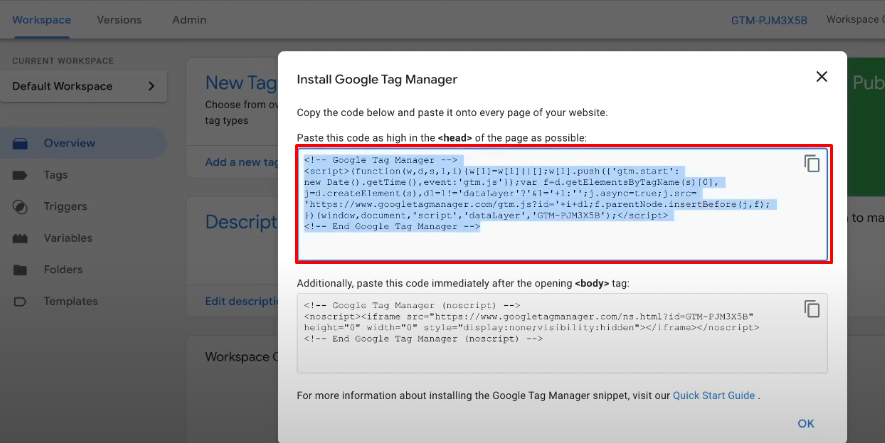
- In GTM, navigate to Admin > Install Google Tag Manager.
- Copy the GTM container code snippets ( code that we will add to your website’s HTML).
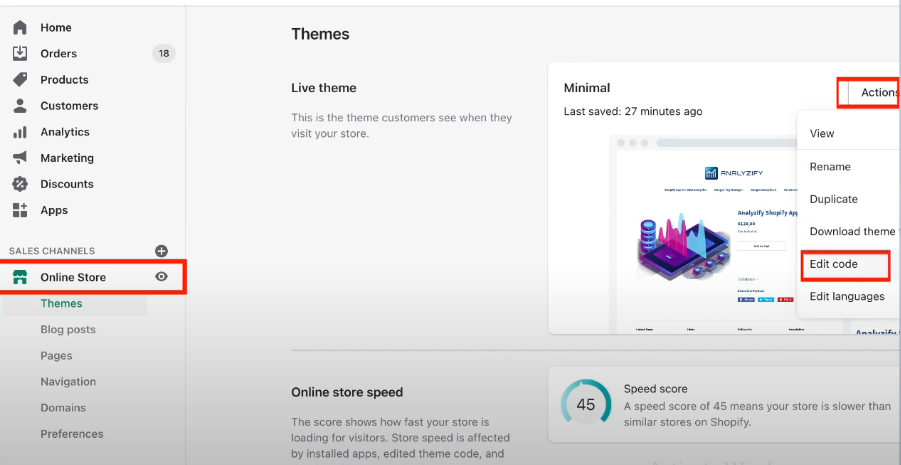
- Go to Shopify store -> Online Store -> Actions -> Edit code.
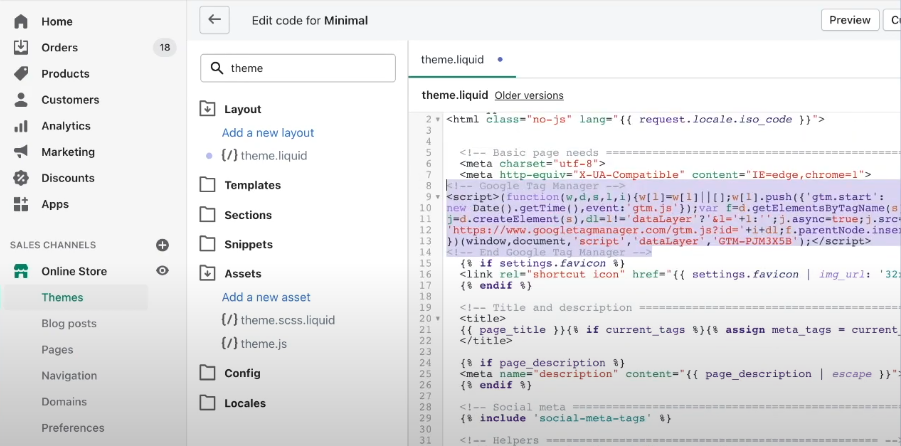
- Paste the code that we’ve copied from GTM into the theme.liquid. If we add this code to this file, it will be triggered on every page of your store except for the checkout.
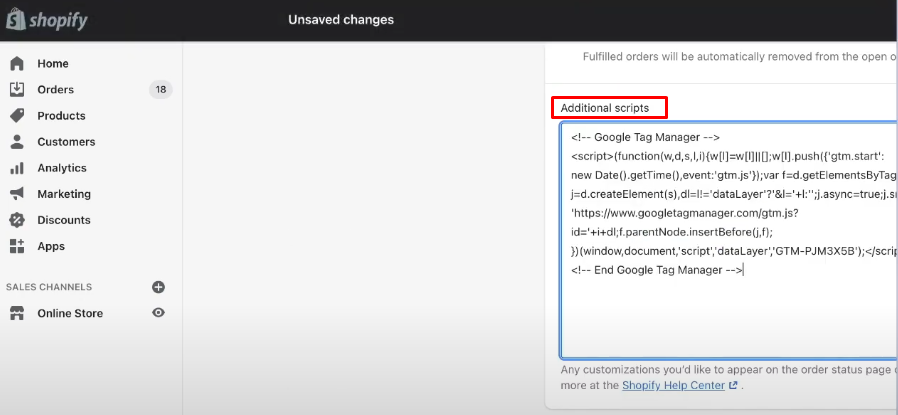
- Add the same code to the Thank you page. Click Settings -> Checkout -> Order processing -> Additional scripts, then you paste the code and Save.
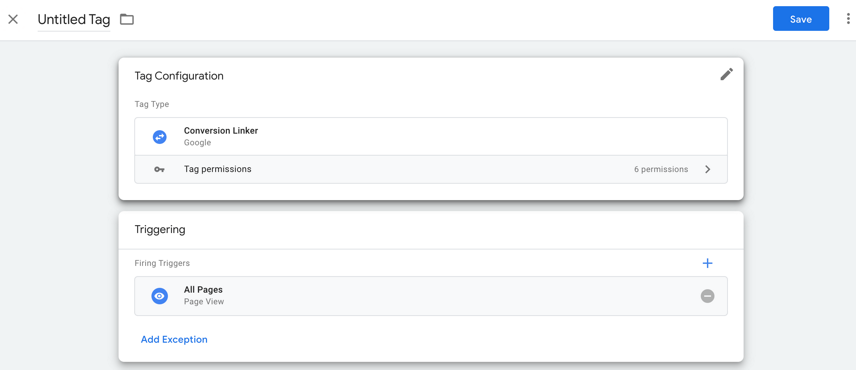
Step 2: Setting up the Conversion Linker tag
To enable Google Ads to send data to Google Tag Manager, you need to set up the Conversion Linker tag. Conversion Linker tags help tags measure click data so that conversions are accurately tracked.
Conversion Linker tags capture and store ad click information. When a visitor clicks on your ad, the URL of the landing page usually contains click information. When the visitor completes a tagged action (e.g., when a Google Ads conversion tag is fired), this click information is used to link the conversion to the original ad click.
Note: If you already have a Conversion Linker tag configured in your server container, you can skip this step.
Steps to set up the Conversion Linker Tag:
- From your server container workspace in GTM, open the Tags menu on the left side of the page.
- Click New to add a new tag.
- Choose the Conversion Linker tag type from the list.
- Configure the trigger that will cause the Conversion Linker tag to fire.
- In most cases, selecting the All Pages trigger is the best option, ensuring the tag fires on every page.
- Give the tag a descriptive name.
- Click Save and publish to finalize the setup.
Step 3: Setting up Enhanced Conversions in Google Ads
When setting up server-side tracking, it’s essential to understand the concept of enhanced conversions. Enhanced conversions use first-party data (like email addresses) to improve the accuracy of your conversion tracking. This data is hashed before being sent to Google, ensuring privacy while providing better match rates between ad clicks and conversions.
Here are steps to set up enhanced conversions for web using GTM:
Instructions
- Go to your Google Ads account.
- Click the Goals icon in the top right corner.
- From the section menu, click the Conversions drop-down. Click Settings.
- Expand the Enhanced conversions.
- Check the box next to Turn on enhanced conversions.
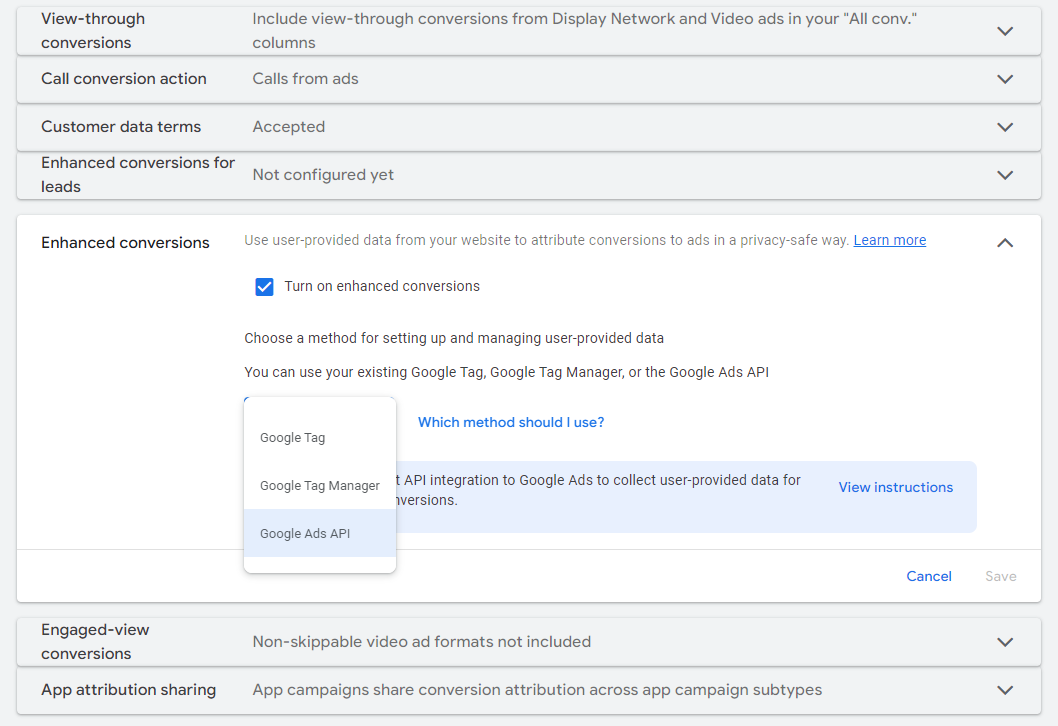
- To enable enhanced conversions, you must confirm compliance with Google’s policies and the Google Ads Data Processing Terms. Click Agree to acknowledge and accept these terms.
- Click the dropdown to choose a method for setting up and managing user-provided data. Select Google Tag Manager. Note: Ensure that you select the correct tagging method, as data sent in a different way (e.g., selecting “Google tag” but sending data through API) may not be processed.
- If unsure which method to select, click Which method should I use?
- Enter your website domain and click Check URL to view suggestions.
- Click Go to Google Tag Manager to proceed with the setup.
Step 3: Completing Enhanced Conversions setup in GTM
There are 3 ways to implement enhanced conversions in GTM and you only need to choose one option to collect user-provided data.
| Automatic collection | Code | Manual configuration | |
| Description | Tag automatically detects user-provided data on the page. | Add a code snippet to your website that sends hashed customer data for matching. | Manually specify CSS selectors or JavaScript variables that contain user-provided data. |
| Pros | Quickest and easiest setup. No special skills needed. | Ensures accurate and consistent data collection. | More precise than automatic detection, and flexible. |
| Cons | Less reliable, as detection may miss or incorrectly format data. | Requires adding and maintaining code on your website. | Less reliable than code; changes in website formatting can disrupt the setup. |
You can access further instructions on how to set up any of the three methods here.
Assigning the variable to the Google Tag
To assign the variable with the Google Tag, follow these steps:
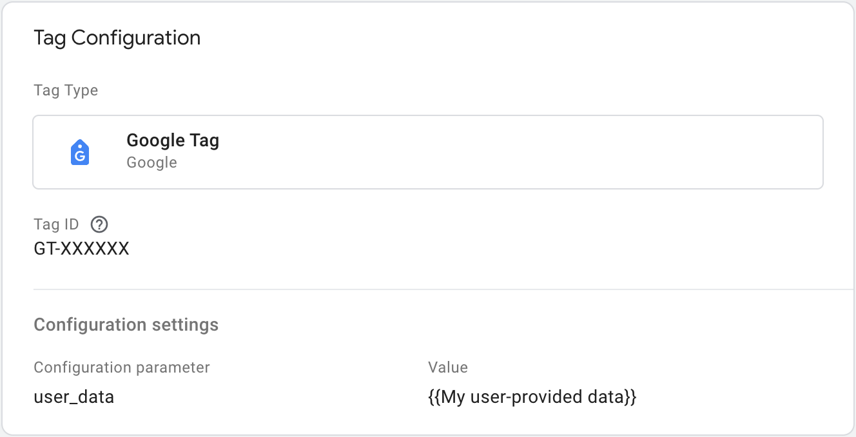
- Navigate to the Tags menu within your web container.
- Edit the Google Tag responsible for transmitting data to the tagging server.
- Within the Configuration settings, include a new Configuration parameter named user_data.
- Assign the Value to the User-provided Data variable, such as {{My user-provided data}}.
- Save your modifications.
Configuring server-side Ads Conversion Tracking tag
To activate Enhanced Conversions in your server container, follow these steps:
- Access the Tags menu in your server workspace.
- Modify the Google Ads Conversion Tracking tag.
- Select the Include user-provided data checkbox.
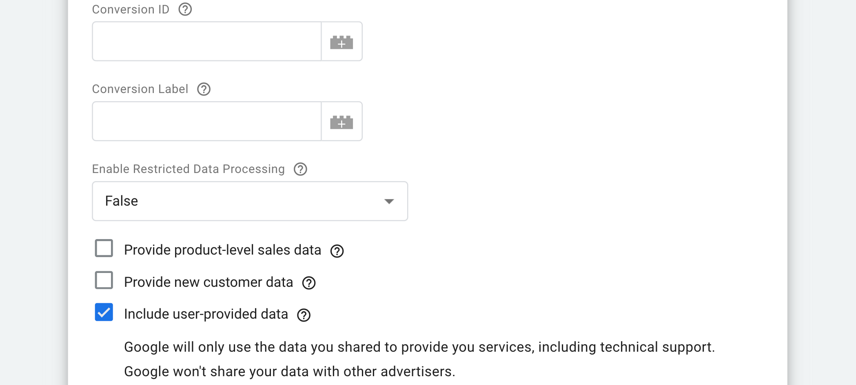
- Save changes.
Step 4: Setting up Webhooks in Shopify
- In Shopify, go to Settings > Notifications.
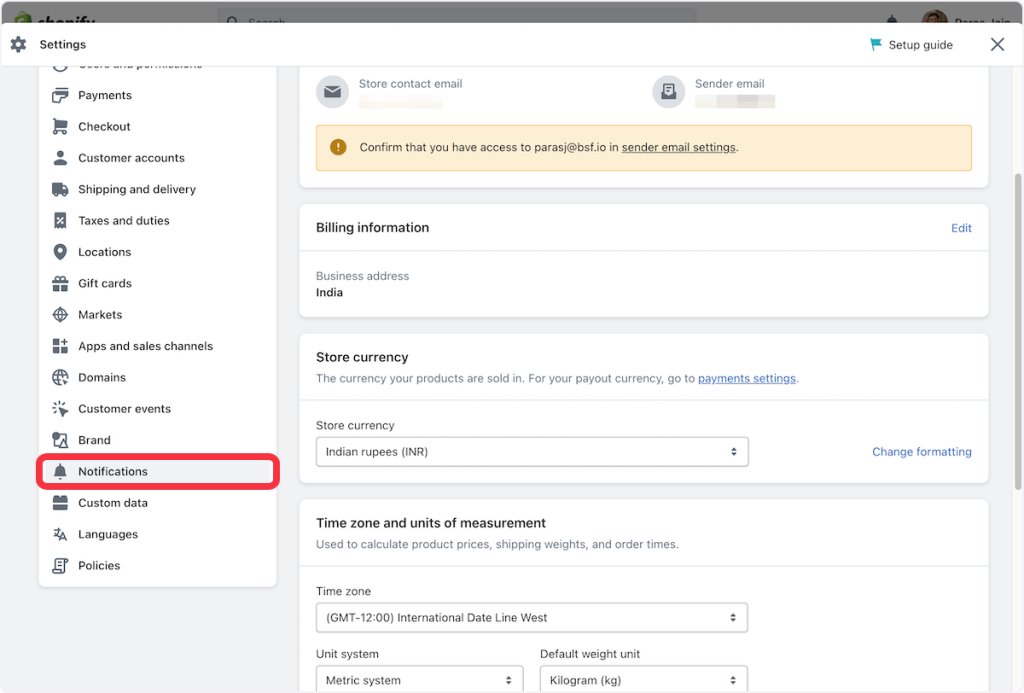
- Determine which events you want to trigger webhooks for. Common events include order creation, order fulfillment, and customer account creation.
- Scroll down to the Webhooks section and click on Create webhook.
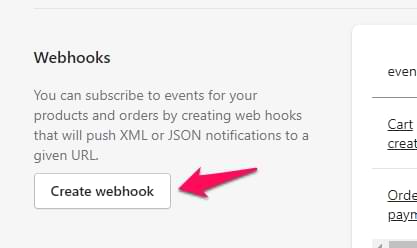
- Choose the event you want to trigger the webhook from the dropdown menu.
- Enter the URL of your server container’s endpoint where you want the data to be sent.
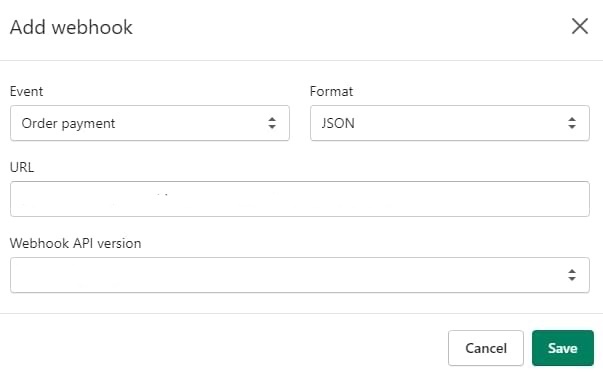
- Click Save to create the webhook.
- From your server-side container setup (e.g., in Google Tag Manager), obtain the endpoint URLs where you want Shopify data to be sent.
- In the webhook configuration in Shopify, paste the corresponding endpoint URL into the URL field for each webhook you create.
Step 5: Testing and Verification
Preview Mode:
- Use GTM’s preview mode to test your tags and triggers.
- Ensure that the enhanced conversion data is being captured correctly.
Verify in Google Ads:
To verify your setup, follow these steps after initiating data transmission with the server container:
- Open your website.
- Within your Google Tag Manager server container, activate the Preview mode. Tag Assistant will commence and load your server container.
- In the Tags tab, review all fired tags to ensure the configured tag is among them.
- Check the Console tab for any transmission errors to the server container. Address any identified errors accordingly.
Method 2. Implement server-side tracking easily with NestAds
Installing a third-party app is an easier way to implement server-side tracking, though it does come with a cost.
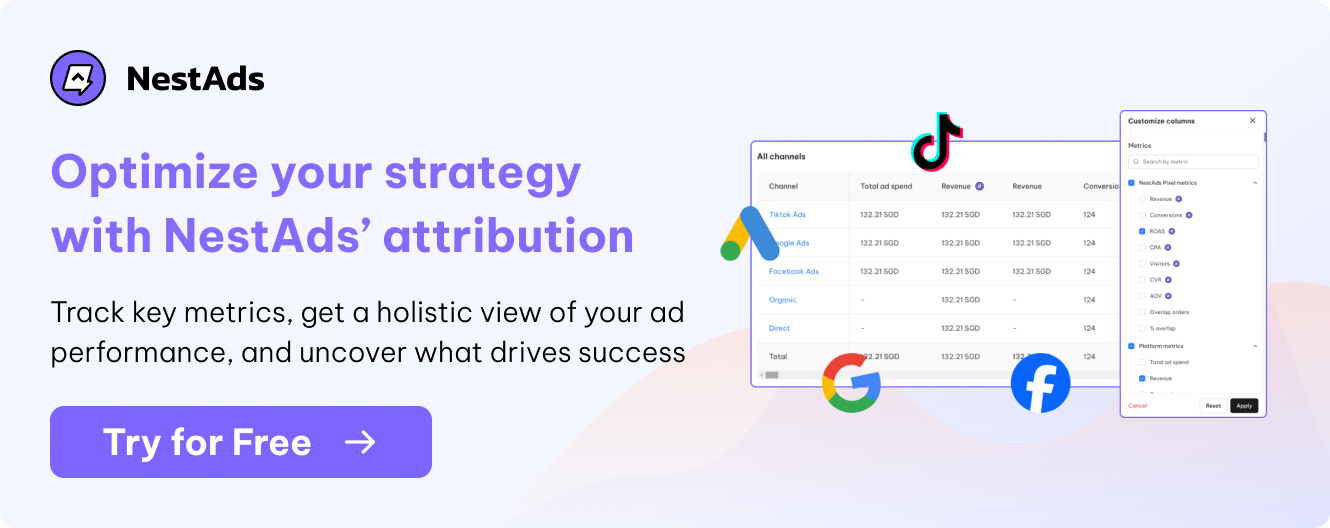
This is because dedicated server-side tracking tools like NestAds is built to track multiple ad platforms in one dashboard, including Google, Facebook, and TikTok Ads.
By following onboarding instructions after installing the app, you can easily integrate Google Ads data with Shopify.
Other than server-side tracking, NestAds provides advanced attribution that gives true conversion credit to platforms on the customer journey. This helps Shopify merchants – especially those that rely heavily on paid ads across channels – can see their conversion in a more holistic view.
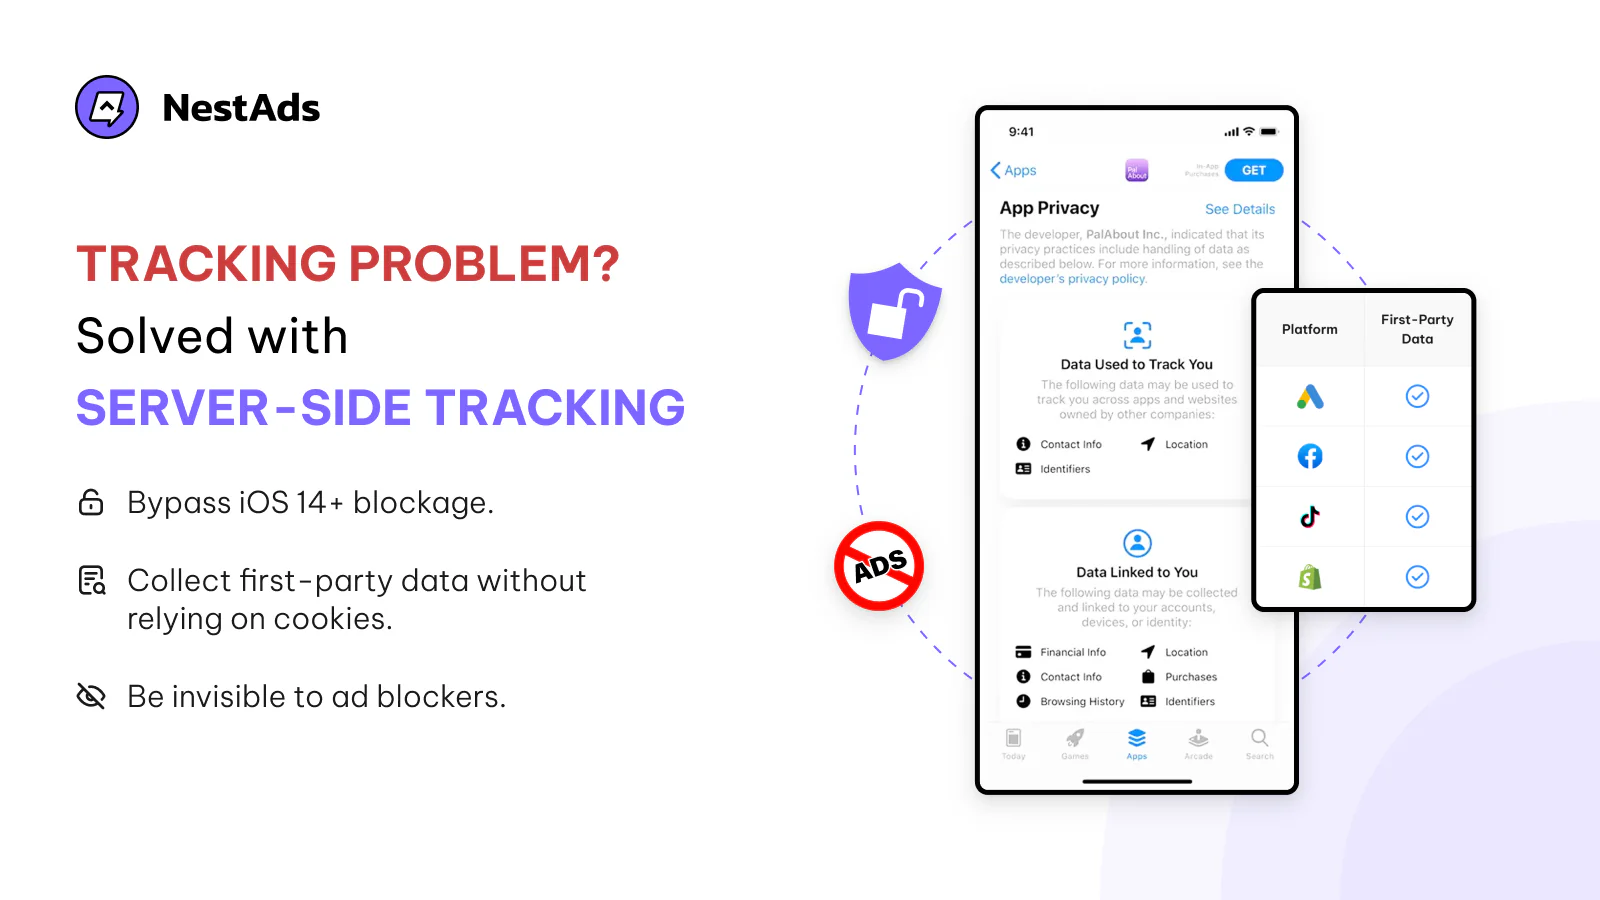
Key Benefits of NestAds:
- Accurate tracking: Utilizes first-party data to ensure precise tracking and rich insights into user behavior.
- Simplified data analysis: A centralized dashboard syncs performance data from multiple advertising channels into one user-friendly interface.
- Cookie independence: Operates independently of third-party cookies, unaffected by Google’s phase-out.
- Privacy compliance: Uses first-party data with user consent, complying with evolving digital privacy regulations.
- Bypass iOS 14+ restrictions: Allows tracking despite Apple’s privacy updates, including the recent iOS 17 Link Tracking Protection.
- Ad blocker resilience: Maintains robust tracking capabilities even when users have ad blockers enabled.
Best practices and optimization tips
Maximizing the benefits of Google Ads server-side tracking involves maintaining data integrity and using the data to refine your ad campaigns. Here are streamlined tips to help you achieve these goals:
Maintaining data integrity and accuracy
- Regularly check your tracking setups and data for consistency and accuracy.
- Set up systems to monitor and log errors, helping you quickly identify and resolve issues.
Optimizing ad campaigns using server-side data
- Utilize detailed user behavior data for more precise audience segmentation and personalized ads.
- Use server-side data for A/B testing and optimize bids based on which ads and landing pages perform best.
- Apply cross-device and cross-channel data to better understand the customer journey and allocate budgets effectively.
- Employ data to tailor retargeting efforts, focusing on users who showed interest but did not convert.
You may concern: How to Set Up GA4 Server-side Tracking & Best Practices
FAQs: Google Ads Server-side Tracking for Shopify
To prevent duplicate conversions, you must send a matching, unique identifier — specifically the Shopify transaction_id or Order ID— from both your browser-side and server-side tags. When Google Ads receives two identical conversion events with the exact same transaction ID within a 24-hour window, it automatically deduplicates them, ensuring your conversion metrics remain perfectly accurate without inflating your sales data.
Yes, because server-side tracking and Enhanced Conversions serve two entirely different purposes: server-side tracking is the secure delivery pipeline that bypasses browser restrictions, while Enhanced Conversions is the payload of hashed first-party customer data (such as emails and phone numbers).