When it comes to Google Ads, conversion tracking plays a crucial role in deciding the effectiveness of any ad campaign. Yet, many marketers find themselves grappling with the challenge of setting up a seamless conversion tracking system, particularly when it comes to integrating it with Shopify.
So, in this comprehensive guide, we’ll go over what Google Ads conversion tracking is, why we should add Google conversion tracking to Shopify, and provide you with a step-by-step guide to make it happen. We won’t keep you waiting any longer, let’s get started!
What is Google Ads conversion tracking?
So, before we dive further into anything else, let’s get these questions out of the way: What exactly is Google Ads conversion tracking?
Basically, Google Ads conversion tracking is a tool that shows you the actions customers take after interacting with your ads. Here’s how it works:
You define a conversion event in Google Ads, such as making a purchase or clicking on an ad. Google provides a tracking code that records when users complete this action on your website. Then, this data is sent back to Google and becomes accessible in your Google Ads account, helping you identify the most effective ads.
Why we should add Google Ads conversion tracking to Shopify?
Since Shopify is one of the world’s leading e-commerce platforms, there is a pressing need to integrate Google Ads conversion tracking into Shopify stores. This will allow businesses to track their users’ interactions with their Shopify stores, particularly those resulting from Google Ads campaigns. So now, let’s look deeper into the benefits you can get:
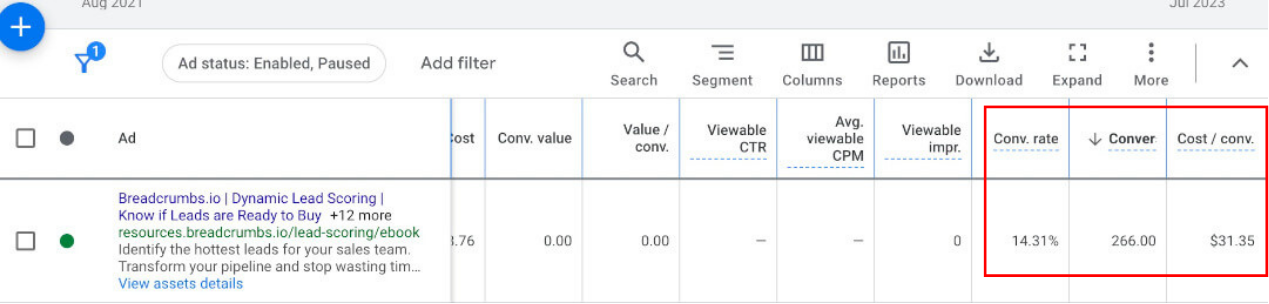
- In-depth conversion insights: By linking Google Ads with Shopify, you gain access to valuable data on how many conversions your ads are generating, along with the generated revenue. This granular data, available at the campaign, ad group, or ad level, allows you to understand your campaign’s effectiveness in real-time.
- Strategic bid adjustments: With detailed conversion data, you can fine-tune your bidding strategies. For instance, with manual CPC bidding, you can adjust bids for high-performing keywords and reduce or pause those underperforming. Automated bidding strategies, like Target CPA or Target ROAS, leverage this conversion data to optimize bids automatically, aiming to maximize conversions or return on ad spend.
- Keyword and ad optimization: Conversion tracking helps identify which keywords and ads drive the most conversions. With this data, you can prioritize high-converting keywords and optimize ad copy, leading to improved campaign performance and higher ROI.
How to set up Google Ads conversion tracking in Shopify?
In term of how to set up Google Ads conversion tracking on Shopify, there are two main ways to go about this: Use the Google & YouTube app or Input the code (Google Tag) on your Shopify site manually. So, in the next section of this blog post, we’ll go over the details of both methods.
Method 1: Use the Google & Youtube app
The Google & Youtube app is an application available on the Shopify app store. It’s mainly for Shopify merchants to sync their products to Google Merchant Center. What’s interesting is that if you are using Shopify’s Google & Youtube app, the channel will automatically add conversion tracking to your Google Ads account. You don’t need to do too much setup – Google will automatically track for you the list of actions below:
- page_view
- search
- view_item
- add_to_cart
- begin_checkout
- add_payment_info
- purchase
Also, besides having to have a Shopify store, businesses will also need to have a Google Merchant Center account. We recommend creating one if you haven’t already, as it is completely free of charge and only takes a few seconds to make.
Moving on to the next order of business, check if you can satisfy all the Shopify requirements to use the Google & Youtube channel. Make sure that your store checks all the boxes before setting up your account. You’ll also be required to have a Google Merchant Account.
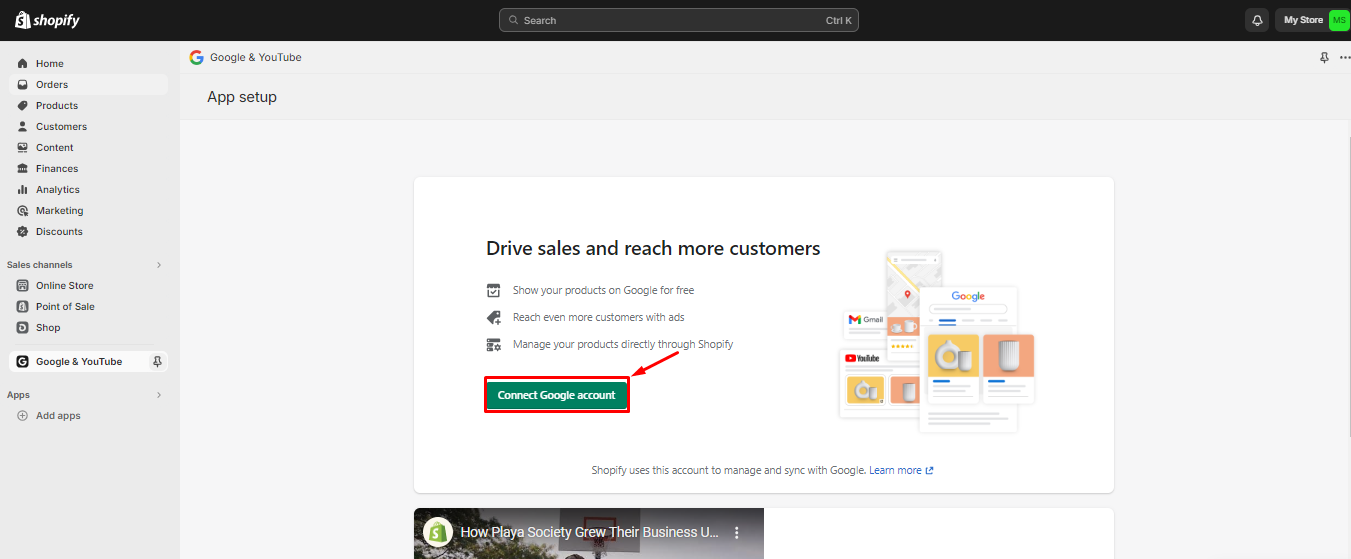
Step 1: Go to Shopify Appstore and install the Google & YouTube app.

Step 2: On the next screen, click on Connect Google Account and choose one from your account list.
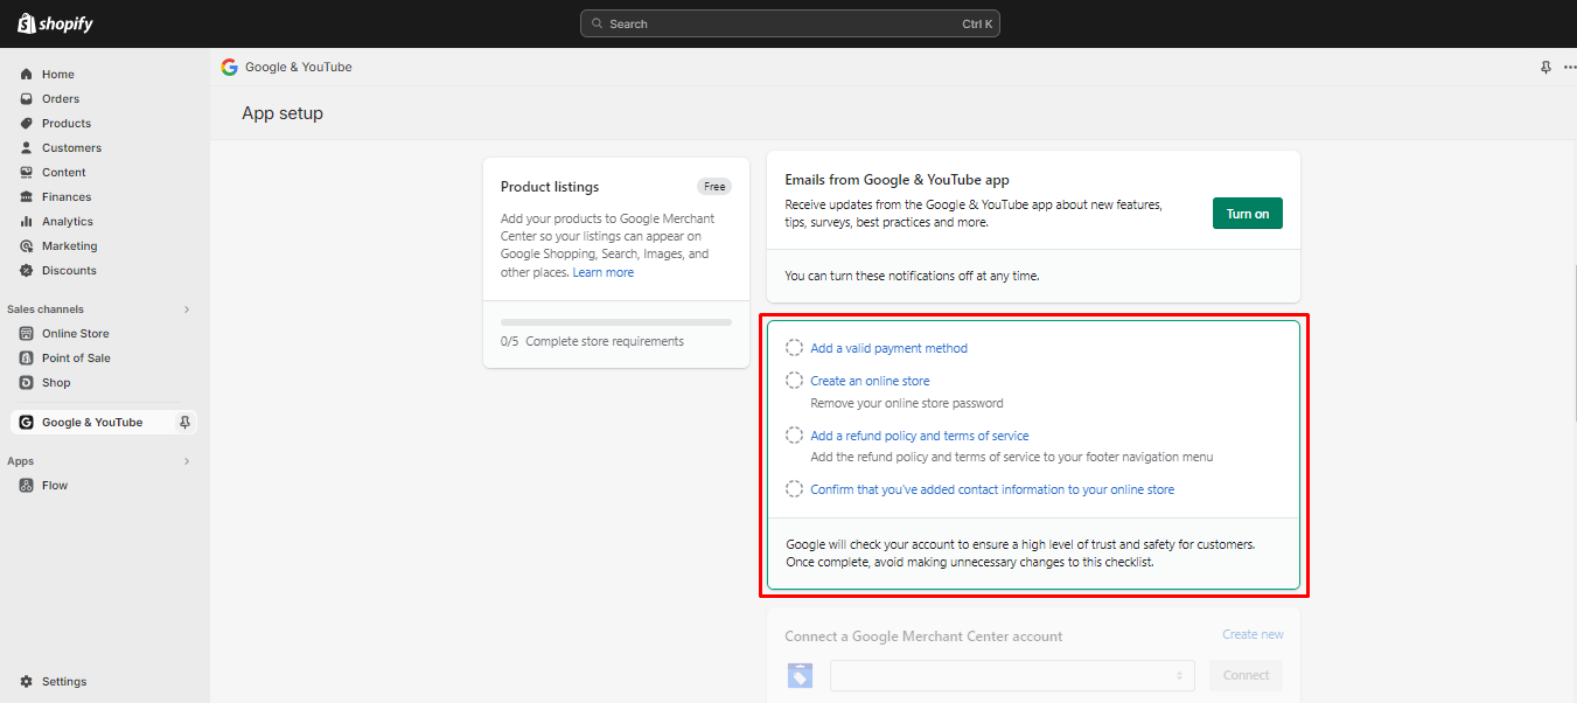
Step 3: In case you have not finished all the requirements stated in the beginning, you’ll see a checkbox listing them before you can set up the sync.
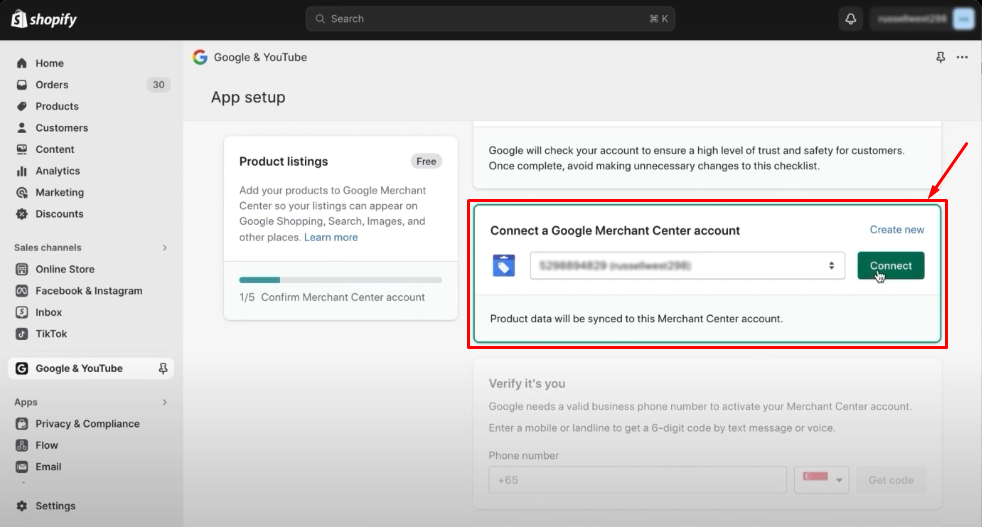
Step 4: Connect your Shopify store to your Google Merchant Account by clicking the Connect button.
Step 4: Add your product feed settings by selecting your target country, language and shipping settings.
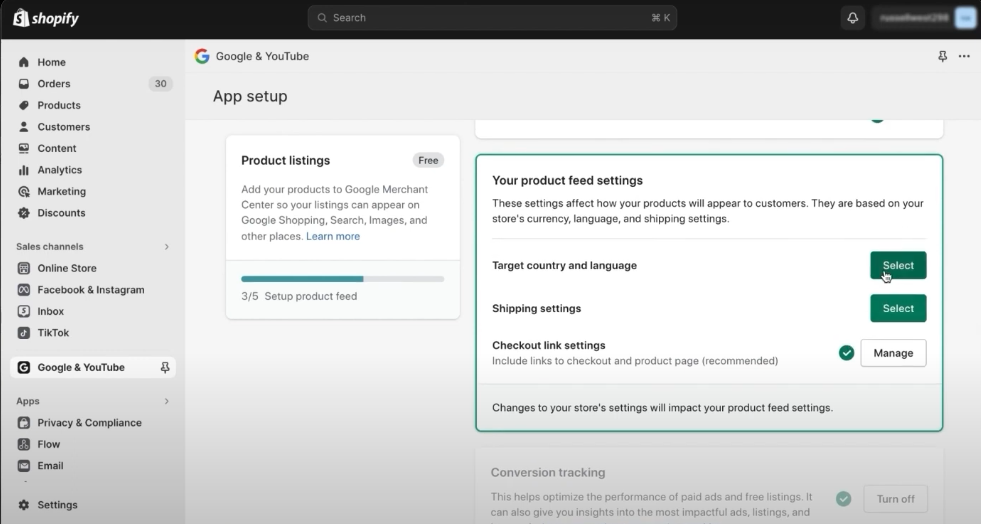
Step 5: Accept the terms & conditions to complete the setup.
And that’s all. Please note that you might have to wait a few hours before you see any action. Other than that, you’re done!
Method 2: Set up Google Ads conversion tracking manually by using Google Tag
This option is undoubtedly more complicated, as you’ll have to set up the conversion tracking yourself. The many steps include creating a conversion action, installing the Google tag then adding the event snippet to the web pages you want to track.
The process can be quite painstaking, so we suggest you get some help from an expert or developer while setting it up. However, if you need to track more than just the basic conversion actions for your store, then we highly recommend using this method.
Now, let’s get right to it:
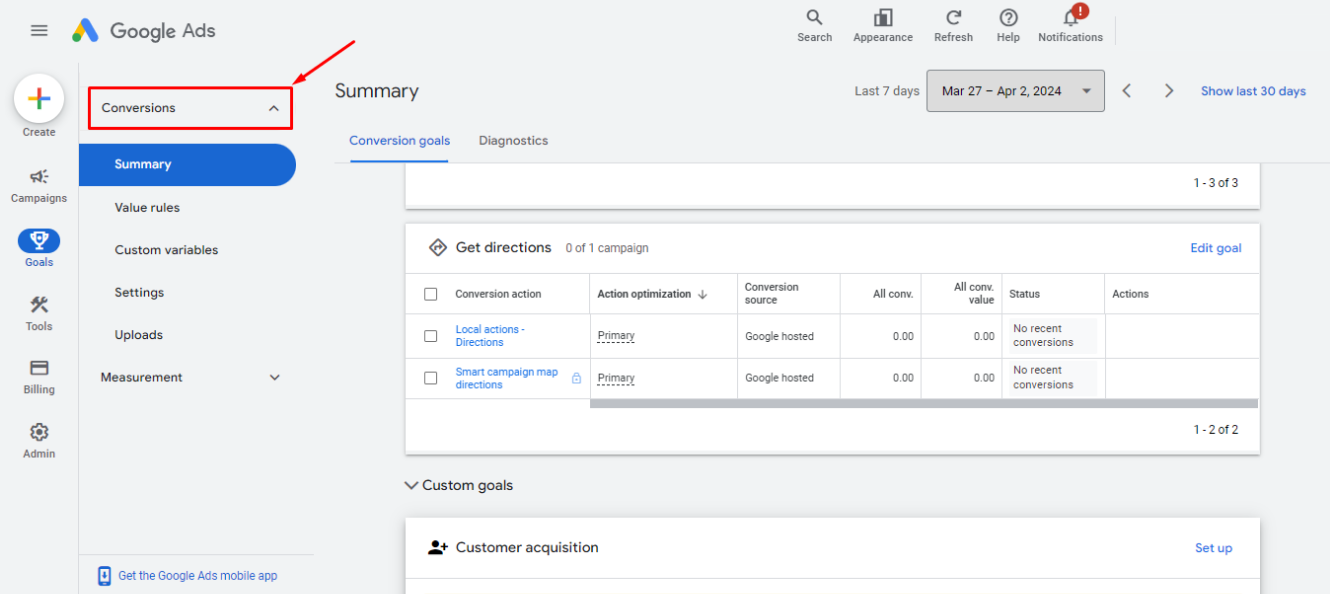
Step 1: Create a conversion action in Google Ads
Access your Google Ads account. There, head to Goals > Conversions
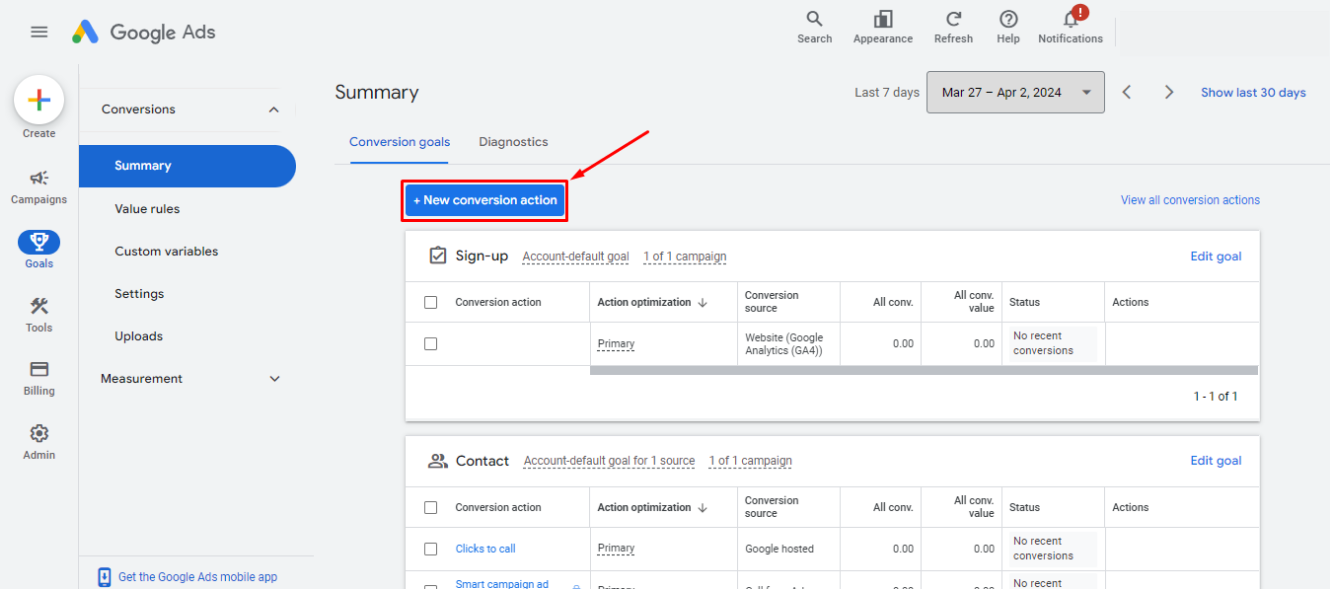
Once there, click on add New conversion action at the top of the page.
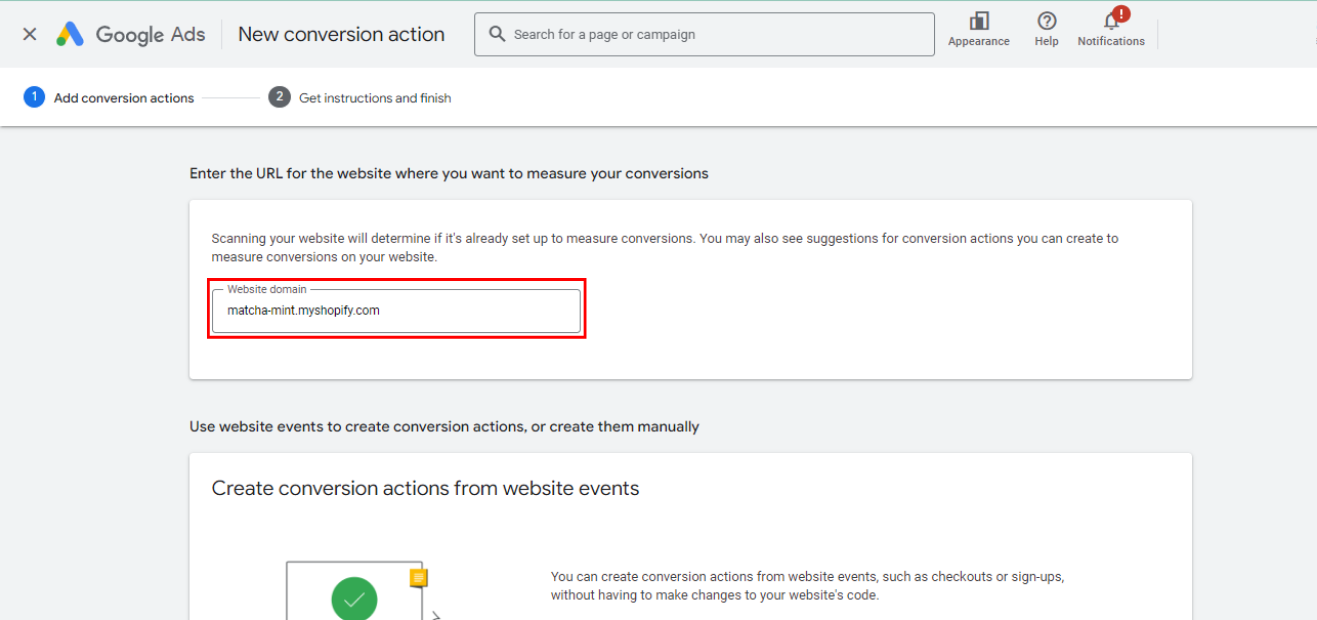
Here, you can choose the kind of conversion you want to track. In this case, we want to track on our Website.
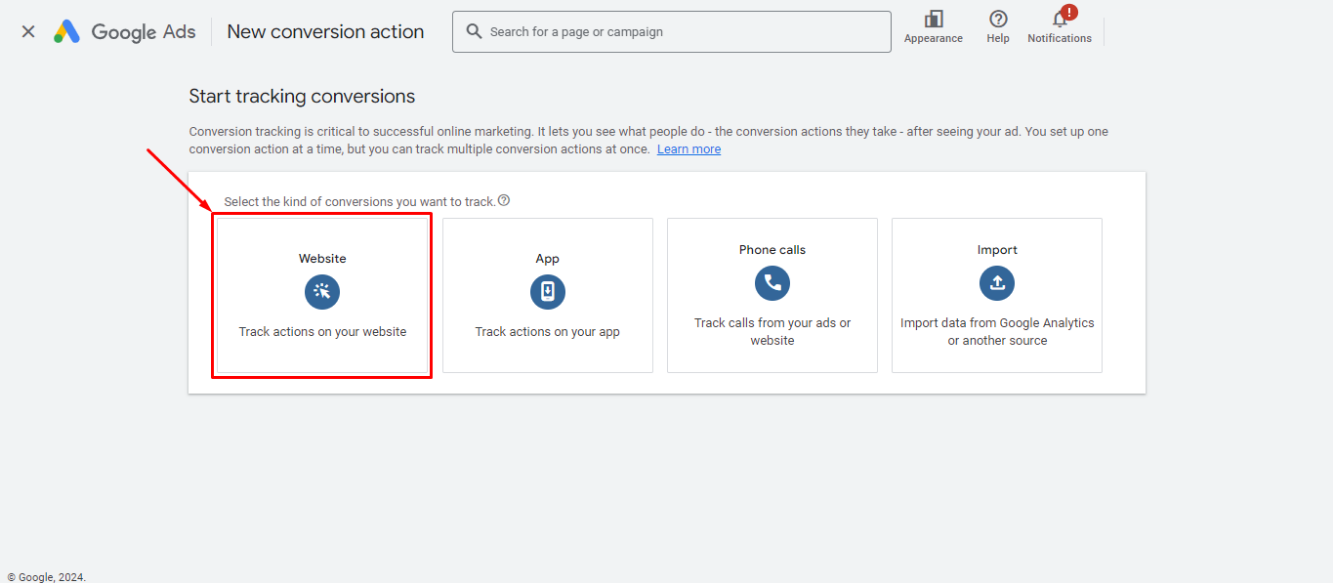
Then, input your website URL into the box for scanning purposes.
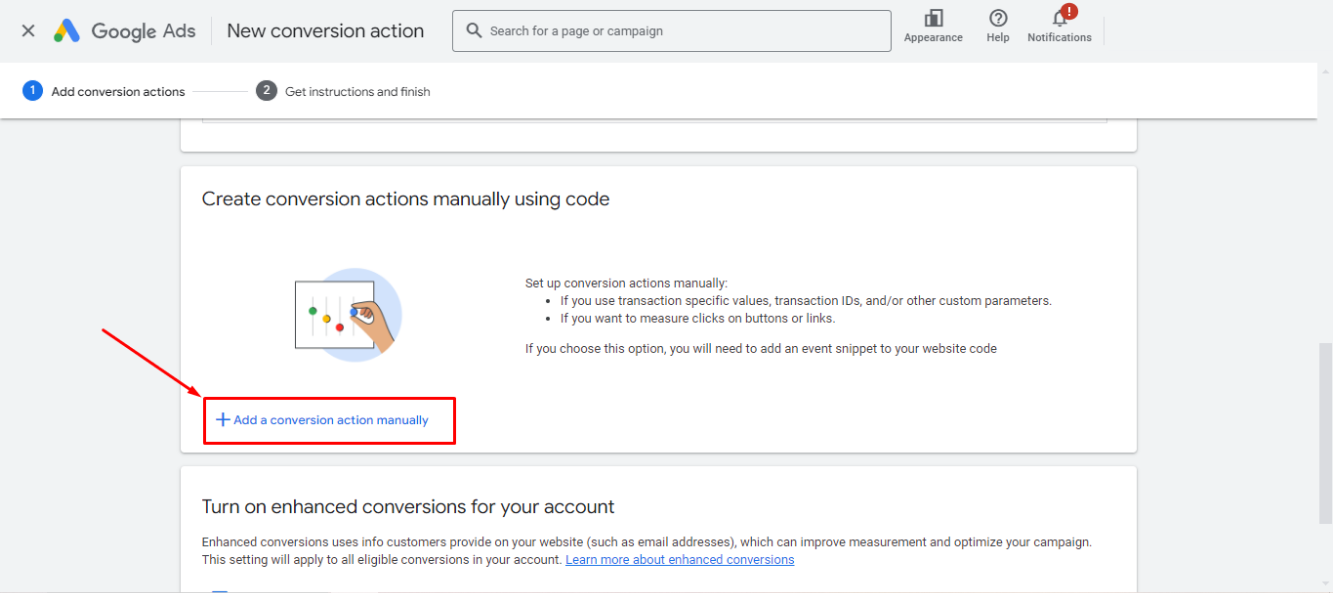
Next, scroll down to the bottom of the page to the Create conversion actions manually using code box. Click on Add a conversion action manually to start setting it up.
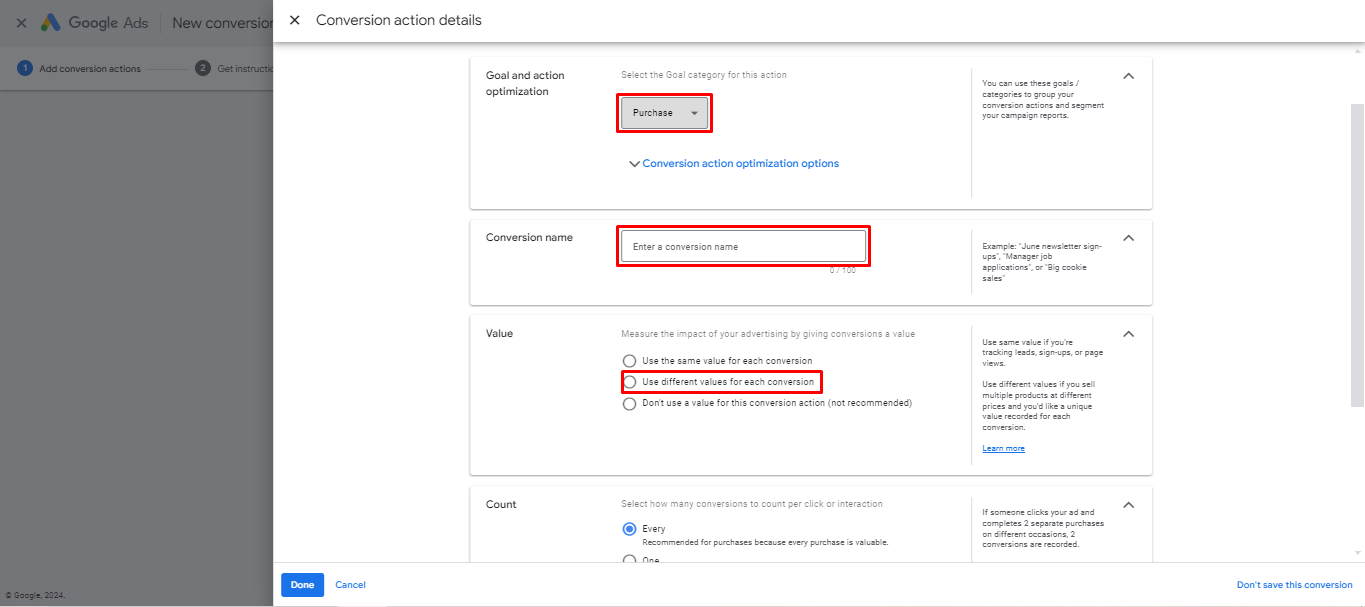
A Conversion action details will pop up. Choose the options for the event details. Here, for Goal and action optimization, we’ll go with Purchase. Fill in other details as per your preference. However, make sure to choose the Use different values for each conversion option for Value to include all the products you’re selling. Hit Done to save your conversion action.
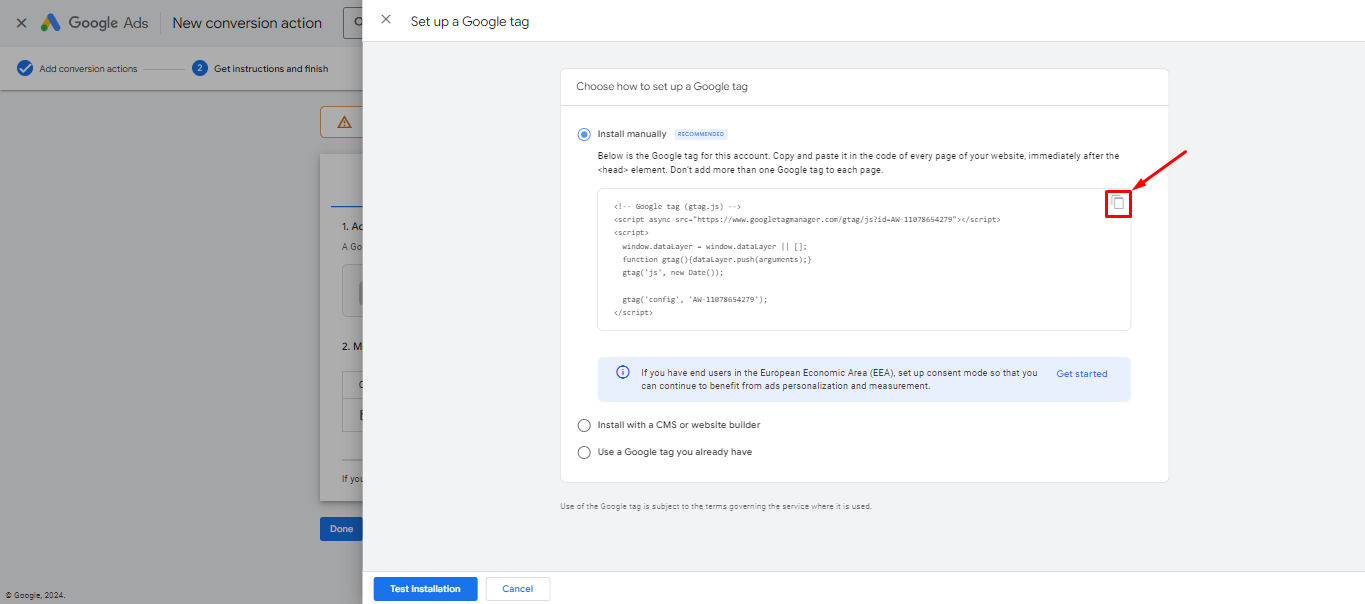
Step 2: Add Google Tag to your Shopify store
Once you finished all the steps above, an event snippet for the conversion action you just set up should be available. Click on Set up to get the Google Tag and install it on your website.
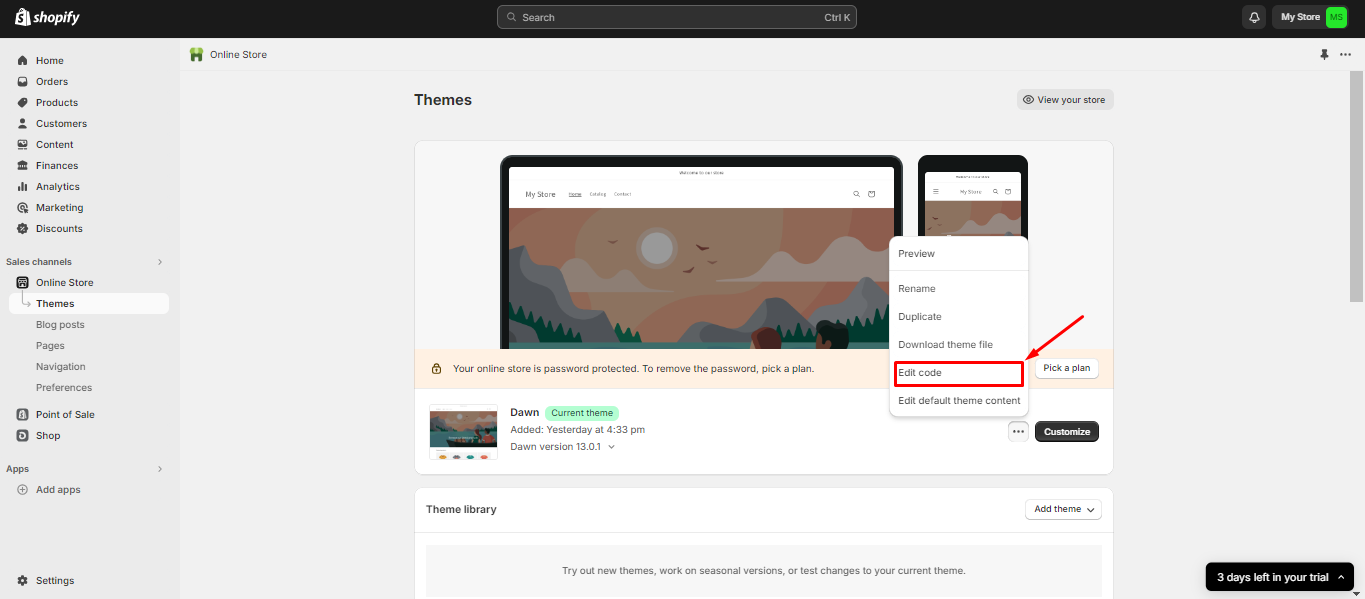
After getting your Google tag, It’s time to head back to your Shopify store. Navigate to Online Store > Themes. Edit your themes by clicking on the three-dot button and hit Edit Code.
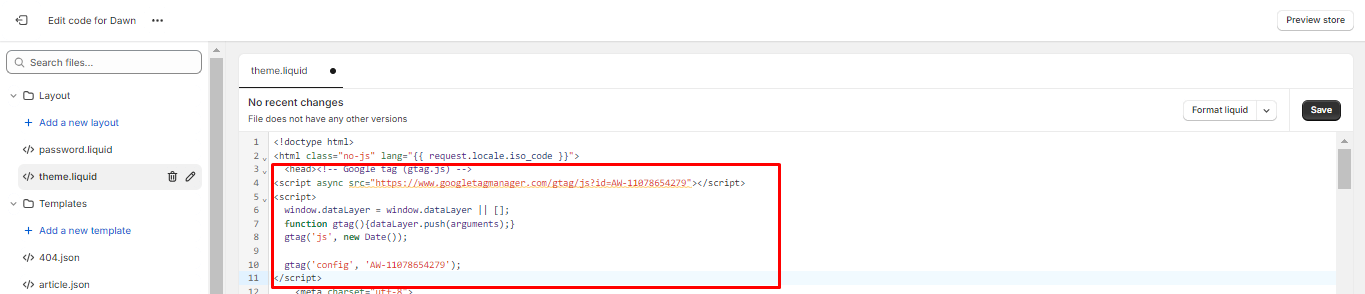
Here, navigate to the left-hand side menu and open theme.liquid file under Layout. Add your Google Tag code after the <head> element. The code should look something like this, starting with <!– Google tag (gtag.js) –> and ending with </script>. Once you’ve got it, remember to click Save.
Step 3: Add the event snippet to Shopify
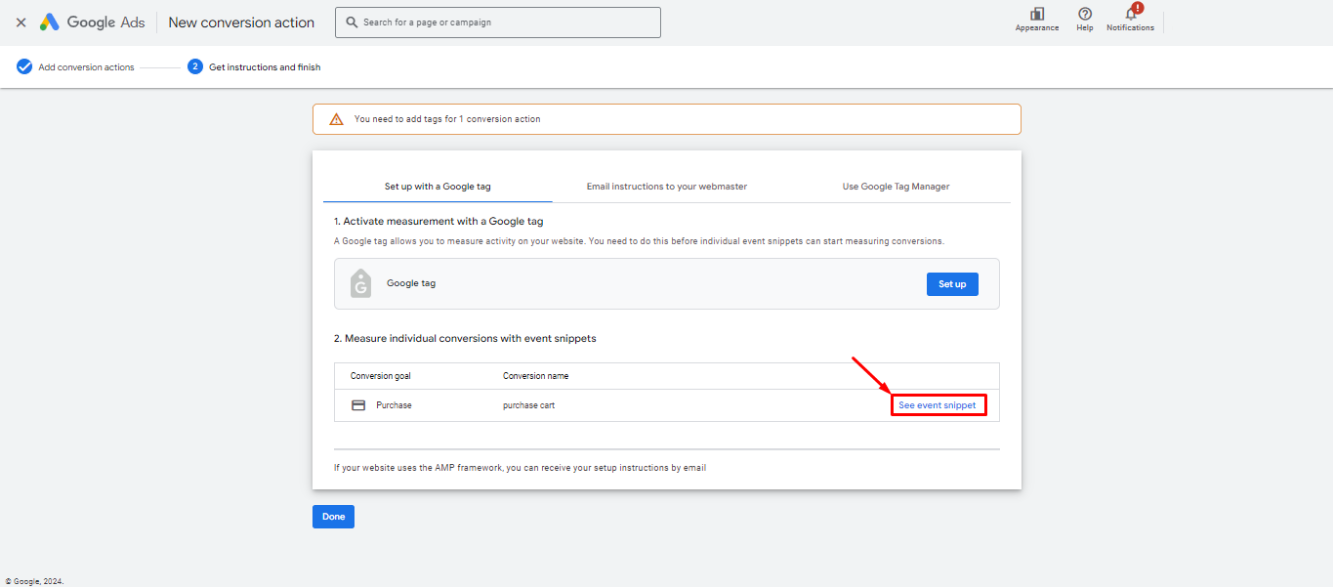
Go back to Google Ads Manager. Move on to the Get instructions and finish page. Click on See event snippet.
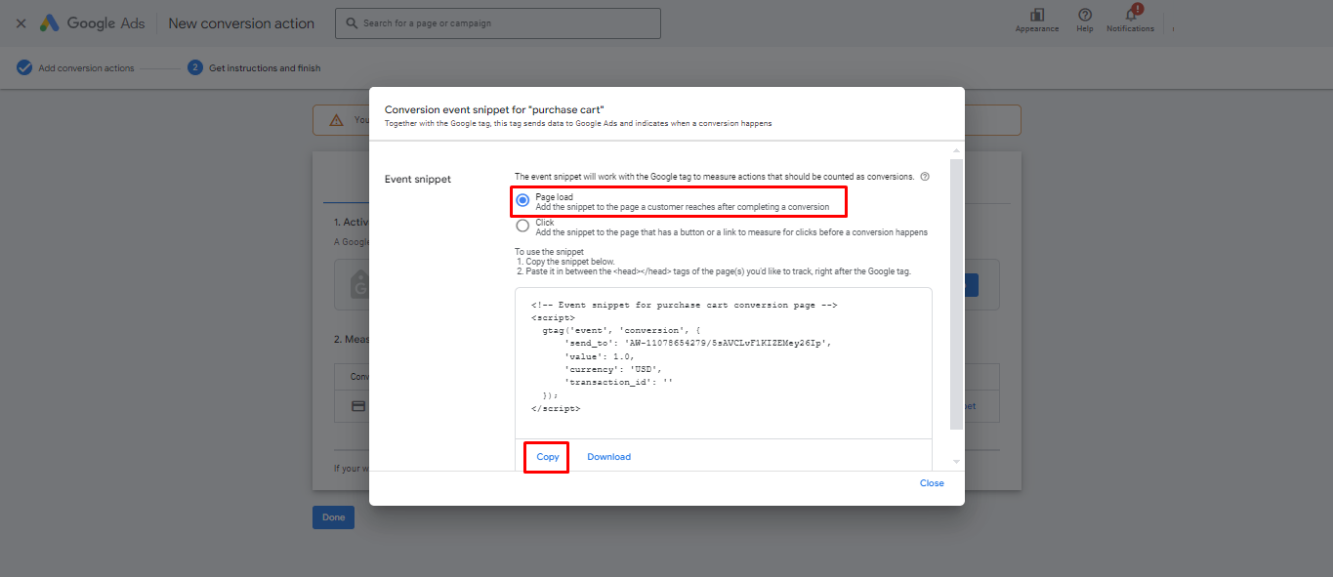
Then, select the Page load option and copy your event snippet.
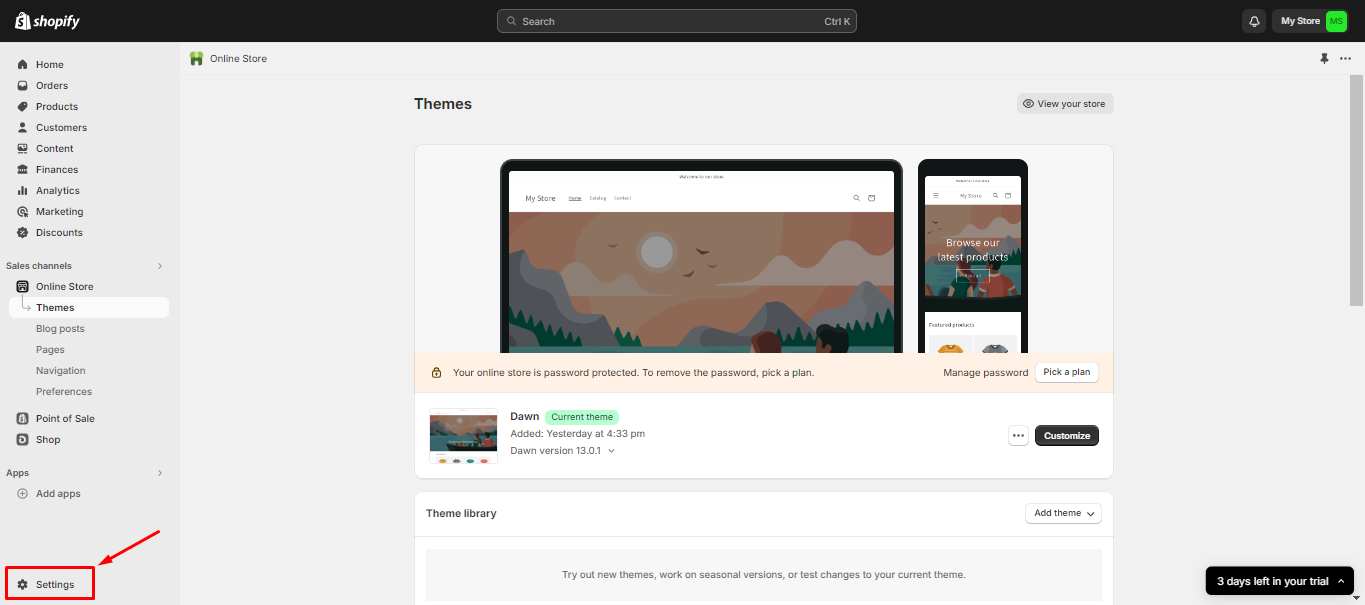
Go back to your Shopify admin page. Navigate to the end of the page and go to Settings.
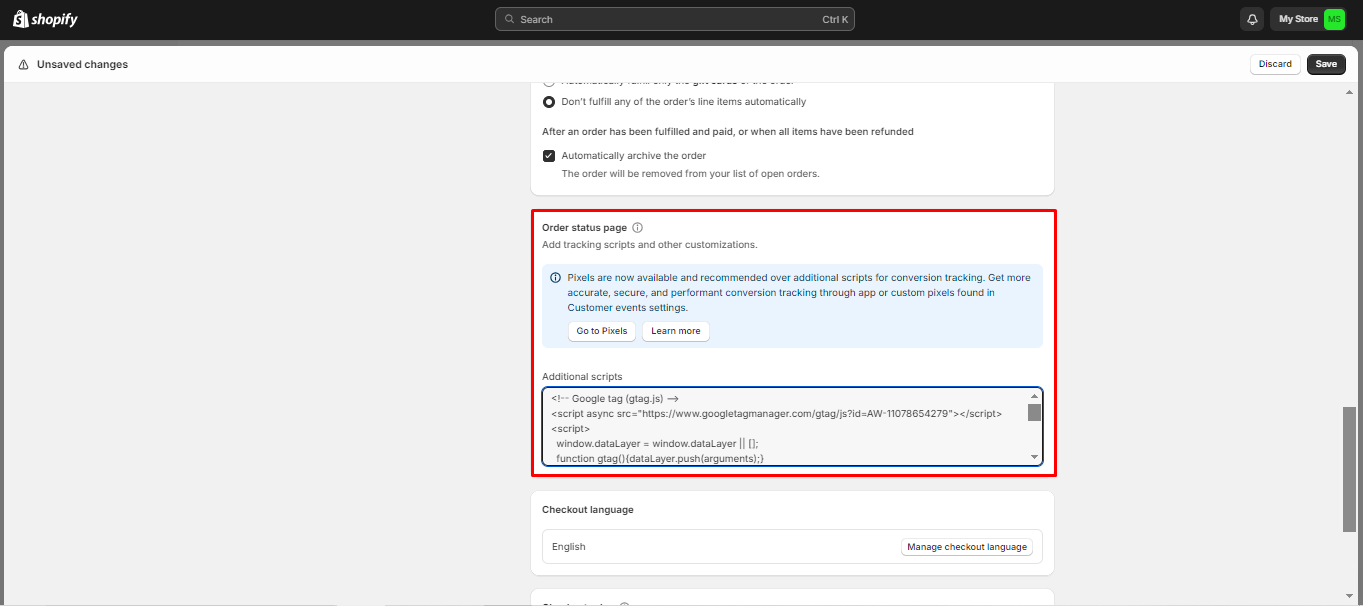
Once there, go to Checkout. Next, scroll down to Order status page, paste the Google Tag code first in the Additional scripts box. Then, paste the event snippet.
A little note for you:
Google Ads might record a conversion twice if a customer reloads the Checkout page. To avoid this, add the tag code before and after the event snippet in Additional scripts (so it only triggers once per customer)
- Paste this line {% if first_time_accessed %} right above the event snippet code.
- Paste this line {% endif %} right below the event snippet code.
- In the event snippet, the default currency is USD. If you sell in other other currencies, replace ‘USD’ with ‘{{ currency }}’.
- To record different orders, find ‘transaction_id‘. Right next to it, replace the black with ‘{{ order_number }}’.
- In case your store sells items at different price points, navigate to ‘value’ and replace it with one of these snippets: ‘value’: {{ checkout.subtotal_price | divided_by: 100.0 }} (exclude tax & shipping) OR ‘value’: {{ checkout.total_price | divided_by: 100.0 }} (include tax & shipping)
- Remember to hit Save to save your edit.
After a few hours, you can also test the conversion actions to see if they’re working properly. The easiest way is to actually purchase one of your products by yourself and see if Google Ads records the conversion action.
If you’re feeling a bit lost in these tutorials, no need to worry! We’re here to provide you with a visual solution to guide you through. Take a look at our step-by-step video guidance, where we show you how to set up and track data from your Shopify store using Google Ads conversion tracking. In just under 10 minutes, you’ll have Google Ads Conversion tracking all set up and be ready to tackle it on your own!
Some common errors with Google Ads conversion tracking
Kudos on getting your Google Ads conversion tracking up and running! You should start to see some data coming in. But, if you haven’t seen anything yet, don’t fret just now. We’ve got you covered. Take a look below, where we’ve outlined some of the typical errors that could lead to your Shopify Google Ads conversion tracking not working.
No conversion data
If there’s no conversion data recorded, then it’s likely that something has gone wrong in the conversion tracking set up. In this case, simply use Google’s Tag Assistant tool to double check your implementation.
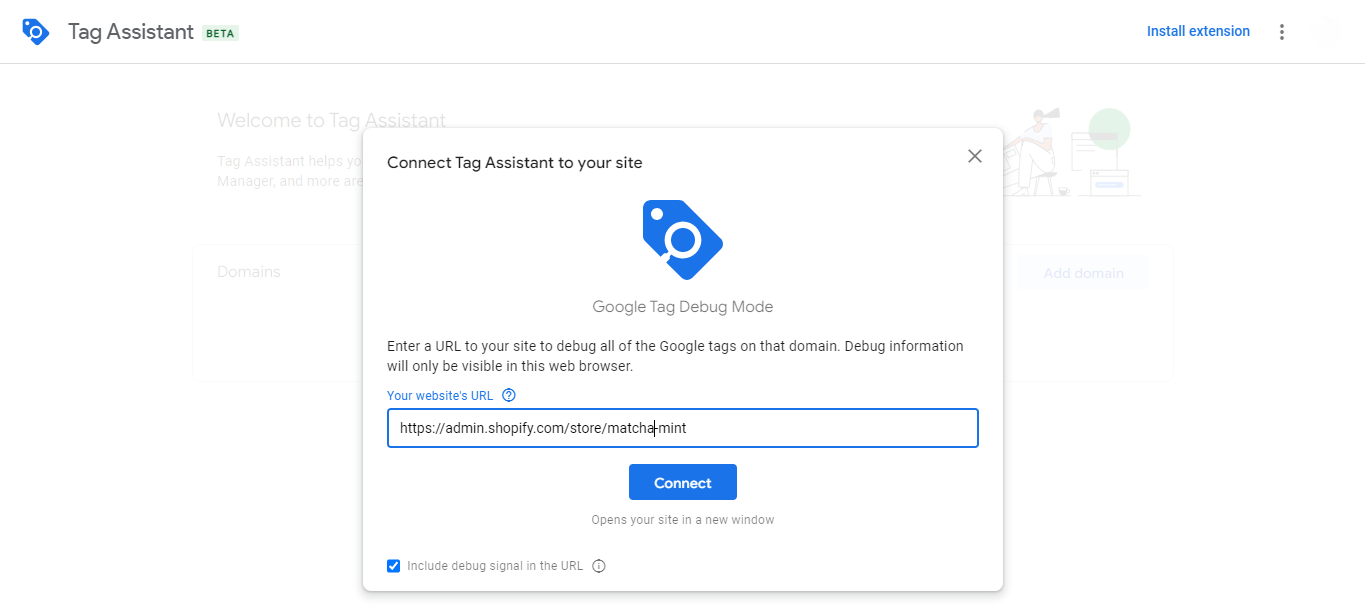
All you have to do is type in your domain and hit Connect. Then, take the action you want to test (eg: make a purchase). Then, you’ll know if the conversions are still functioning or not.
Incorrect or lost conversion value
If you set up Google Ads conversion tracking in Shopify manually, then chances are it might be prone to errors. So, in case you notice and lost or incorrect value, revisit your tracking code and double-check the values like currency or transaction_id. For the currency value, you can change it manually to whichever currency you prefer (eg: ‘EUR’ or ‘JPY’) or use the currency set in your Shopify account by using ‘{{ currency }}’. Meanwhile, for transaction_id, remember to set the value to ‘{{ order_id }}’ to record the purchases made on your site.
Explore a Google Ads conversion tracking alternative
Google Ads conversion tracking is undeniably valuable for monitoring user behavior and assessing your Shopify store’s performance. However, the setup can be quite burdensome and time-consuming, especially if you’re not well-versed in coding or Google Tag Manager.
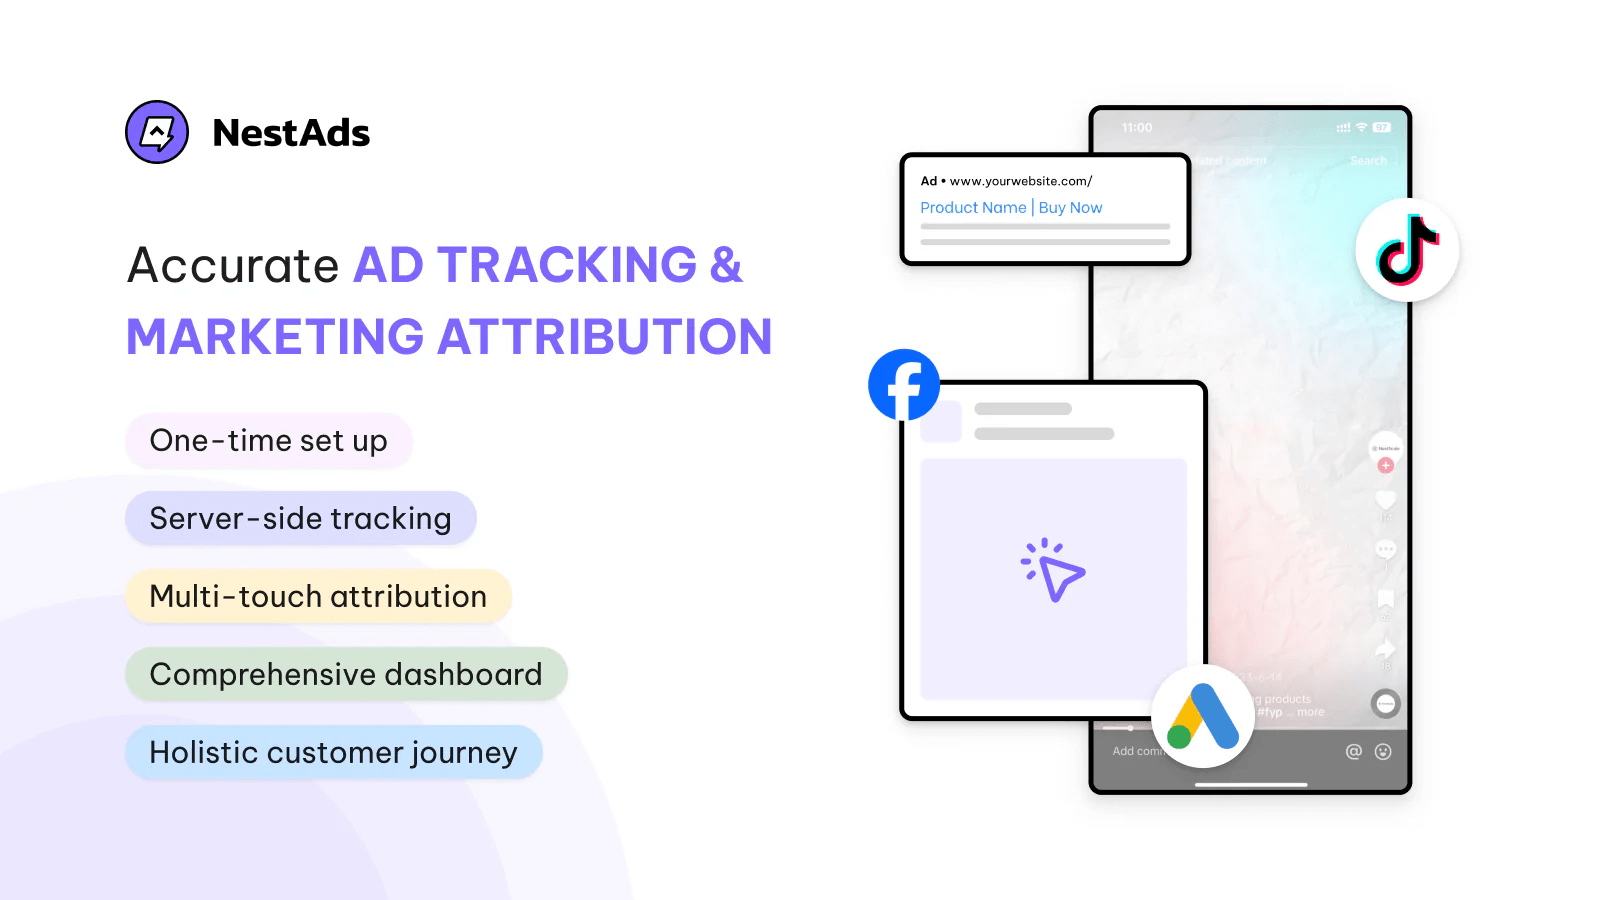
In this case, there’s a more efficient and user-friendly alternative. And that is too harnessing the power of marketing attribution software like NestAds. With NestAds, you can wave goodbye to the complexities of a lengthy setup process, as it seamlessly integrates with Shopify. What’s more, NestAds is also able to centralize data from various platforms into a unified dashboard, simplifying the monitoring of cross-channel performance for businesses.
Given all these benefits, it seems like a no-brainer to position NestAds as one of the most compelling alternatives to Google Ads conversion tracking. So, why wait any longer? Level up your Shopify conversion tracking with NestAds today!
FAQs
Why is my Google Ads conversion tracking not working?
Having trouble with your Google Ads conversion tracking on Shopify? Don’t worry, it’s a common issue. Generally, there are two main reasons why it might not be working. So, let’s break down the usual suspects:
Setup issues:
- Missing conversion data: You might not see any conversion data at all if the tracking code isn’t installed correctly or if there’s a delay in data processing.
- Incorrect conversion data: If the data you’re seeing doesn’t match your Shopify sales, there might be an issue with how the conversion actions are defined or how the values are being tracked.
- Extra scripts: Sometimes, additional scripts on your site can interfere with the conversion tracking code.
Tracking issues:
- Impatience: Conversion data isn’t always instant. Give it at least 24 hours after setup to start showing up.
- Wrong attribution model: The attribution model determines how credit is assigned to different clicks in a conversion path. Using the wrong model can lead to inaccurate reporting.
- Incorrect testing: If you’re testing your conversion tracking incorrectly, you might get misleading results. Make sure you’re using a reliable testing method.
- Double counting: Sometimes, conversions can be counted twice, leading to inflated numbers.
- Too much tracking: Tracking too many different conversion actions can sometimes lead to performance issues.
Should I set up Google Ads conversion tracking through Google & Youtube app?
Using the Google & YouTube app is definitely the easiest way to set up basic Google Ads conversion tracking in Shopify. Hence, if you just need to track standard conversions like purchases, this method works perfectly.
However, if you have more advanced tracking needs or want more customization options, setting up the Google Ads conversion tag manually through GTM is the way to go. Just remember: GTM integration for the checkout page requires a paid Shopify plan. Moreover, you’re on a free trial or a basic plan, you won’t be able to use GTM for checkout tracking.
In case GTM feels a bit overwhelming, you can track your sales conversions using a third-party tool like NestAds. It’s much simpler to set up and provides a user-friendly dashboard for monitoring your key metrics. Plus, it’s specifically designed for e-commerce, so you’ll get ecommerce-centric metrics, all in one place. It’s a great alternative for streamlining your conversion tracking.