


In this guide, we’ll show you how to add and customize color swatches on Shopify without code, using NestScale’s NS Color Swatch Variant Images app. Let’s see what you’ll learn through this blog:
- How to set up color swatches on Shopify product & collection pages
- How to customize the design of your color swatches to match your store branding
- Full step-by-step video tutorial to set up color swatches in Shopify from scratch
- Frequently asked questions related to Shopify color swatches
🙌 While we’ve built advanced features to help you manage and display variants more effectively, you can still enjoy our color swatches on product pages feature with full customization capabilities for totally FREE.
Step 1: Set up color swatches with NS Color Swatch Variant Images
Let’s start by getting the app installed and embedded so your swatches can show up beautifully on your storefront.
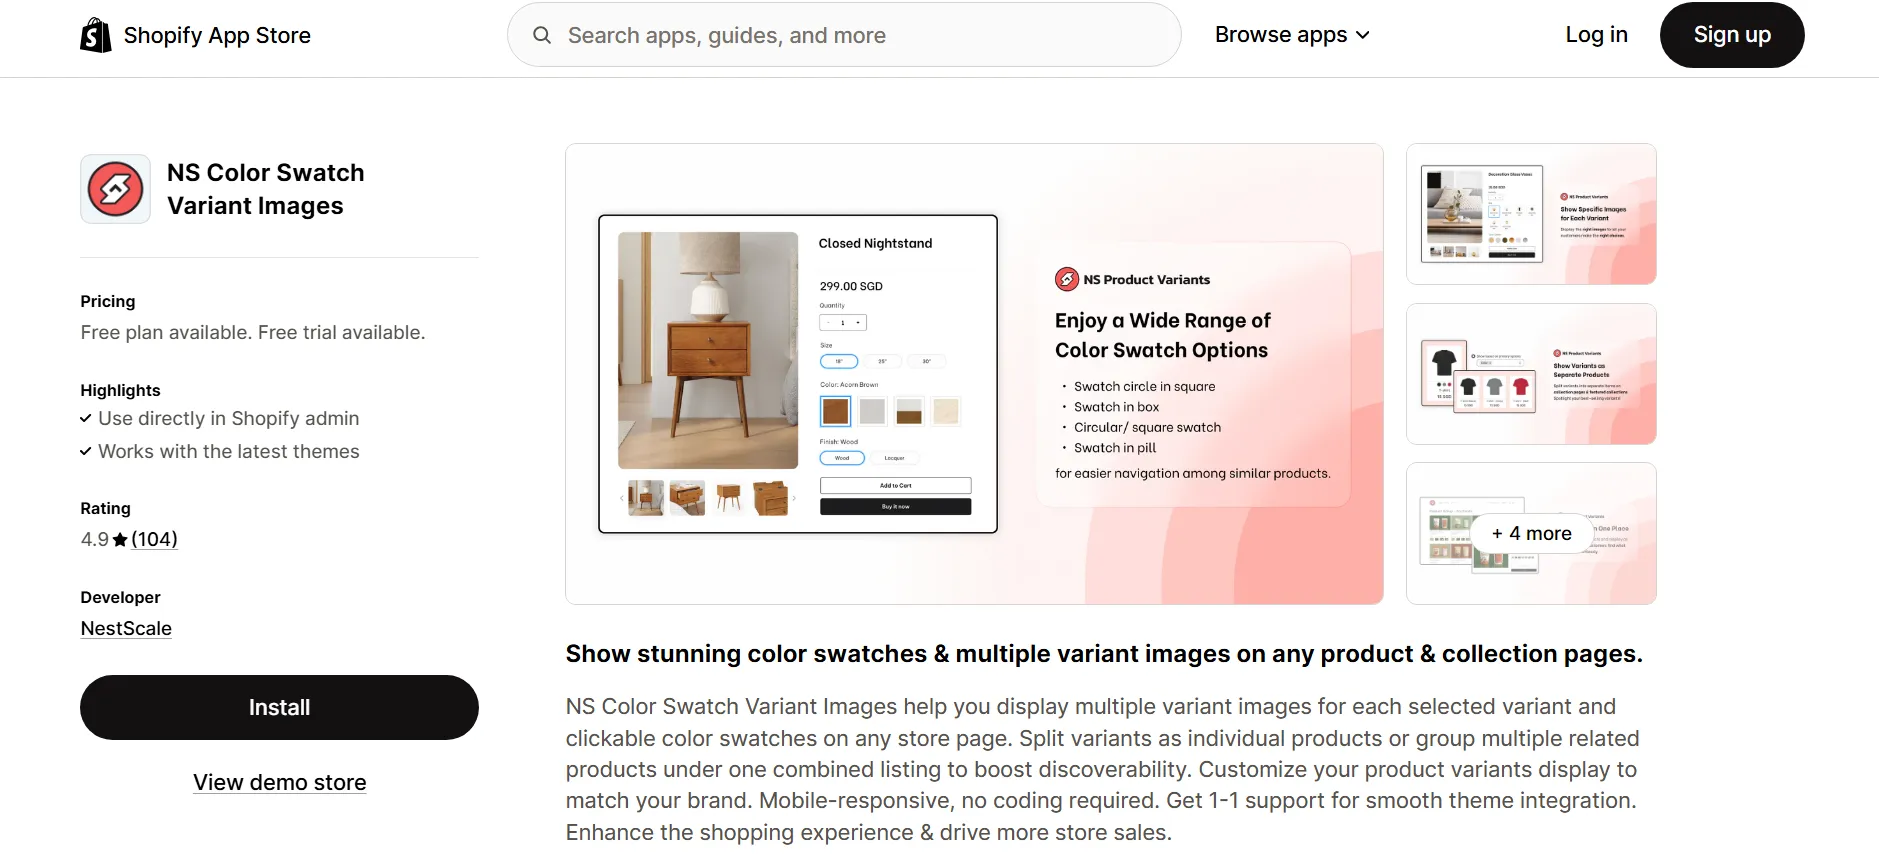
1. Head over to the Shopify App Store, search for NS Color Swatch Variant Images, and click Install.
2. Open the app from your Shopify admin, and follow the quick Get Started setup instructions.
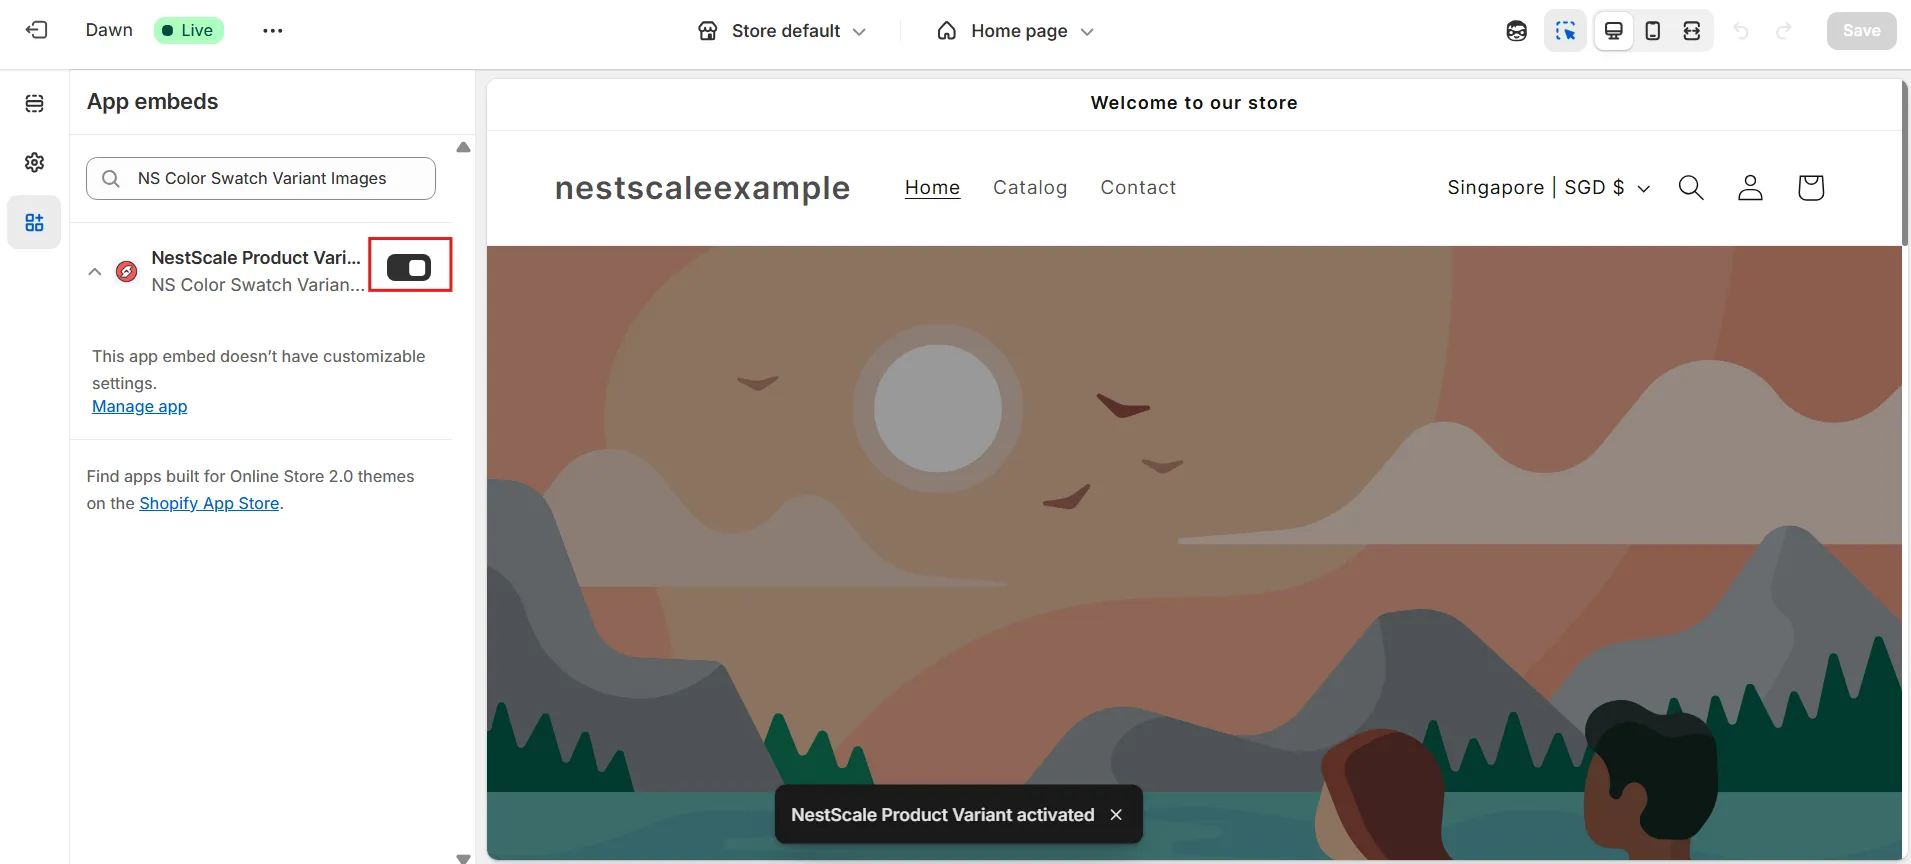
3. Click Embed app.
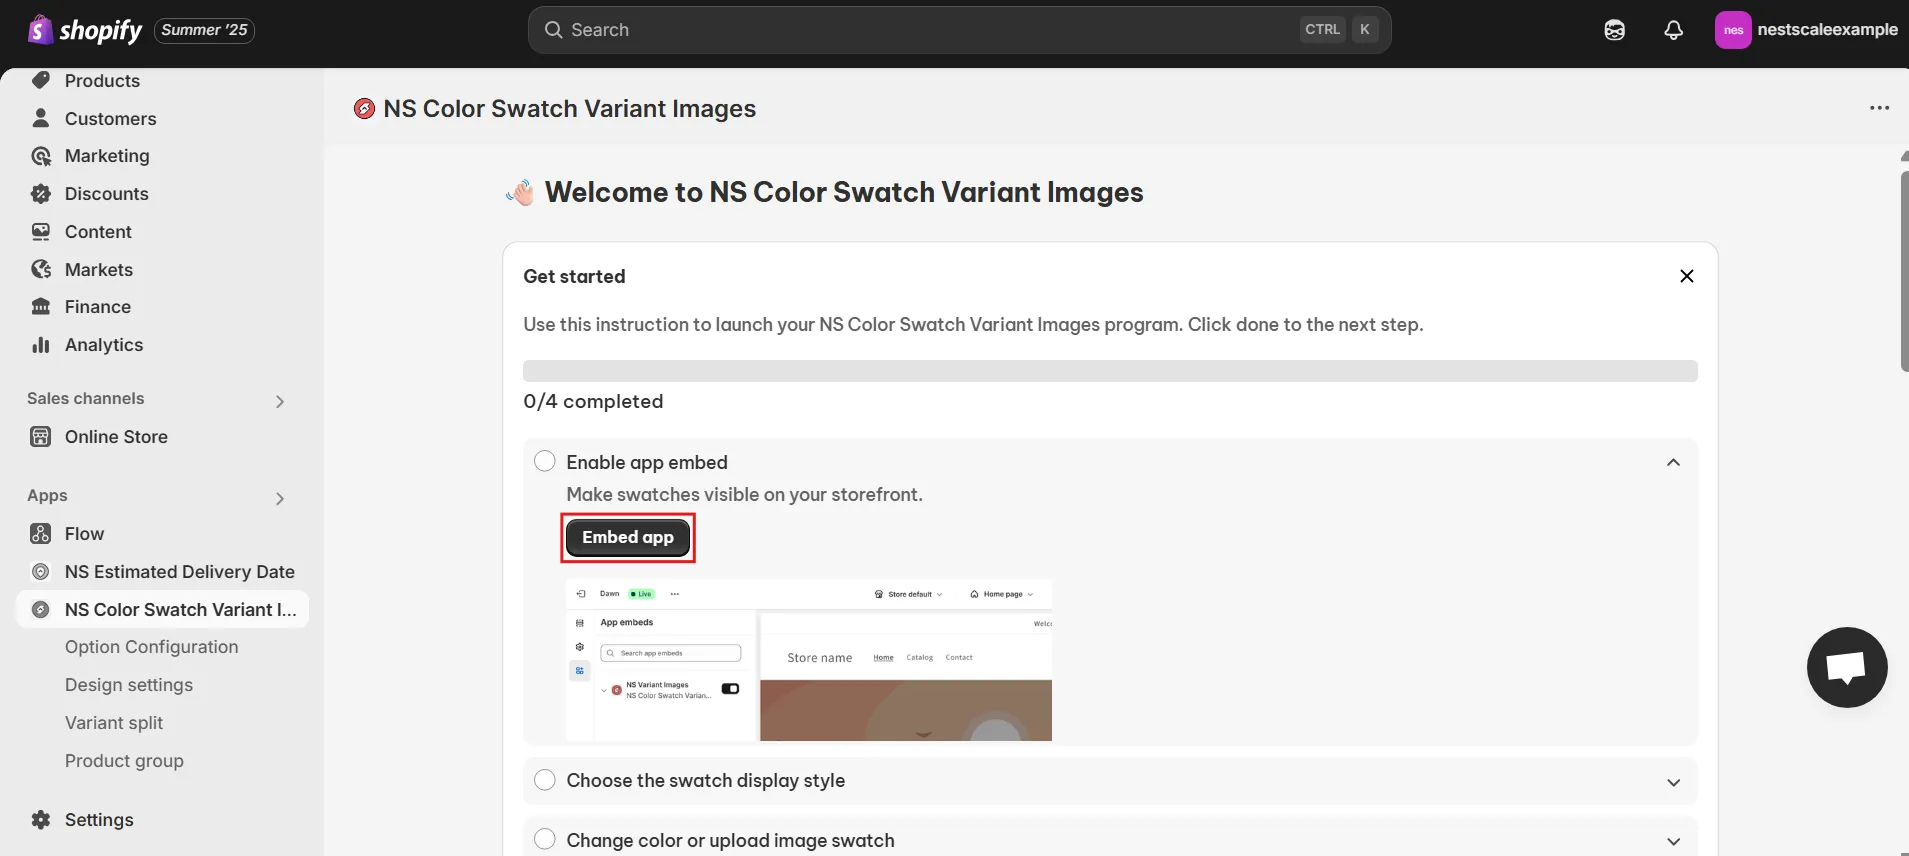
4. You’ll be redirected to Shopify’s theme editor, just toggle ON the switch next to NS Color Swatch Variant Images and save your changes.
Step 2: Display color swatches on Product and Collection pages
Now that the app is live, it’s time to choose how your swatches will appear on your product and collection pages.
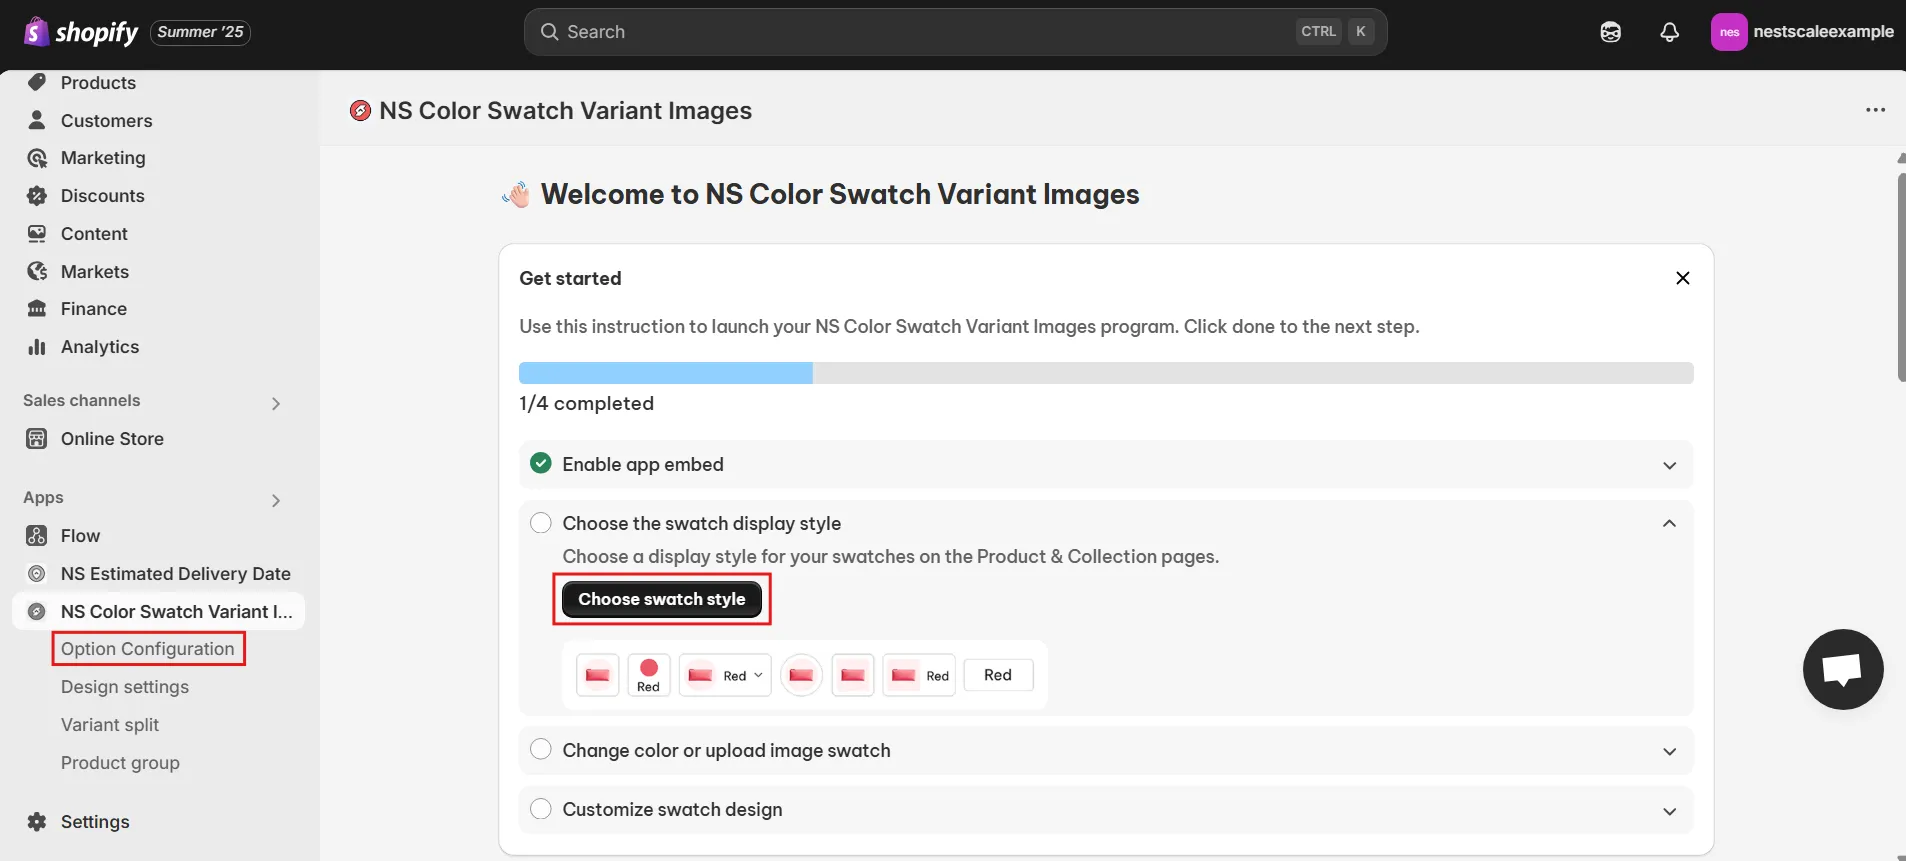
1. From the app’s instructions page, click Choose Swatch Style or go directly to Option Configuration in the left-hand menu.
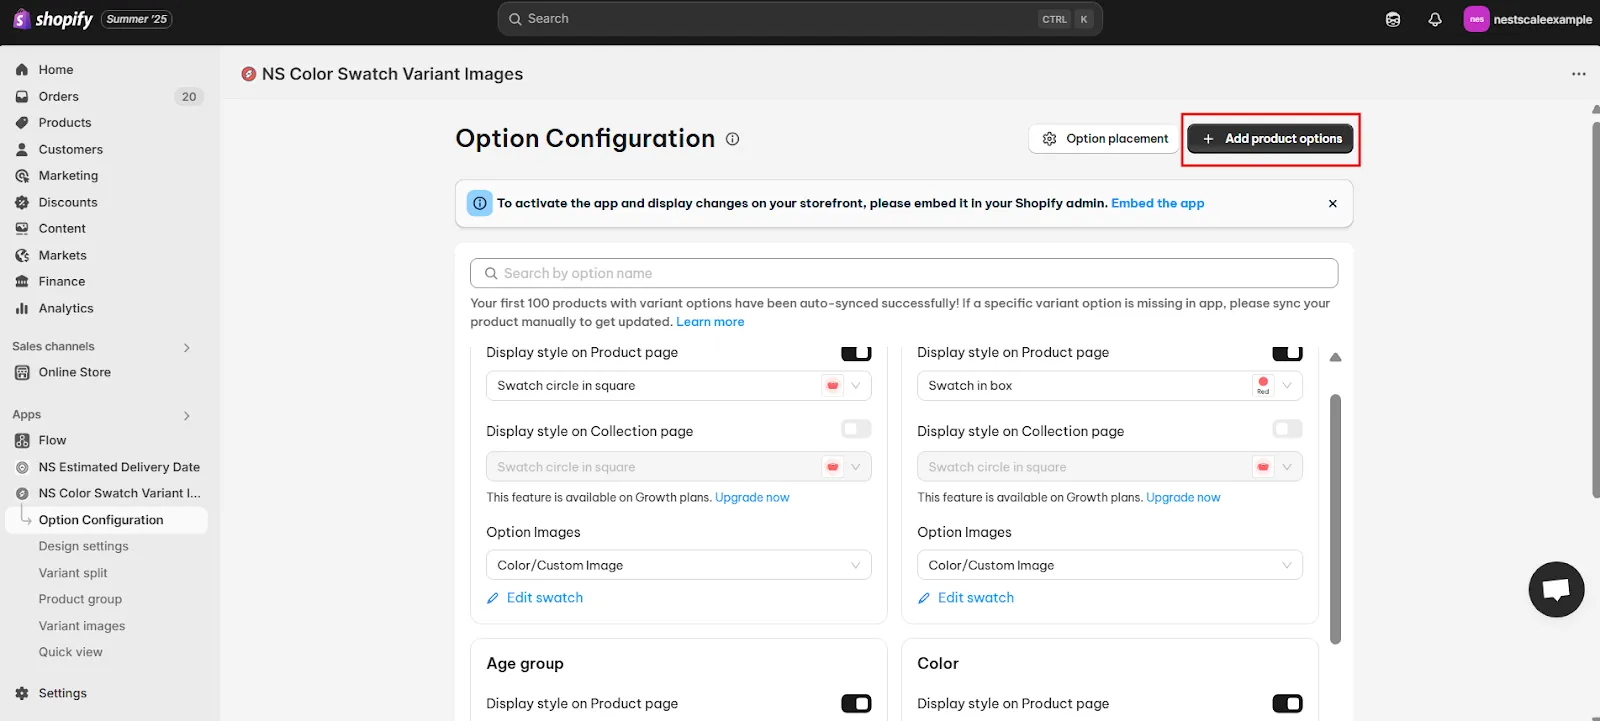
📝 The app will automatically sync the latest 100 products that already have options.
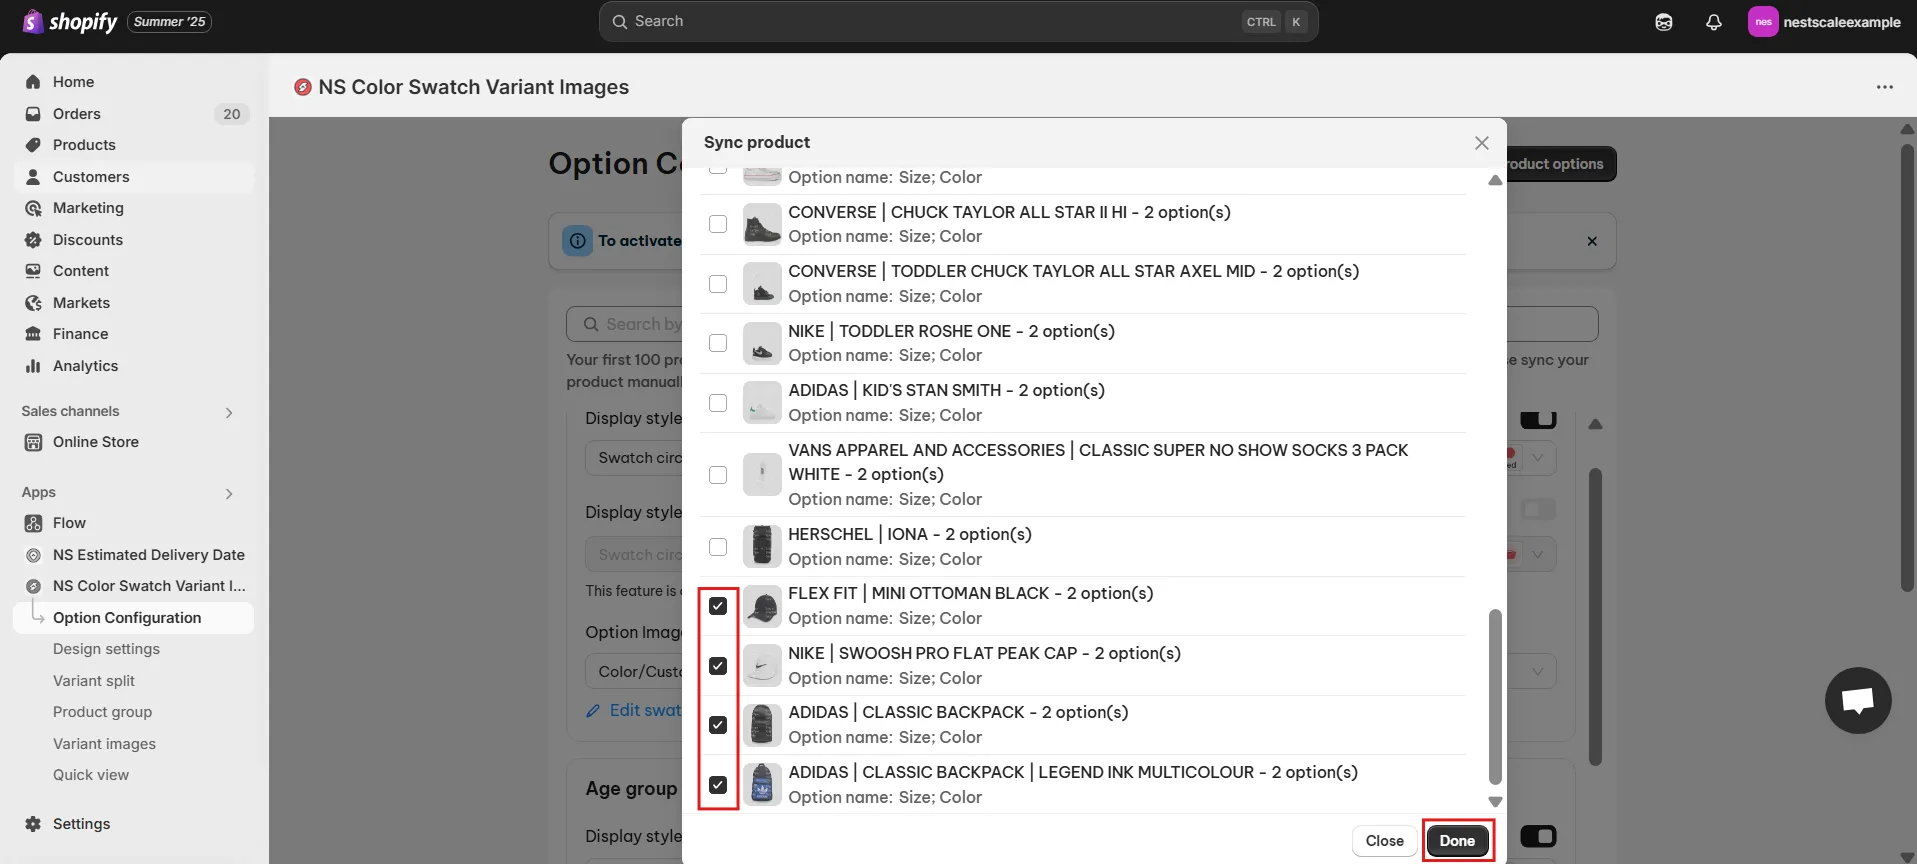
If the product or option you want isn’t there, no worries, click Add Product Options to bring it in manually.
2. A product list will pop up. Select the ones you want to add swatches to, and hit Done.
You can pick multiple at once.
3. Next, toggle ON the Display Style on Product Page for the options you want to turn into swatches.
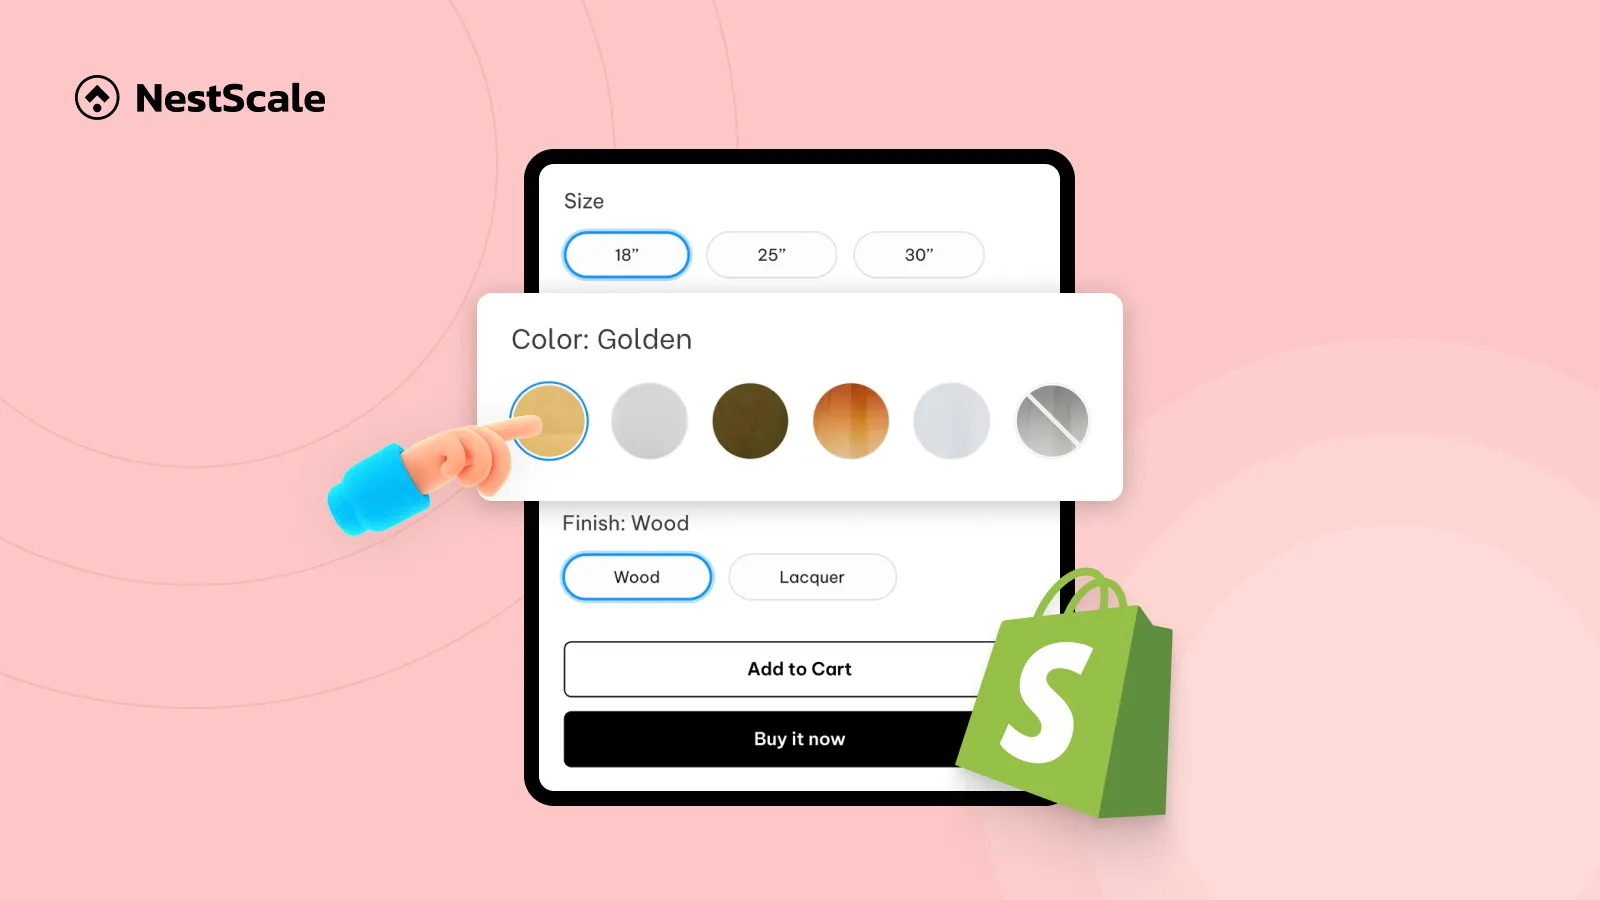
For example, I’m adding color swatches to a product in my florist store called “Tulips”. So I’ll toggle on the display for my Tulips color option.
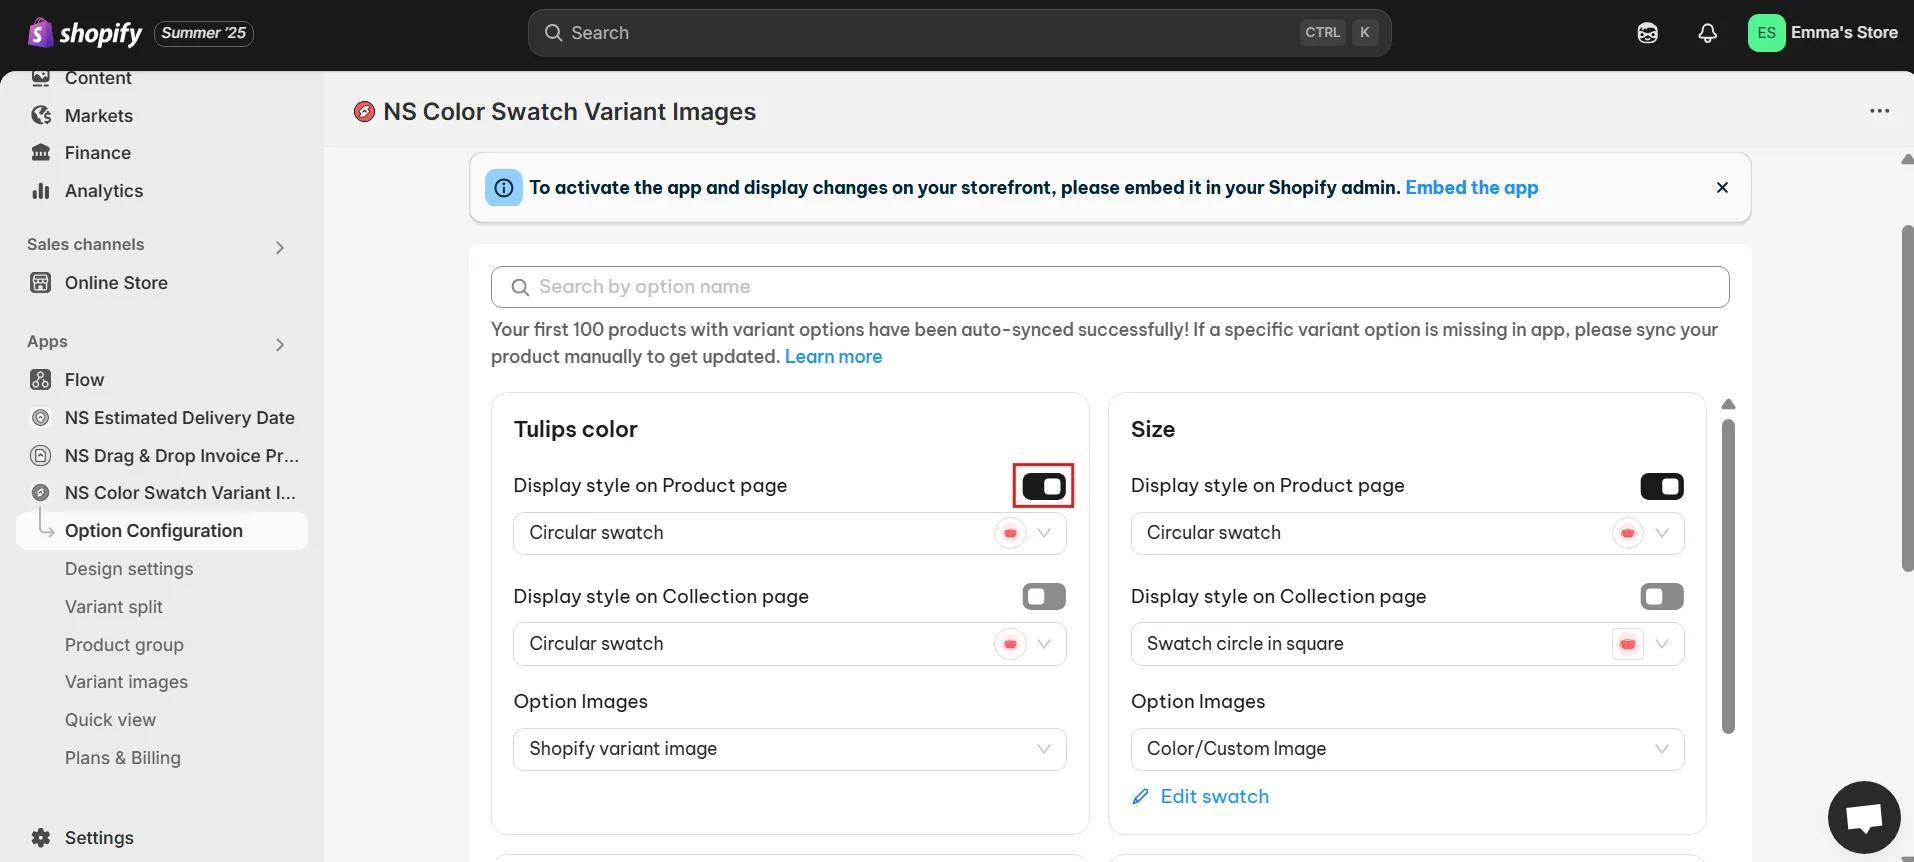
4. Want your swatches to show up on Collection pages too? Just toggle on the corresponding option.
✨ Heads up: Displaying swatches on collection pages is a premium feature. You’ll need to upgrade from the Free plan to access it.
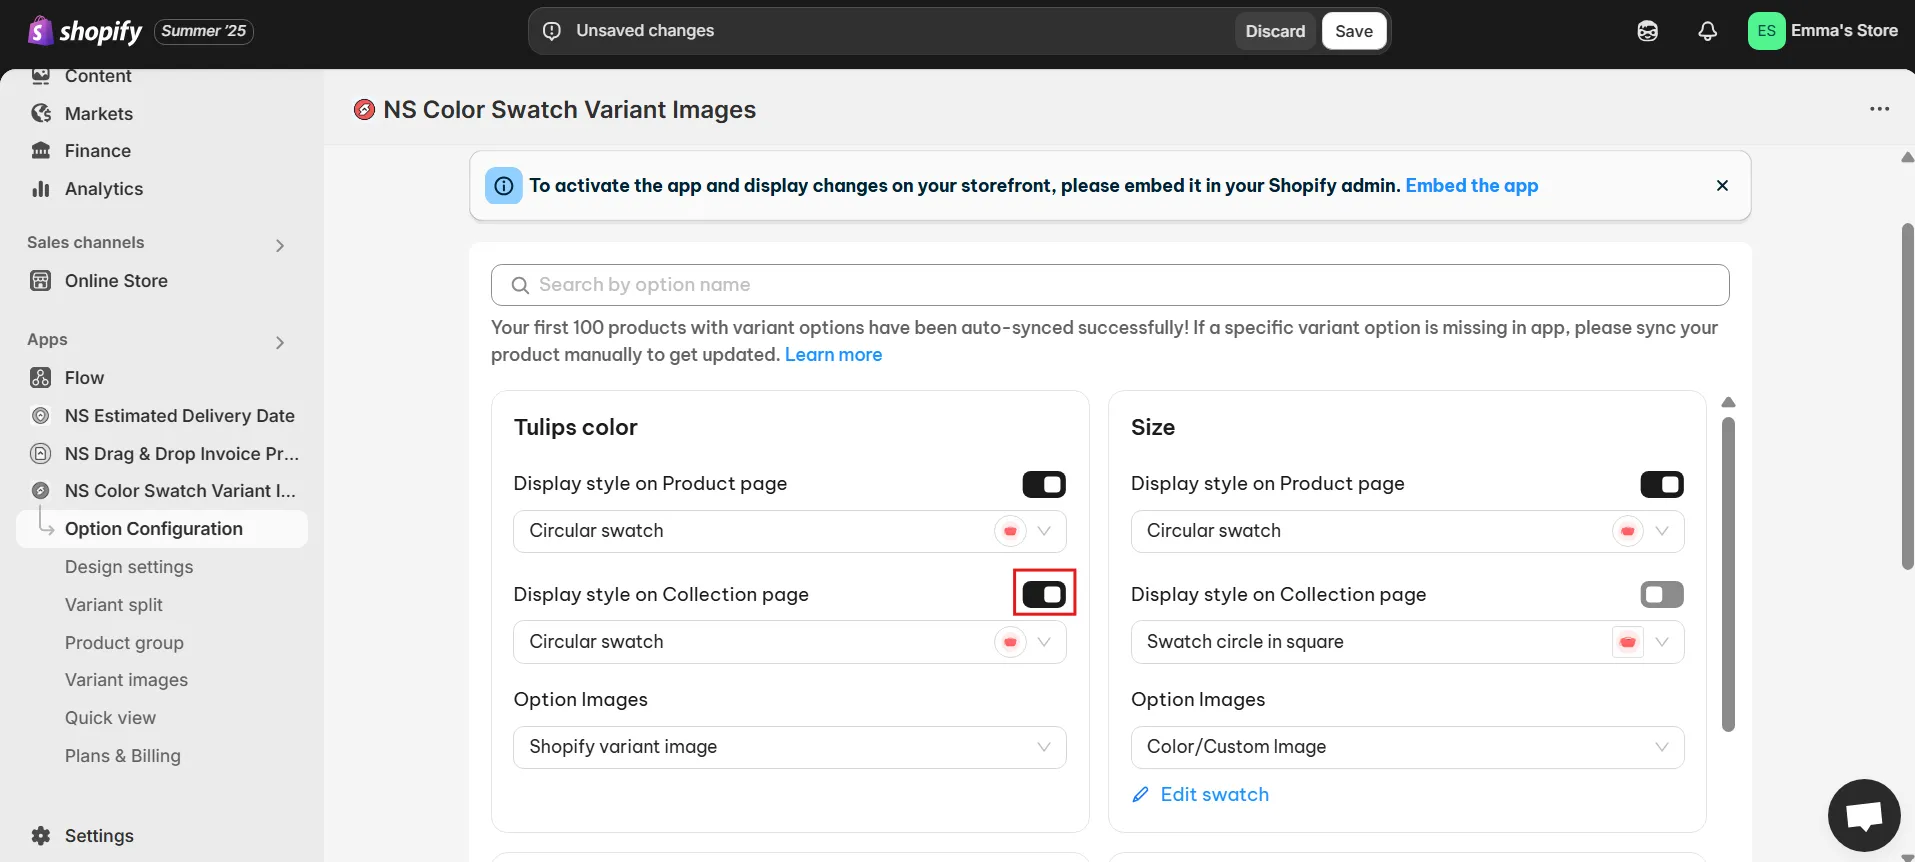
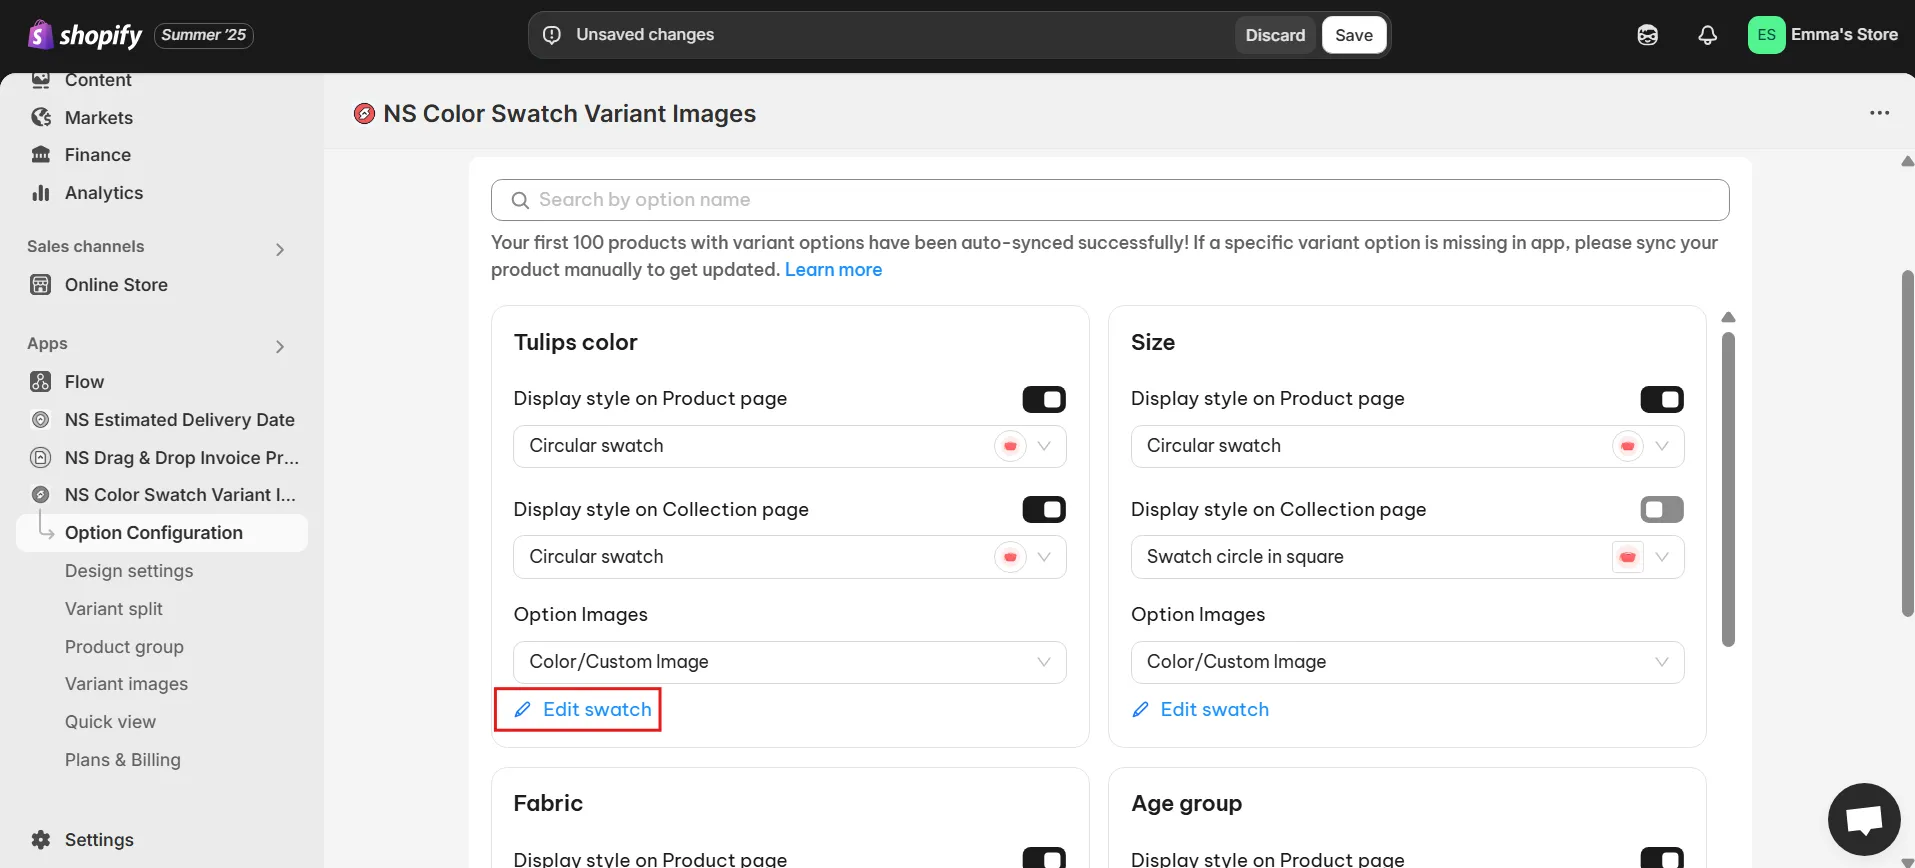
5. Now it’s time to choose the shape and style for your swatches.
Below the toggle, you’ll see a dropdown menu with shape options, such as squares, circles, and pills, along with a preview image that shows how each one looks.
For this guide, I’m going with the Circular swatch – a clean and rounded look.
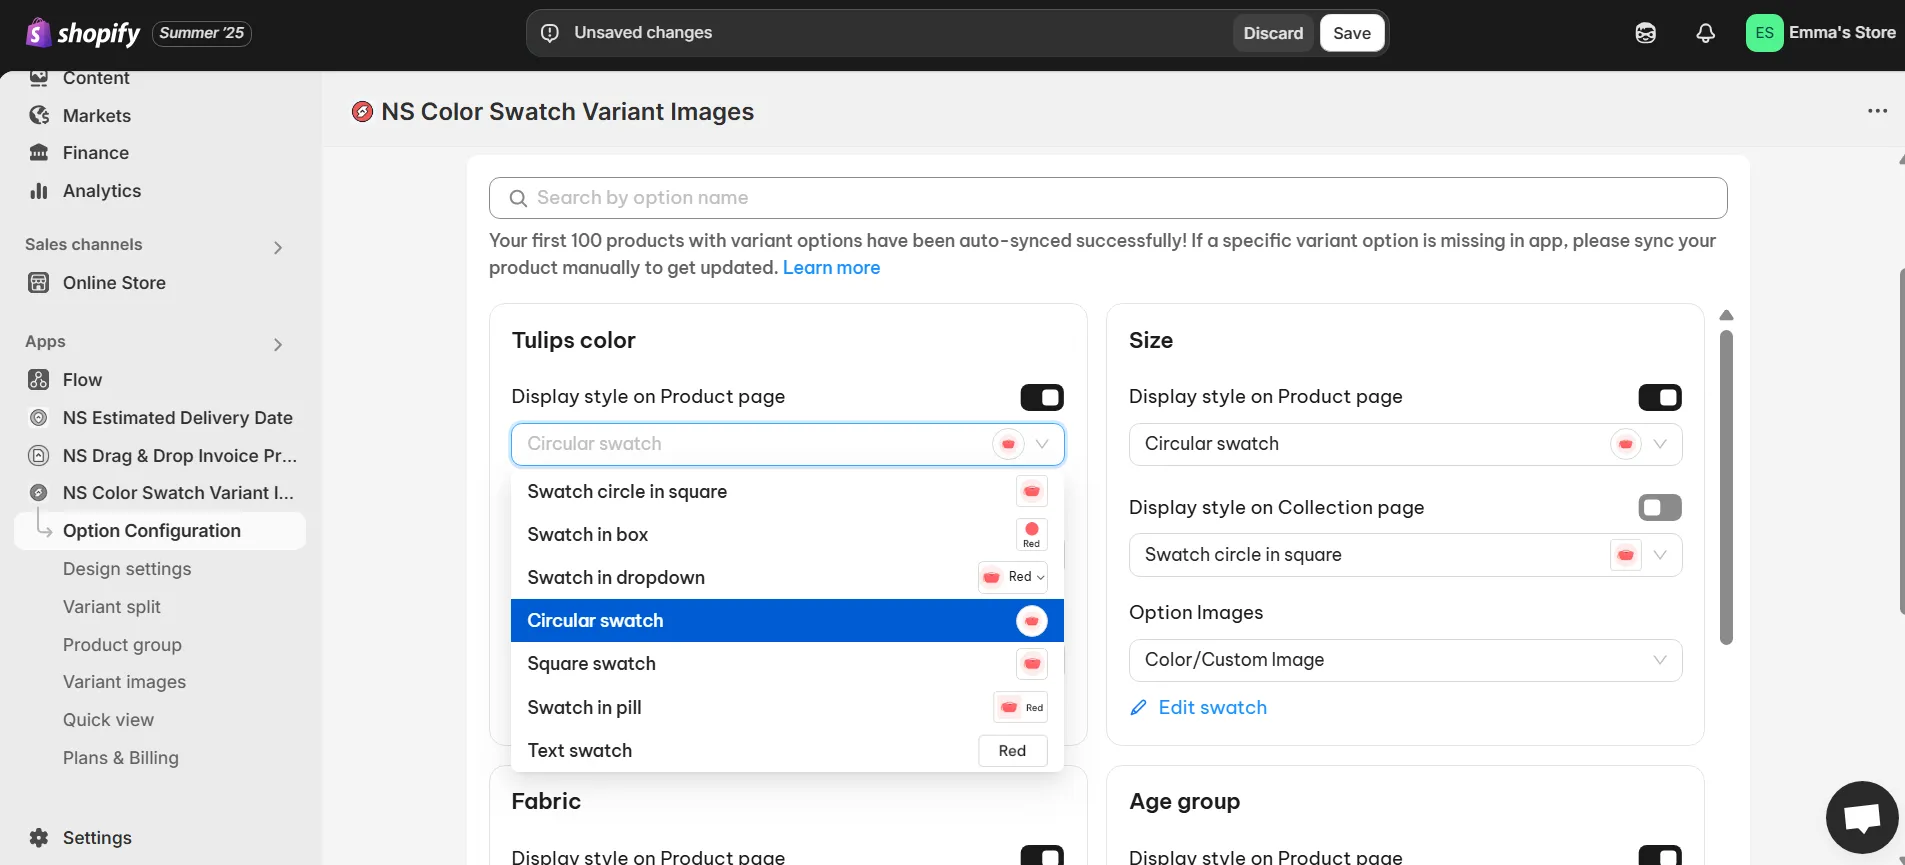
6. Next, choose how you want to display the swatches:
- Option 1: Use your existing Shopify variant images.
- Option 2: Use Color / Custom images – where you can pick a color using a color picker, enter a HEX code, or upload an image from your computer.
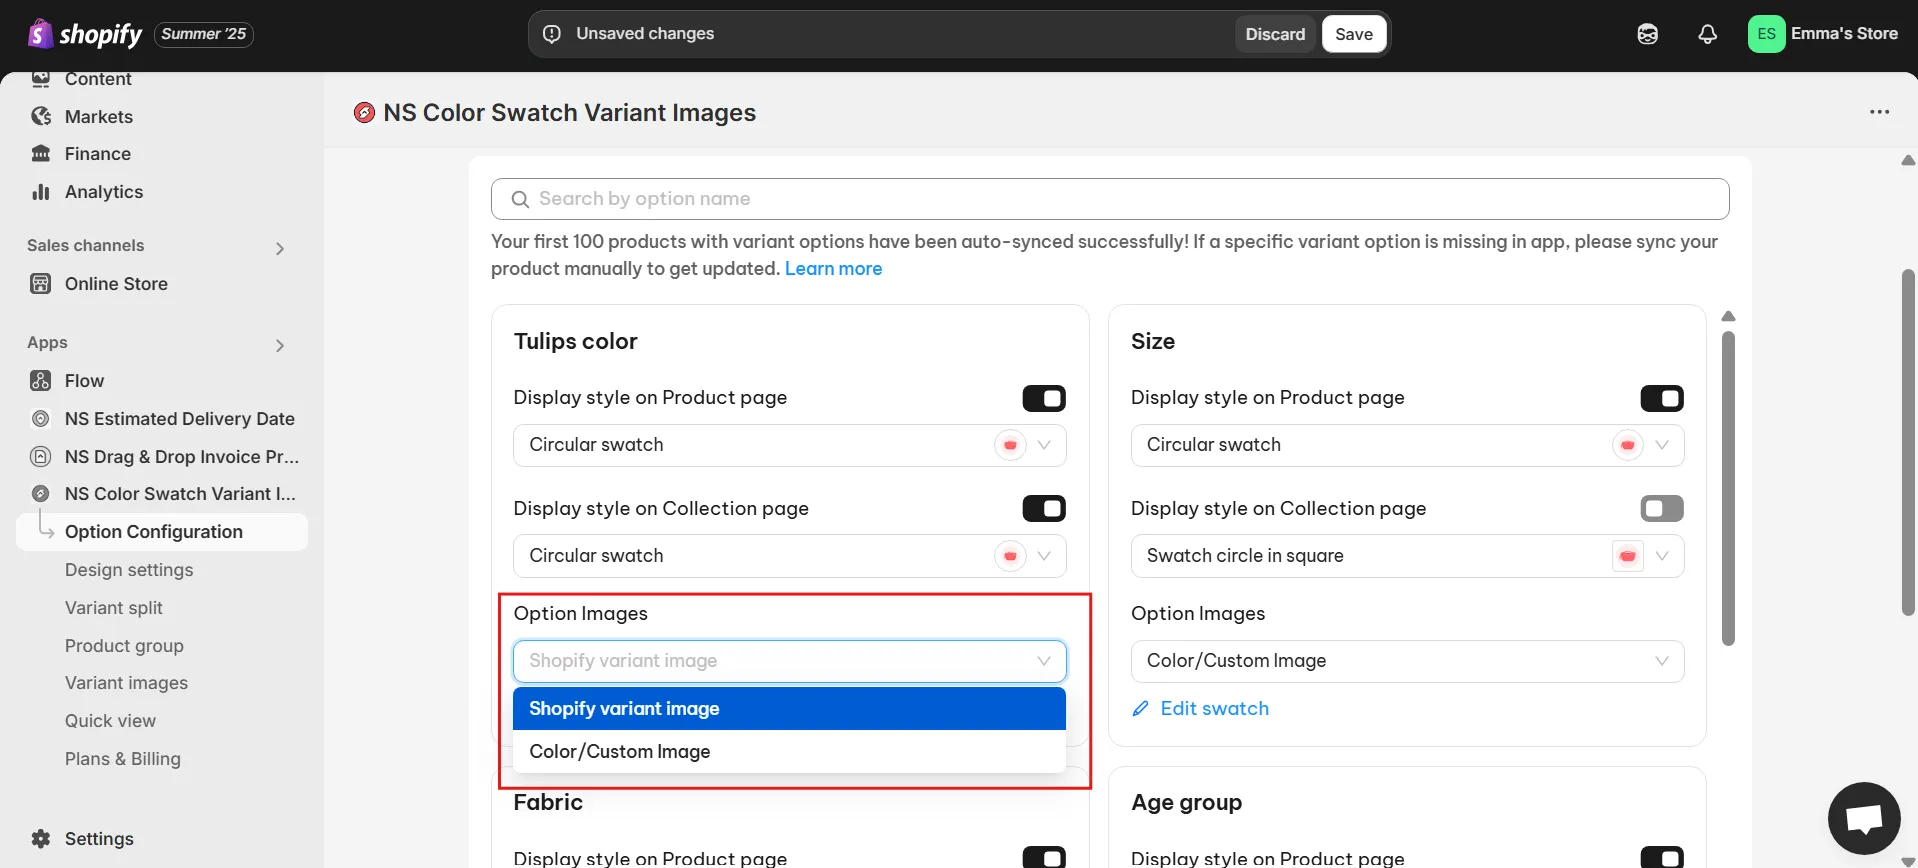
7. If you choose Option 2, click Edit Swatch to customize the look.
8. In the pop-up window, assign a color or upload an image for each variant. Just make sure each swatch matches the correct variant name.
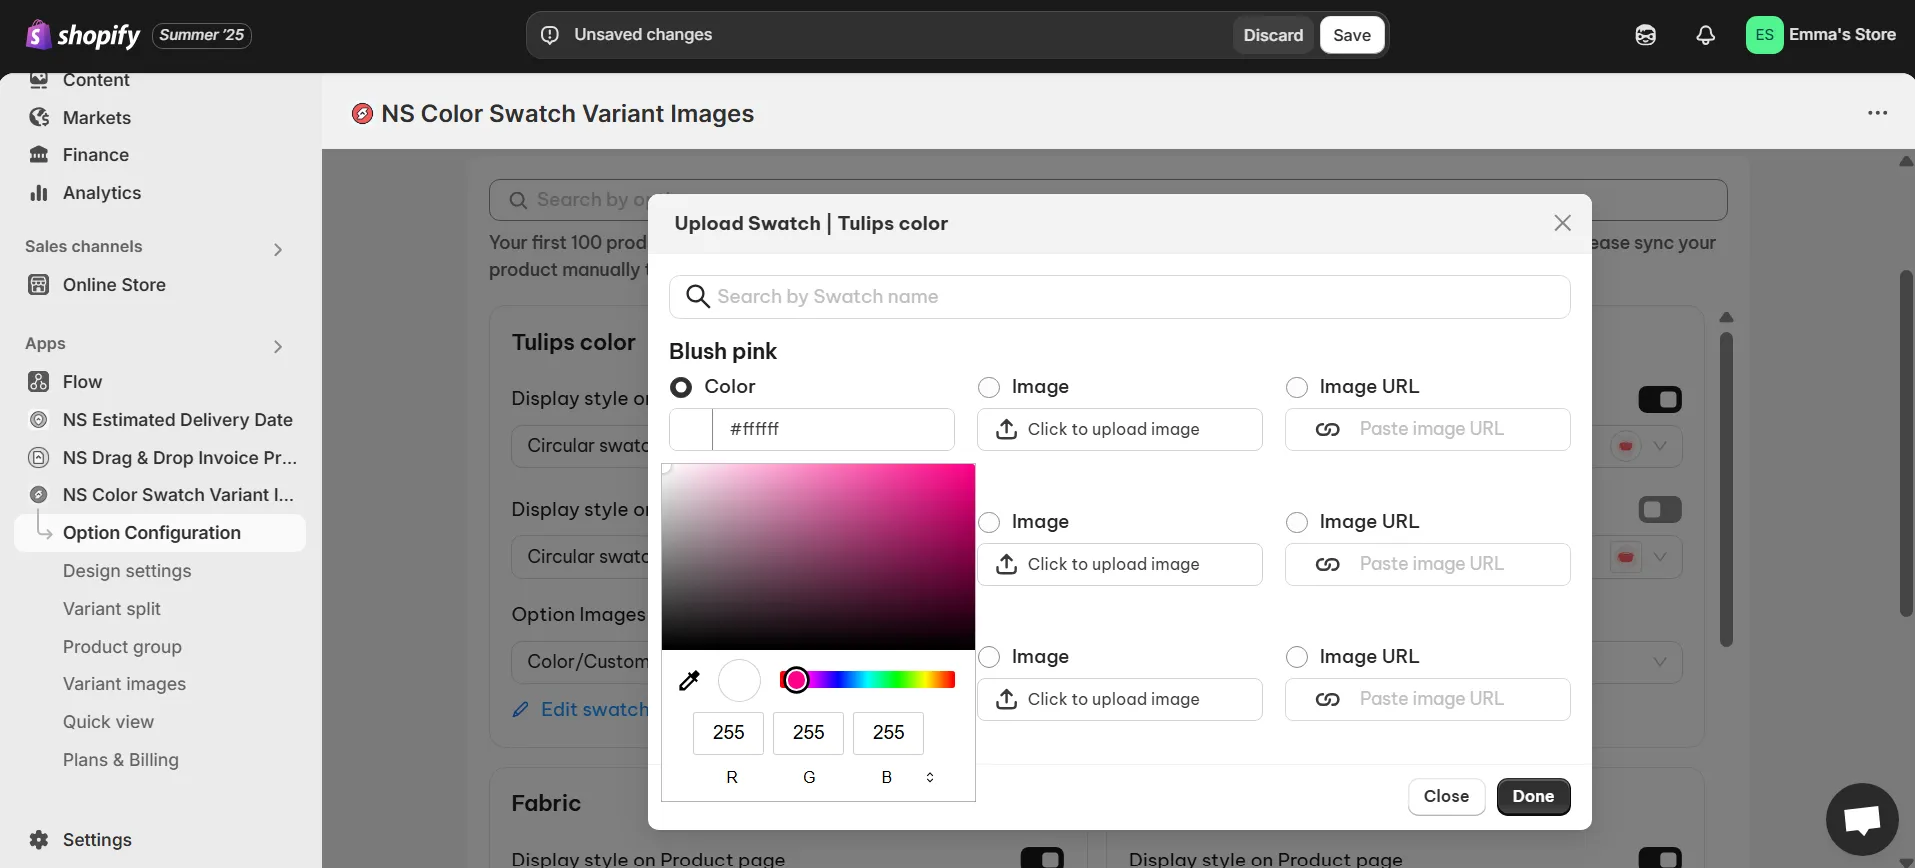
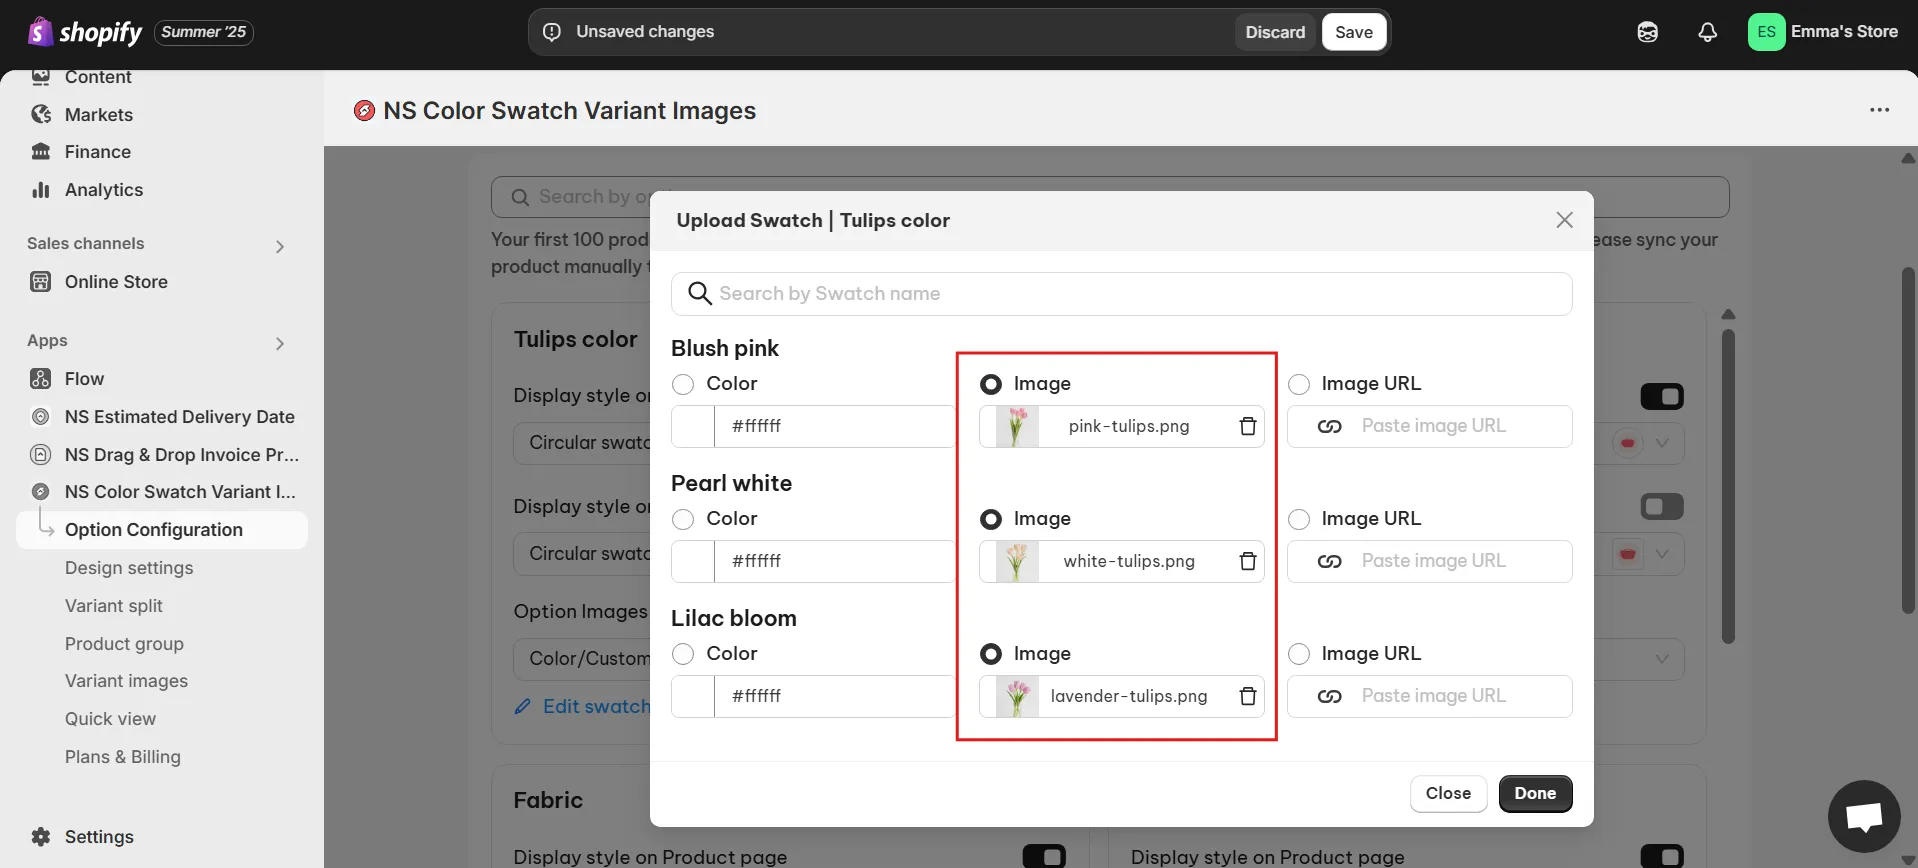
9. When you’re finished, click Done and then Save.
Your swatches are now showing up in your store. But let’s go a step further and style them to match your store’s vibe.
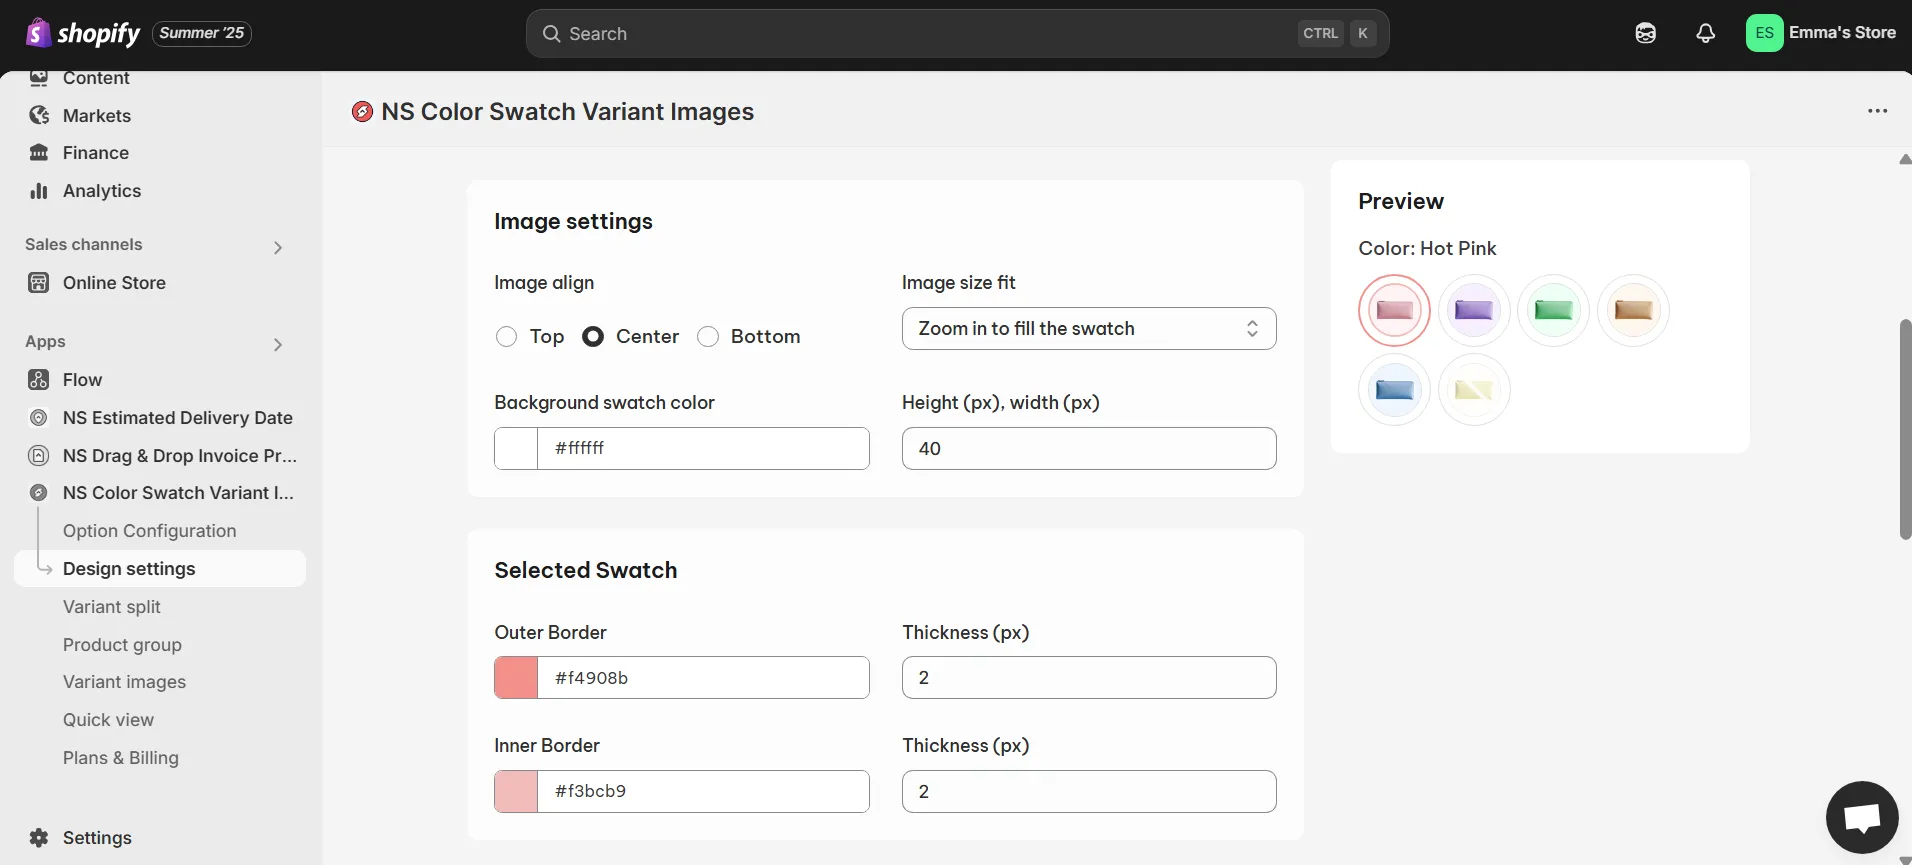
Step 3: Customize your color swatches design
1. In the app’s sidebar, go to Design Settings.
2. Find the swatch style you picked earlier (look for the one marked “In Use”) and click Customize.
I picked Circular Swatch, so I’ll click to customize that style.
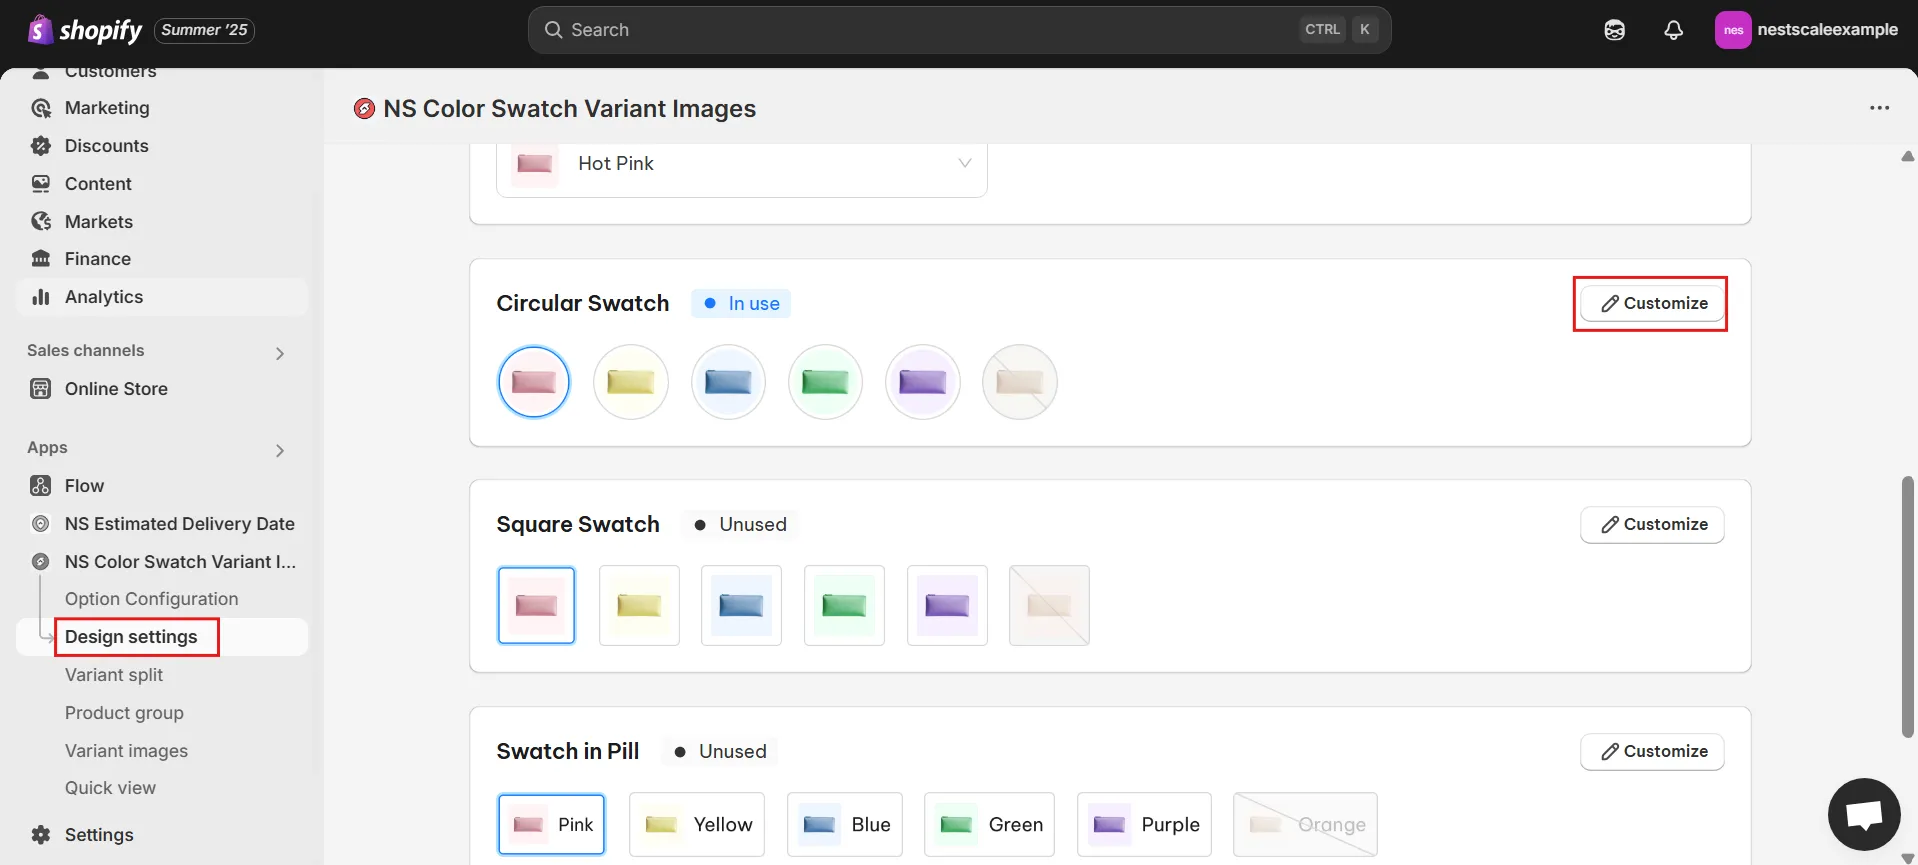
3. You’ll see five sections of design options:
- General Settings: Adjust swatch size, spacing, and border thickness.

- Image Settings: Set how images behave on hover—zoom in/out, image position, etc.
- Selected Swatch: Customize the look of a selected swatch (border color, thickness).
- Unselected Swatch: Set how unselected swatches appear.
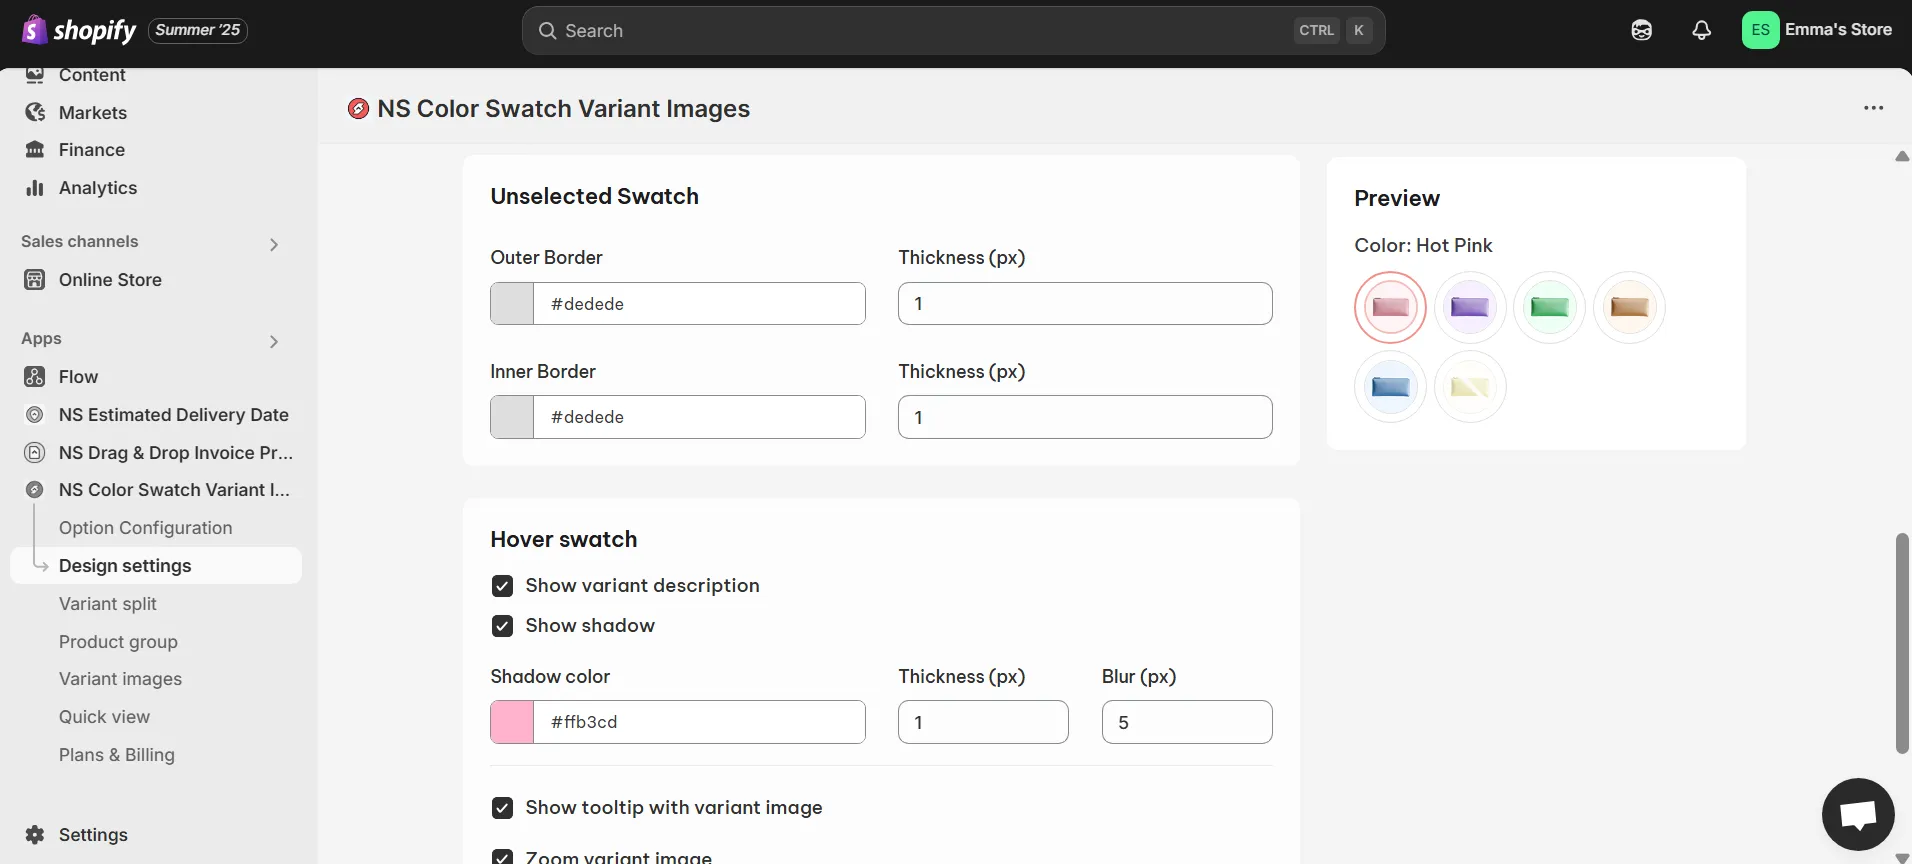
- Hover Swatch: Add effects like variant names, shadows, tooltips, or zoom on hover.
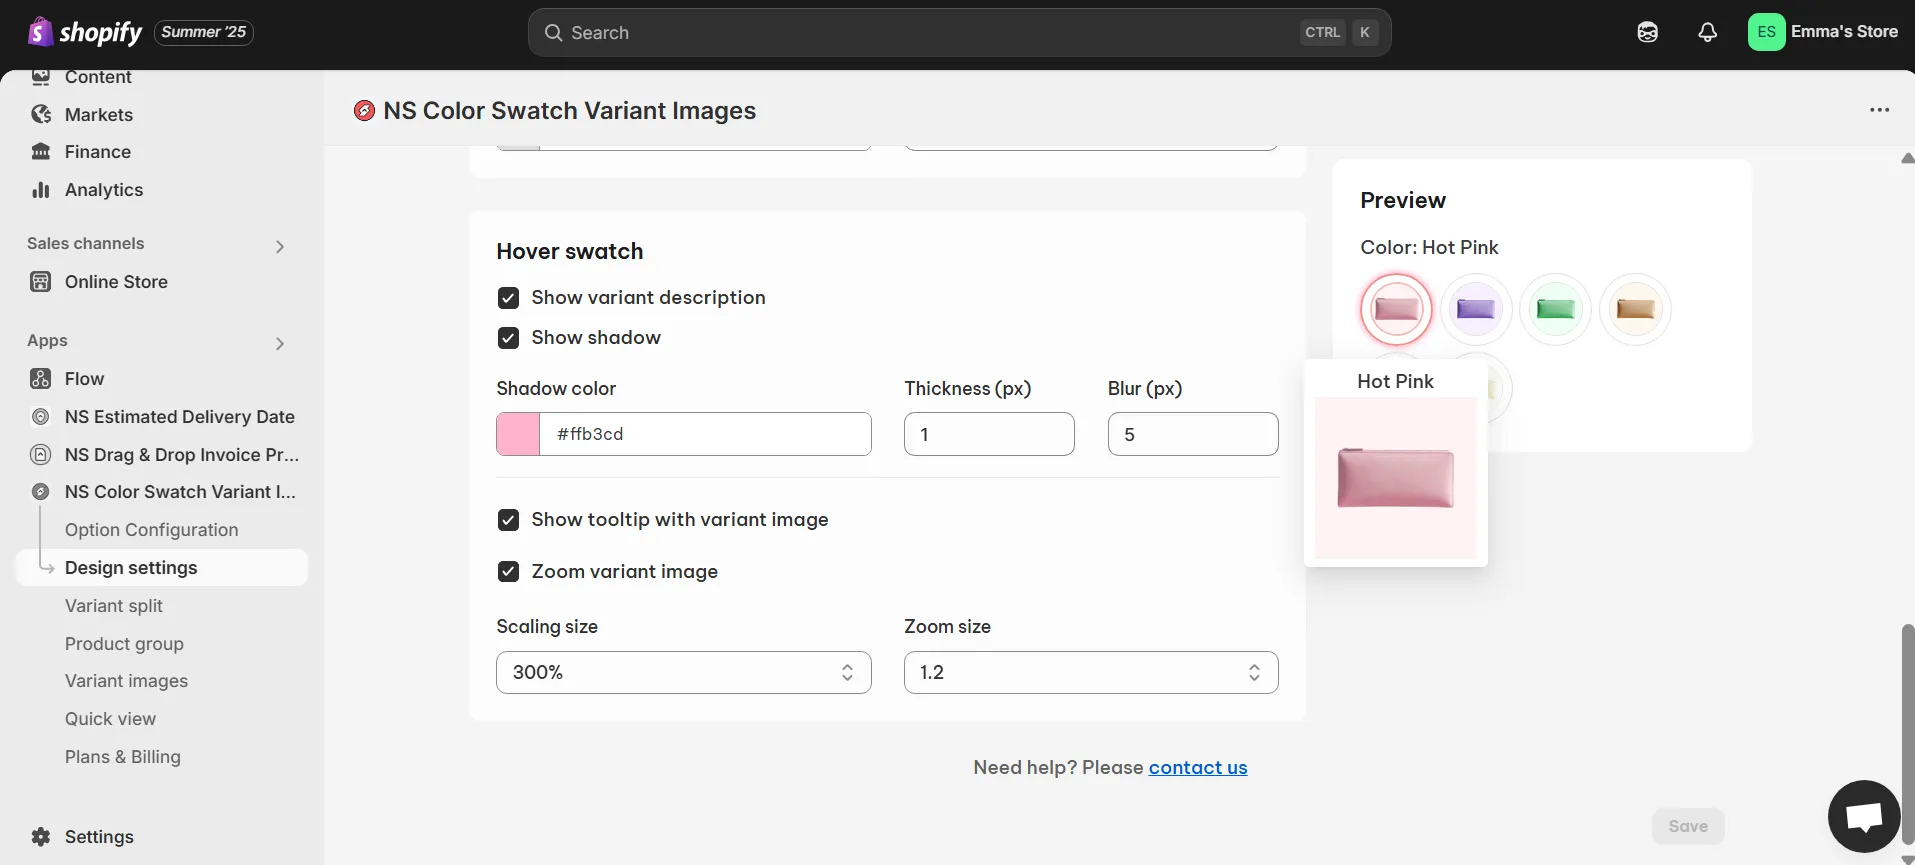
💡 As you customize your swatches, check the Preview to see your updates in real time.
4. Once you’re happy with how everything looks, don’t forget to hit Save.
Now let’s check the new look of your variants in your store!

🌷 If you noticed our fresh blooms delivery message, you may want to explore NS Estimated Delivery Date – an EDD app to show the delivery timeline for specific products and collections in your Shopify store.
✨ NS Color Swatch Variant Images also offers other awesome features to help you organize and display product variants on your storefront more efficiently:
- Split variants into separate products
- Merge products as variants
- Assign relevant images to each variant
- Quick view product details without loading product pages
- Set multi-language variant labels
Video tutorial by NestScale
In this video, Oliver will show you step by step how to add color swatches in Shopify, from setup to styling. You’ll also learn how to link Shopify color variants to clickable swatches so customers can instantly see the variant image change when selecting a color.
FAQs
Do color swatches really improve conversion rates compared to dropdowns or text lists?
Yes, they really can! Especially when you’re selling visually driven products like fashion, accessories, or home decor. Color swatches give customers an instant, visual way to understand their options. Instead of reading through a dropdown or text list, they see the colors at a glance and make decisions faster.
It also ties into basic customer psychology. According to researches, 85% of consumers say color is the main reason they buy a product, and 90% of impulse decisions are influenced by color alone (Source: Color Psychology in Marketing & InVerve Marketing). So if your store isn’t visually showing those options upfront, you might be missing out on easy conversions.
How can I make only the images of a variant show up when customers click on that variant?
To do this, you’ll want to use a feature called Multiple Variant Images, which is available in NS Color Swatch Variant Images.
Here’s how it works: you assign specific images to each variant (like a red t-shirt or a green backpack), and when the customer clicks on that variant swatch, only the relevant images for that color or style will appear.
How to reorder or arrange the display order of color swatches on my product pages?
You can do this directly in your Shopify Admin.
Just head over to your Products page, open the product you want to edit, and scroll to the Variants section. There, you can drag and drop the variants to change their order. This will update both the order of the variants and how the swatches are displayed on your storefront, assuming your theme or app reflects Shopify’s variant order.