In this guide, we’ll walk you through how to add Shopify color swatches on Product page and also customize them to fit in your theme design. This tutorial works for most Shopify themes and versions, and you’ll have our support if there are any issues during the setup.
This solution is totally Free. And, it’s suitable for your store if:
- You don’t have experience with theme code changes
- You want your swatches to be highly customizable
- You need a low-maintenance solution that scales with your store over time
- You need fast support from a tech team whenever issues happen
If these feel right for you, let’s get started.
Step 1: Install NS Color Swatch Variant Images
1. Go to the Shopify App Store and search for NS Color Swatch Variant Images.
2. Click Install to add the app to your Shopify store.
3. Open the app.
Step 2: Embed the app to make swatches visible on your storefront
1. Follow the onboarding instructions provided by the app.
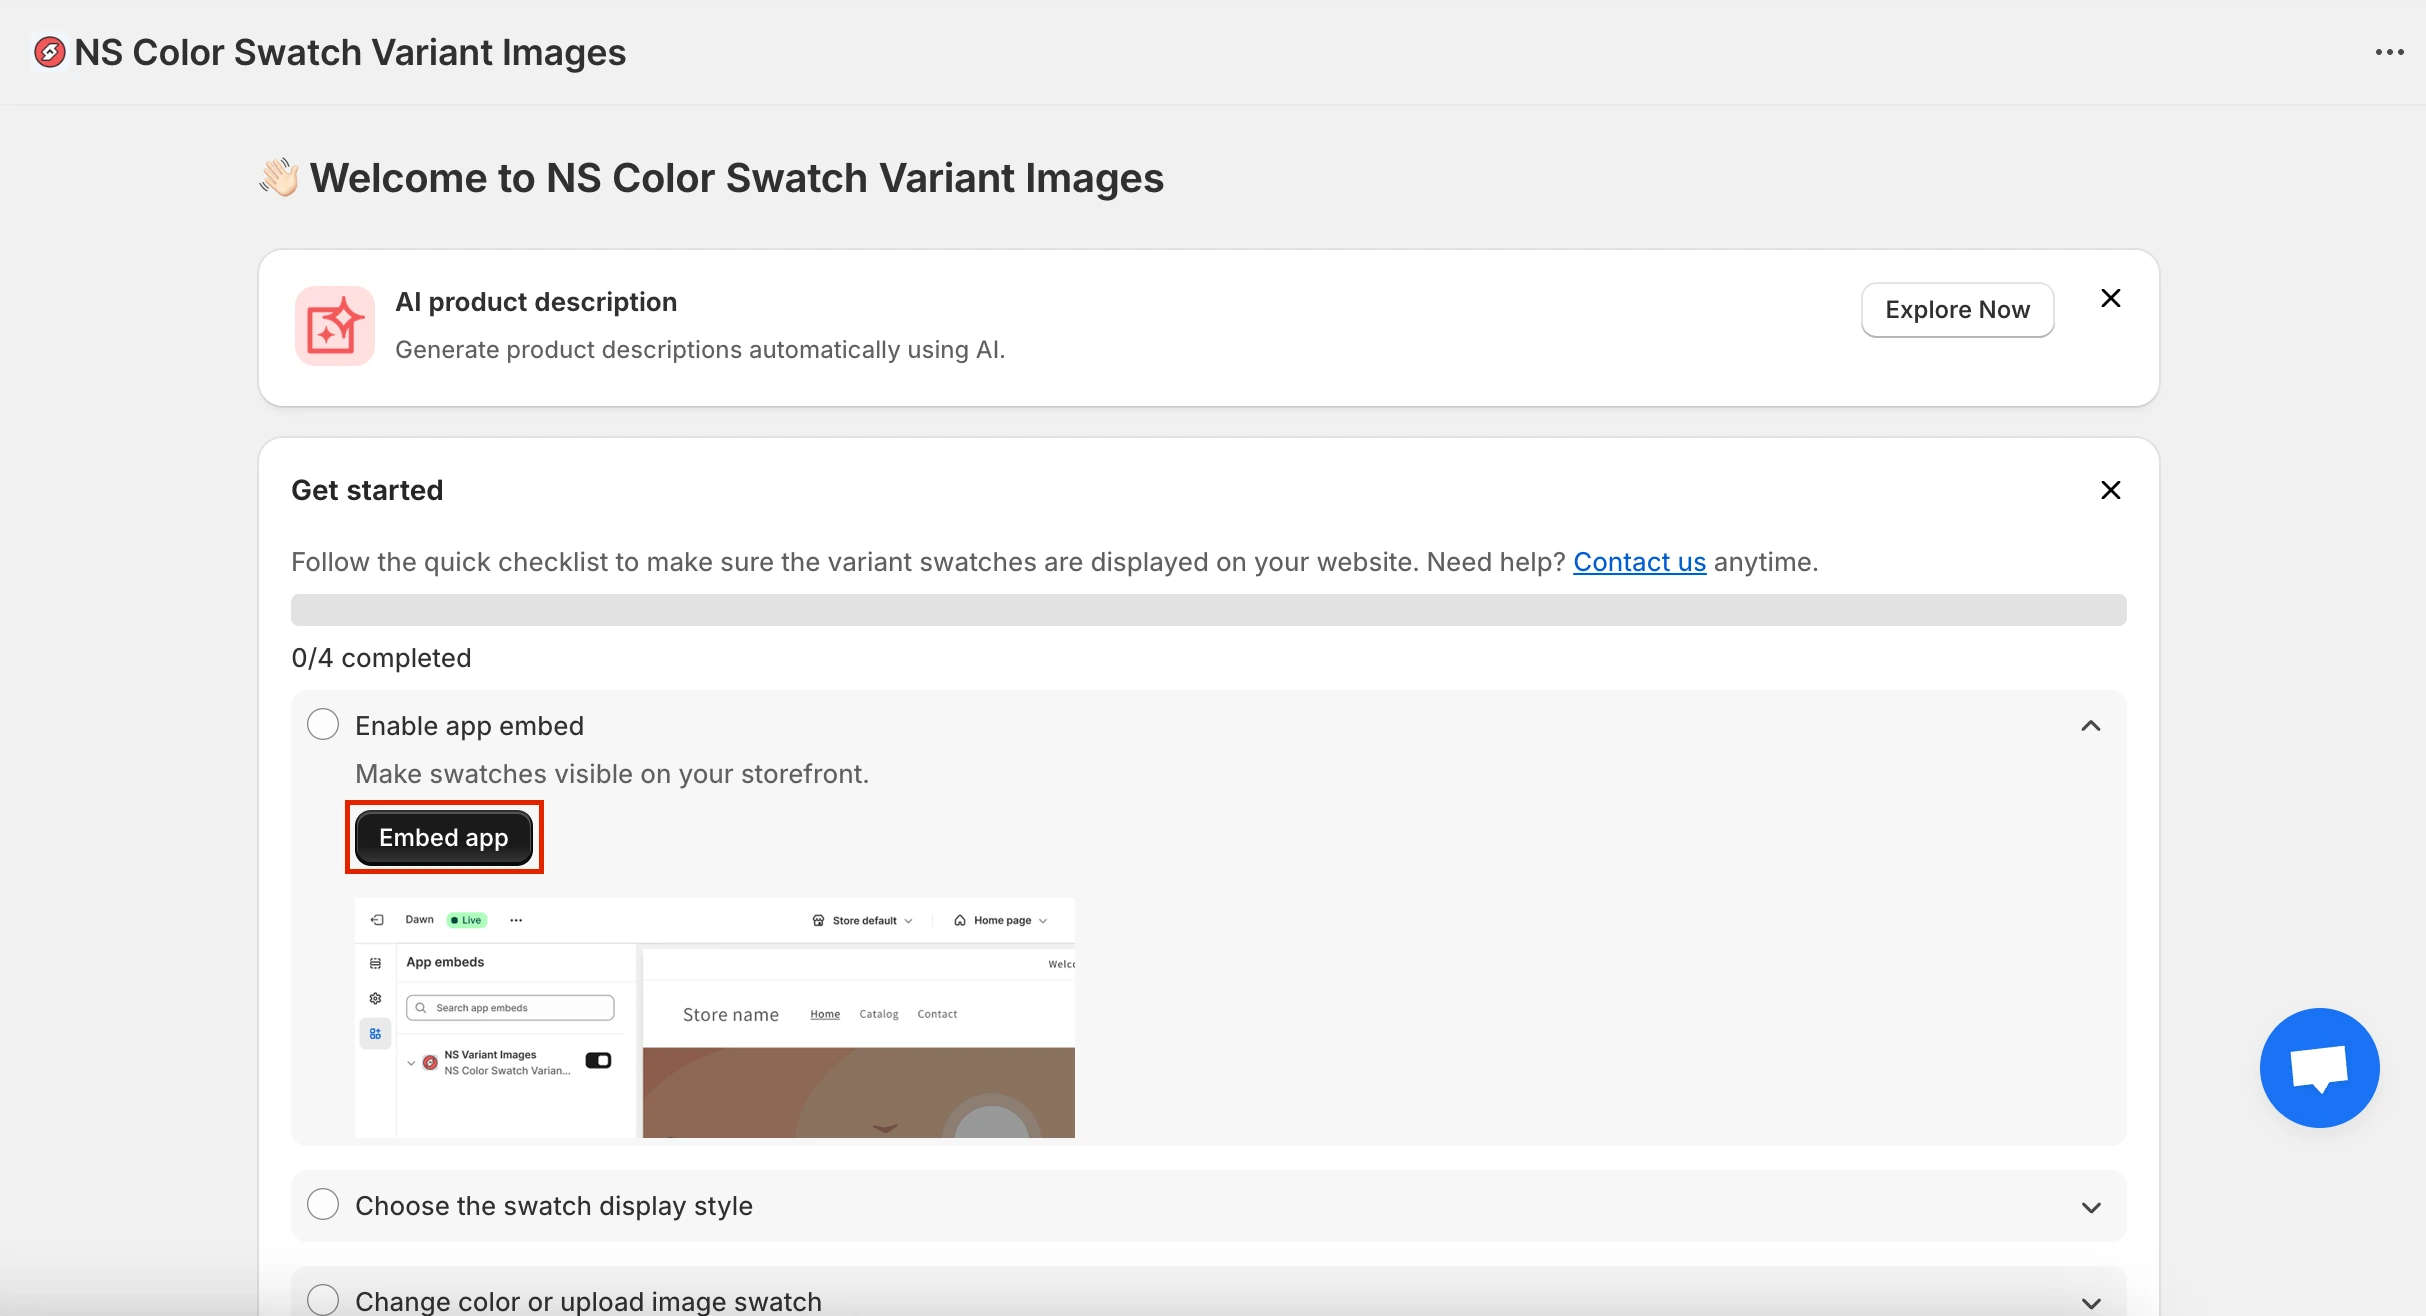
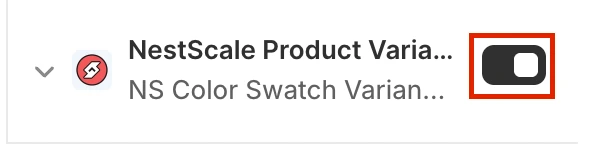
2. Enable embed by toggling this button and Save.
Step 3: Display color swatches on Product pages
Now that the app is installed and running, let’s decide how your swatches will appear on both product pages.
1. From the app’s main instructions page, you can either click Choose Swatch Style or jump straight into Option Configuration from the left-hand menu.
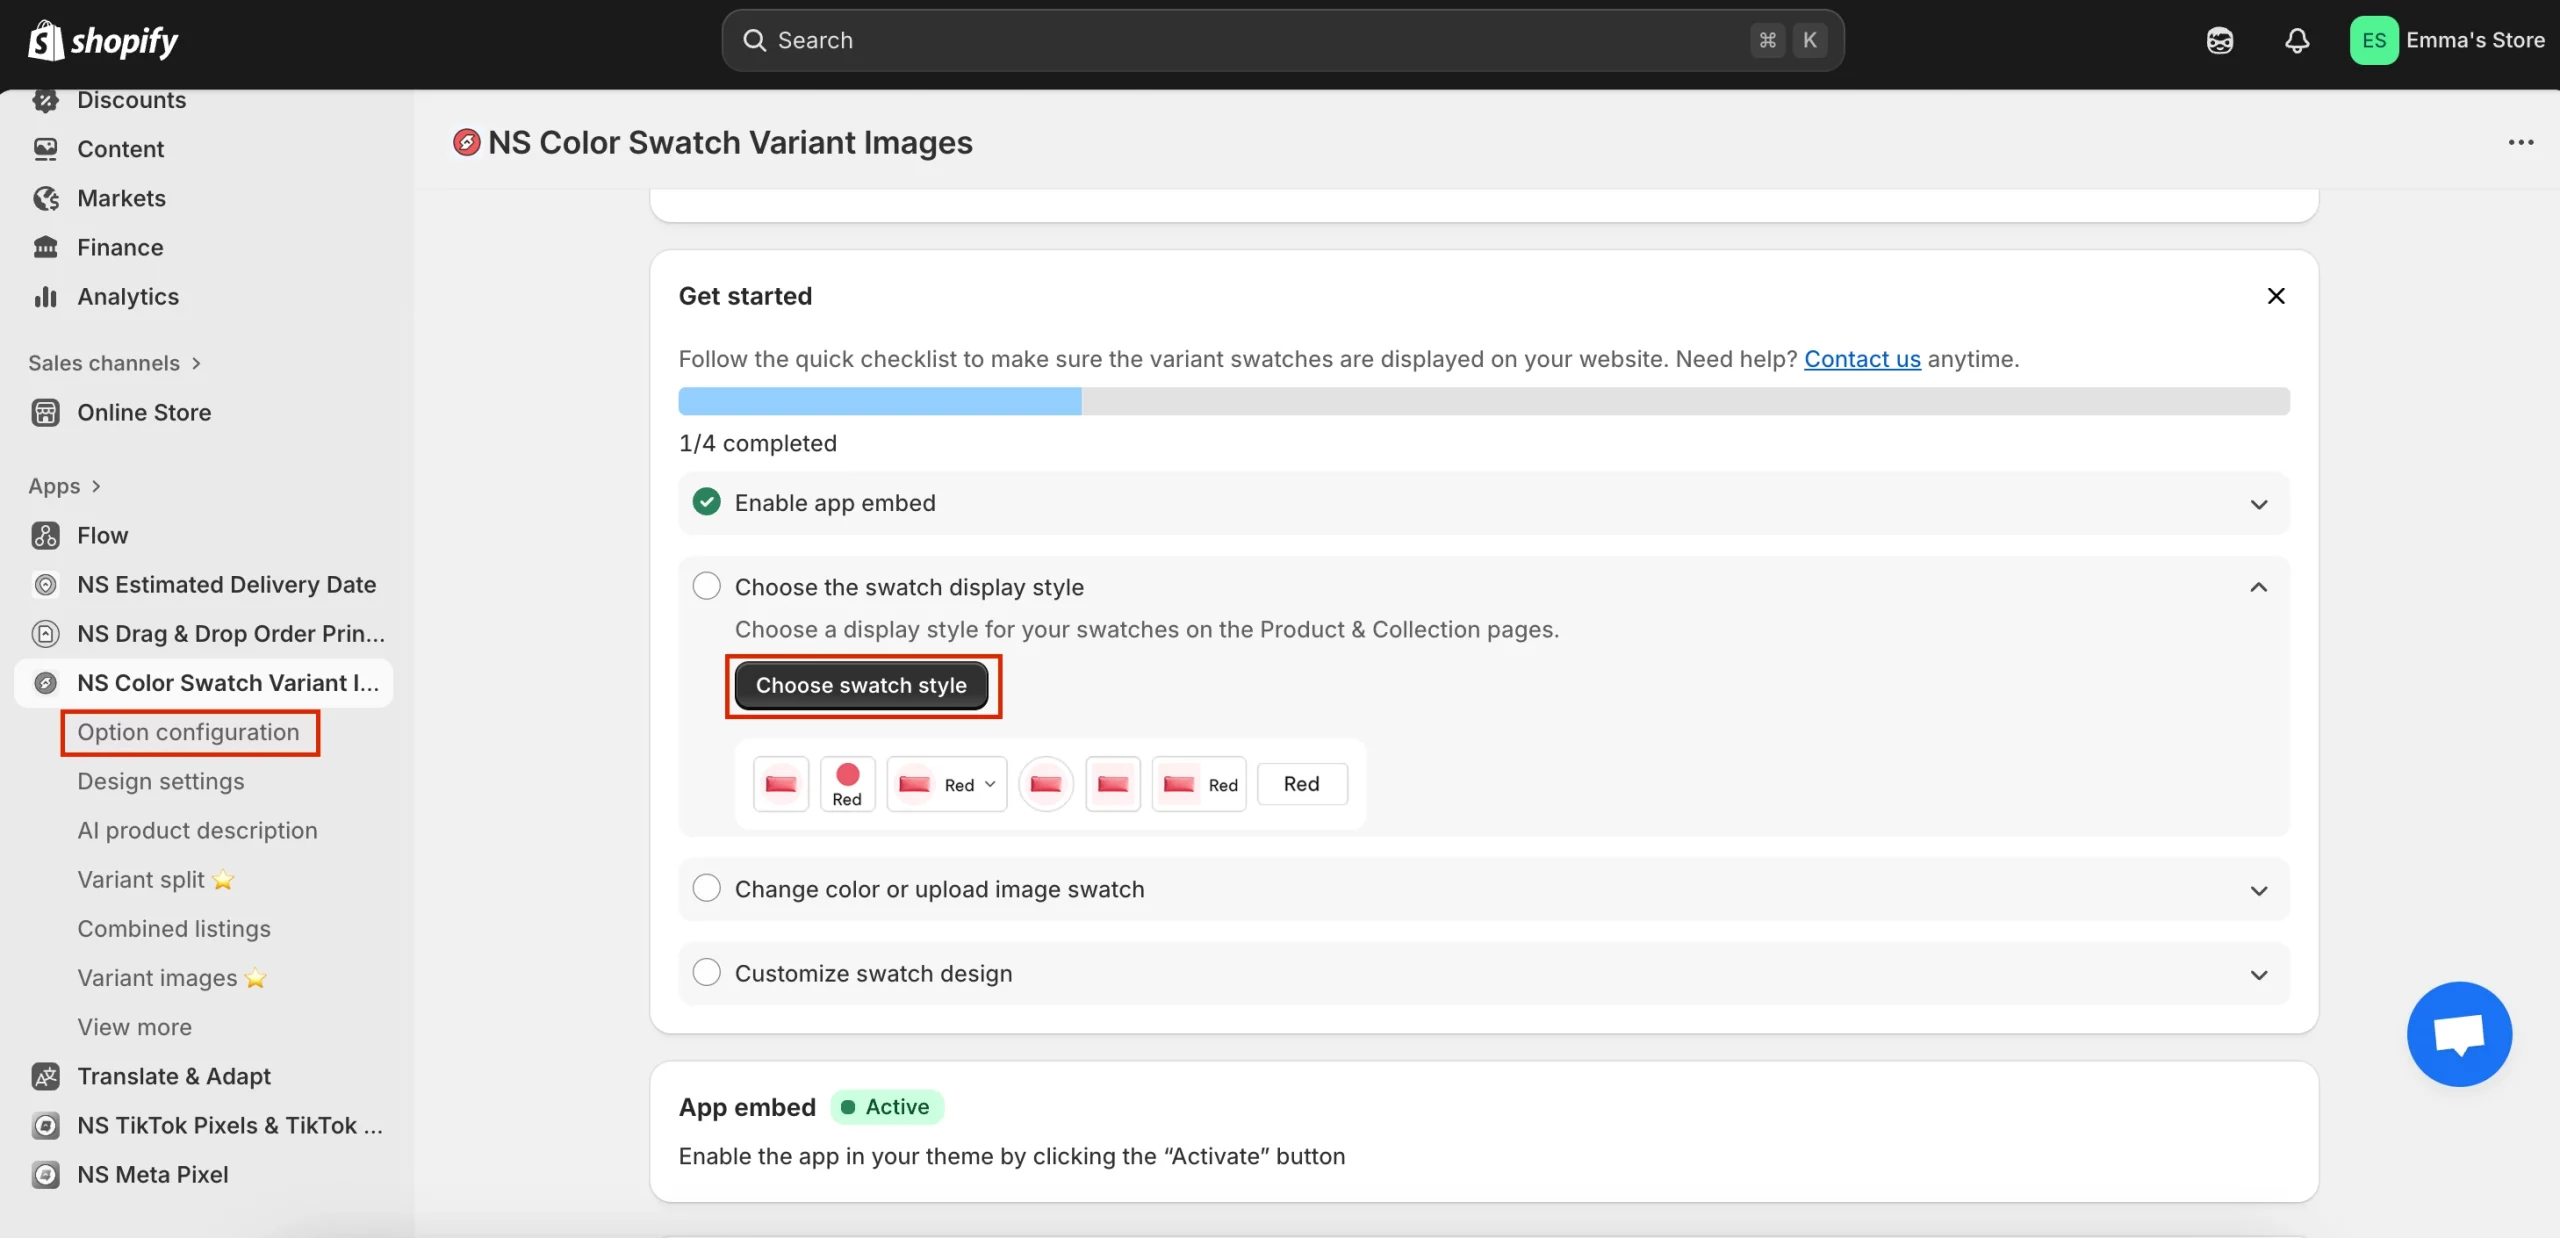
📝 The app automatically syncs the most recent 100 products that already have options.
If you can’t find the one you’re looking for, click Add Product Options to manually pull it in.
*Out-of-stock toggle: Enable this if you want to hide sold-out variants.
2. A product list will pop up, simply tick the boxes for the items you want swatches on, then hit Done. You can select multiple products at once.
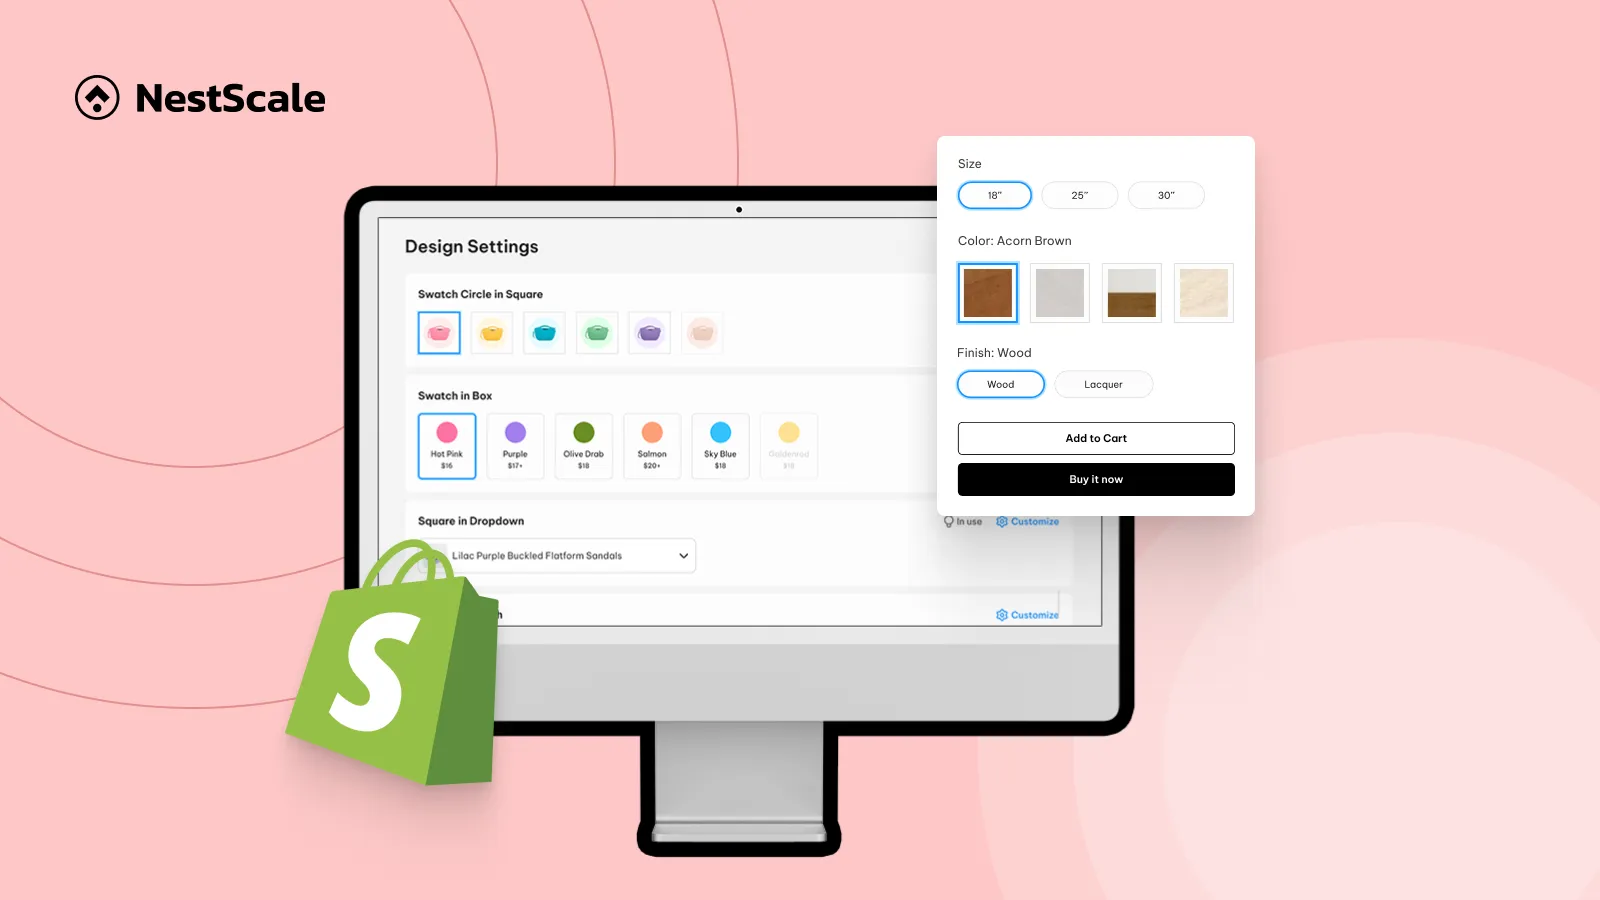
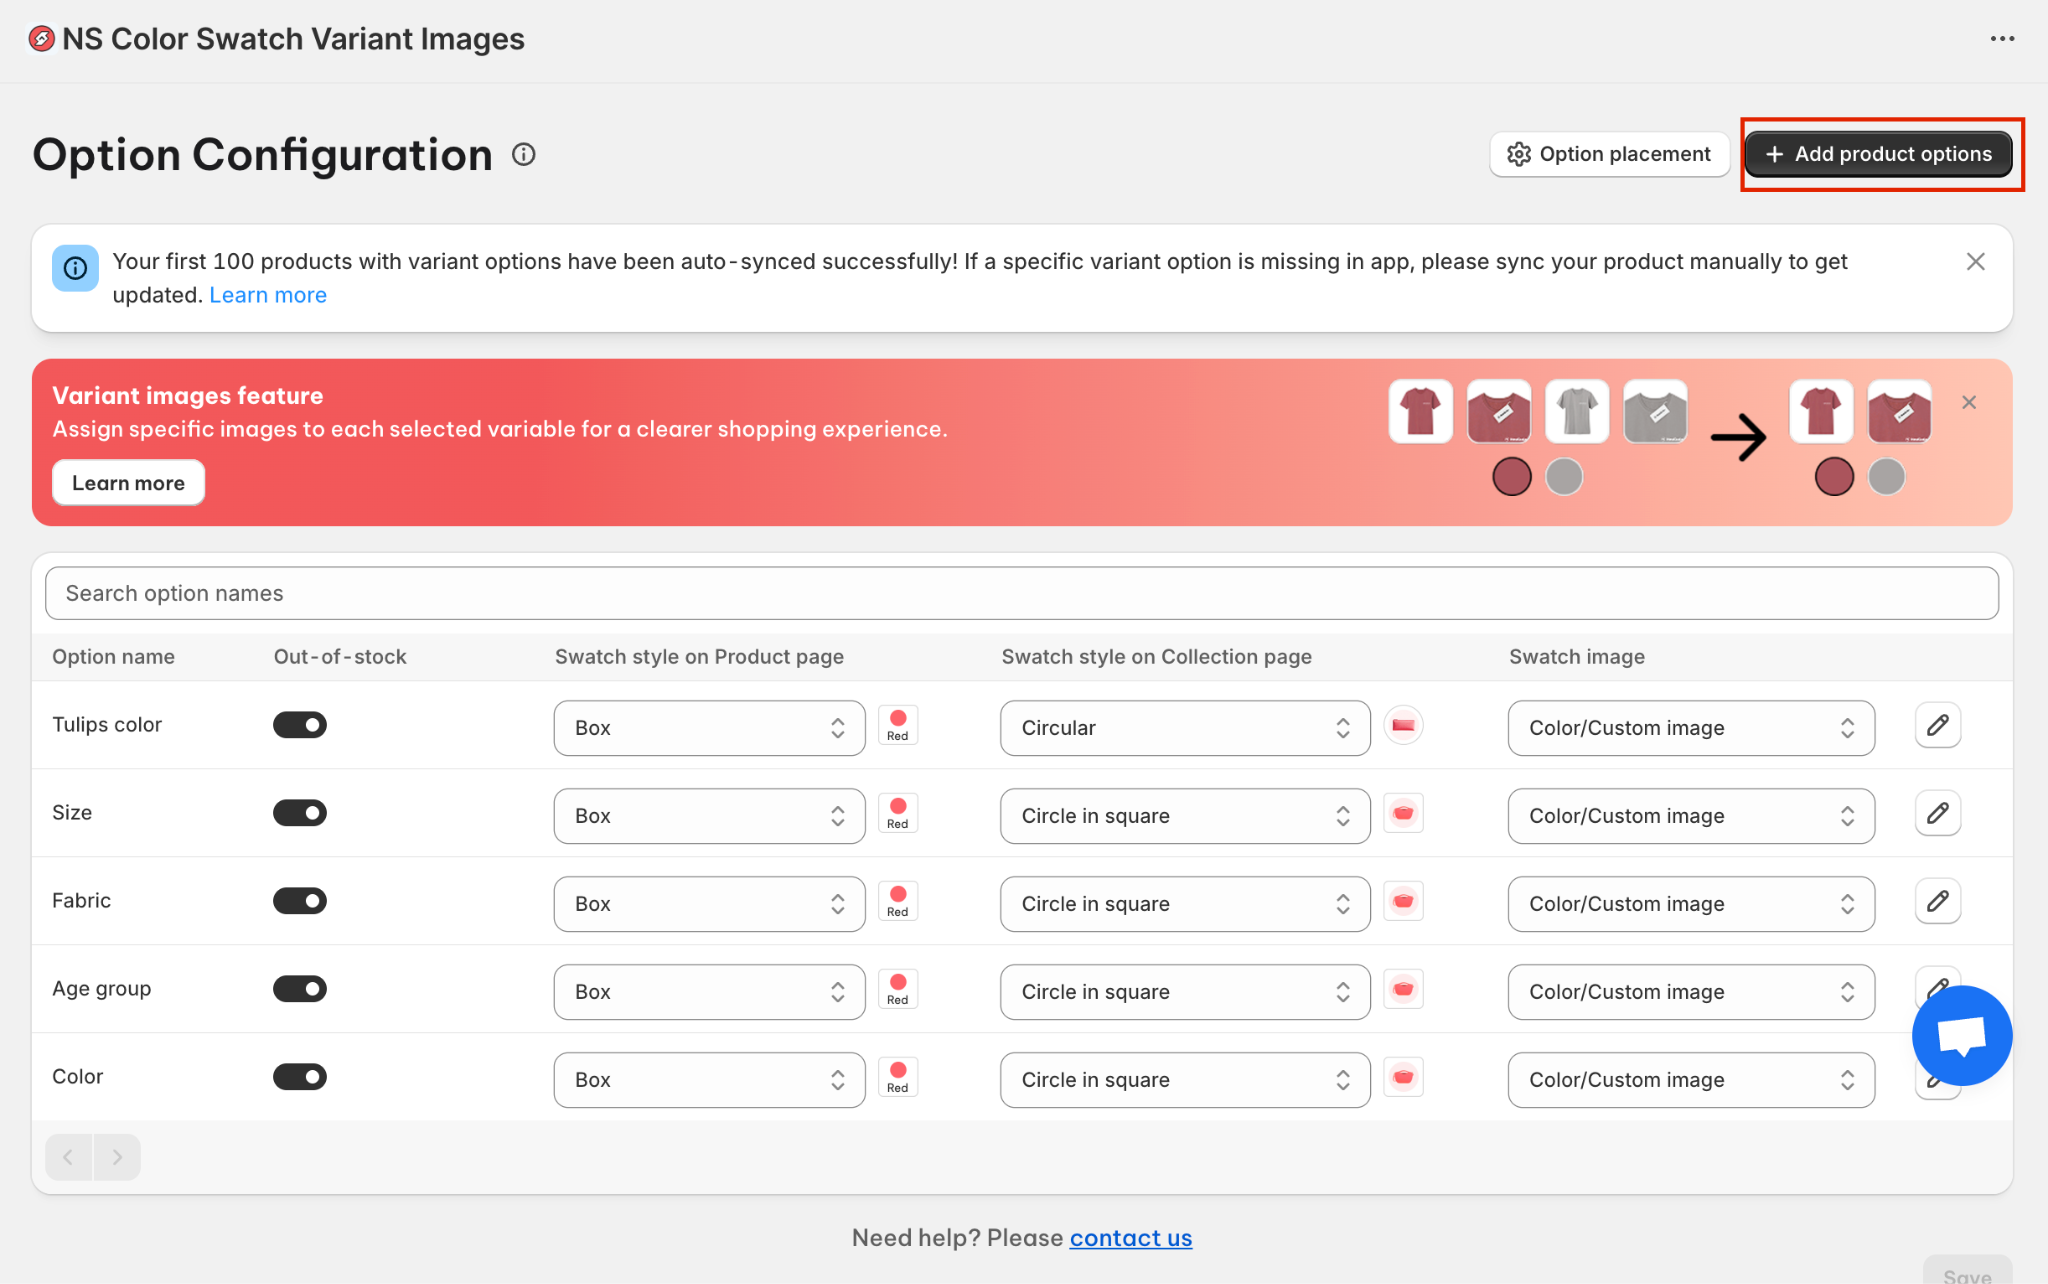
3. Find the option you want to convert into swatches and choose a swatch display style for it.
The dropdown brings multiple options like squares, circles, pills, etc. For this guide, I’m going with the Circular swatch for a clean, rounded look.
✨ You’ll also see the column to show your swatches on collection pages. Yet, this is a premium feature, so you need to upgrade from the Free plan.
4. You have two choices to display the swatches:
- Option 1: Use Shopify variant images (if your variants already have images uploaded).
- Option 2: Use Color/Custom images – pick a color from the color picker, enter a HEX code, or upload your own image.
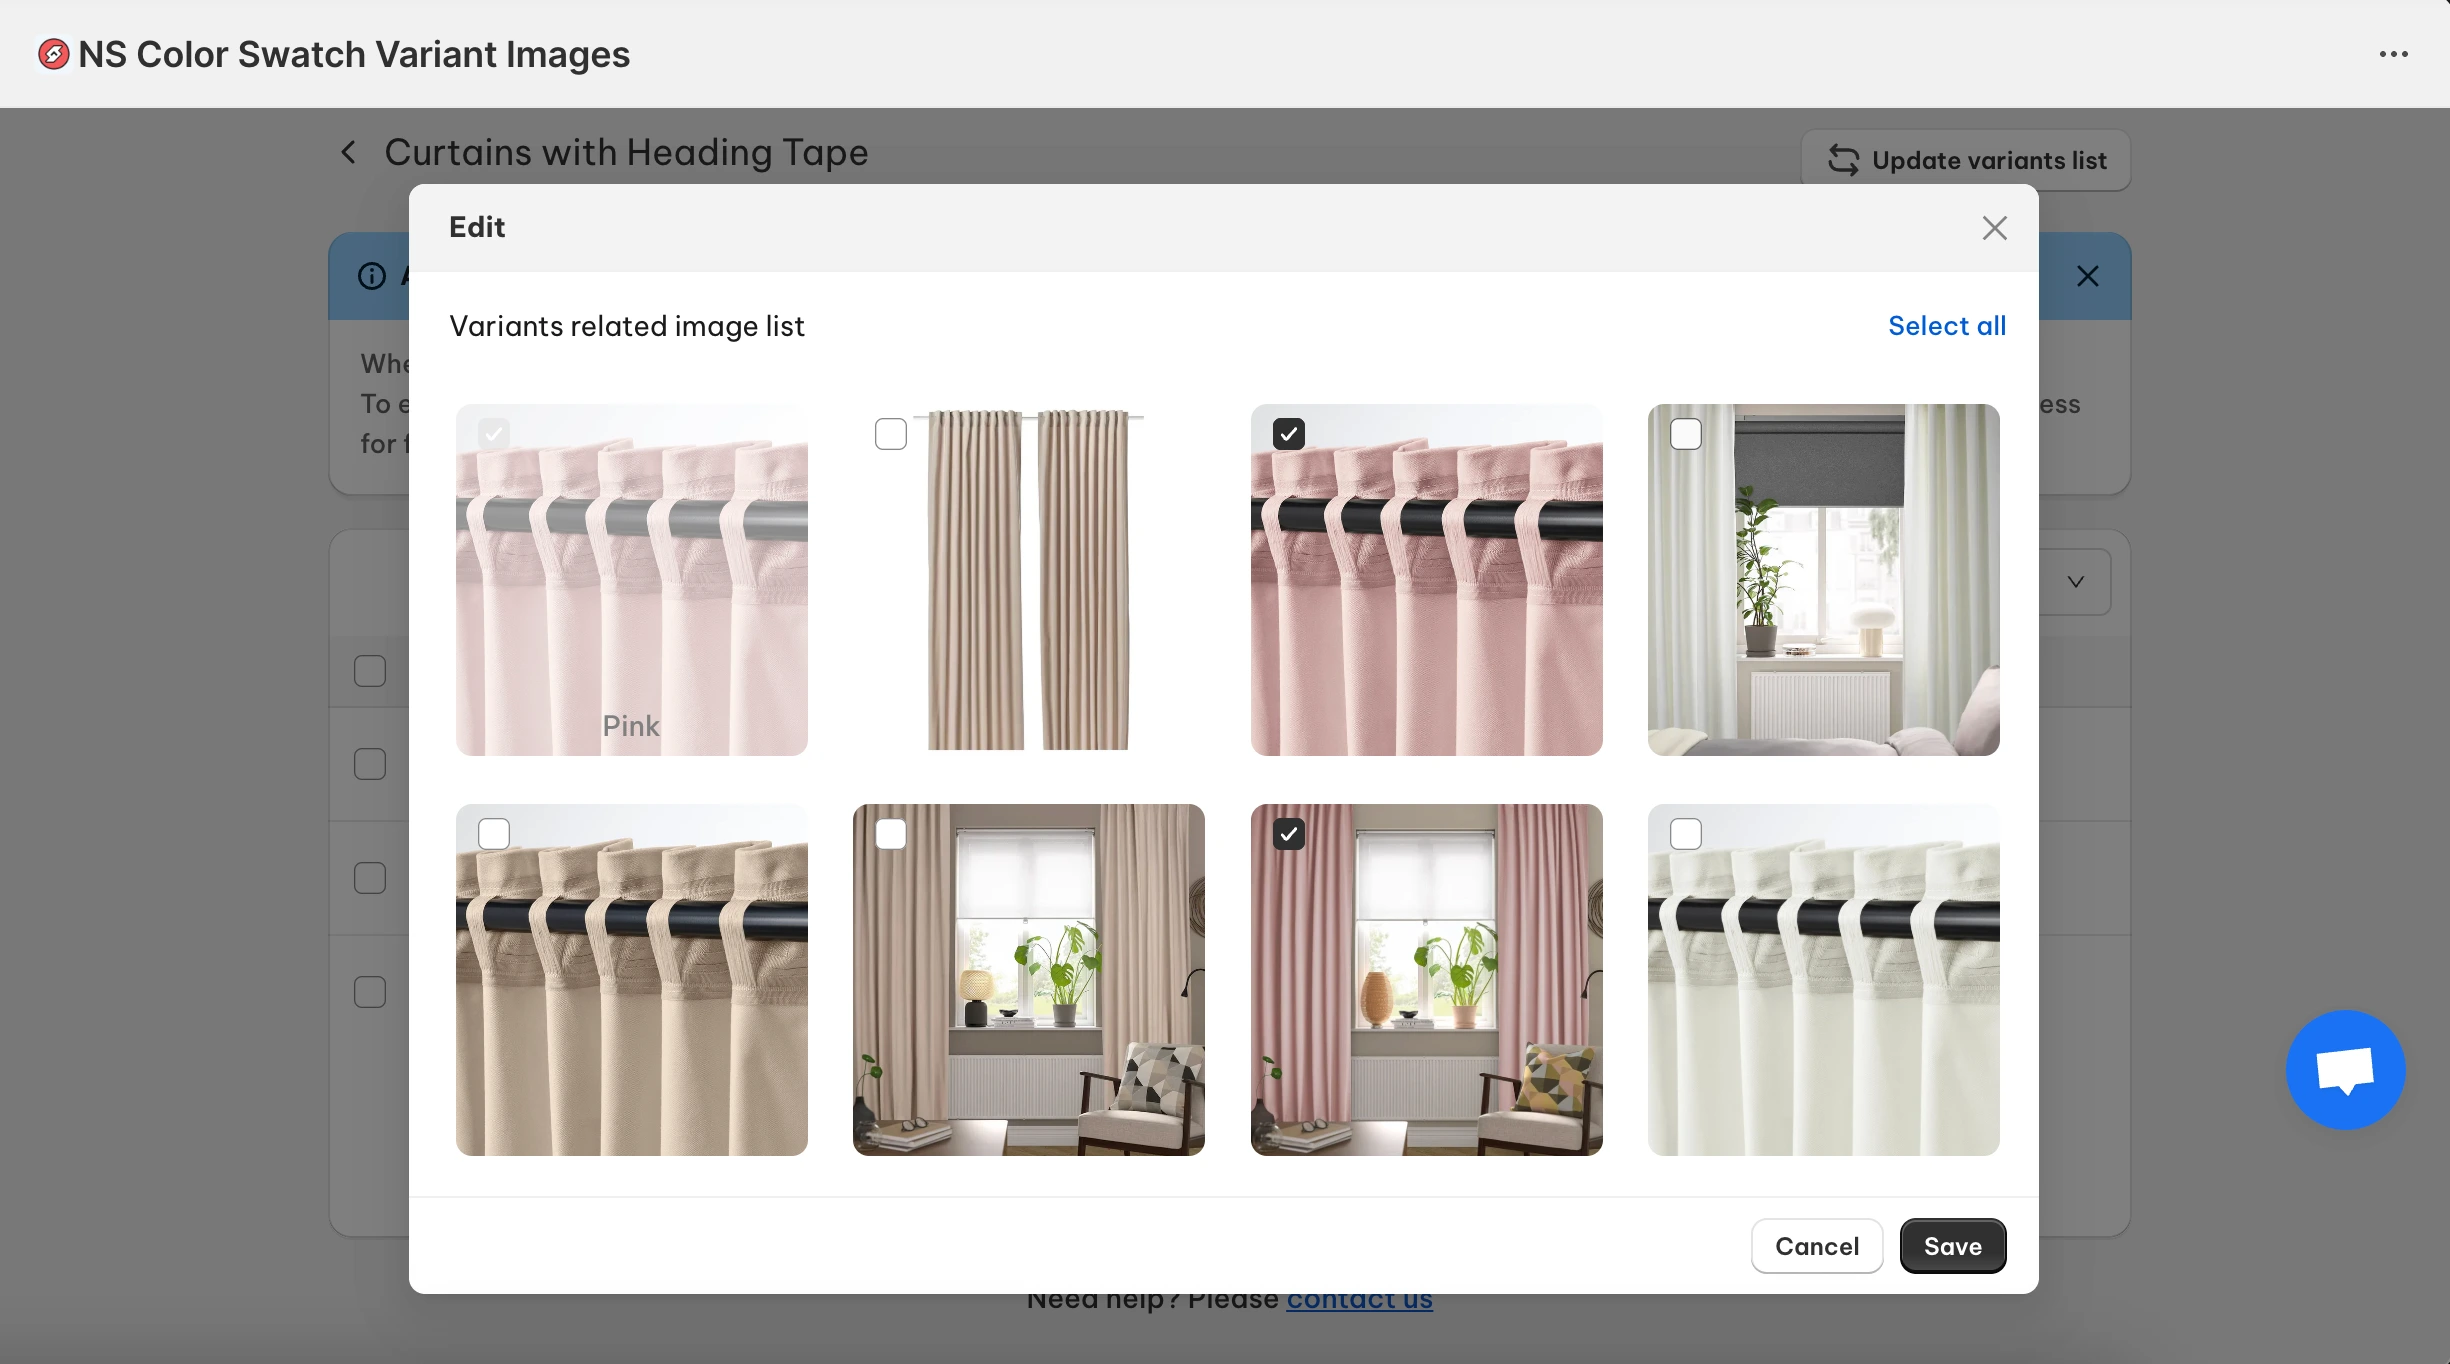
5. If you pick the Color/Custom image option, click the pencil ✏️ to upload your image or choose a color from the color picker.
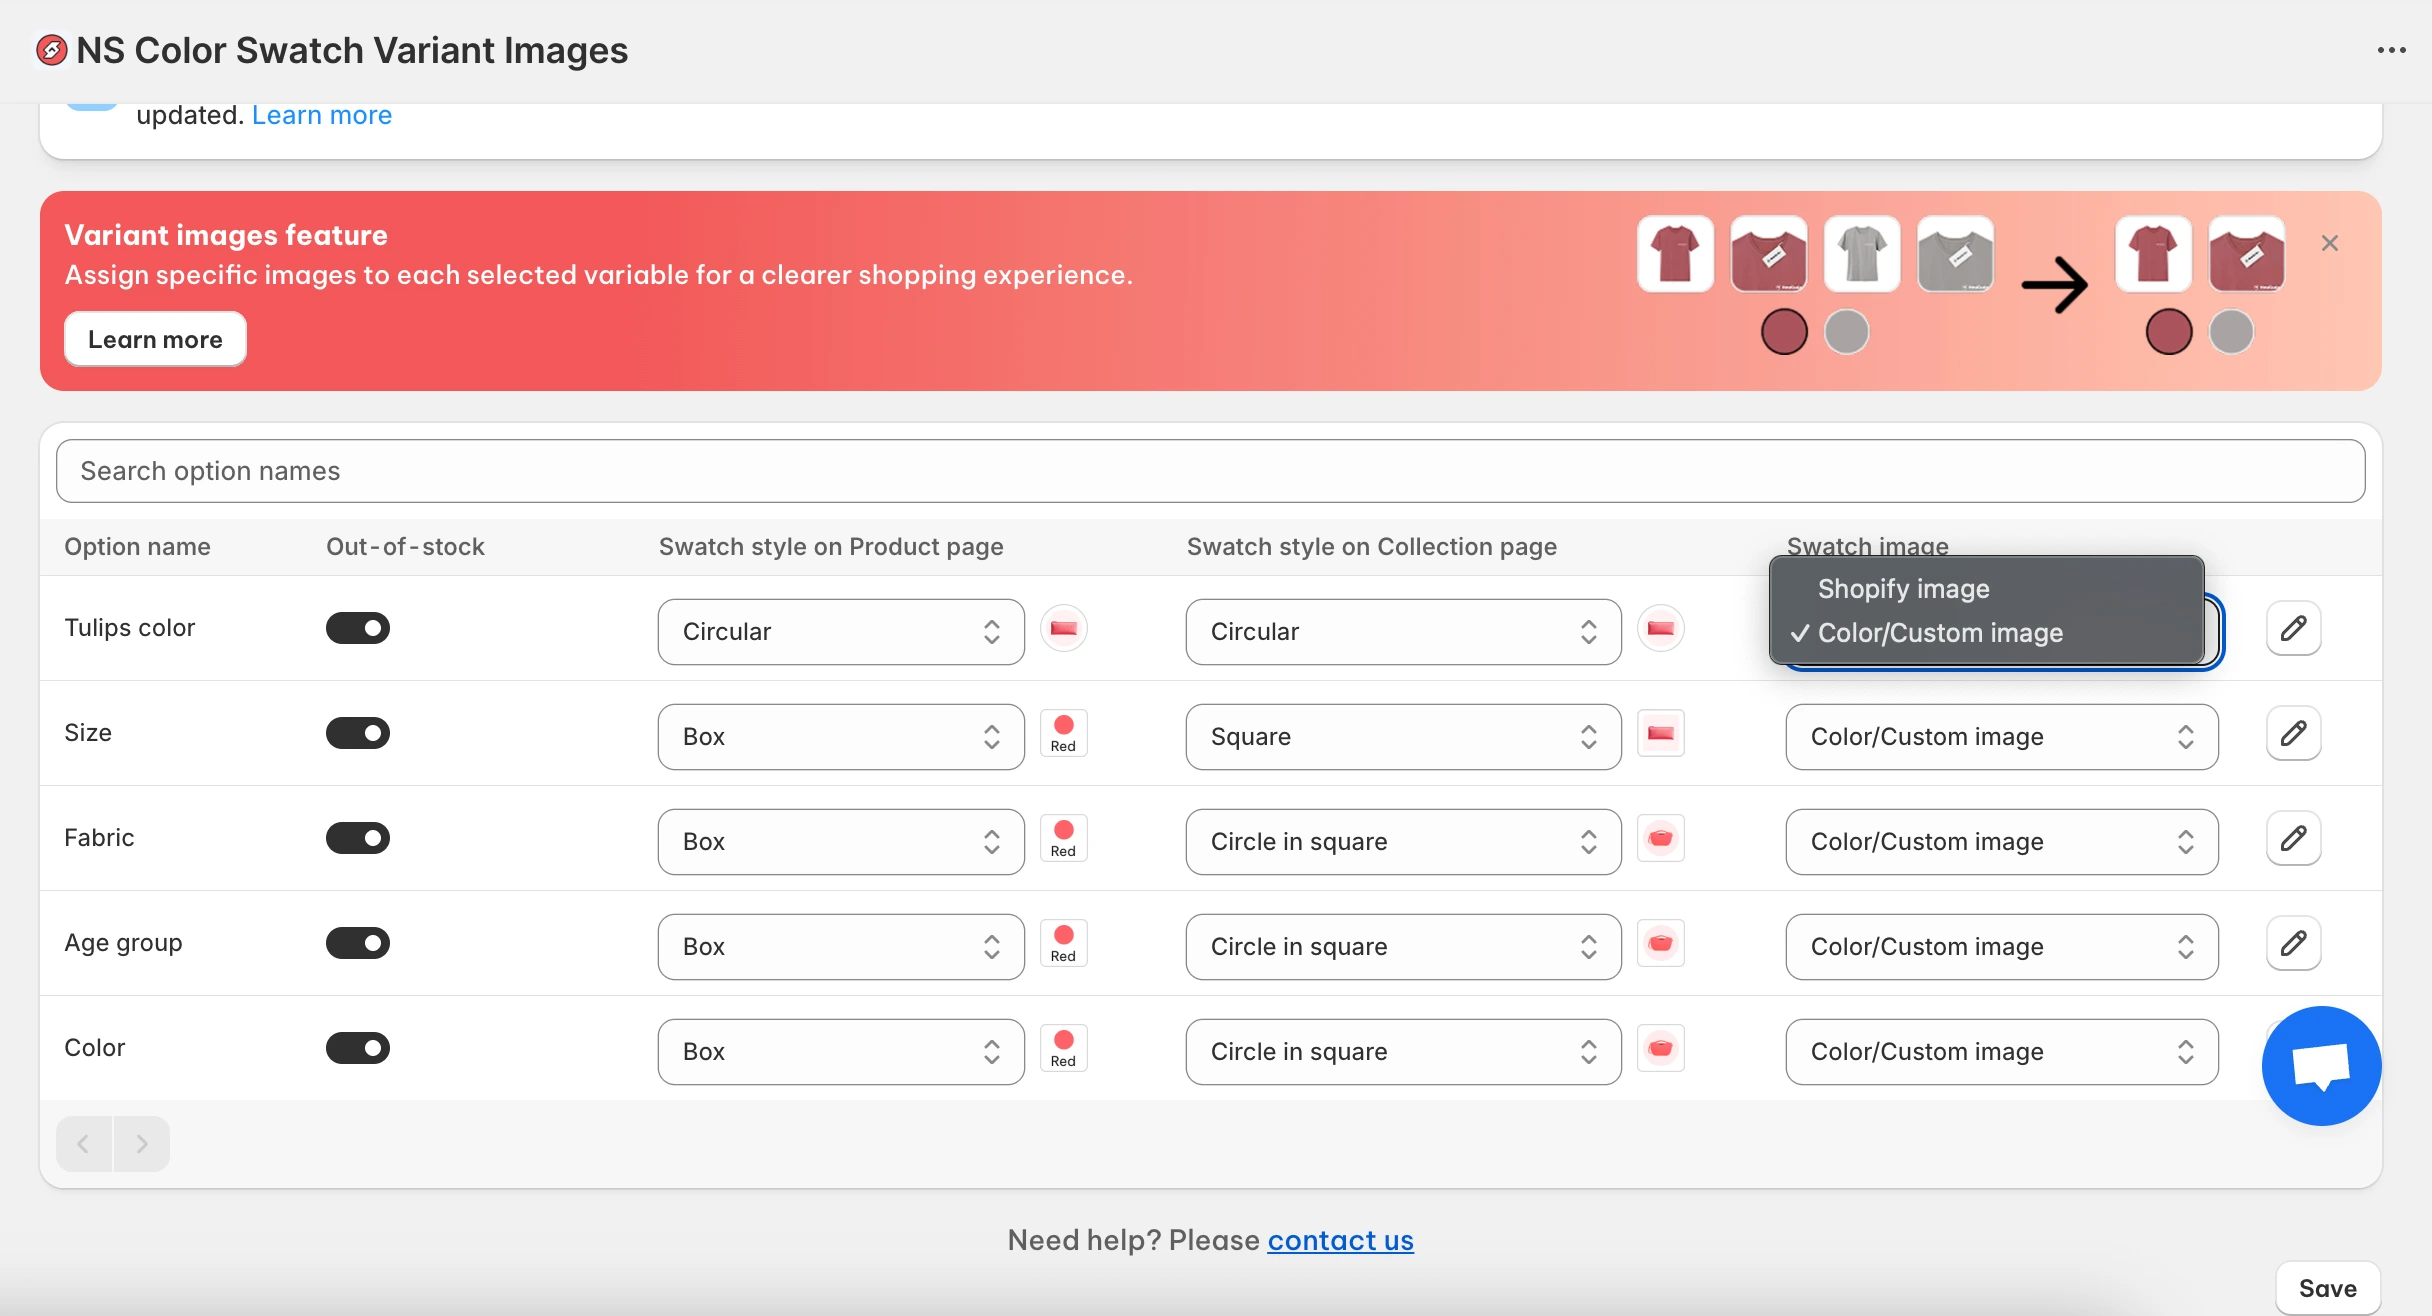
6. In the pop-up window, set the color or upload an image for each variant. Double-check that each swatch is linked to the correct variant name.
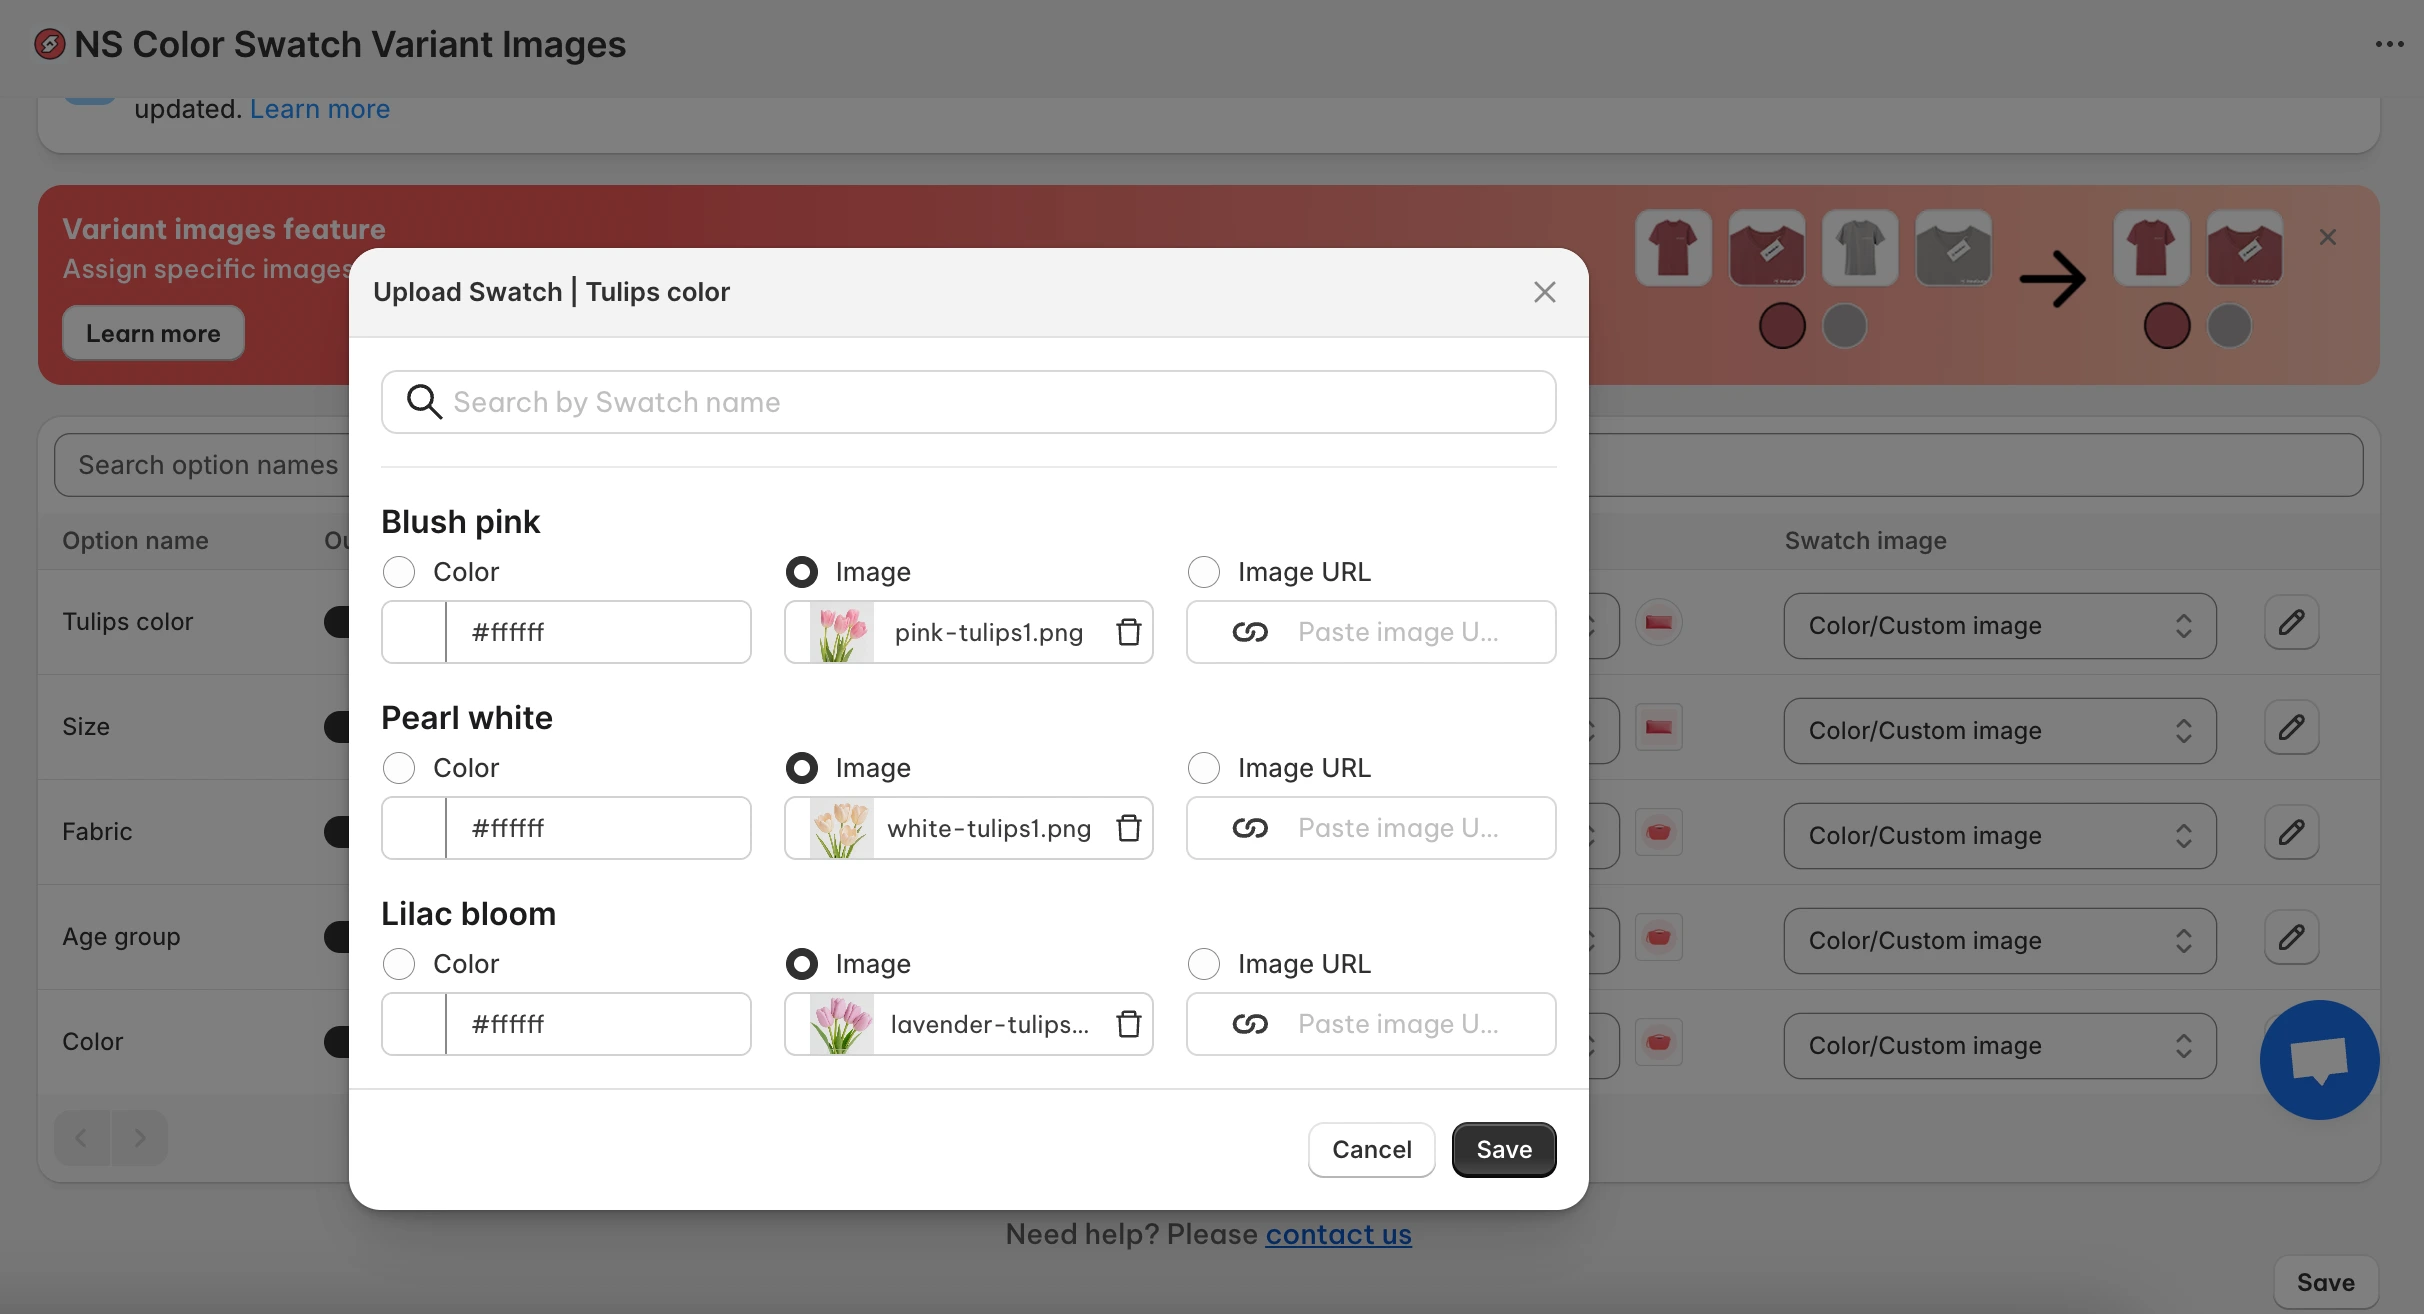
7. Click Done, then Save. And your swatches are now live on your store.
But we’re not stopping here. Let’s make them match your store’s style perfectly.
Step 4: Customize your color swatches design
1. In the app’s sidebar, click Design Settings.
2. Find the swatch style you chose earlier (look for the “In Use” label) and click Customize.
Since I picked Circular Swatch, I’ll be editing that one.
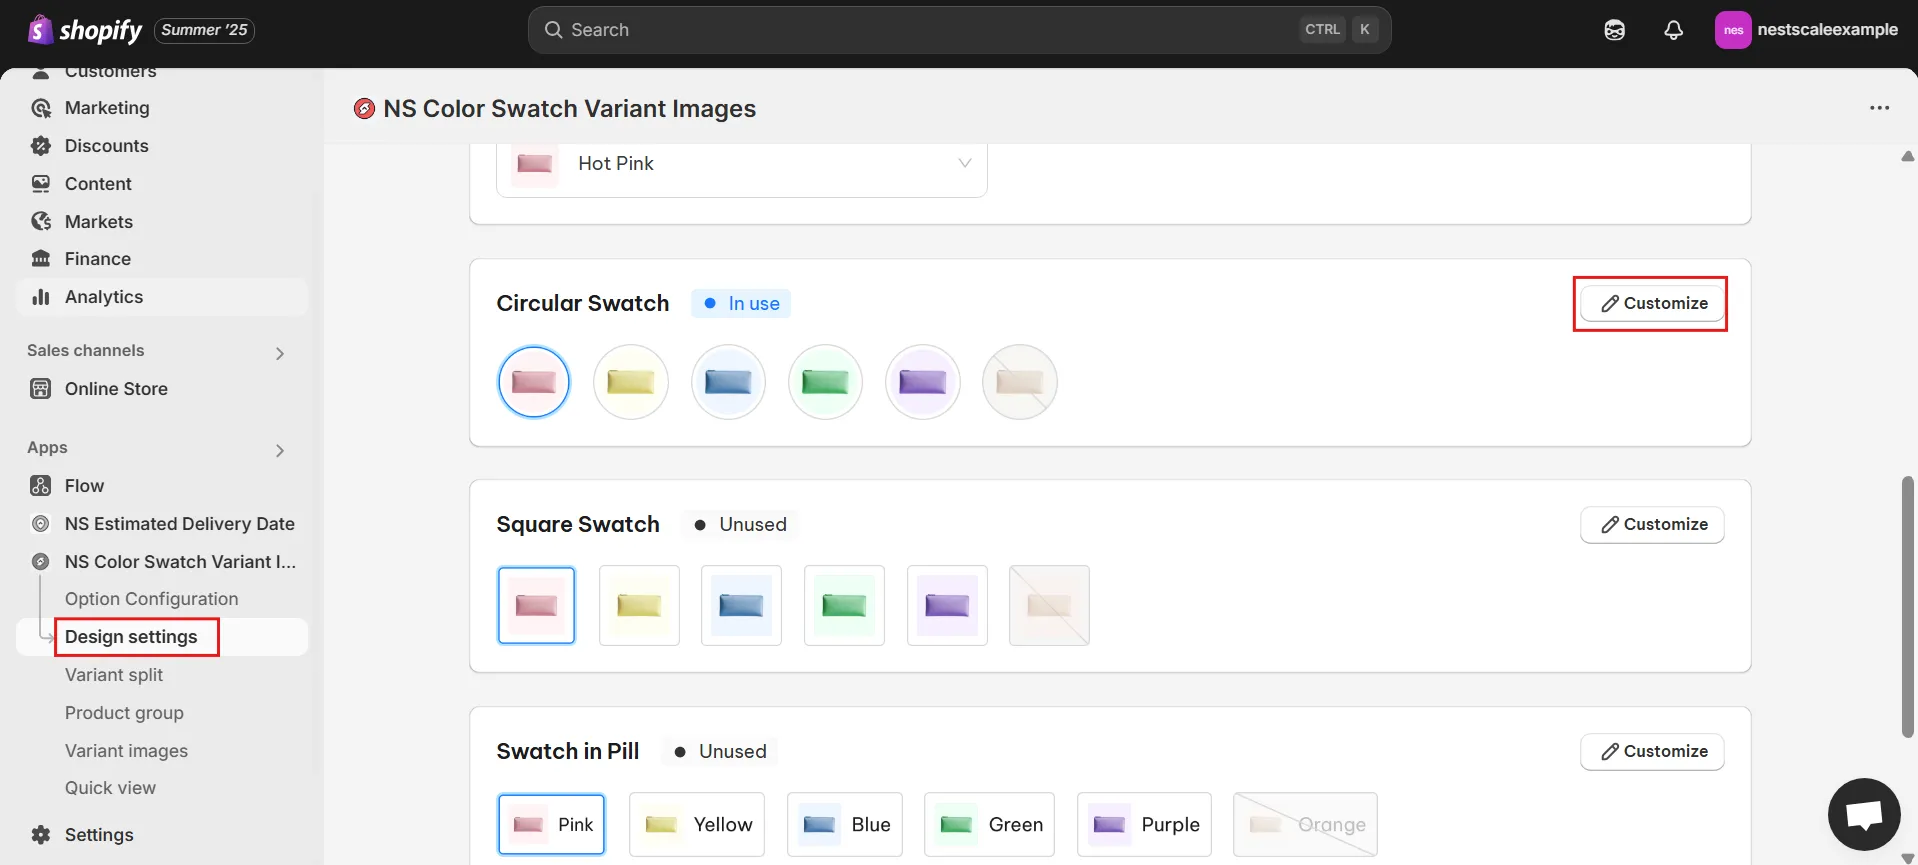
3. There are five sections you can tweak:
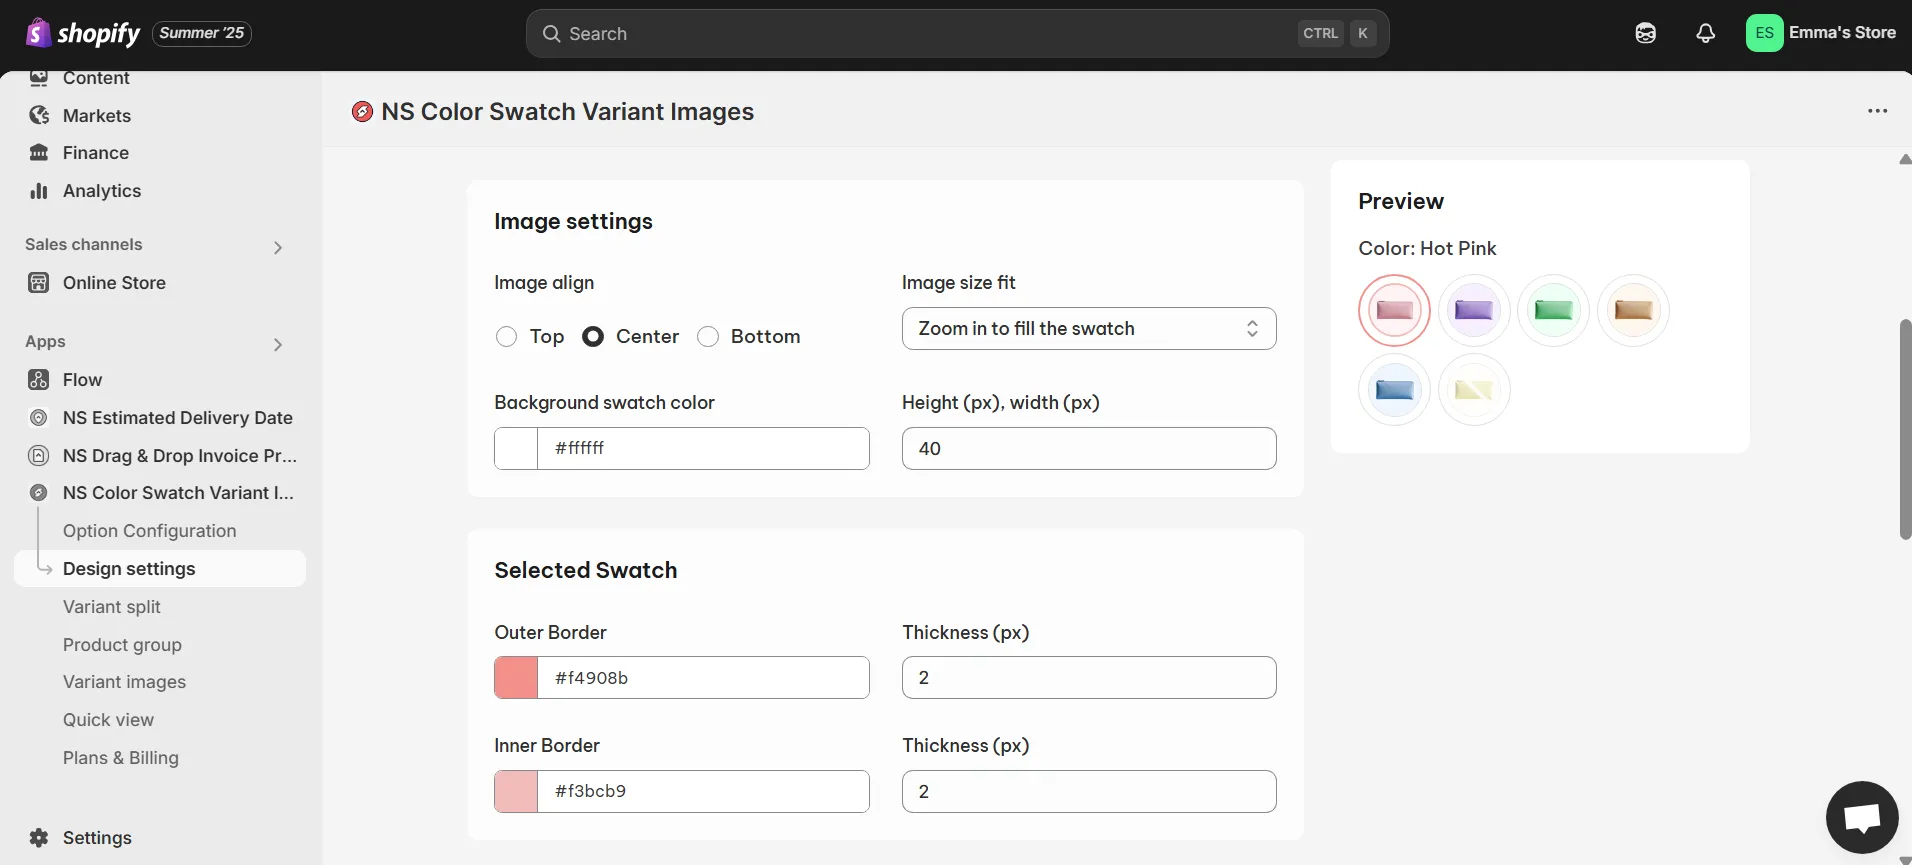
- General Settings: Size, spacing, border thickness.

- Image Settings: Zoom level and position on hover.
- Selected Swatch: Border color and thickness for the selected option.
- Unselected Swatch: How unselected swatches look.
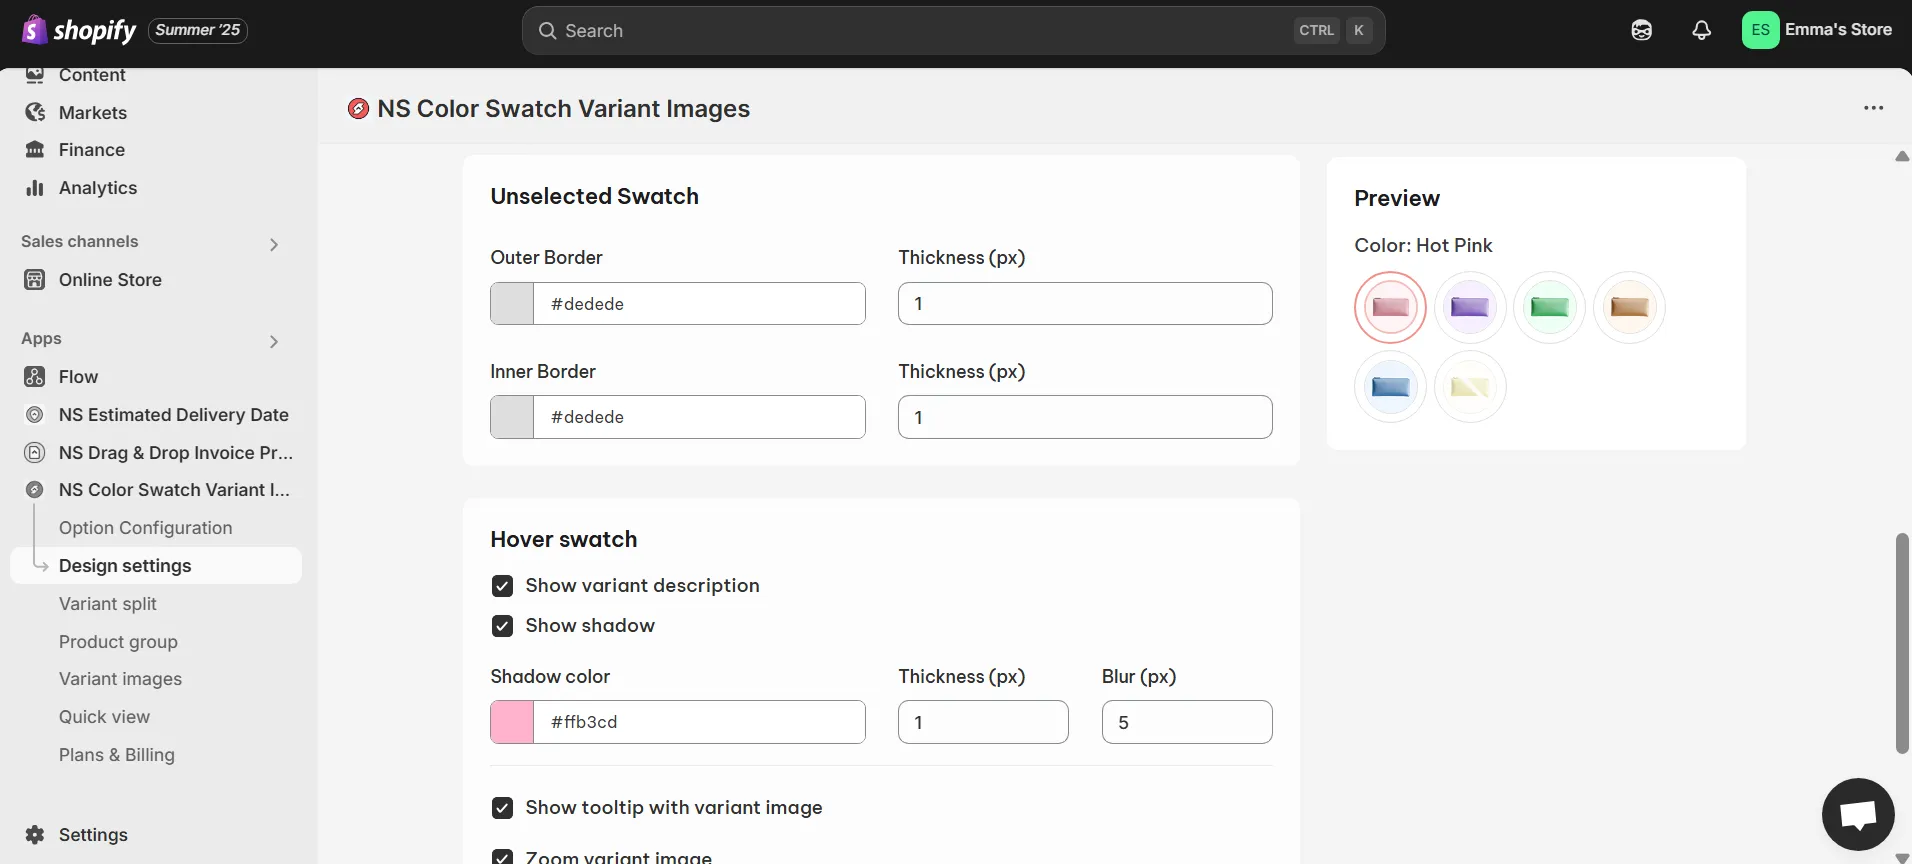
- Hover Swatch: Show variant names, shadows, tooltips, or zoom effects.
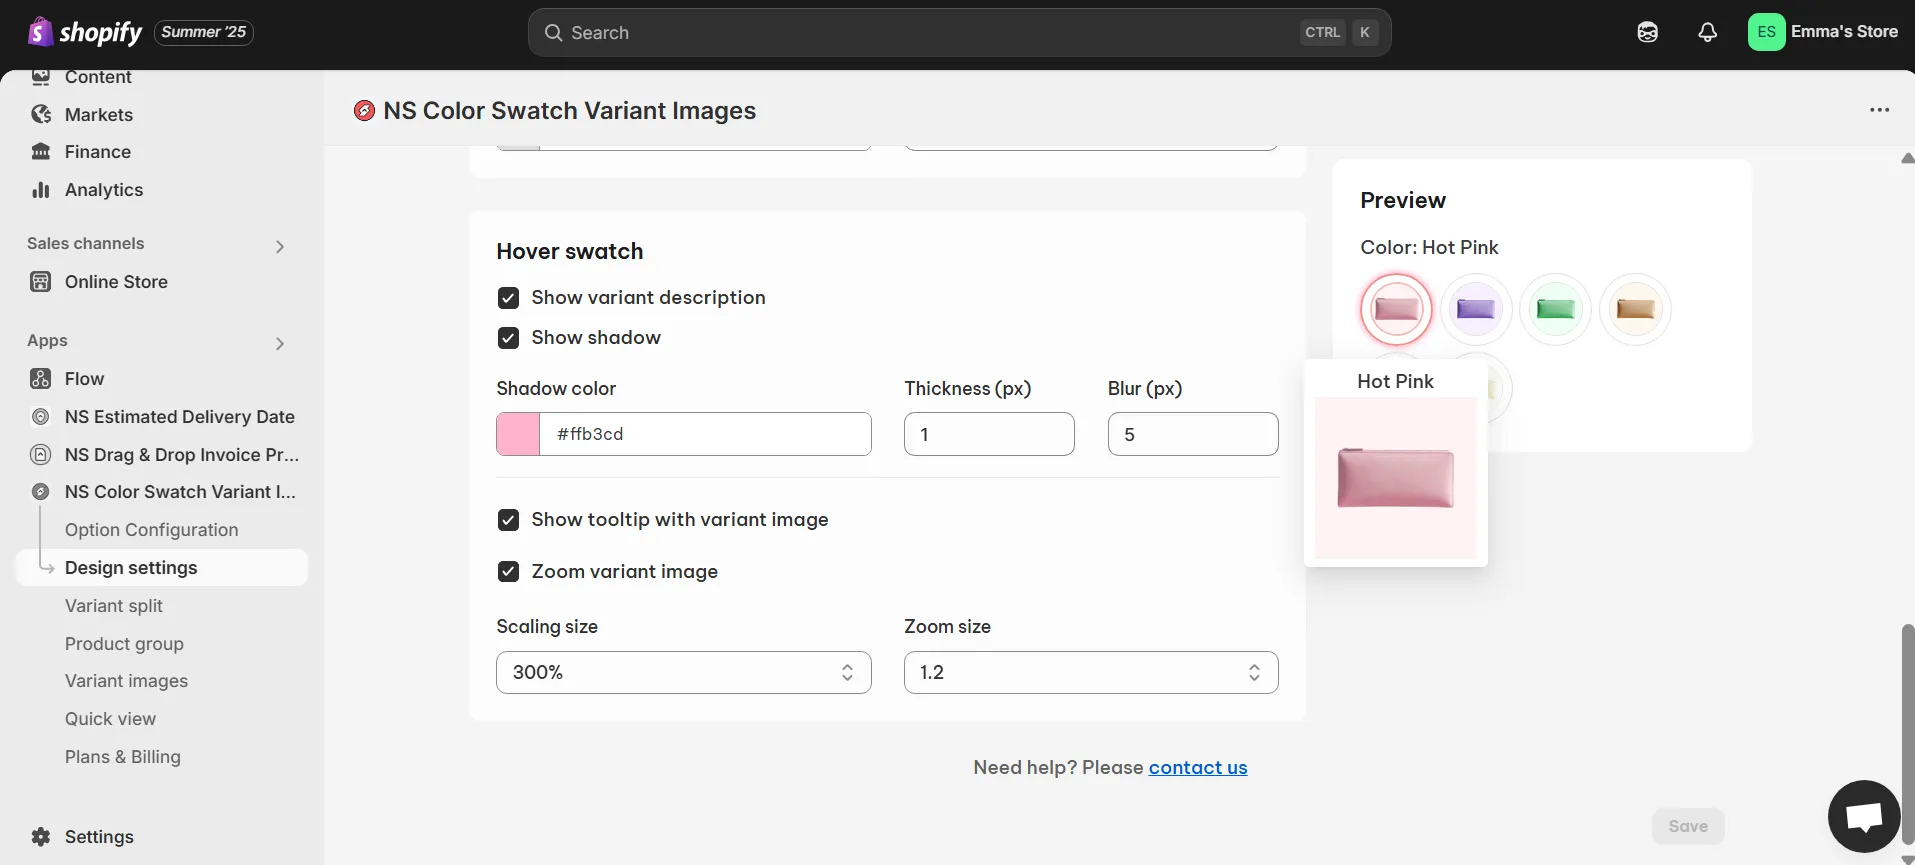
💡 Use the Preview panel to see changes instantly before saving.
4. When you’re happy with the look, click Save.
Then head to your storefront and check the new swatches ✨

✨ NS Color Swatch Variant Images also offers many must-have features for your store:
- Color swatches on the collection pages
- Automated variant image swatches
- Multiple variant images (Display images to specific variants)
- Separate products as variants (Keep individual URLs for SEO)
- Quick view product details
- AI-generated product descriptions
FAQs
How to add Shopify color swatches on the collection page?
To add Shopify color swatches on the collection page, you need to upgrade to the Growth or Pro plan of NS Color Swatch Variant Images. Then, just choose the swatch style for your collection swatches from the Option Configuration settings, and you’re all set.
It’s possible to use custom code to add color swatches on collection/ category pages. Yet, if you don’t have a strong technical background, the coding process may be challenging as you’re likely to make errors.
How to add color swatches in the Prestige theme on Shopify?
Method 1: Using Prestige’s built-in color swatches
- Go to Shopify Admin > Online Store > Themes.
- Click Customize on the Prestige theme.
- Navigate to the Default Product template.
- Look for the Variant picker settings under the Product page section.
- In Color selector type dropdown menu, select Color swatch.
Method 2: Using NS Color Swatch Variant Images: While our app supports most Shopify themes, you can also use the app with the Prestige theme to enable swatches.
👉 Read the full tutorial: How to Add Color Swatches for Shopify Prestige Theme? (2025)
How to change images based on the selected swatch in Shopify?
You can use the Variant Image feature in NS Color Swatch Variant Images to show only relevant variant images based on the selected variants instead of showing all the images (Shopify default).
The app offers 2 simple methods (1) auto-assignment based on the order of variant images in Product media (2) manual-assignment for each variant.