Are you looking to create an effective welcome automation email for your ecommerce store? Welldone, you’re in the right place! In this blog, we’ll be sharing with you 5 simple steps to create a compellingshopify automated welcome email that will help build a strong relationship with your customers. We’ll also be sharing some elements that make a welcome email effective, so be sure to read on!
What is a Shopify welcome email?
A welcome email is a message that you send to someone who has just signed up to use your ecommerce store. It’s a friendly way of saying “hello” and welcoming them to your community.
In your welcome email, you can introduce yourself and your store, explain what your store is all about, and let them know how to get started with shopping on your website. You can also include some special offers or discounts to encourage them to make their first purchase.
It’s important to make your welcome email friendly and welcoming. This can help build a positive relationship with your new customers. You want them to feel excited about using your store and to keep coming back for more.
So, be sure to take some time to craft a great welcome email. Then, you’ll be on your way to building a loyal customer base for your ecommerce store!
Elements of an effective shopify automated welcome email
Timely
In order to capitalize on the excitement that new subscribers have for your brand, it’s important to send a welcome email in a timely manner. By doing so, you will be at the forefront of their minds and increase the likelihood of converting them into paying customers.
Clear subject line
Crafting a clear and engaging subject line is crucial for the success of your welcome email. The subject line can make or break whether a subscriber reads your email or not, so make sure it is personalized and urgent.
Personalization
Personalization is key when it comes to making a connection with your subscribers. Use their name in the greeting to show that you care about them as an individual and not just another name on your list. This small touch can go a long way in building trust and loyalty.
“Next step”
Don’t leave new subscribers hanging, guide them towards the next step. Recommend your best content and offer valuable resources to keep them engaged with your brand. This can include links to archived newsletters, top blog posts, eBooks, videos, and other content.
Incentive
Offering something special to your new subscribers can be the cherry on top. Many welcome emails include an offer for a discount on a first purchase or a free shipping code. This can incentivize subscribers to make their first purchase and increase the likelihood of turning them into repeat customers.
Encourage social media follows
Make sure to include links to your social media platforms in your welcome email, but also ask your subscribers to follow you on their preferred platform. By doing so, you can ensure that they are always connected with your brand’s highlights. Provide them with a reason to follow you, such as exclusive offers, sneak peeks, and other perks that will keep them engaged with future welcome email content.
Ask for referrals
Ask your subscribers to refer a friend to join your email list. Referred subscribers tend to be more engaged than subscribers from other sources. Include a refer-a-friend link to make it easy for subscribers to share with others.
Use visuals that pop
Use colorful and attention-grabbing visuals in your welcome email template to create an engaging experience. Different colors evoke different emotional reactions, so stay true to your branding but don’t be afraid to experiment. With people receiving hundreds of emails every day, it’s important to stand out in the inbox with a bold and responsive design.
How to customize your welcome emails in Shopify
Here is a comprehensive guide on how to personalize your greeting emails on Shopify. We will take you through each step to access the welcome email template, which will allow you to create an email that is uniquely tailored to your brand and customers.
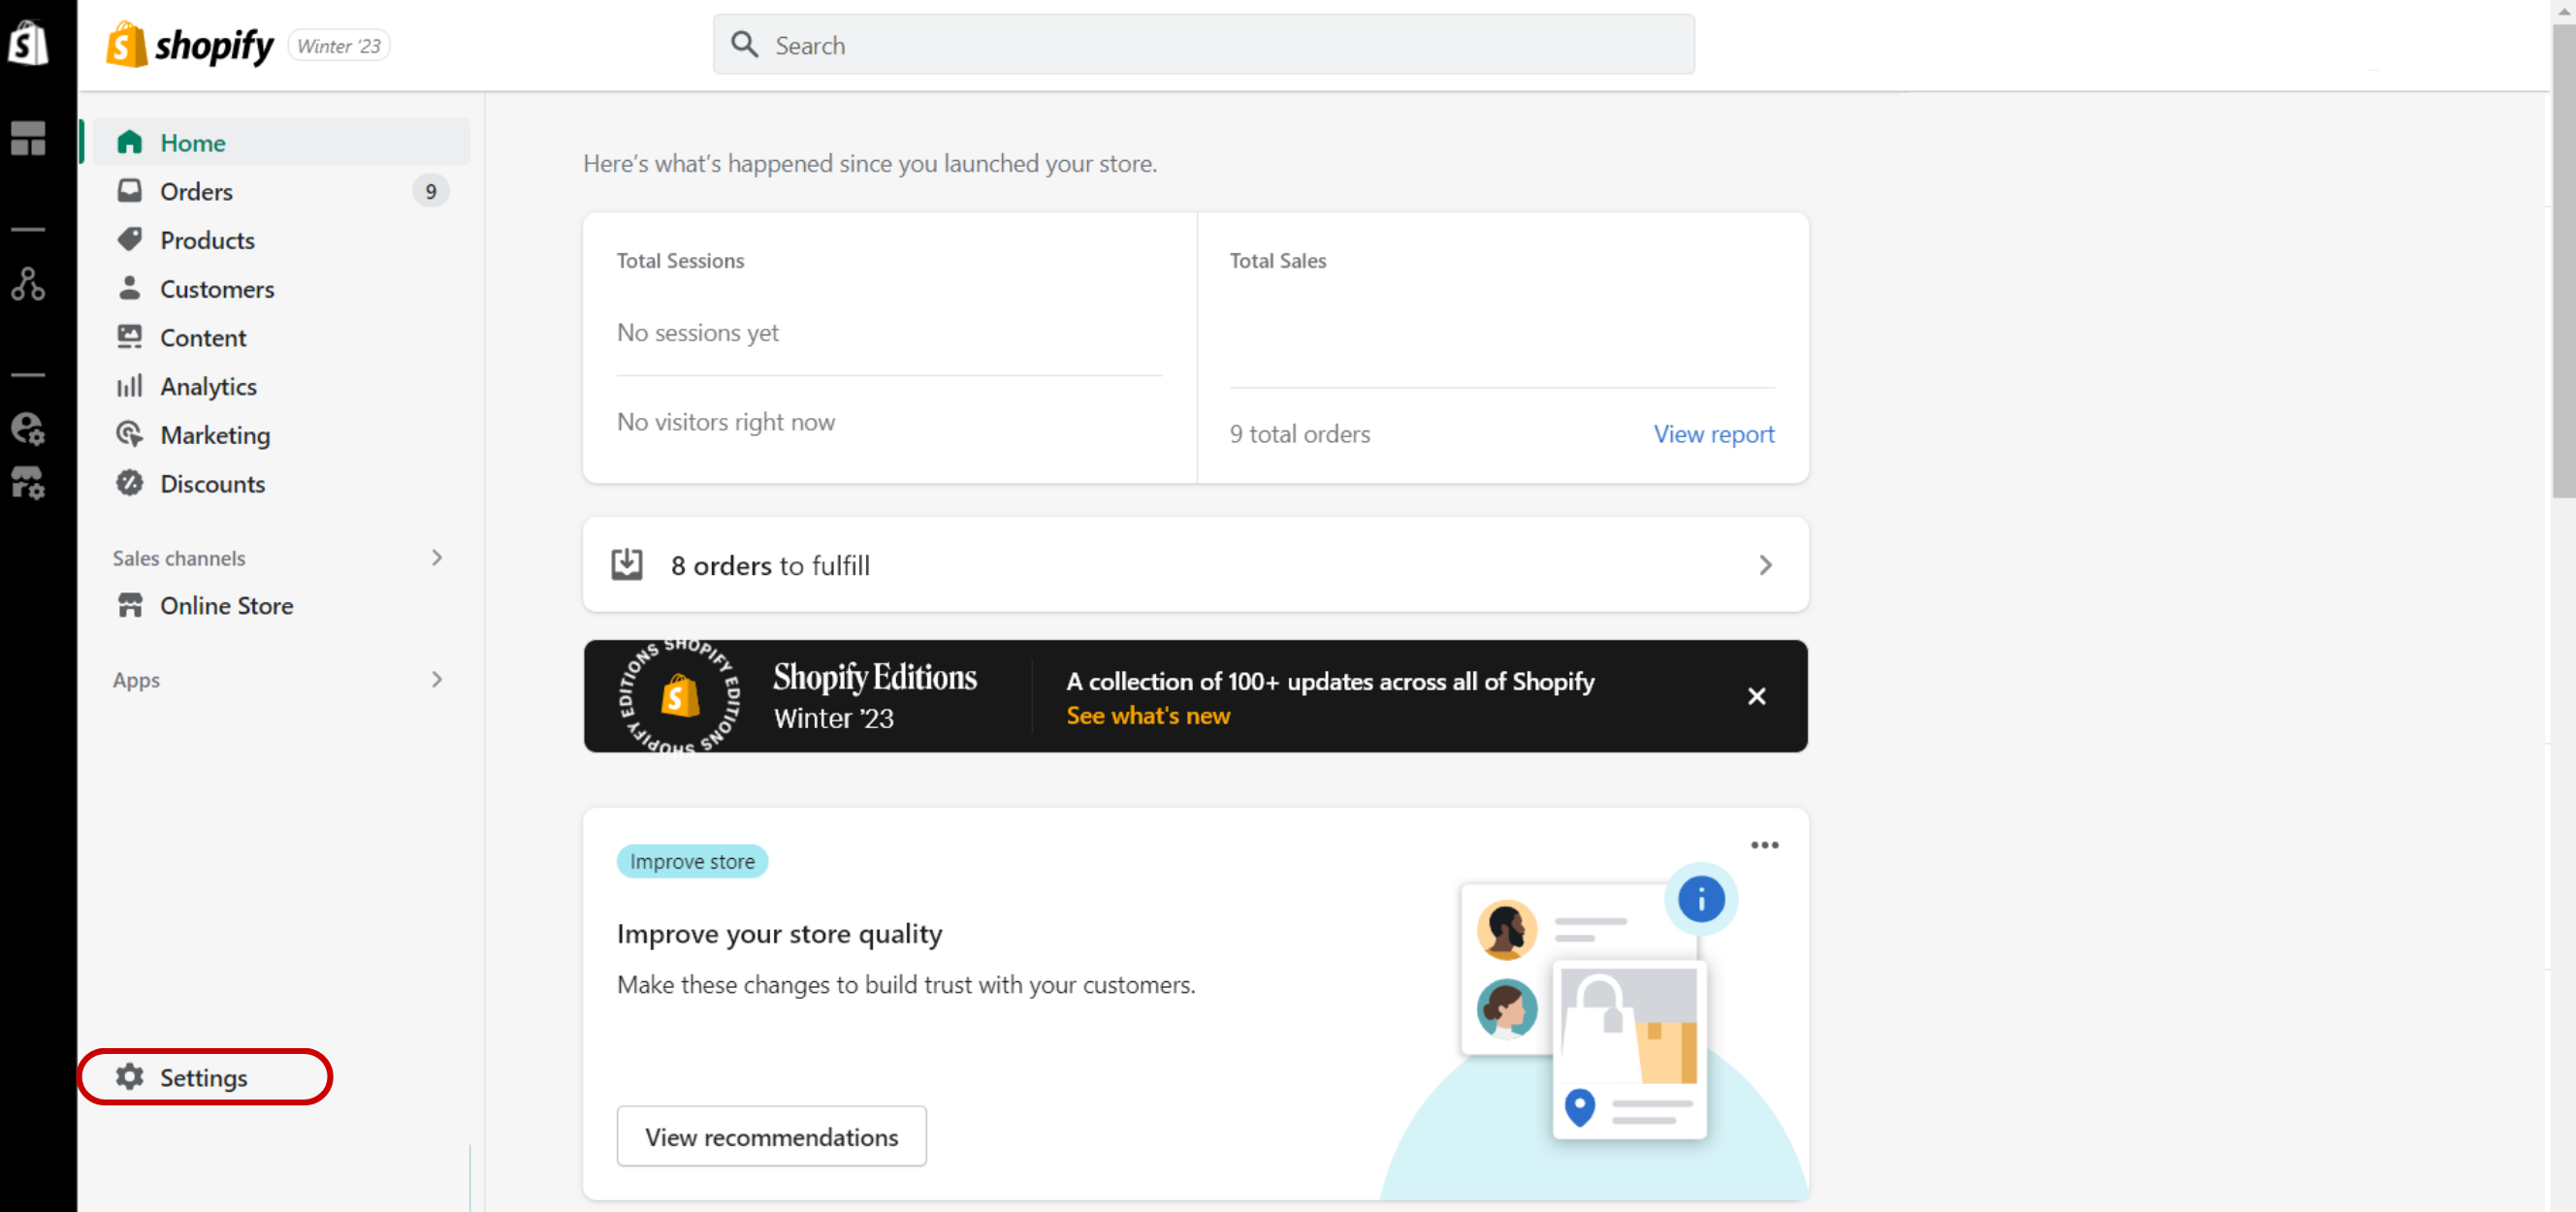
Step 1: Access the Shopify Admin Panel
To access the email templates on Shopify, you must first log in to your Shopify admin panel. After successfully logging in, go to the left-hand side of your screen and select the “Settings” tab.
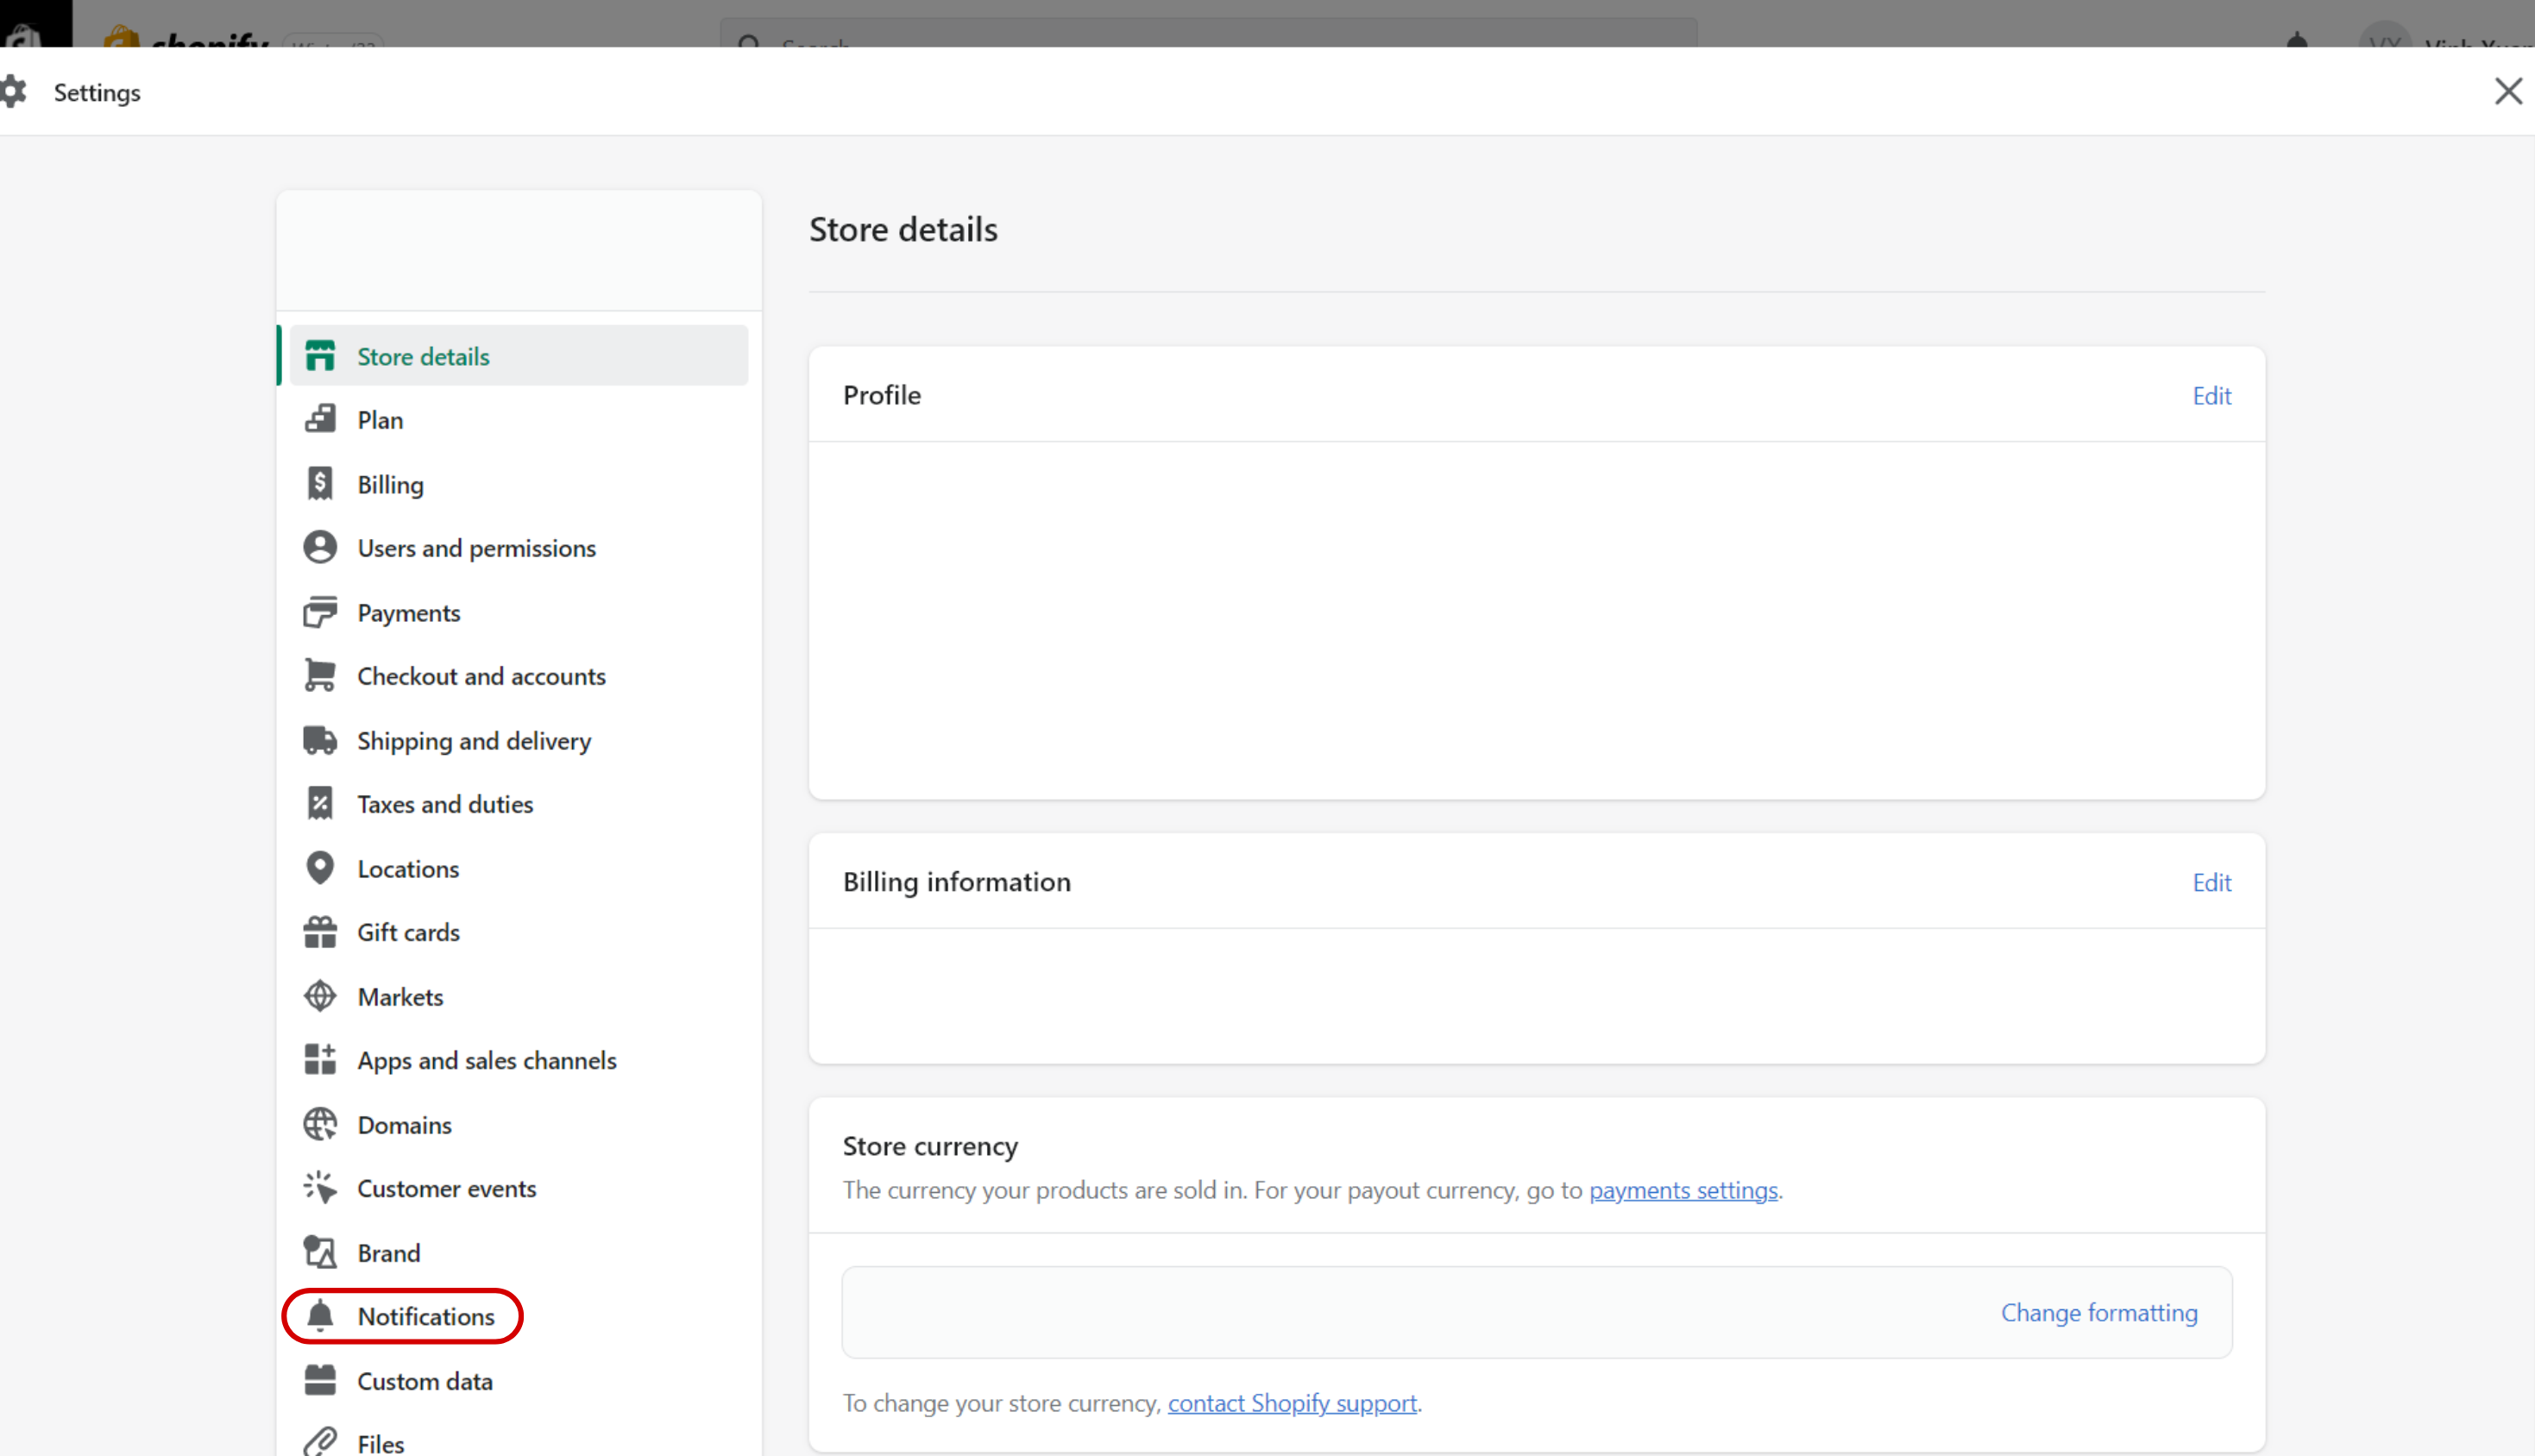
Step 2: Access the Notifications Tab
Once you have accessed the “Settings” tab, scroll down the page until you locate the “Notifications” button, which is situated towards the bottom of the page. Clicking on this button will enable you to proceed to the next step.
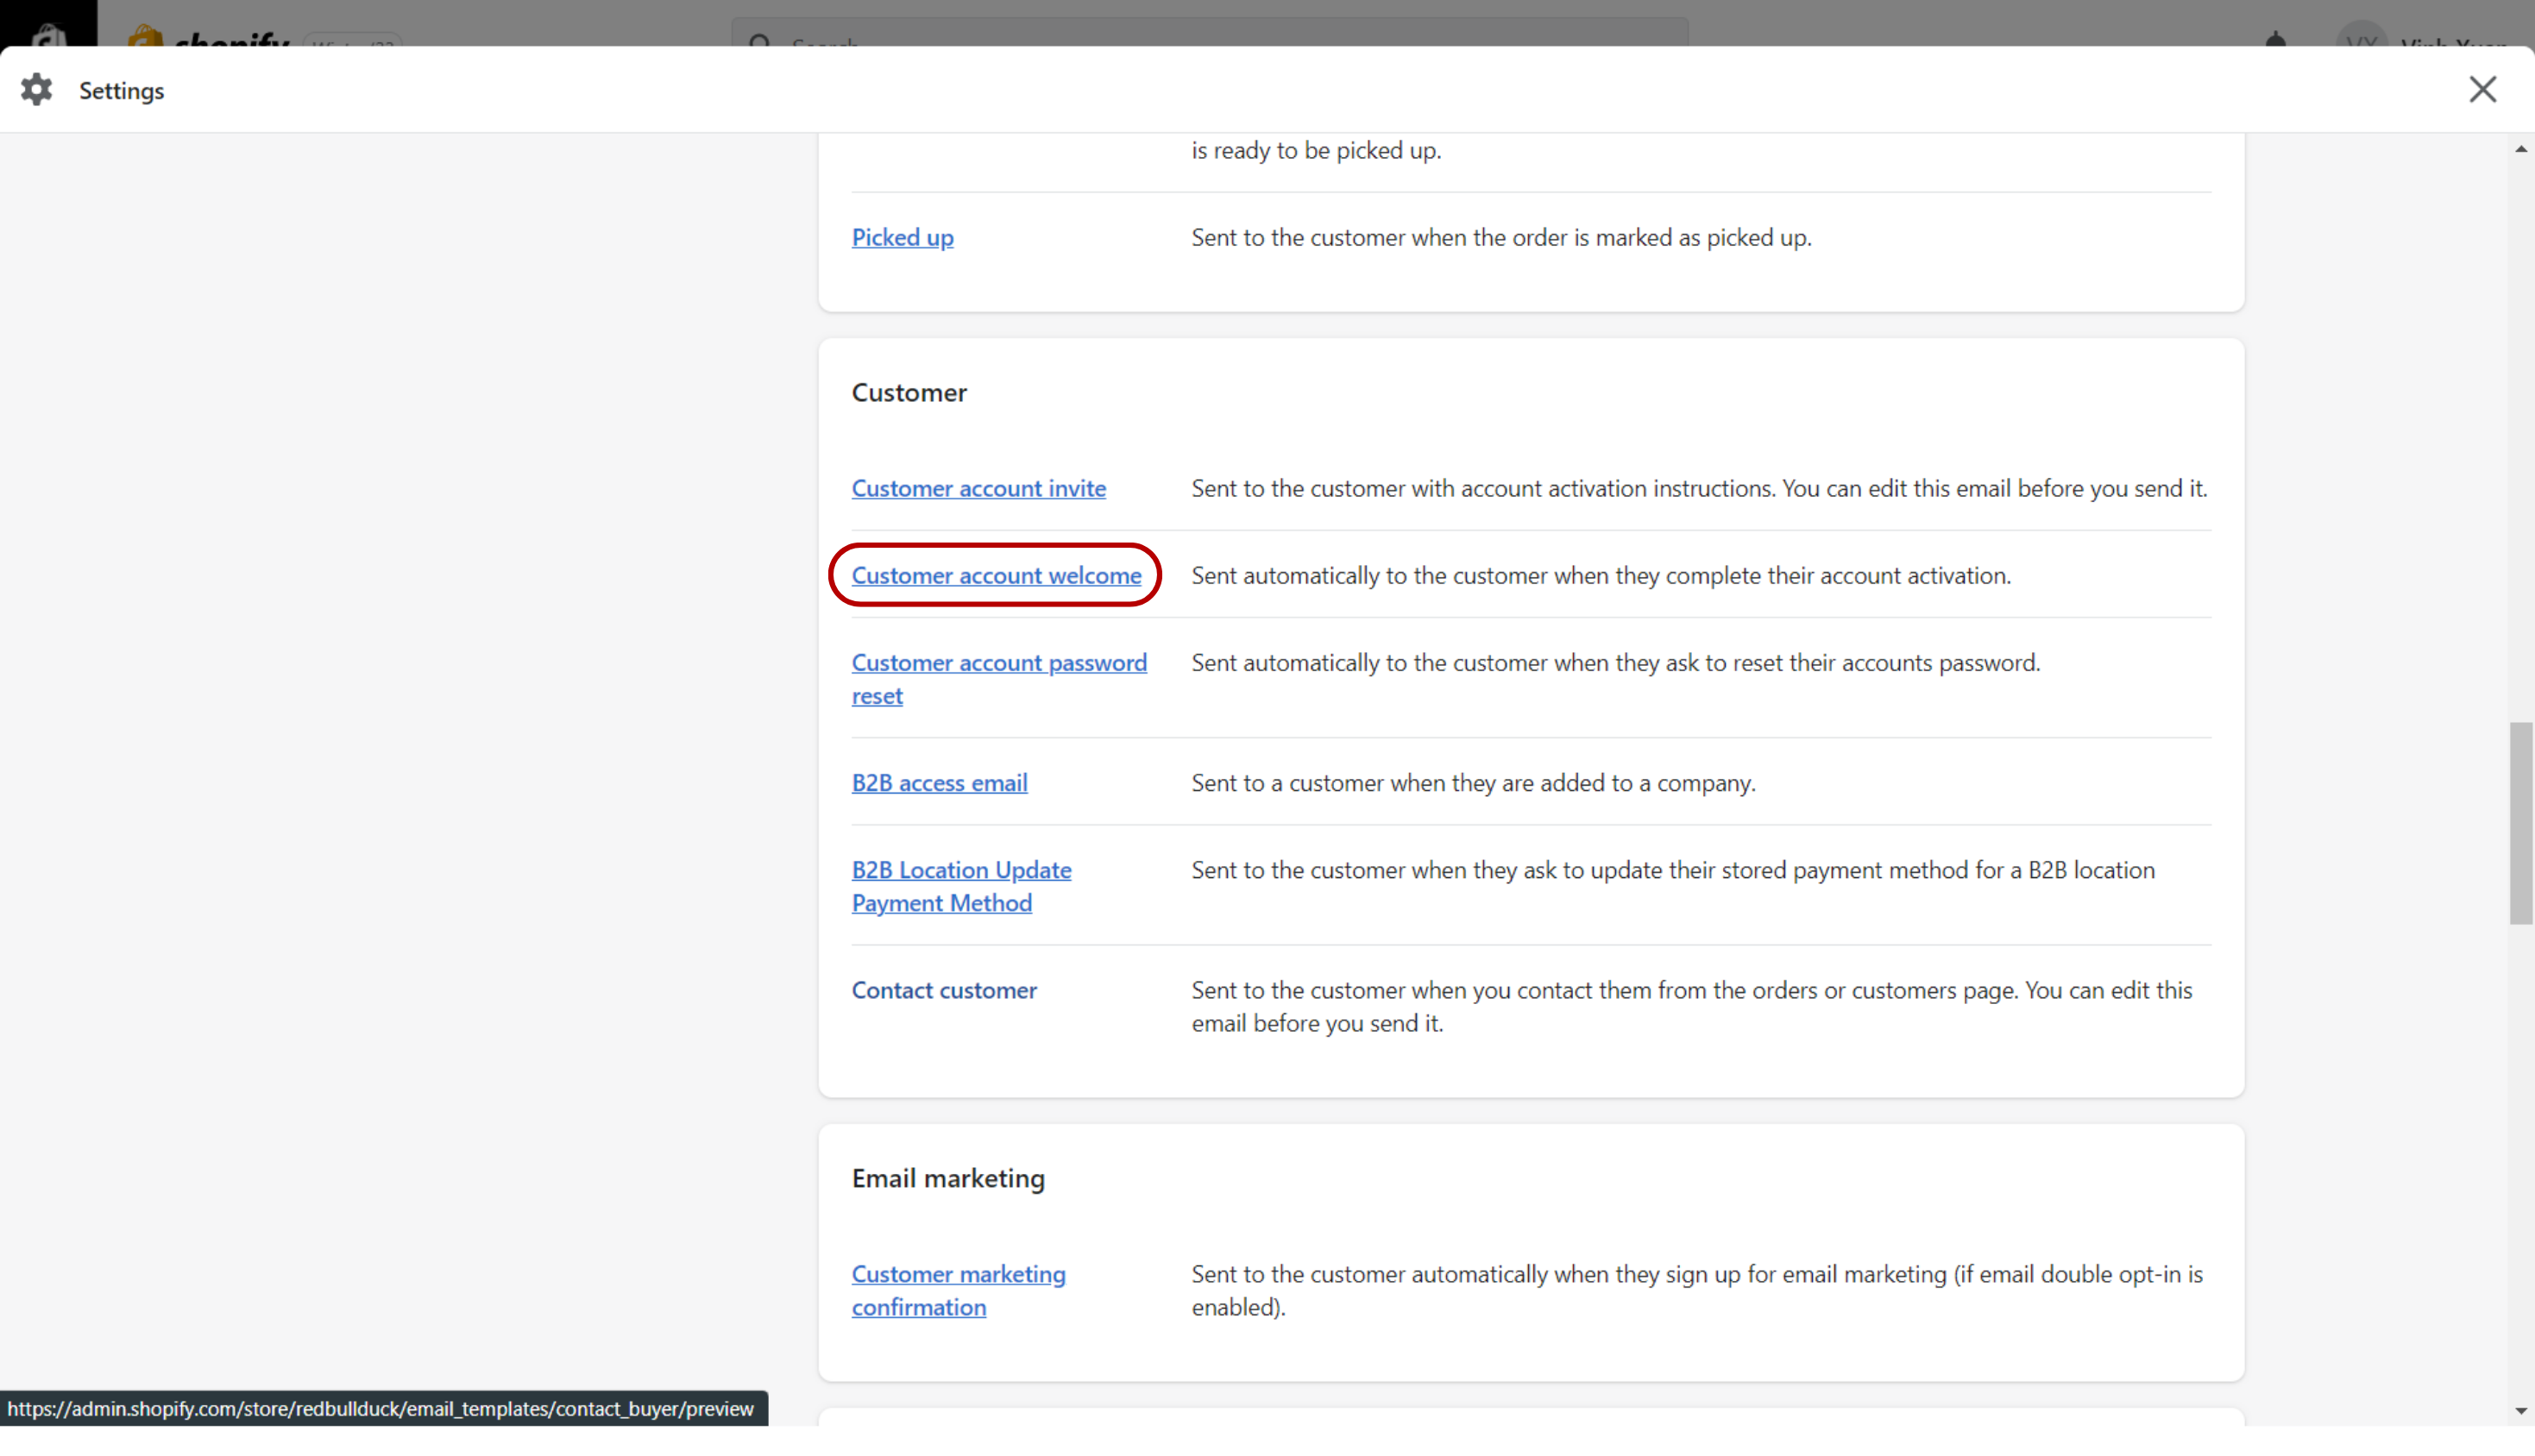
Step 3: Select the “Customer Account Welcome”
You will then be directed to a page containing a list of email variations. Locate the “Customer Account Welcome” section from the list and click on it to select it.
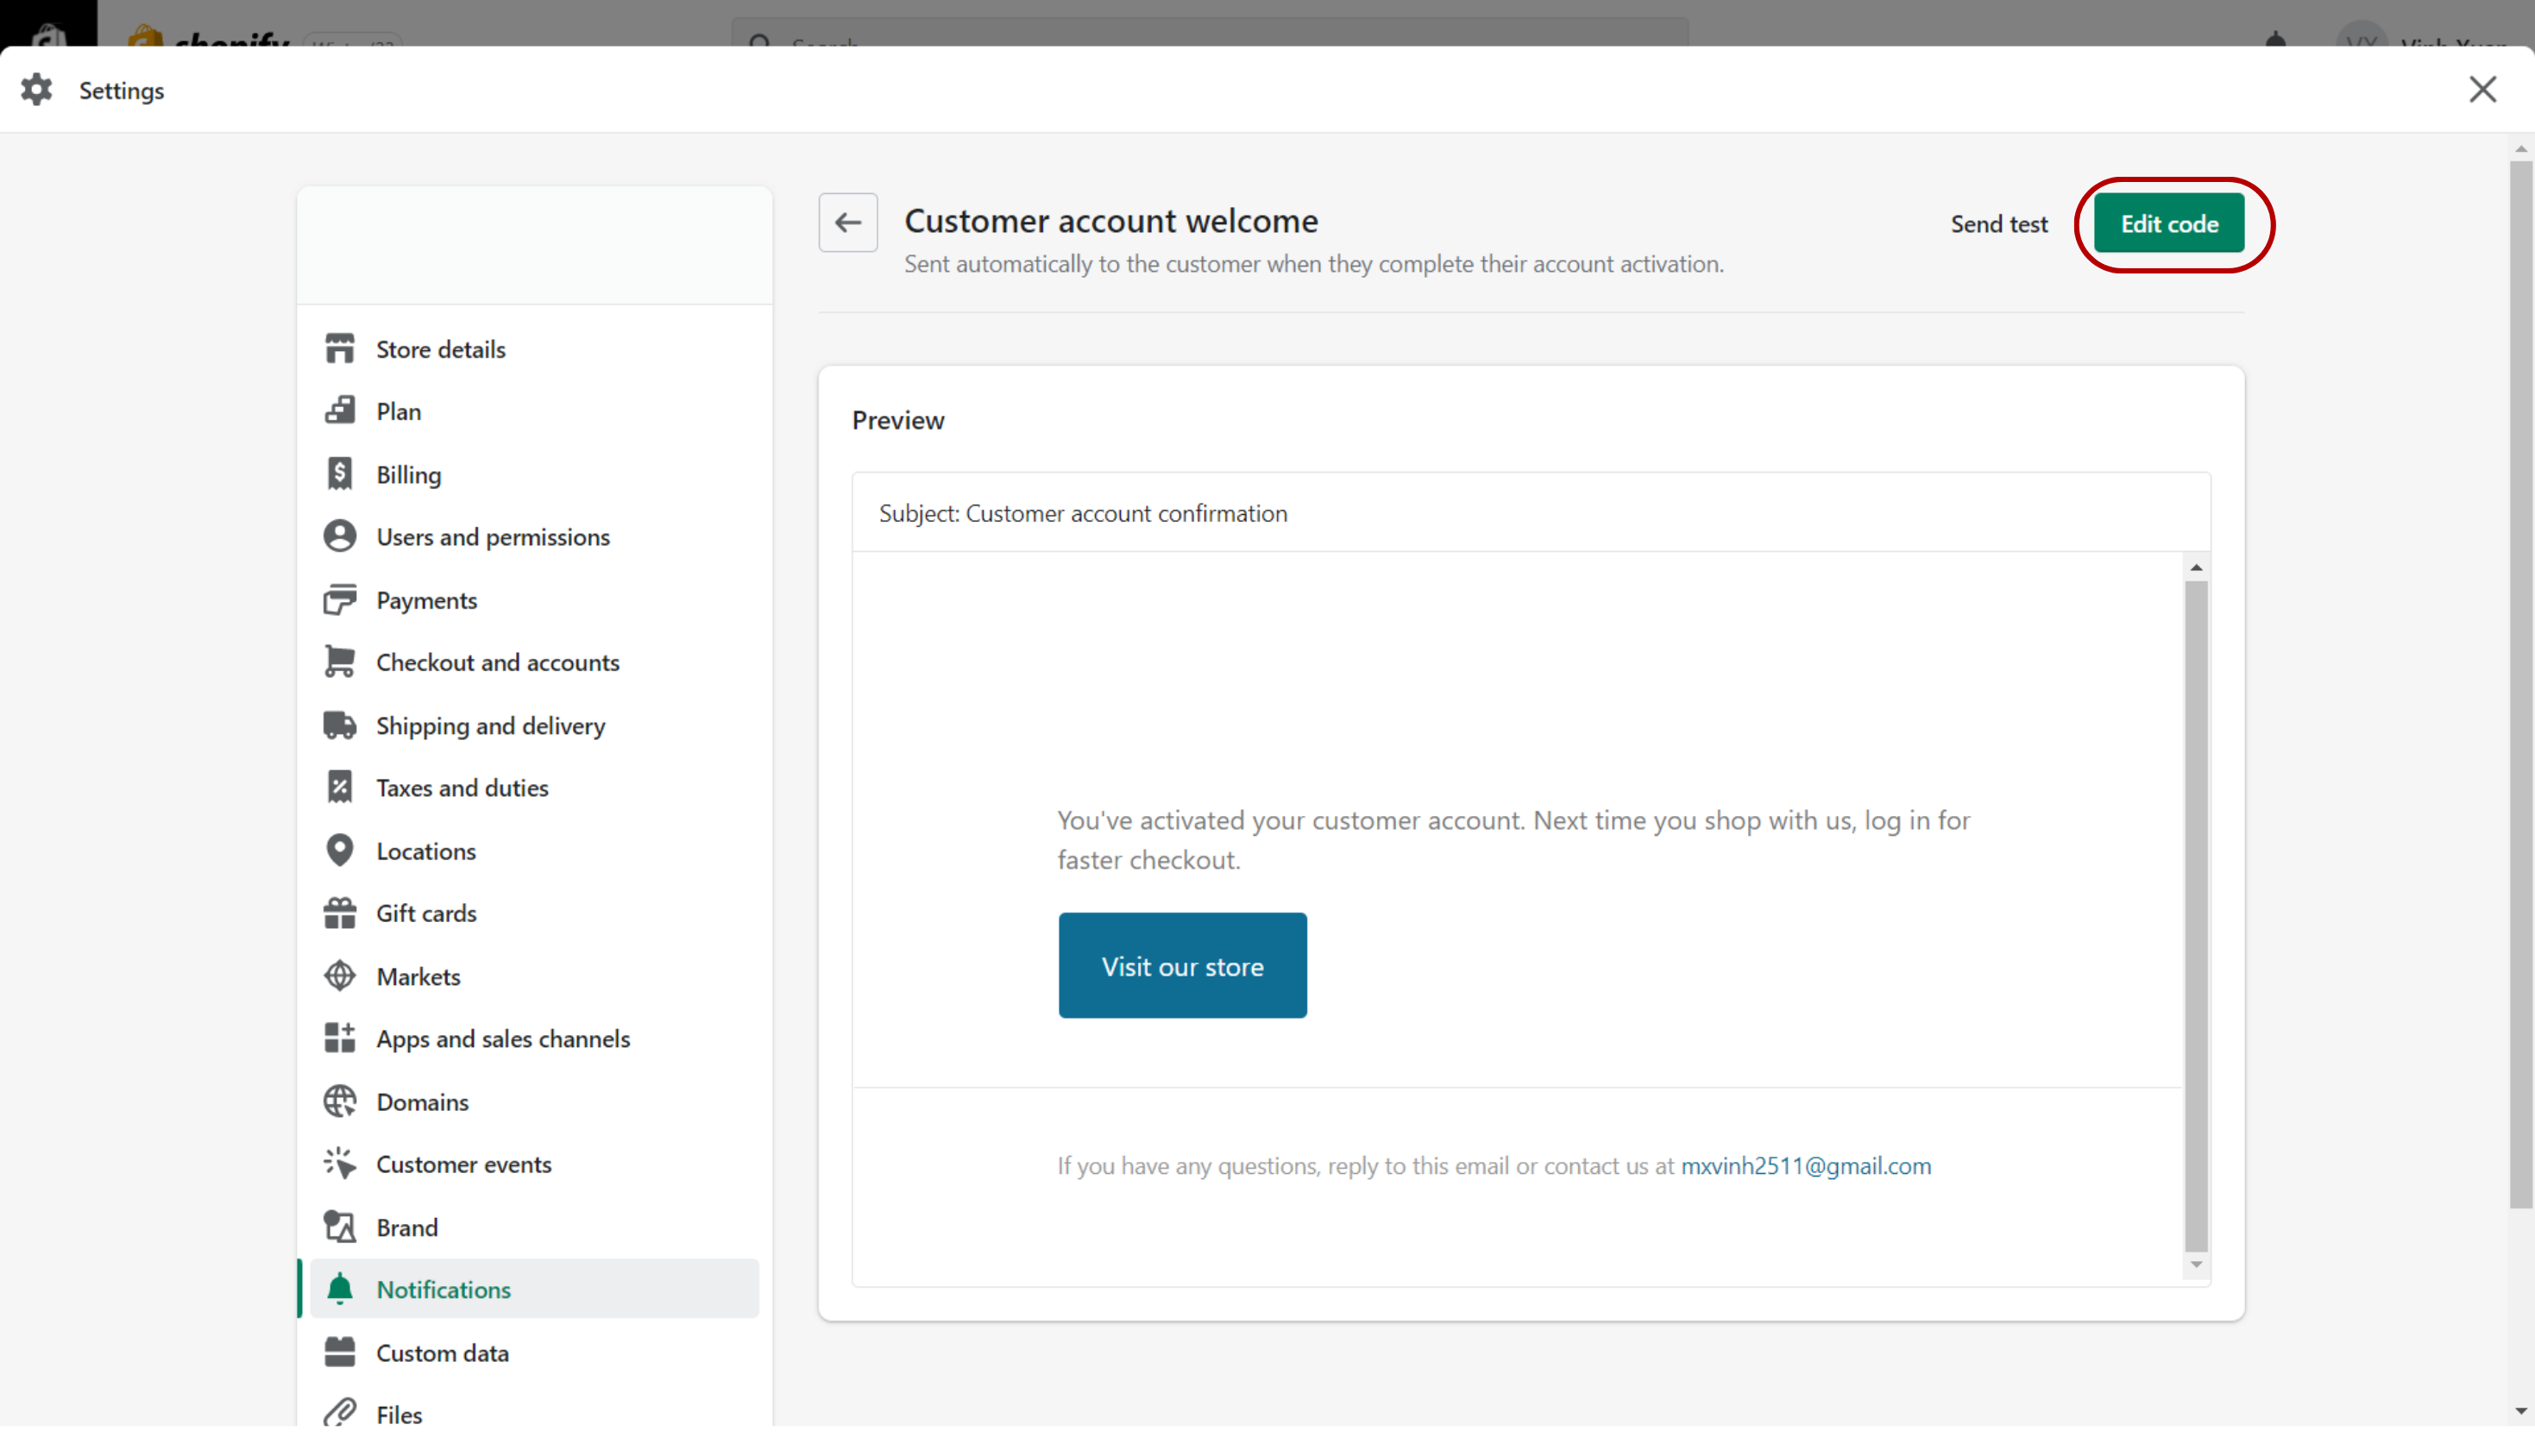
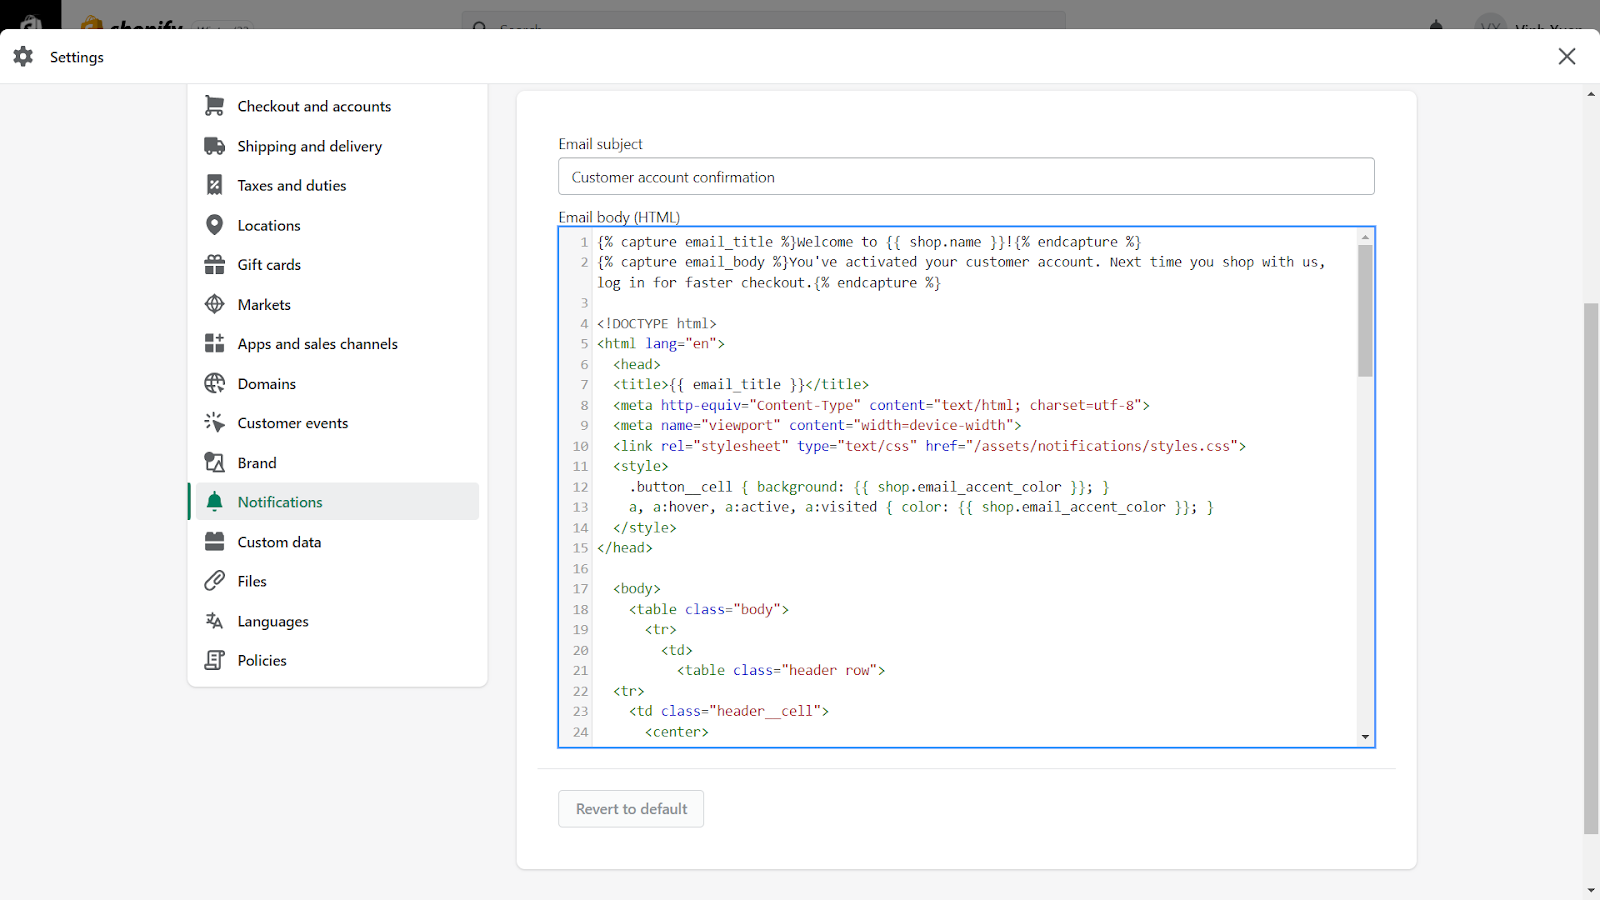
Step 4: Customize your email
To customize your email, click on the green “Edit code” button situated in the top-right corner of the screen. This will take you to the email template editor, where you can modify the email’s subject line, body, and formatting to suit your preferences.
However, if you lack familiarity with HTML, crafting an email design to your exact specifications may prove to be a challenge. Furthermore, the editor may lack certain features that would enhance the overall appearance of your email, resulting in a less aesthetically pleasing result.
In addition, this editor lacks the ability to create a customized automation sequence, which means that you cannot schedule a chain of emails to be sent to customers.
If you want to design visually stunning and personalized emails for your customers, you should consider using other email marketing apps that are compatible with Shopify. If you are in search of an effective solution, we strongly suggest giving NestSend a try.
How to create a shopify automated welcome email in just 7 steps!
NestSend is an exceptional application that allows you to effortlessly create an email flow for your Shopify welcome email. With its user-friendly interface and a wide array of features, creating an automated email flow has never been easier.
To set up your welcome email flow using NestSend, simply follow these seven steps, and you will be sending automated emails in no time.
Step 1: Install NestSend from the Shopify app store
You can find the NestSend app in the Shopify app store, or you can use the button below to simplify the process.
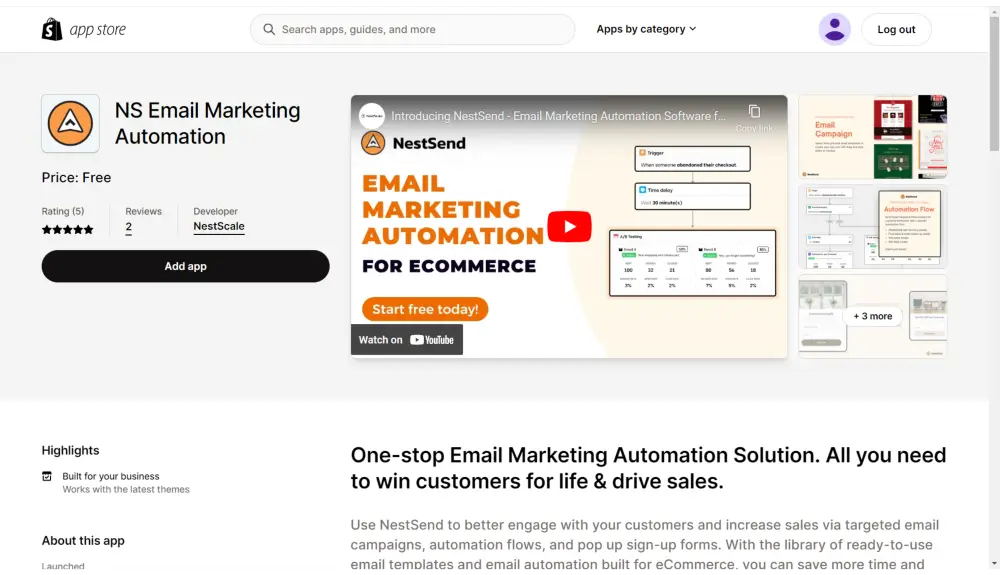
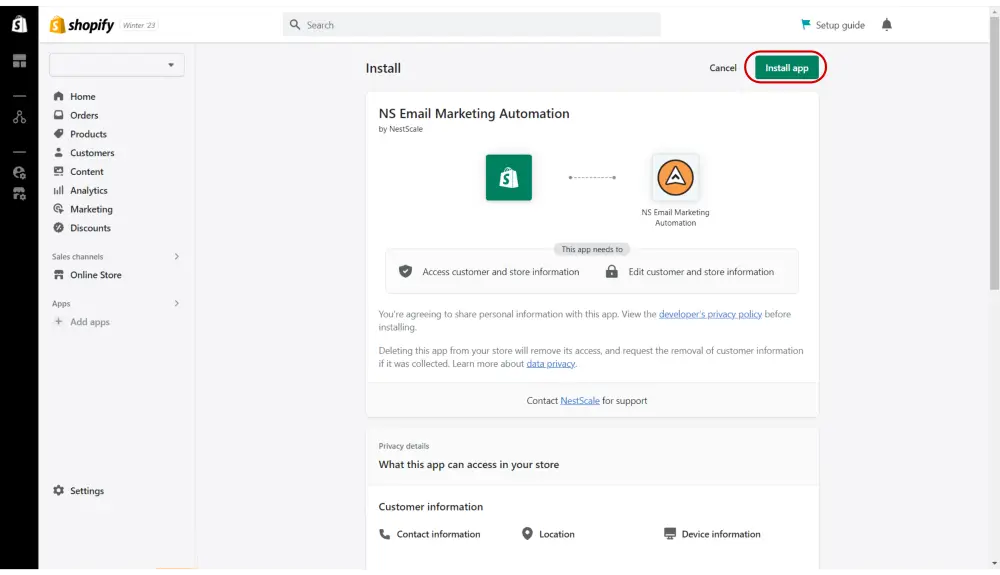
The next step involves integrating the application with your Shopify store. Simply click on the “Install app” button to proceed.
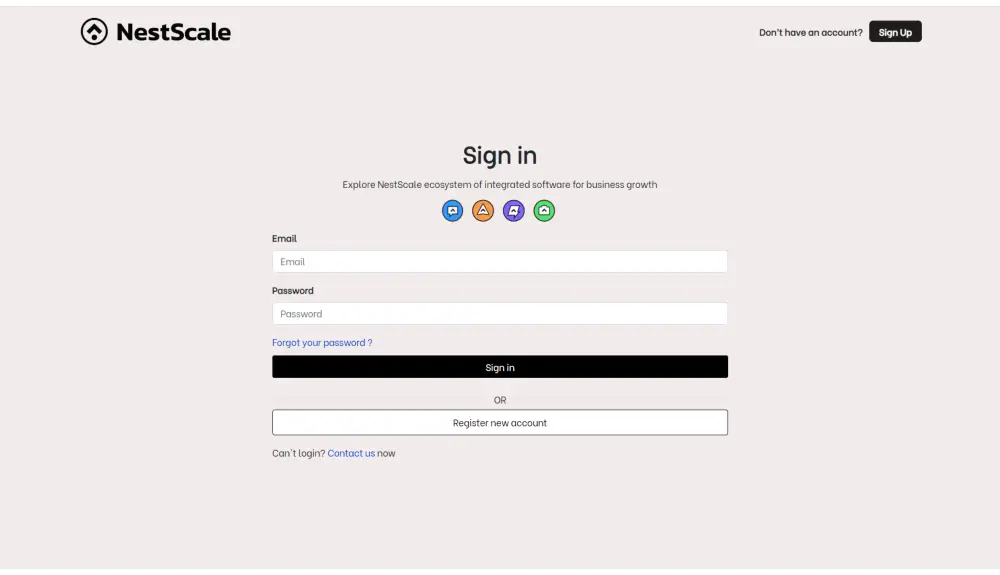
Step 2: Sign up
After clicking the “Install app” button, you will be prompted to sign in to your NestScale account. If you do not have one, you can easily create an account at this point.
Pro tip: Having a NestScale account will grant you access to NestScale’s apps ecosystem, making it easier to manage your Shopify business.
Step 3: Access the Automation Flow
Once you have completed the previous steps, navigate to the left side of the screen and locate the “Automation Flow” section. Click on “Create Automation Flow” to access it.
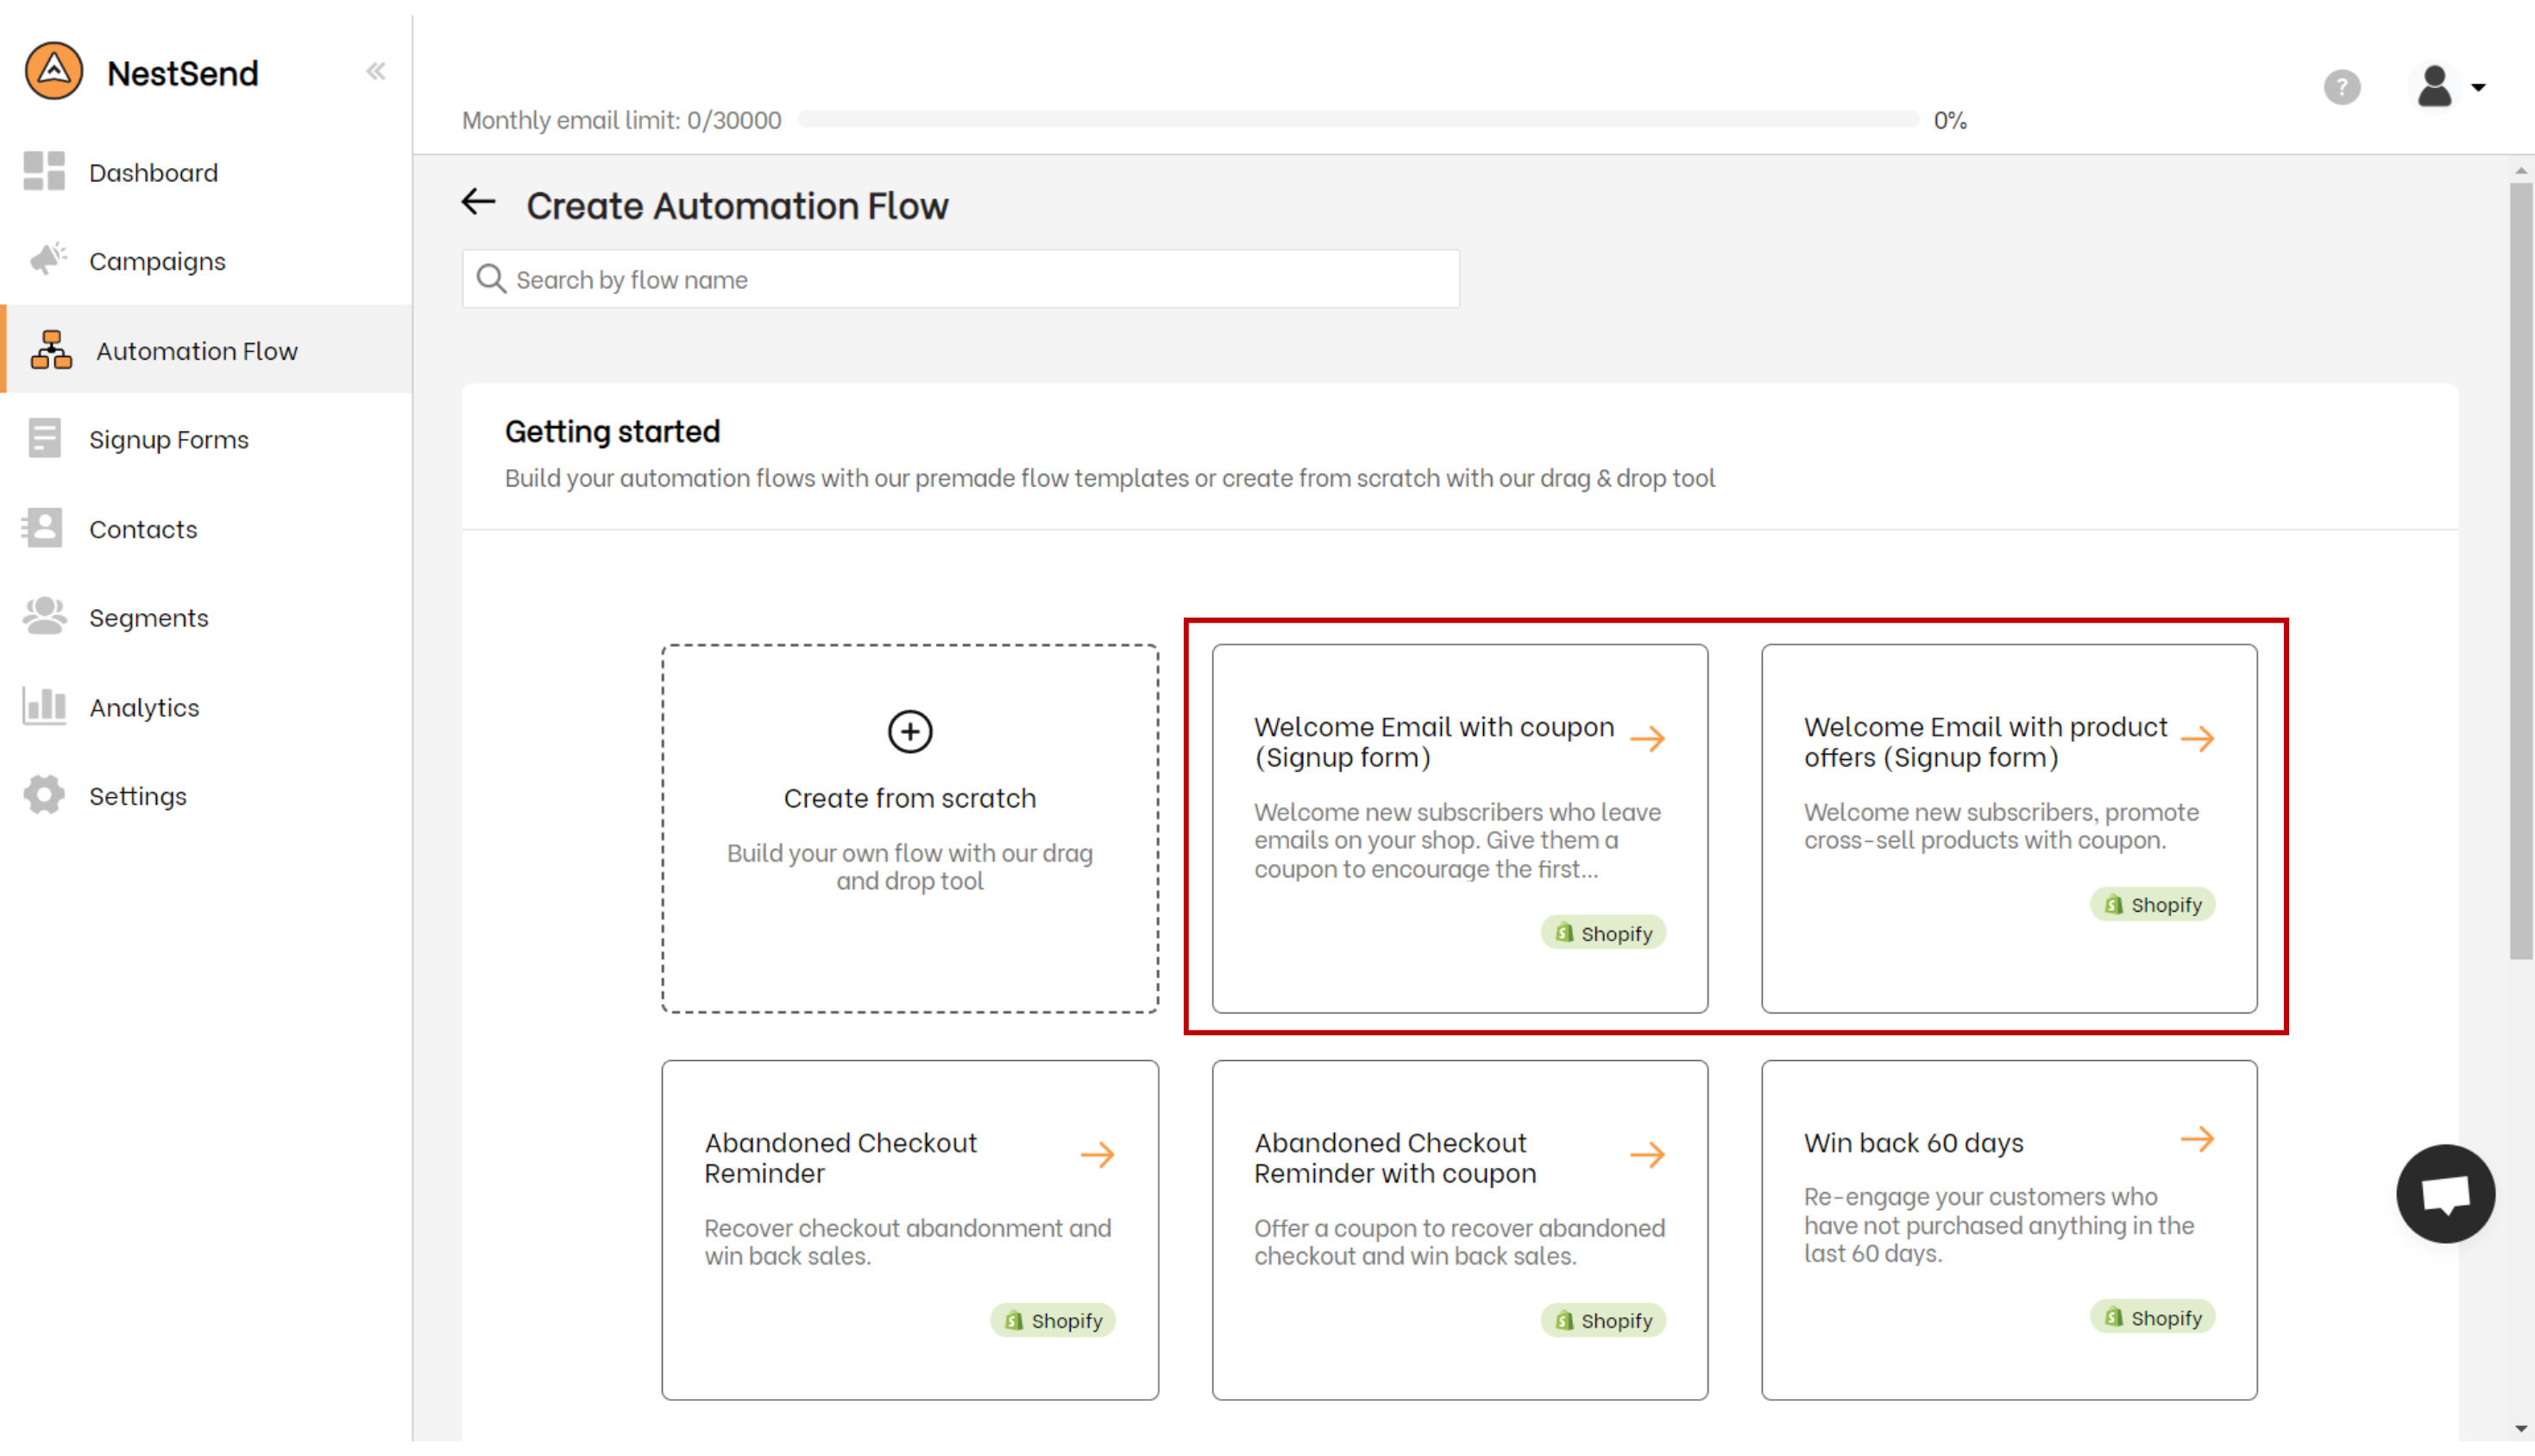
Step 4: Create your welcome email flow
Here you have to decide whether you can either save time by selecting a pre-built flow or create your own. If you opt for the pre-built flow, you can proceed directly to step 6.
Step 5: Add Trigger and Email Nodes for your flow
If you decide to create the entire flow from scratch, the next step after filling in the flow information is to set up the trigger node. The trigger node determines when the email will be sent to the recipient.
To send a welcome automation email, you need to choose the segment trigger option, and select the “New Subscribers” segment.
Note: Your segment needs to be linked with your sign up form before doing this step.
After setting up the trigger node, add an email node to your automated workflow. The email node contains the message that will be sent to your audience.

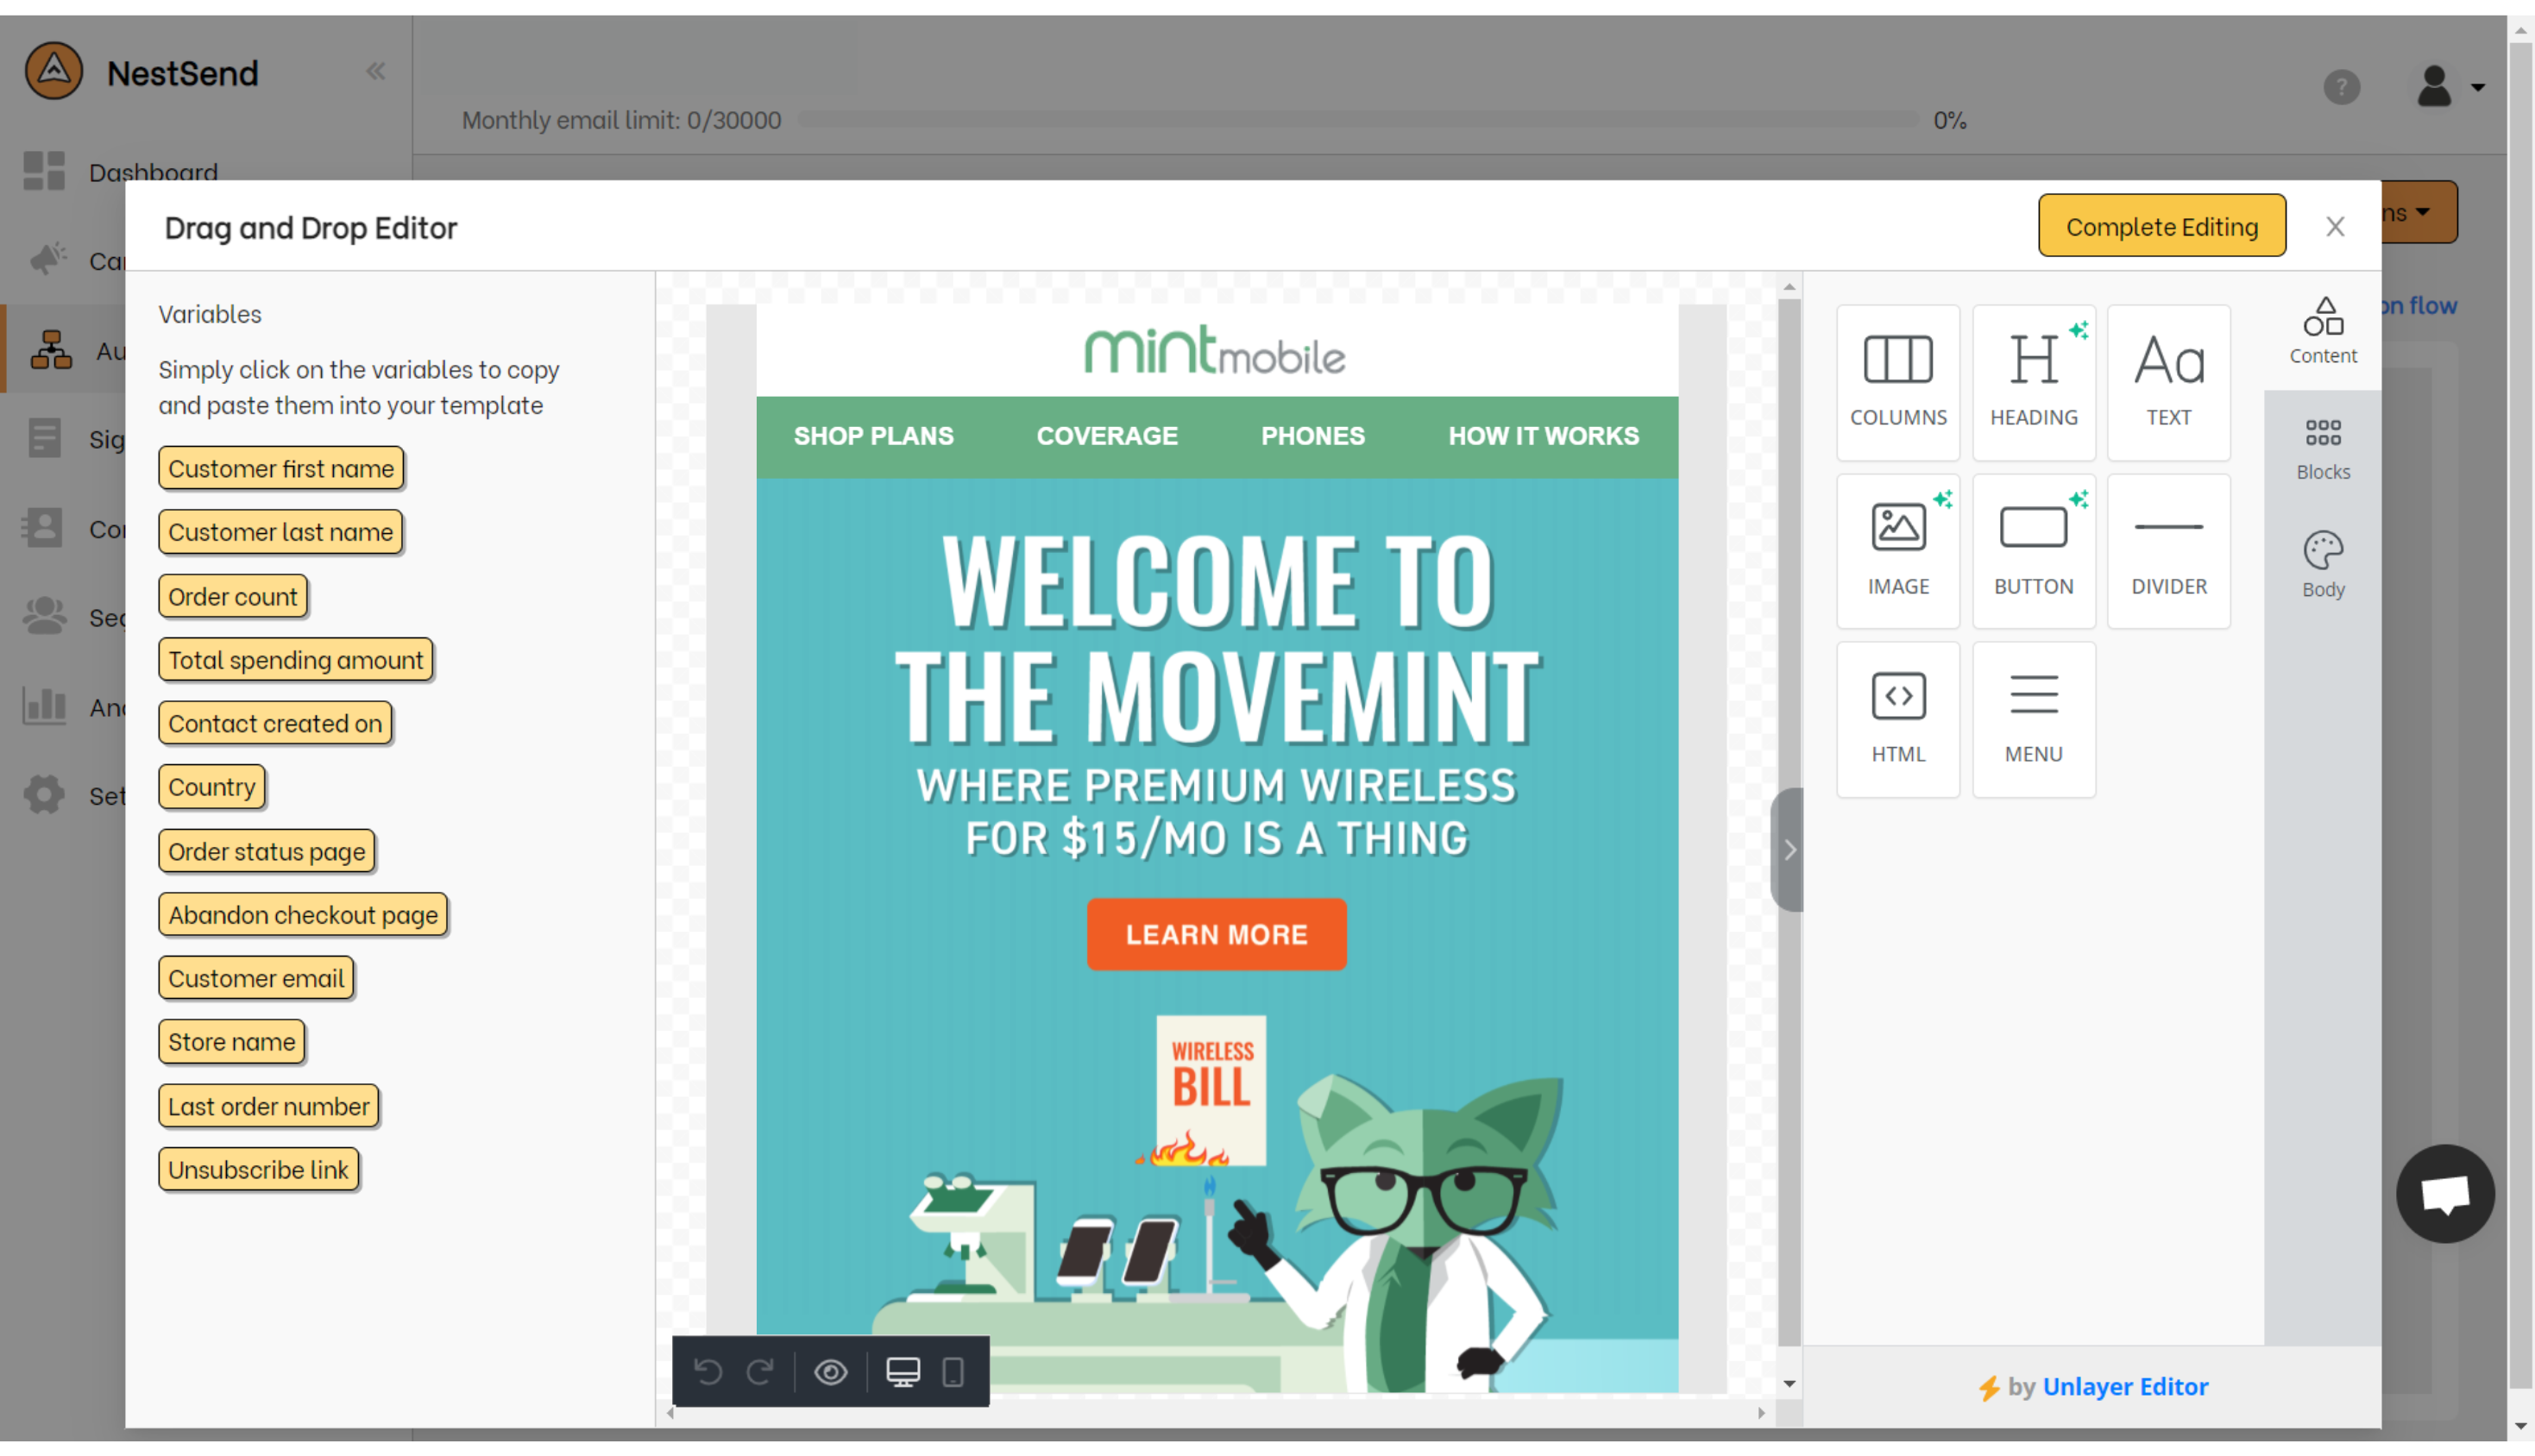
Step 6: Customize your email
Now it’s time to get creative and design your email! NestSend’s email editor comes with a variety of features and components to help you make your email more visually appealing. With NestSend, you can customize your welcome email according to your preferences, without any limitations.
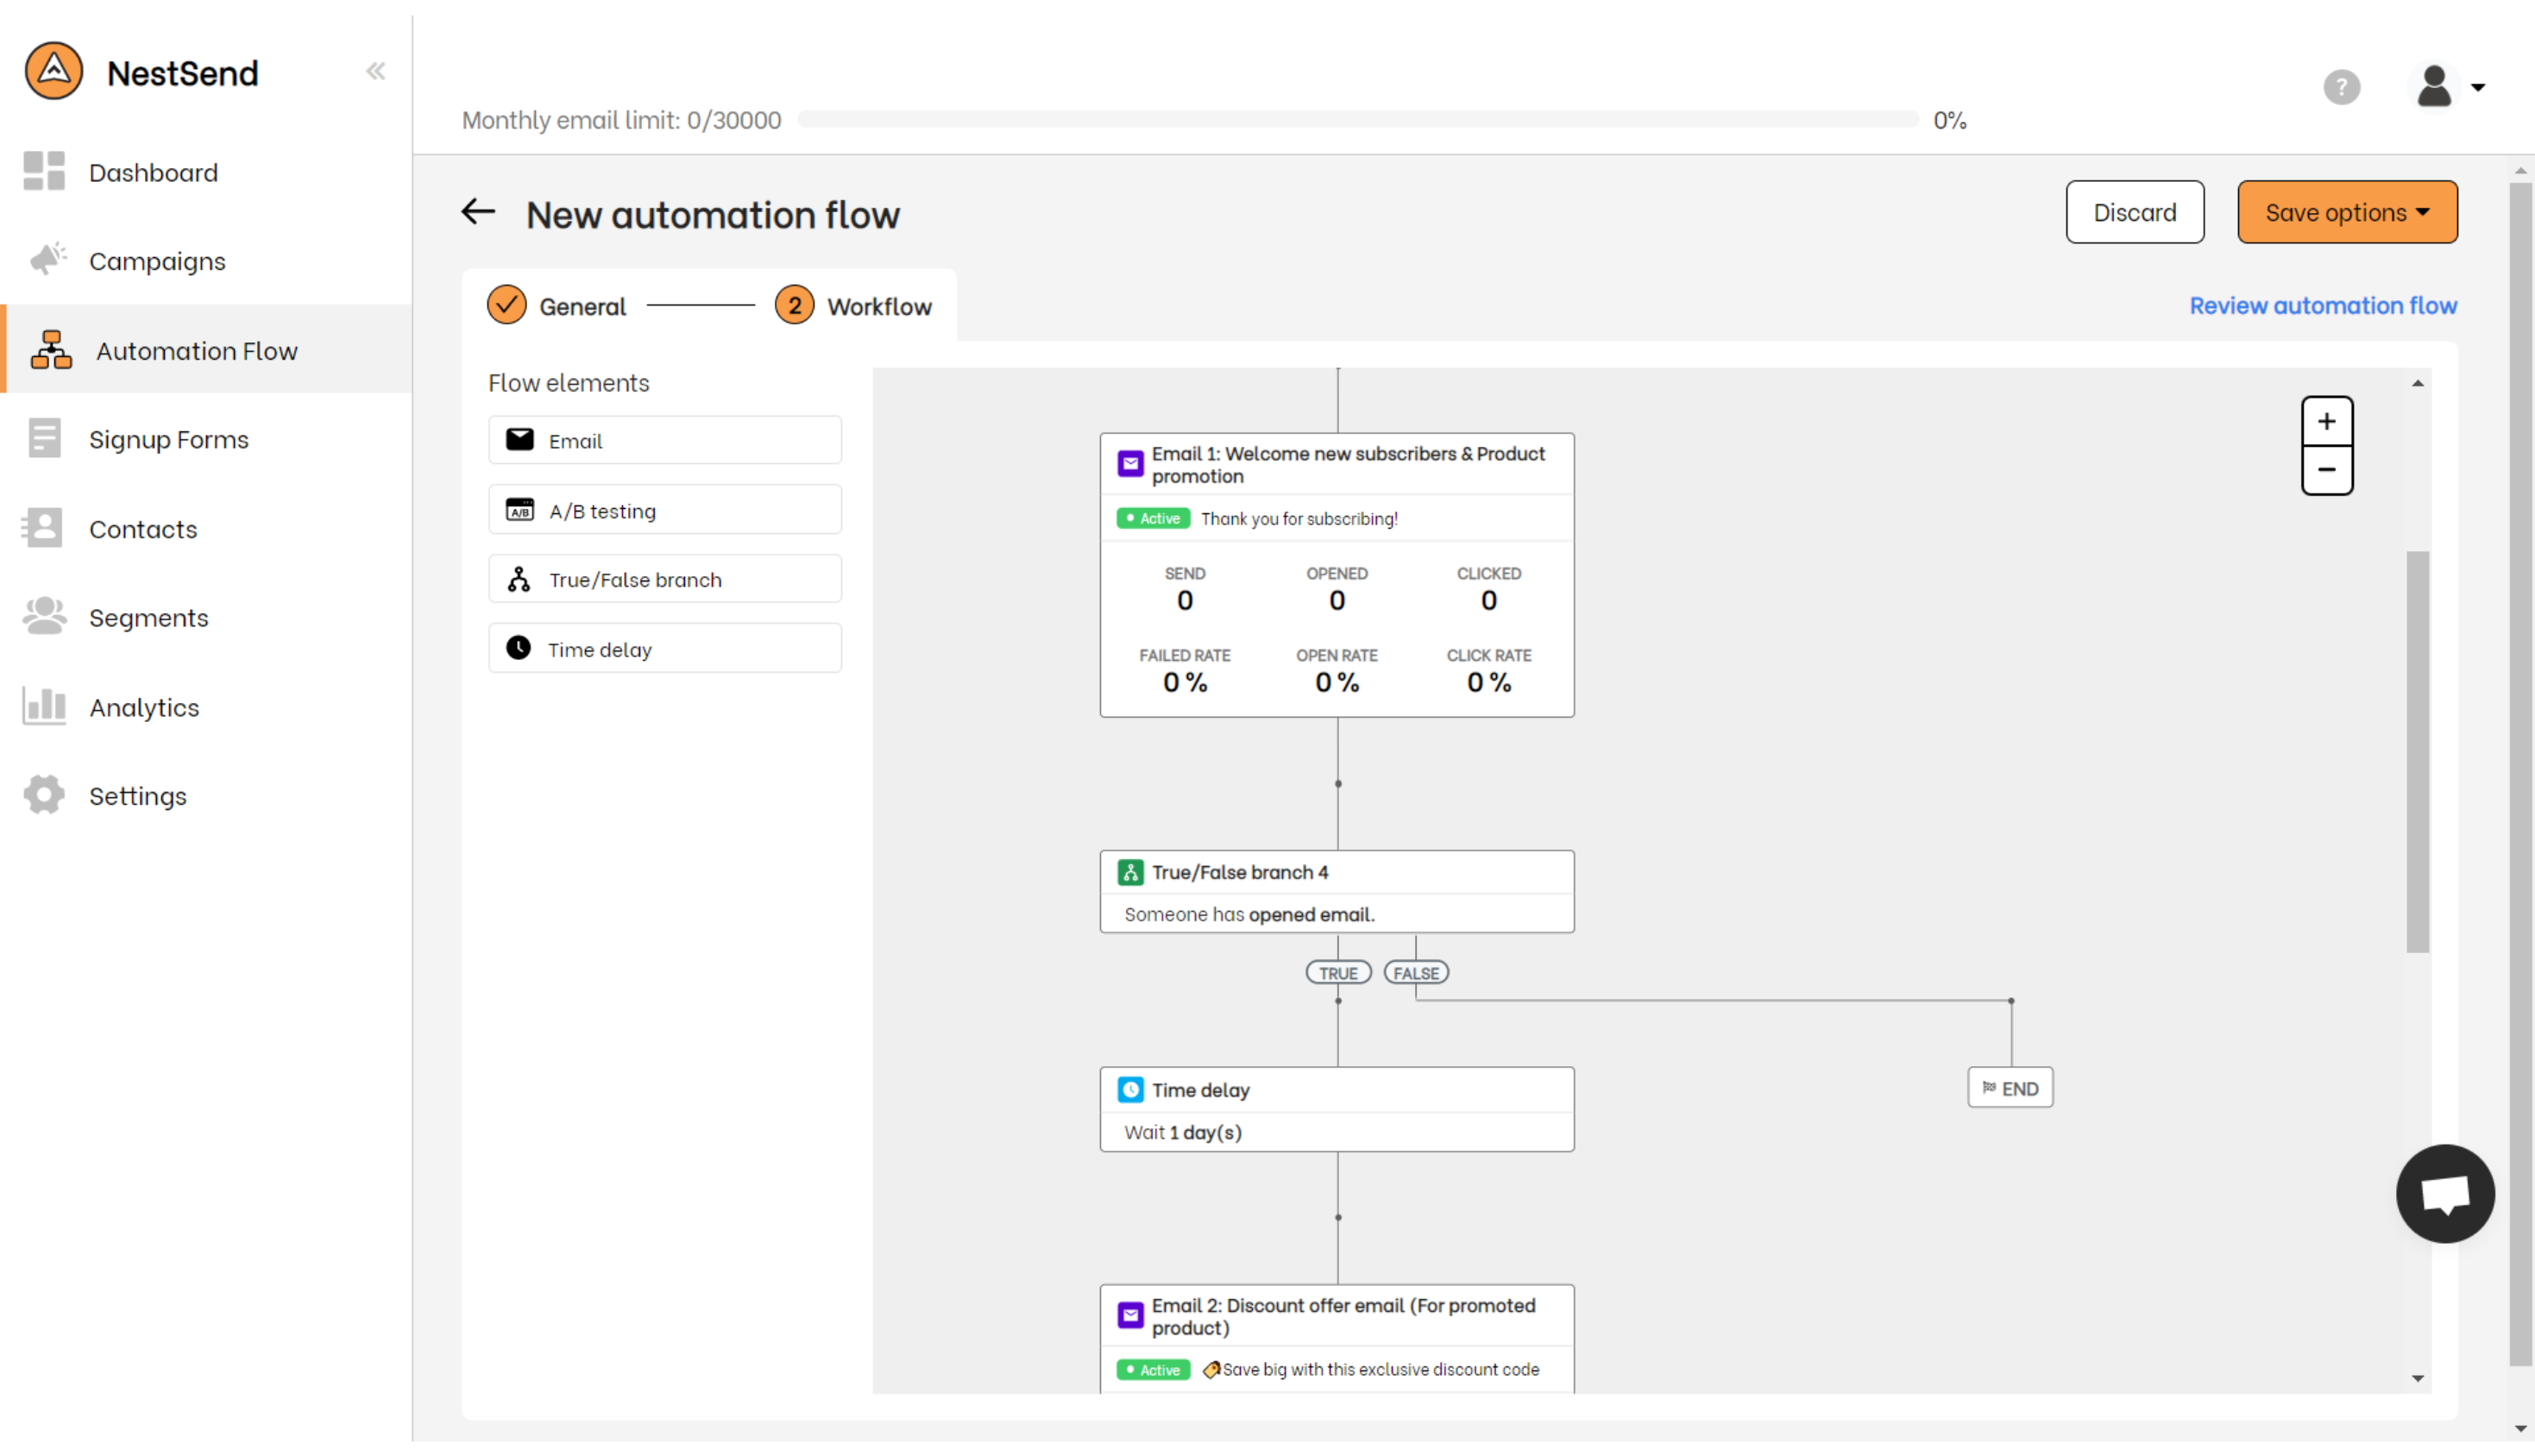
Step 7: Customize your automation flow
To enhance the customer experience, it’s recommended to personalize the automation email flow based on your customers’ preferences. You can achieve this by using time delay or true/false features to tailor the email flow that best suits their needs.
Setting up a welcome email flow using NestSend is very simple. However, if you require assistance, do not hesitate to contact NestSend’s experts for help.
Let’s create a red carpet for your subscriber today!
Welcome emails are a great way to introduce your brand and encourage new subscribers to make their first purchase. Make sure to send your welcome email in a timely manner, use a personalized subject line, and include links to your social media platforms. Offer an incentive to entice subscribers to make a purchase and encourage them to refer their friends to your email list. Use colorful visuals to make your email stand out and create an engaging experience.
If you’re using Shopify, you can customize your email template, but for a more visually stunning and personalized email flow, try NestSend. Install the app and follow the simple steps to set up your welcome email automation.