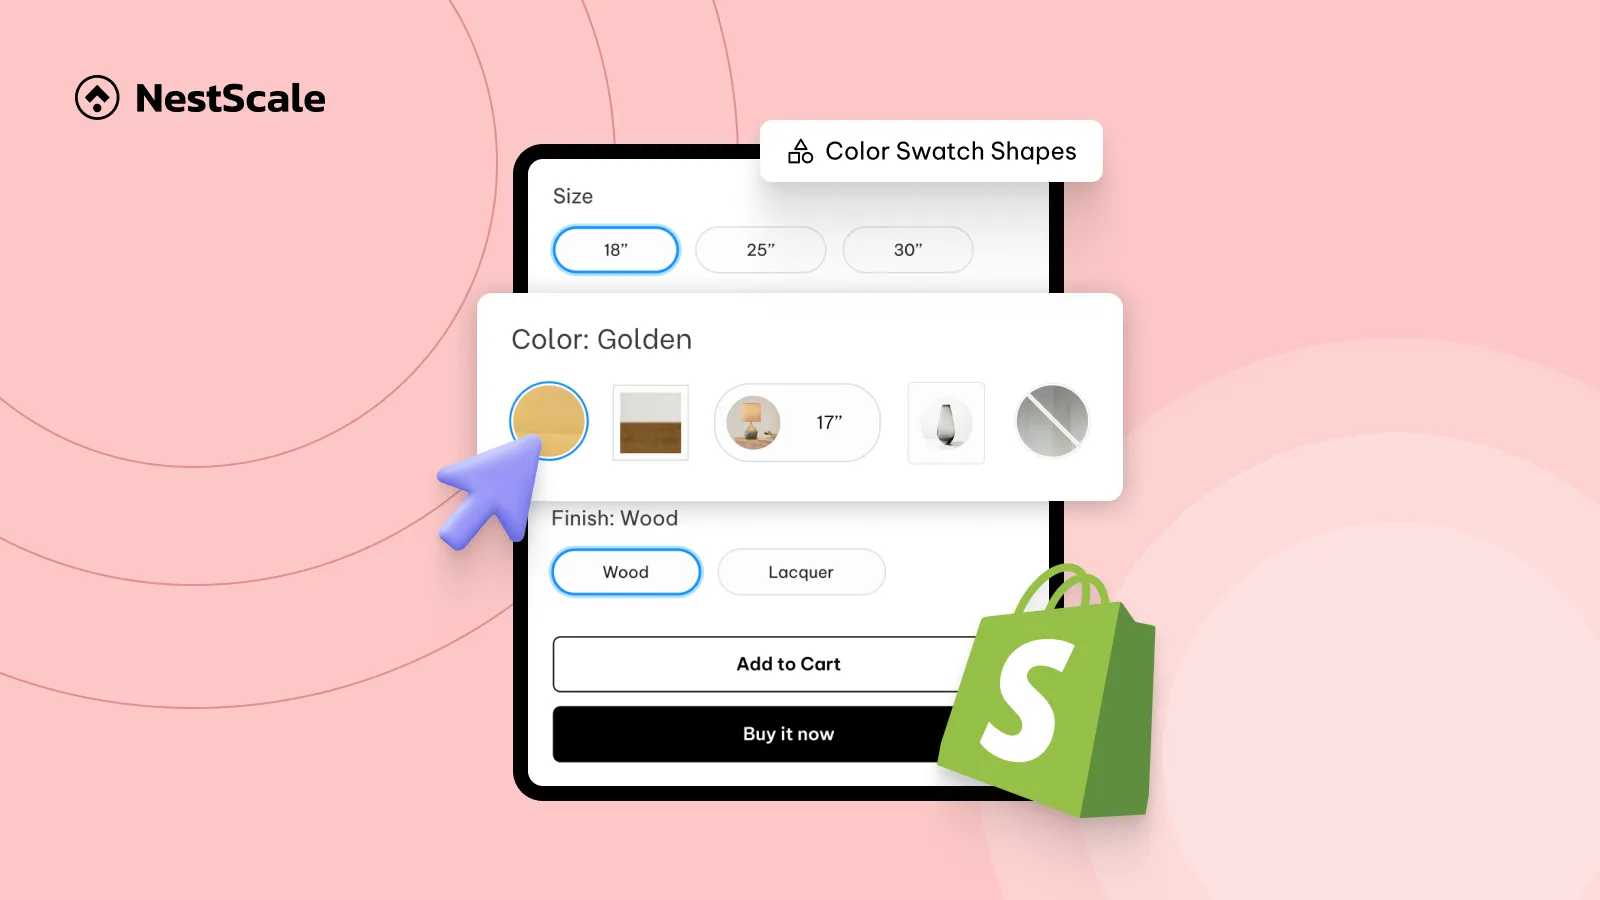
This tutorial will show you how to custom shape for color swatches in Shopify: circle in square swatch, circular swatch, square swatch, pill swatch, and so on. You’ll also learn how to customize the design of your swatches to make them appear beautifully on your storefront.
A quick glance at what we’ll share in this blog:
- How to add color swatches to Shopify product pages?
- How to choose swatch shapes and customize their design on your store?
- Frequently asked questions about Shopify color swatches
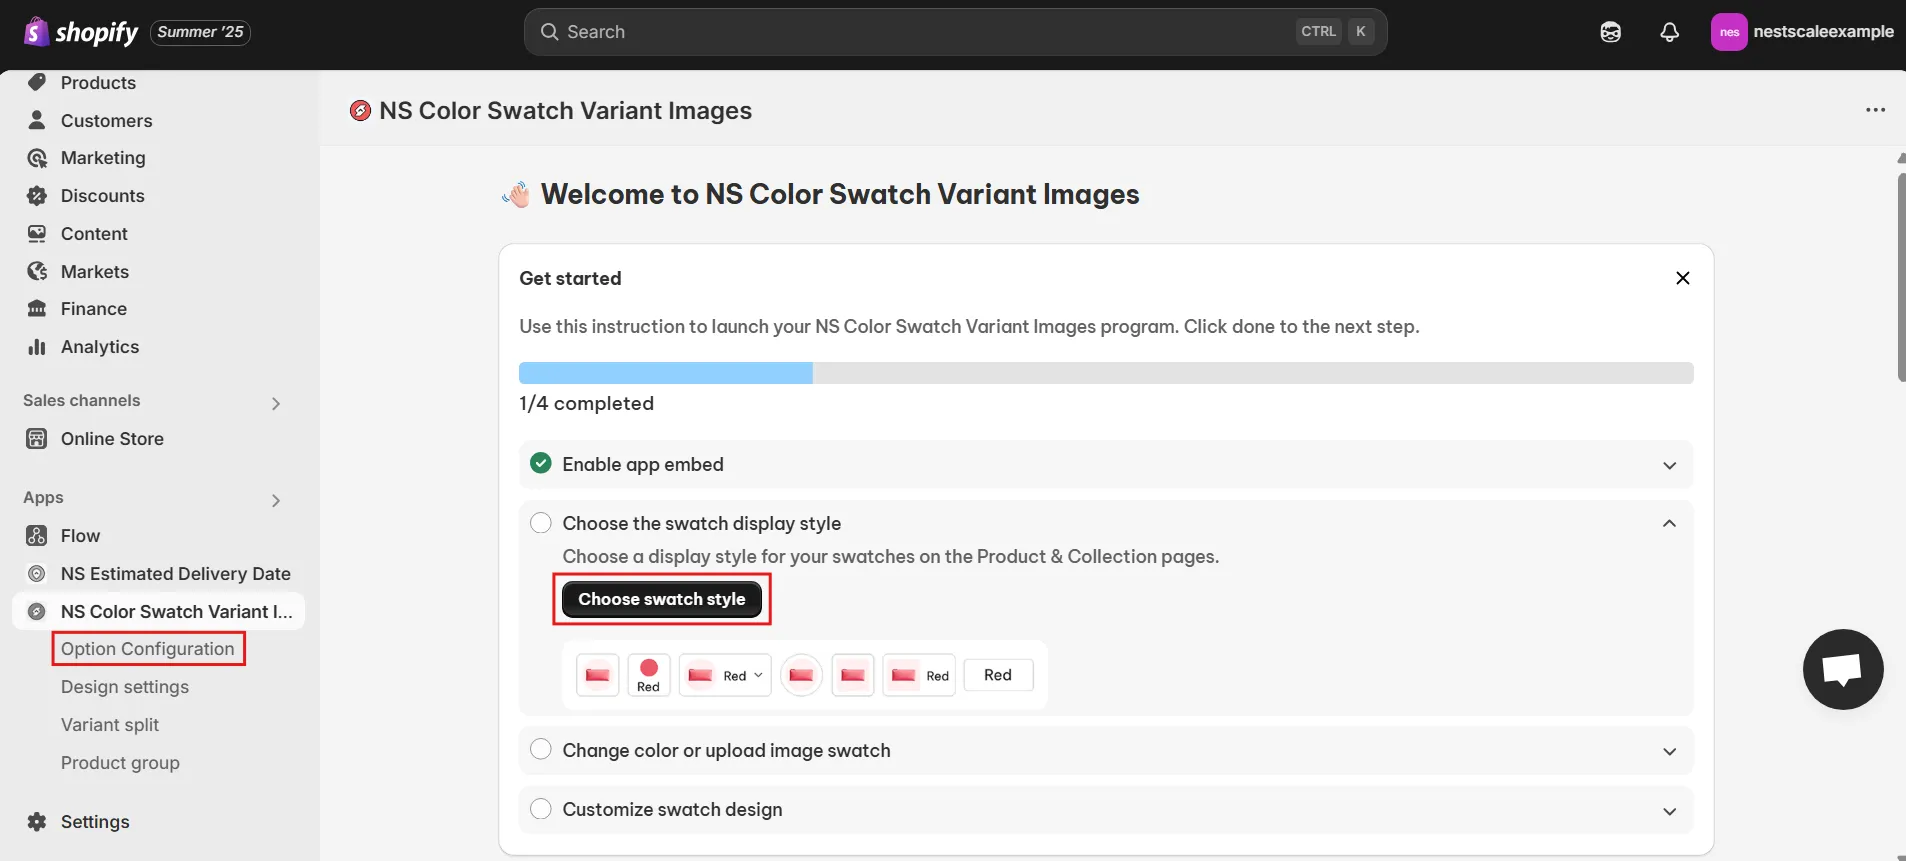
Step 1: Set up color swatches in NS Color Swatch Variant Images
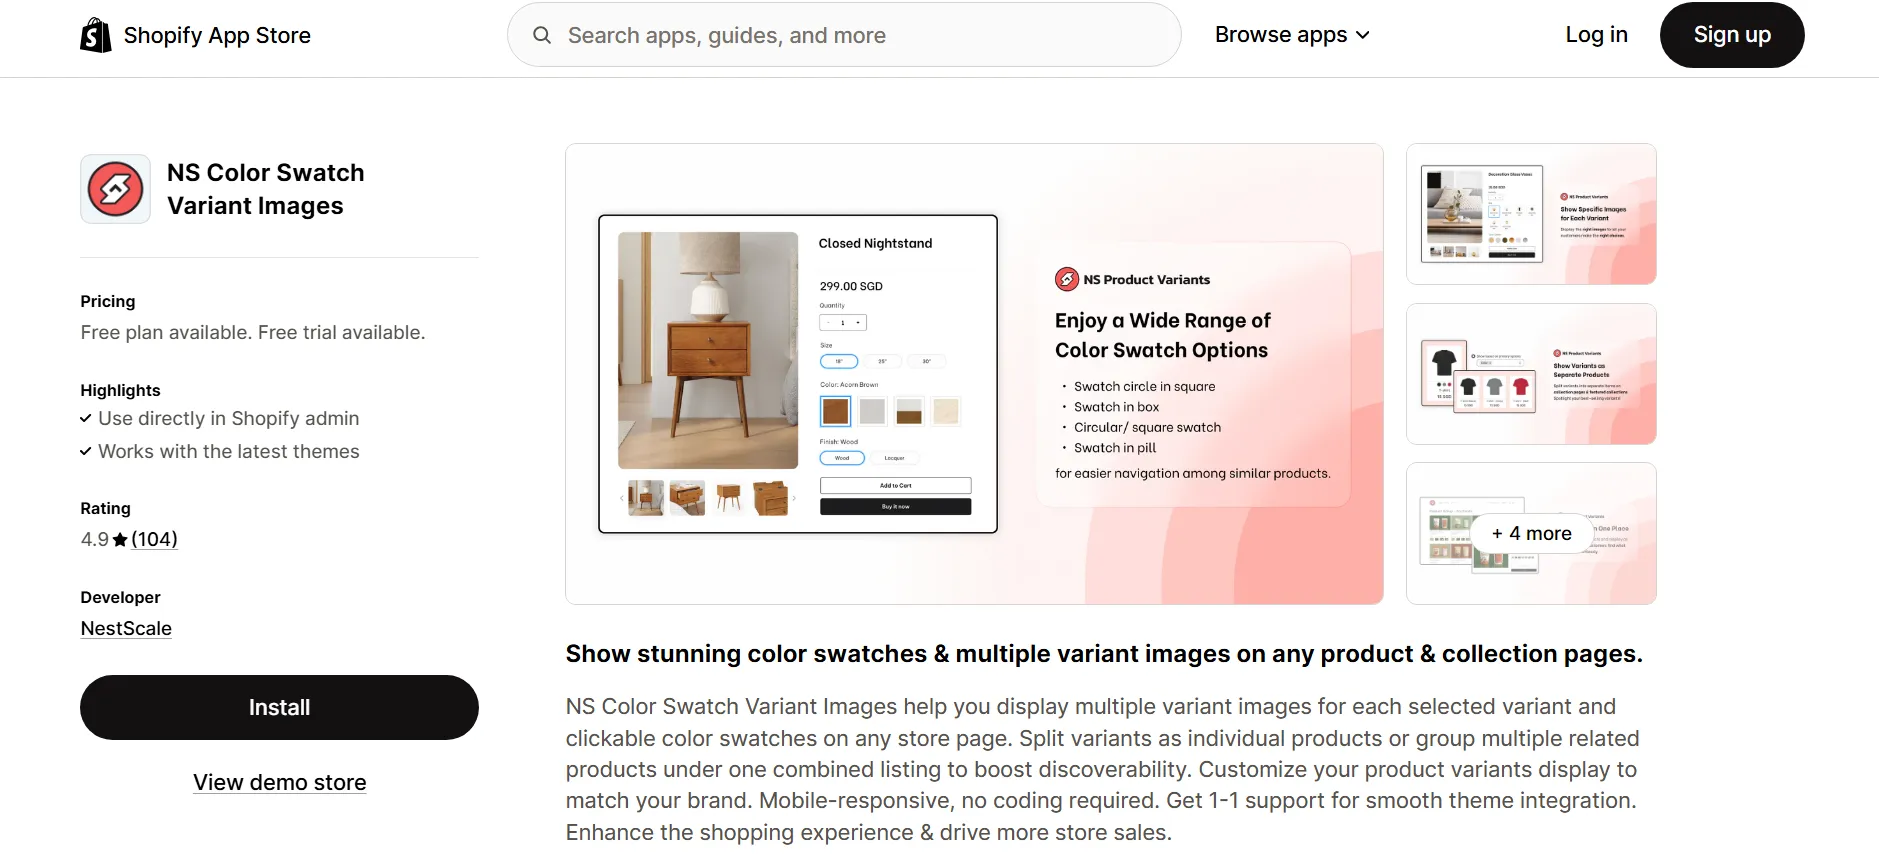
1. Head to the Shopify App Store, search for NS Color Swatch Variant Images, and install it.
2. Open the app in Shopify and follow the Get started instructions.
3. Click Embed app.
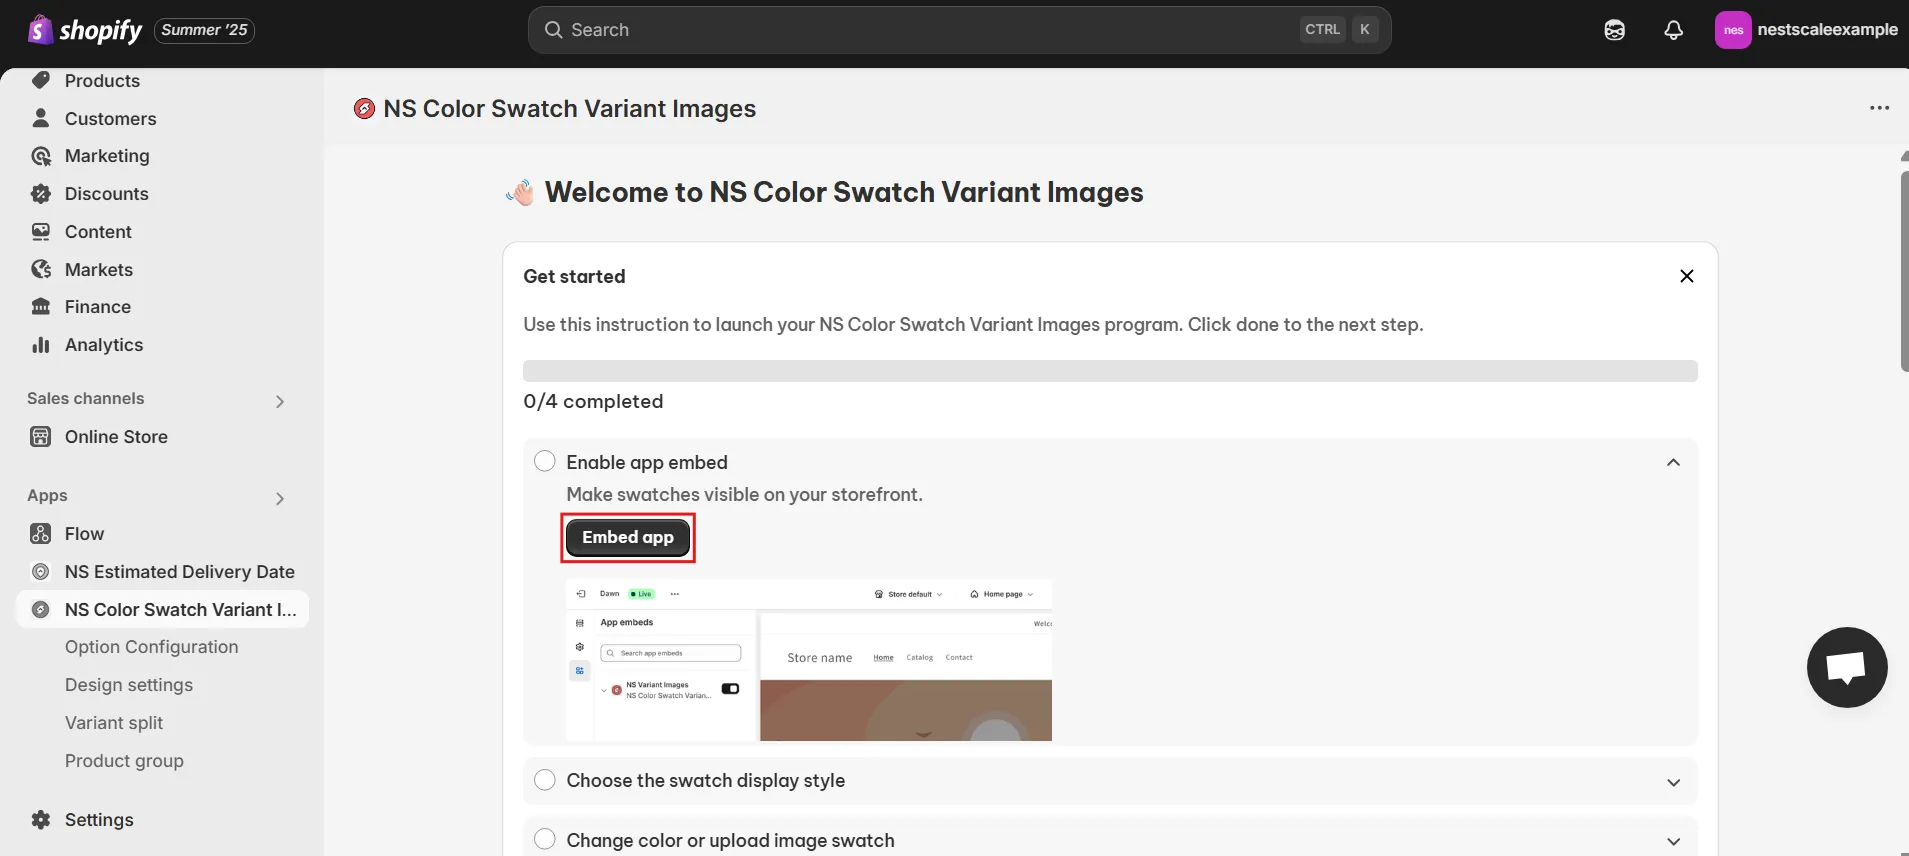
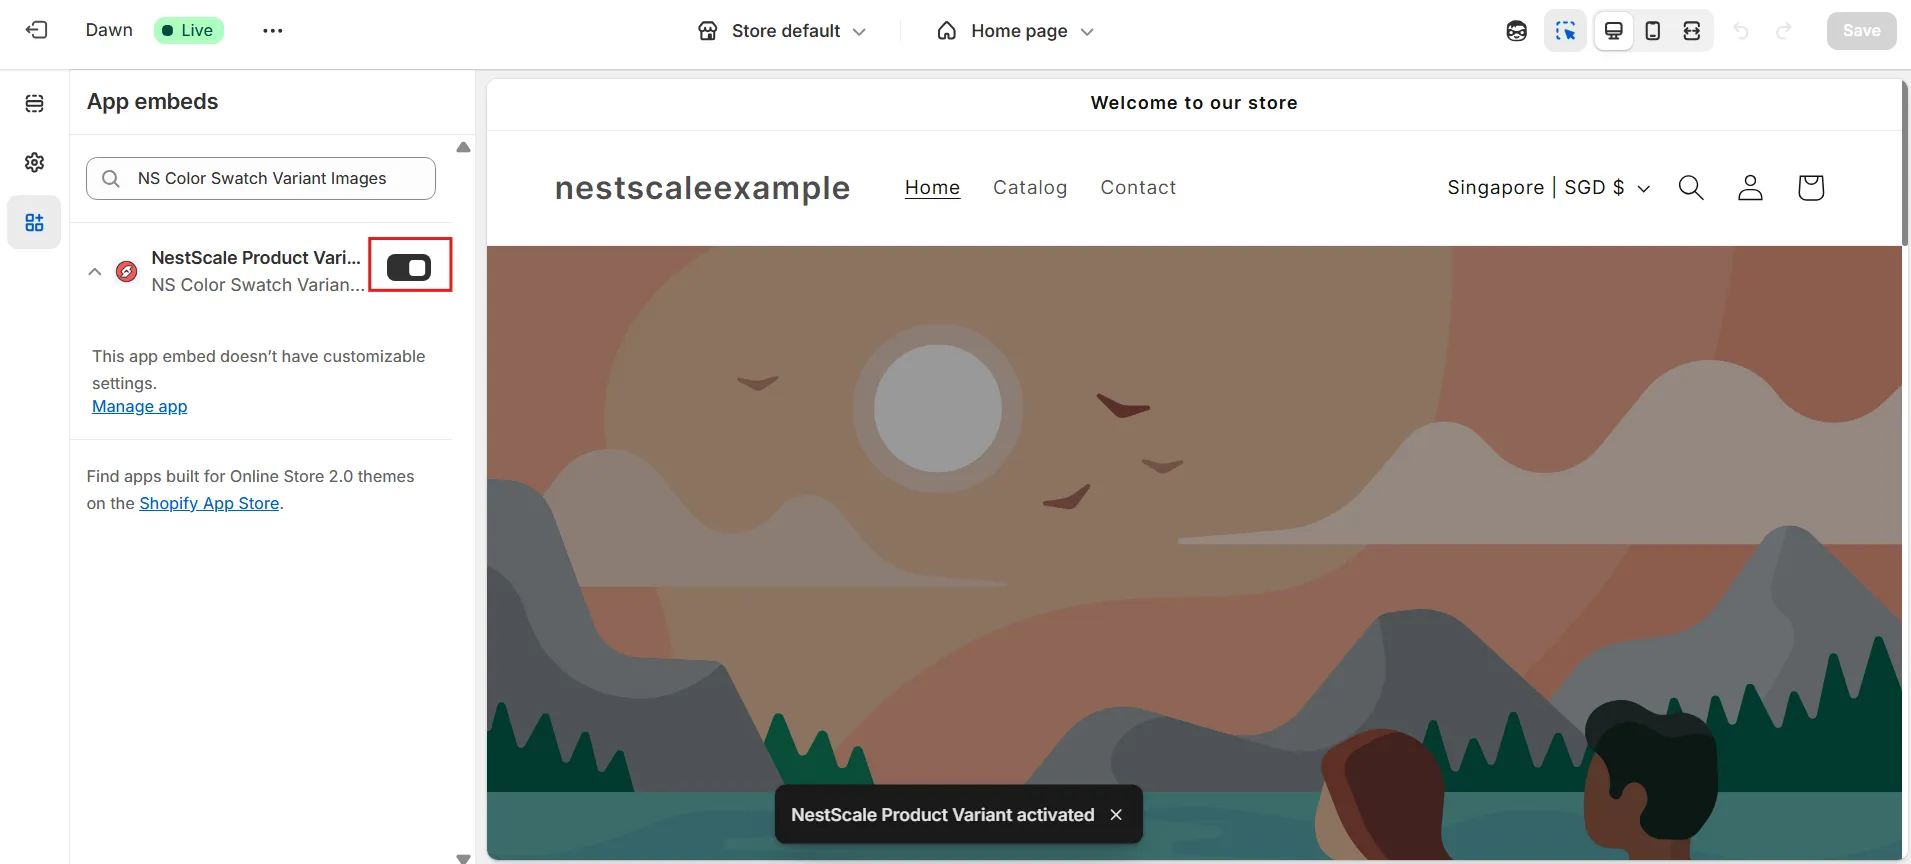
4. Toggle on the button next to NS Color Swatch Variant Images to embed the app.
Step 2: Choose a shape for your color swatches
Now that the app is set up, let’s choose how the color swatches will display on your product and collection pages.
1. From the instructions page, you can either go directly to Option Configuration in the left-hand menu or click on the Choose Swatch Style button to continue.
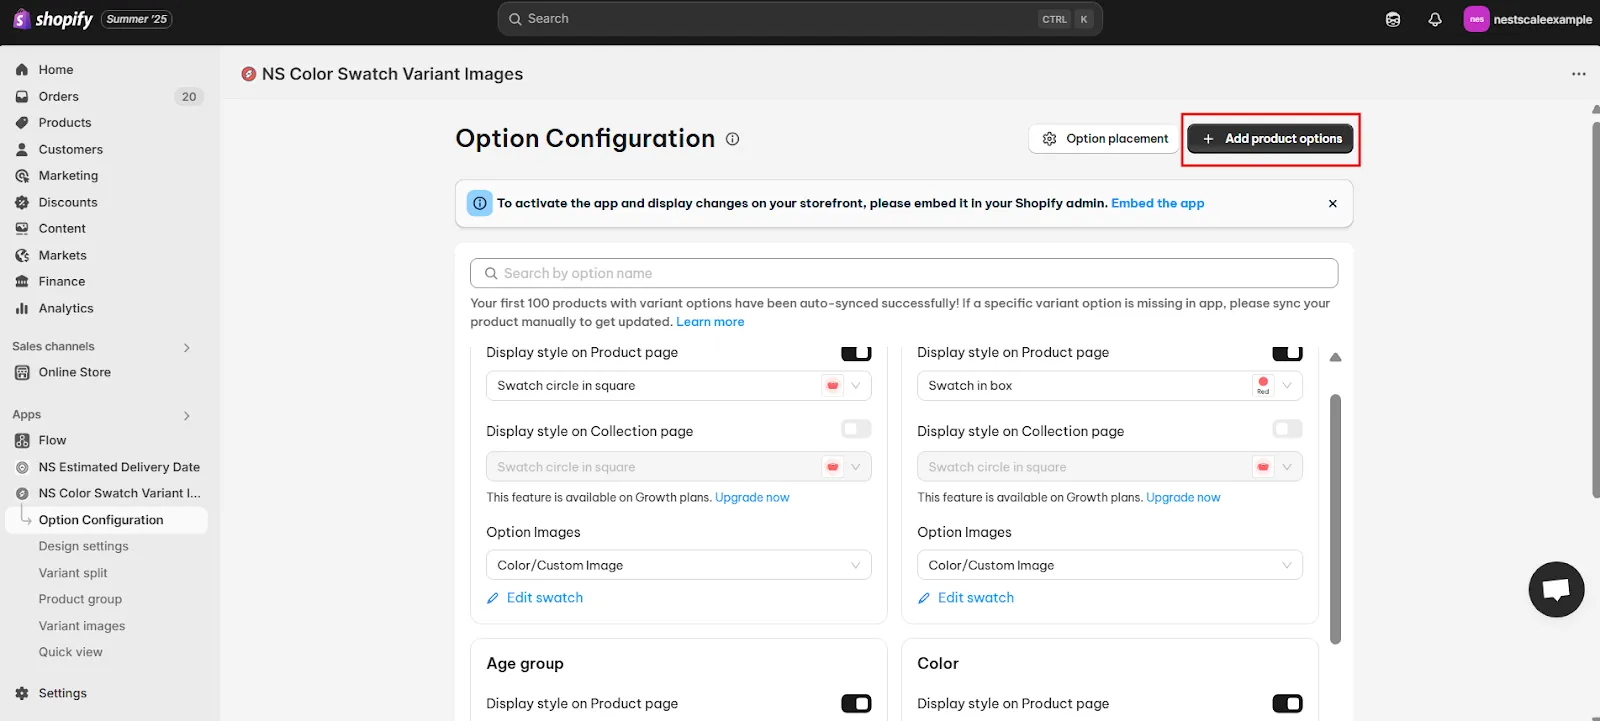
📝 By default, the app will automatically sync your latest 100 products with options. If you don’t see the option you want to customize, click Add Product Options.
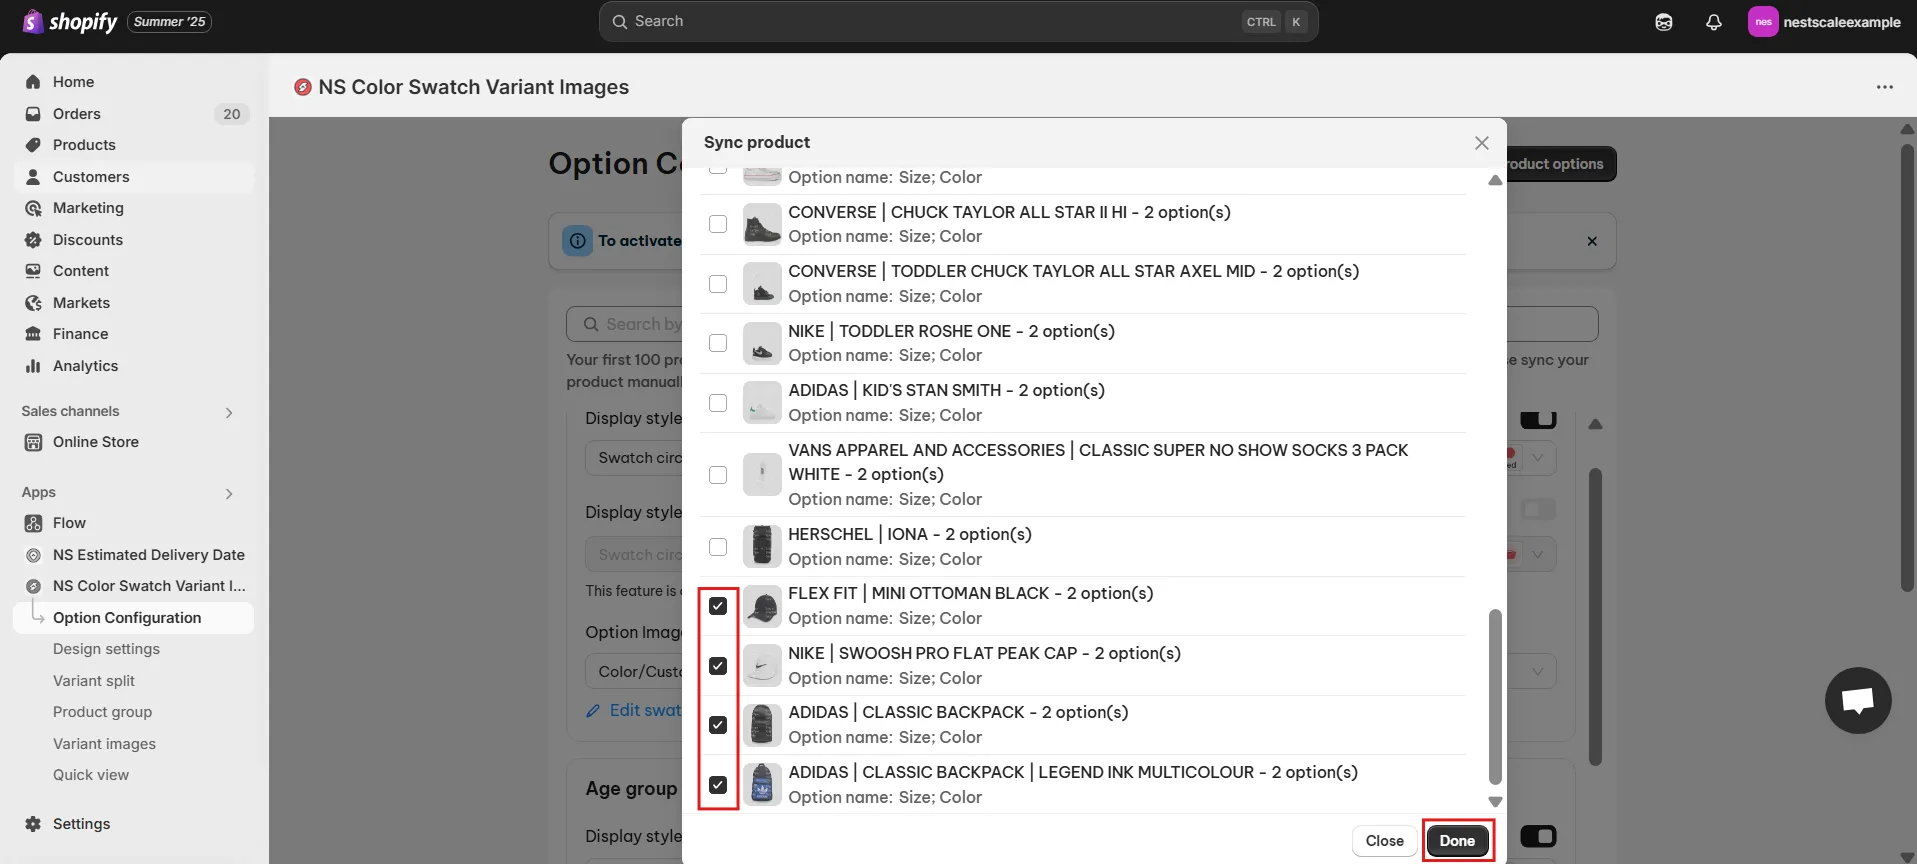
2. A list of products will appear, select the ones you want to set up color swatches for, and click Done.
3. To enable swatches on the product page, toggle on Display style on Product page for the options you want.
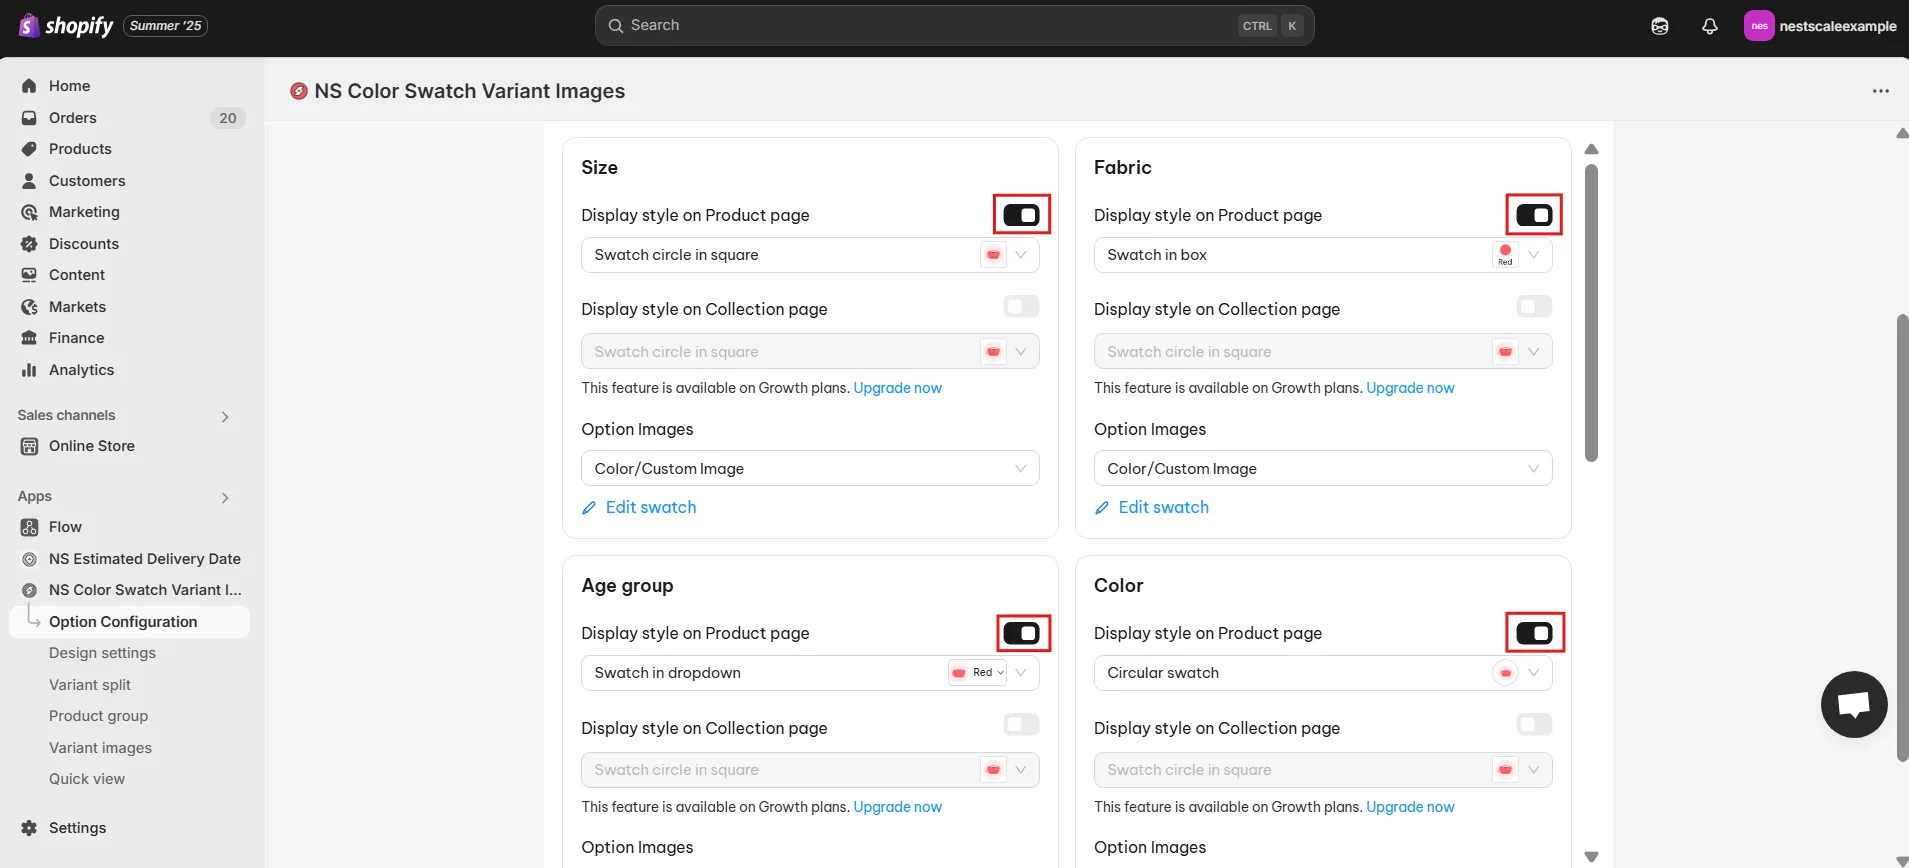
✨ Note: In Free version, you can only show color swatches on Product pages. If you want to show color swatches on Collection pages as well, you may need to upgrade to a higher plan of NS Color Swatches Variant Images.
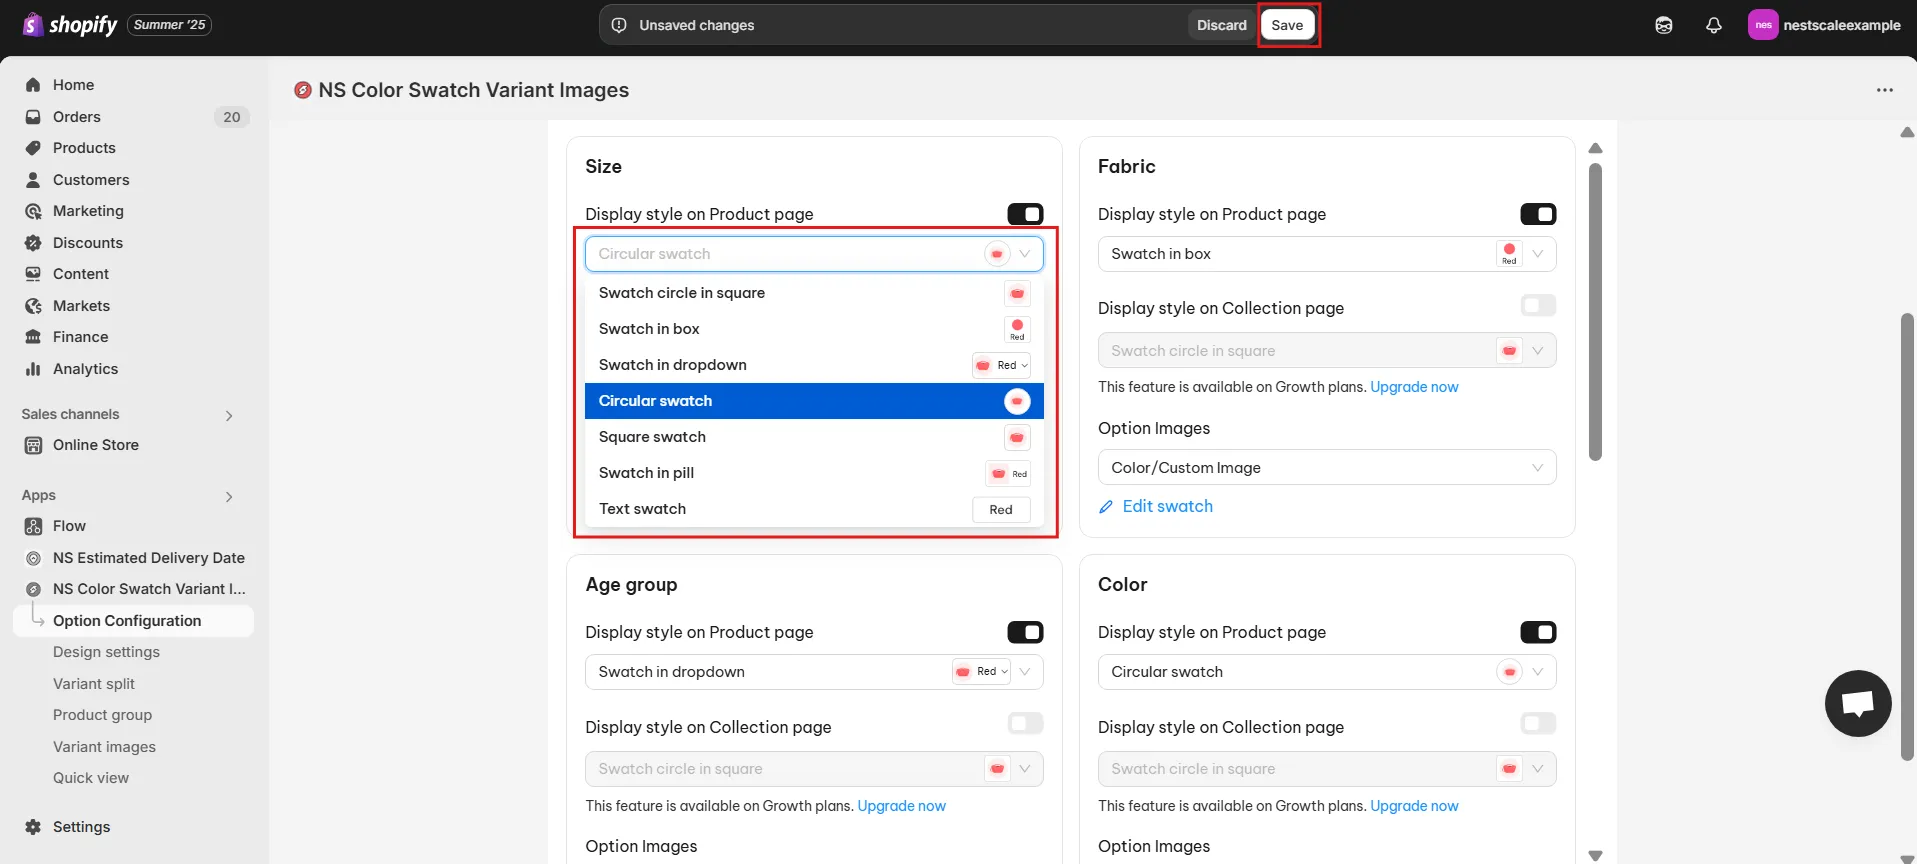
4. To customize the shape of your color swatches, click the box under the toggle button.
5. A dropdown will appear showing various shapes. You’ll see a preview of each style, choose a custom shape for color swatches in Shopify, and click Save.
For this guide, I’ll choose Circular swatch – a rounded shape style.
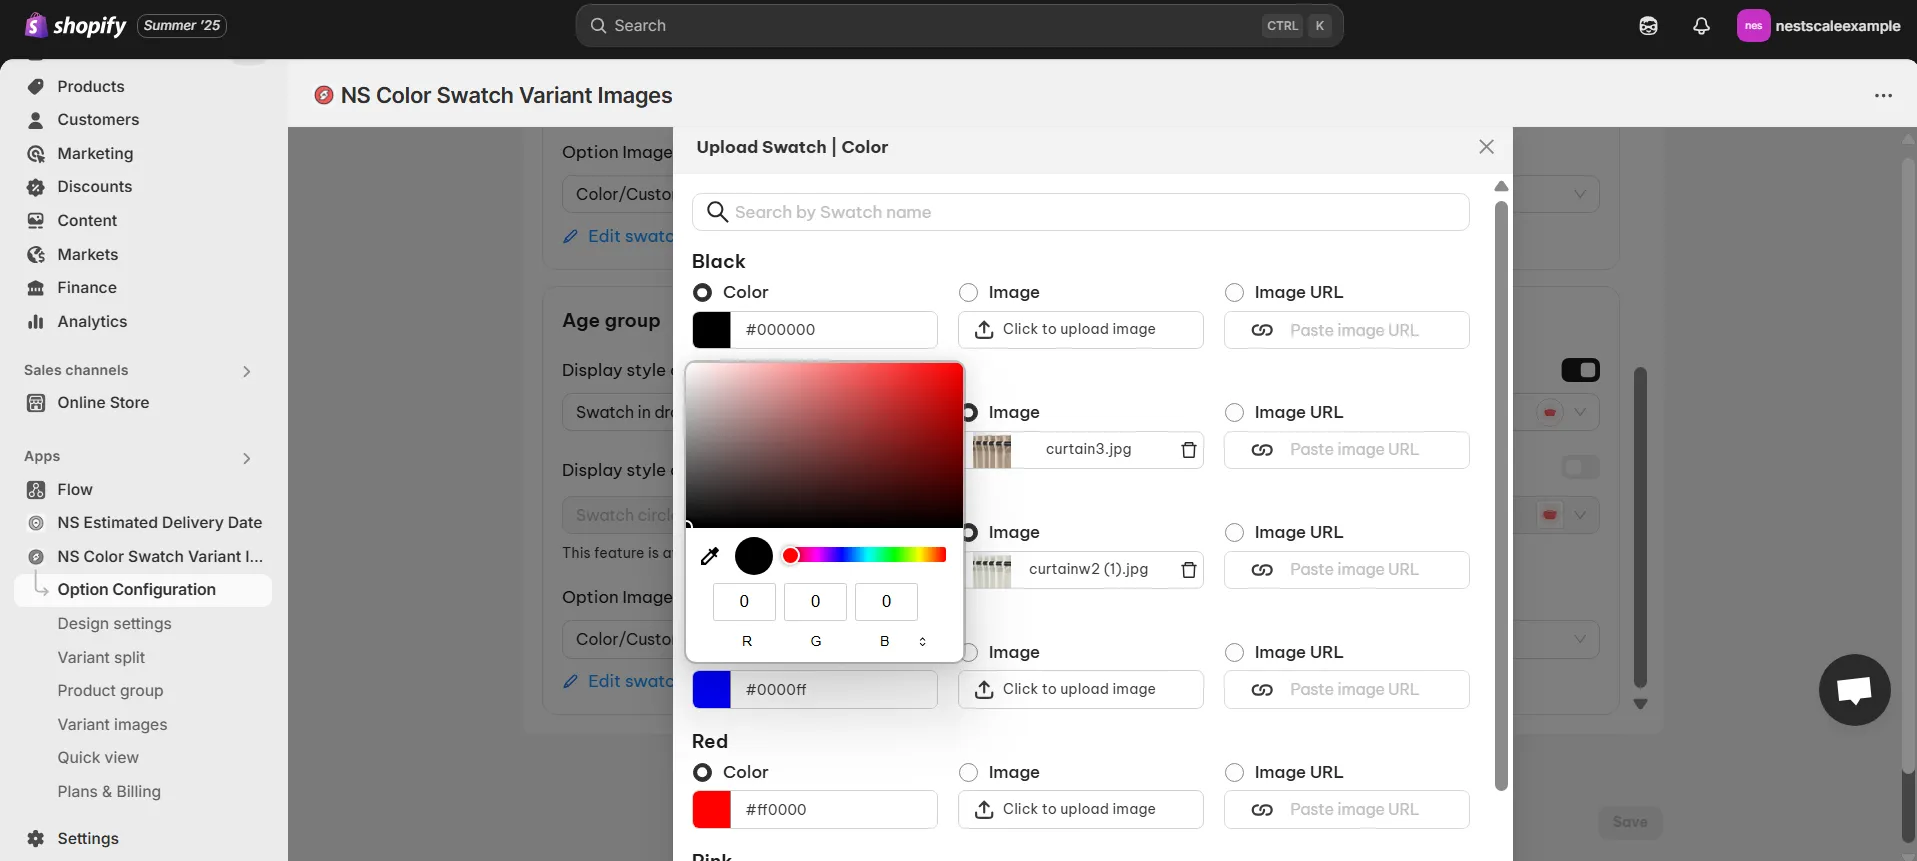
6. Now, decide whether you want to use color swatches or image swatches.
- (1) Use the Shopify variant images (if you already uploaded images for your variants).
- (2) Or use Color/Custom image where you can pick a color with the color picker, enter a HEX code, or upload a custom image from your computer.

7. If you choose the (2) Color/Custom image option, click Edit swatch.

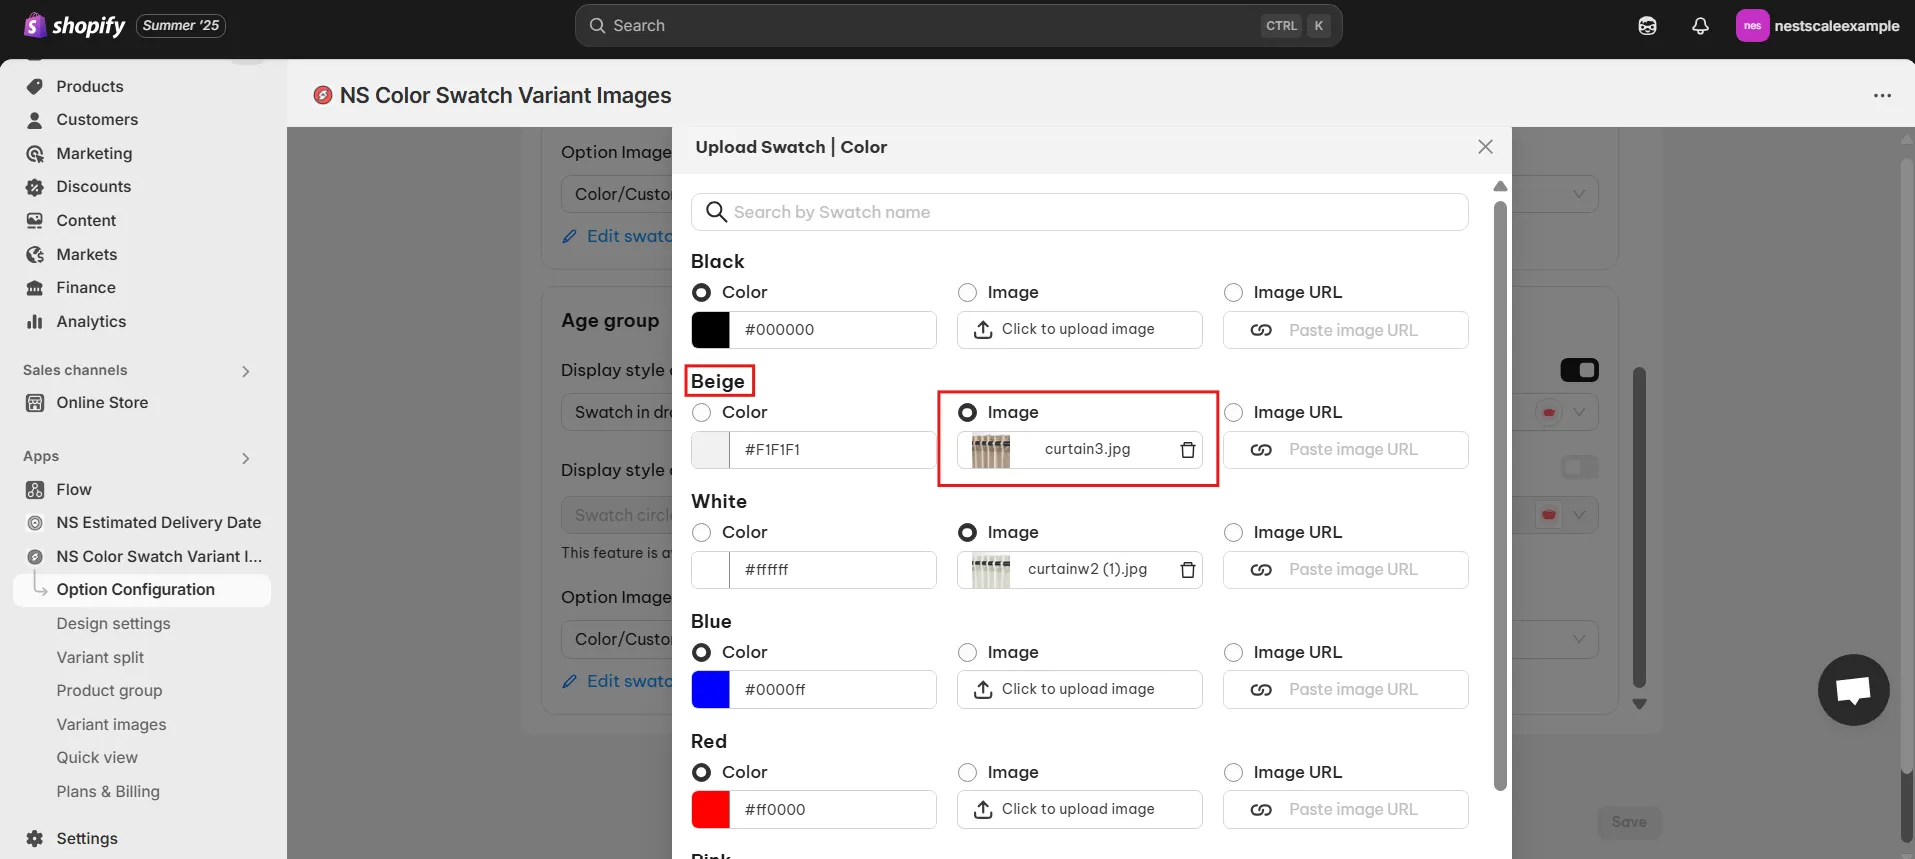
8. In the pop-up, set the color or image for each variant. Don’t forget to check the associated variant name to ensure everything matches.
9. Once you’ve customized your swatches, click Done and Save.
Now that you’ve chosen a shape, it’s time to personalize it to fit your store’s design.
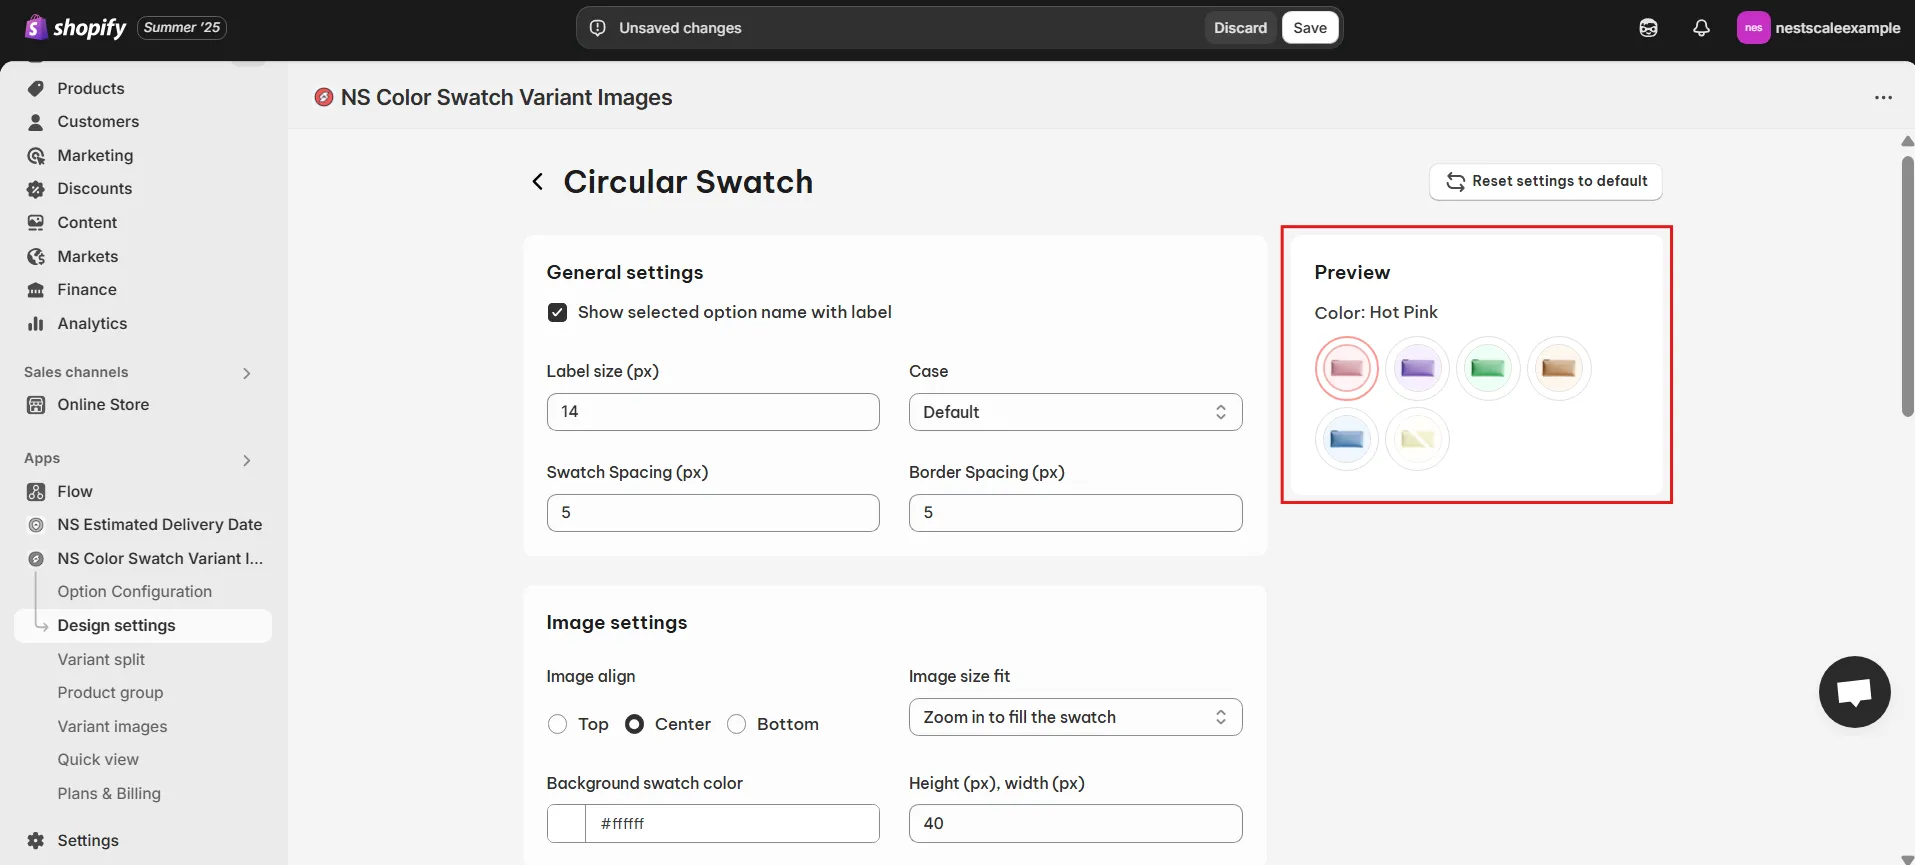
Step 3: Customize shapes for your color swatches
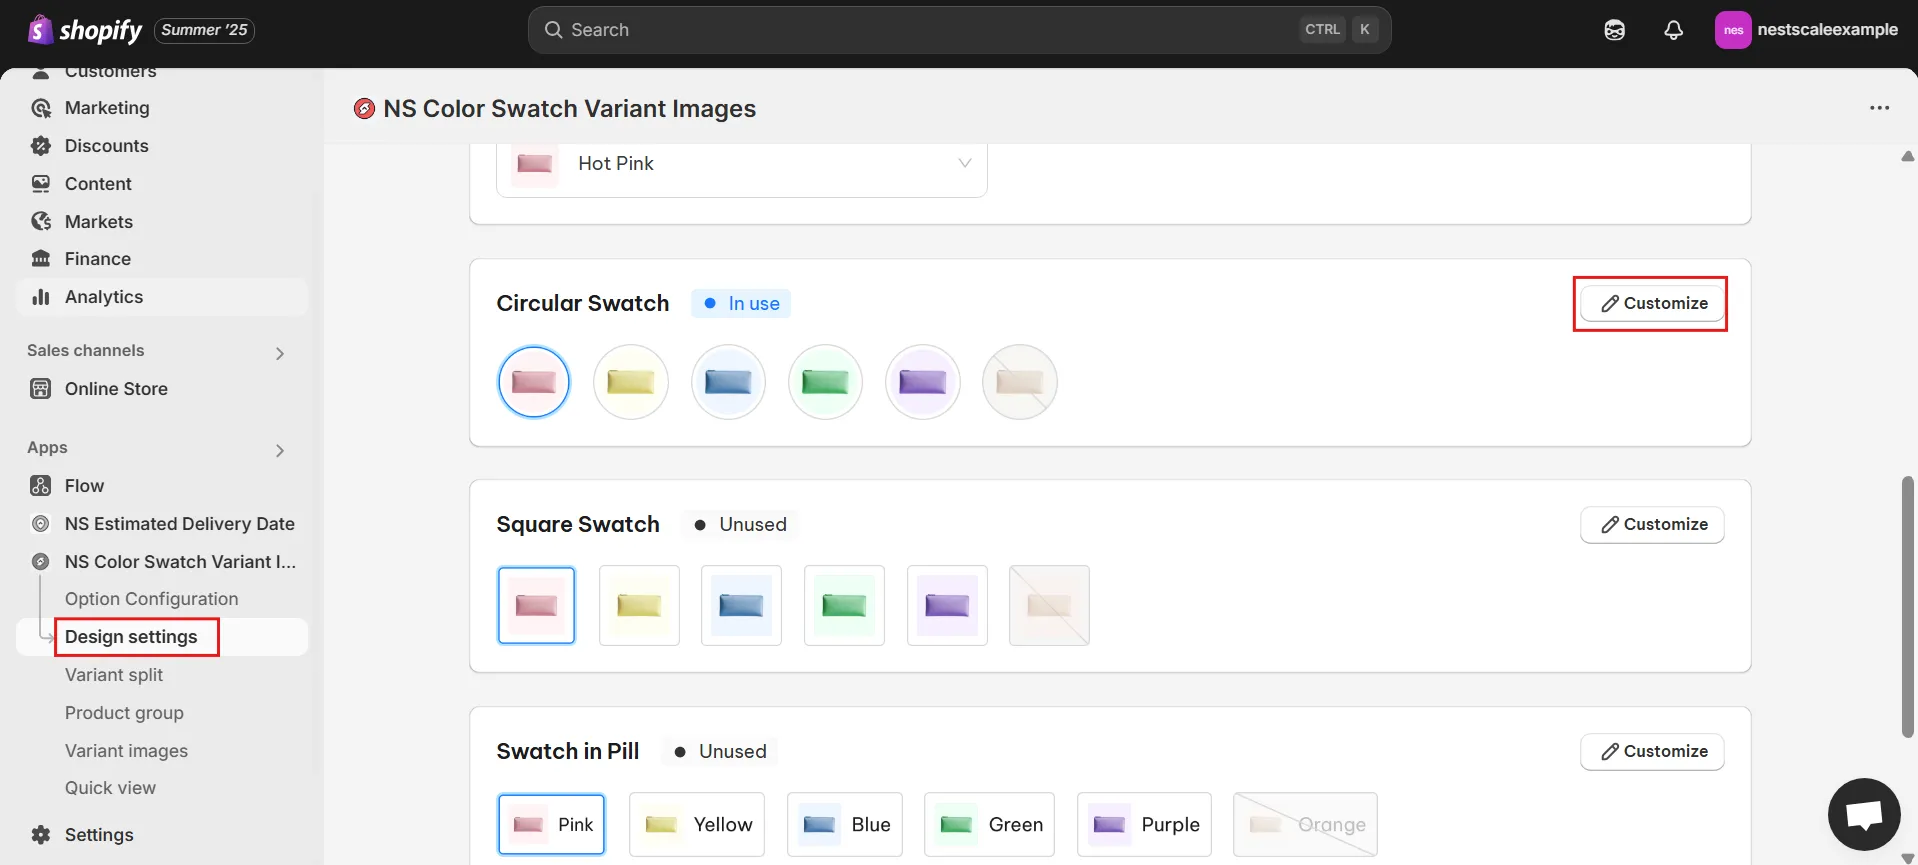
1. Go to Design Settings in the app menu.
2. You’ll find the style you chose earlier (it will say “In Use” next to it, making it easy to spot).
As I chose the Circular swatch style before, I’ll customize it by hitting the Customize button.
3. There are five main sections for customizing the swatches:
- General Settings: Adjust the swatch size, spacing, and border size.
- Image Settings: Choose whether to zoom in or out on the variant image on hover, adjust image size and position.
- Selected Swatch: Customize the border color and thickness for selected swatches.
- Unselected Swatch: Customize the border color and thickness for unselected swatches.
- Hover Swatch: Choose to show the variant name, add a shadow, enable a tooltip, or zoom image on hover.
*I think these customizations are fun, so enjoy the process, I promise the app is super easy to use, so you may not need much instructions for this part.*
💡 As you make changes, use the Preview feature to see how it looks before finalizing your settings.
4. Get your customization done? Don’t forget to hit Save!
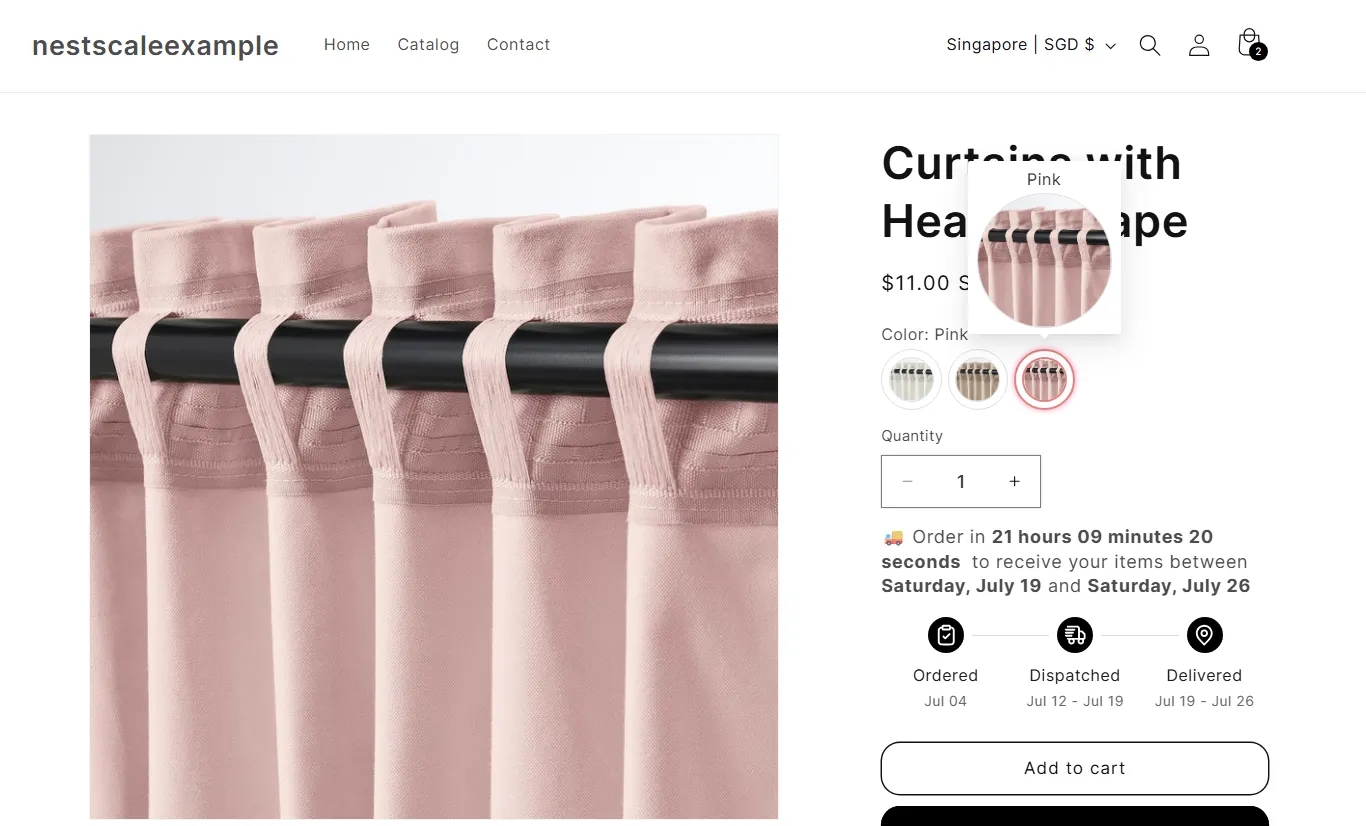
Here’s the final of your custom shape for color swatches in Shopify. Check them on your store, you’ll love it 😉
🚚 Hey-hey, if you noticed the delivery message on my store, I did it with the NS Estimated Delivery Date app, a super duper useful widget to let your customers know when to expect their orders. You may not want to miss out!
Our buddy, Oliver, put together a detailed video tutorial to walk you through customizing your Shopify color swatches step by step. He really went all in on the details, so be sure to check it out!! 🙌
💡 NS Color Swatch Variant Images also offers other awesome features to help you organize and display product variants on your storefront more efficiently:
- Multiple Variant Images: Assign different images to specific variants.
- Show Variants as Separate Products: This feature allows you to treat each variant as its own product.
- Combined Listings: Combine different variants into a single listing for cleaner product pages.
- Quick View: Enable a quick view option for faster browsing.
FAQs
Will the app work with all Shopify themes, including premium and custom ones?
NS Color Swatch Variant Images is built to work with nearly all Shopify themes, including standard, premium, or custom. However, some themes might still need a little fine-tuning to make everything run smoothly. No worries though, our dev team is here to help. Just drop us a message via live chat, and we’ll jump in to make sure everything works properly on your theme.
What’s the ideal swatch size for mobile users?
NS Color Swatch Variant Images is fully optimized for all devices, including mobile and tablet. Just set the swatch size you want on desktop, and the app will automatically scale it to look great on smaller screens. Your mobile shoppers will enjoy a clean, user-friendly experience without any extra setup on your end.