If you’re running an eCommerce store on Shopify, you’re probably familiar with the frustrating experience of abandoned carts. It can be disheartening to see potential customers leave without making a purchase. But fear not! We’re here to share with you a setup guide and best practices for creating effective abandoned cart emails on Shopify.
By the end of this blog post, you’ll have all the tools you need to recover those lost sales and improve your overall conversion rate. So grab a cup of coffee and let’s dive in!
What is an abandoned cart email?
When you go shopping online and add items to your cart, you might decide to leave the website without completing the purchase. This is what we call an “abandoned cart”. Basically, you left the items in your cart without finishing the checkout process.
Now, imagine you receive an email a few hours or a day after leaving your cart. This email reminds you of the items you left behind and encourages you to come back and complete your purchase. This is what we call an “abandoned cart email”!
Abandoned cart emails are a way for businesses to reach out to customers who might have forgotten about their cart, or who were hesitant to make the purchase. The email usually includes a picture of the items left in the cart, a friendly message reminding you to complete your purchase, and a link to go back to the website and finish the checkout process.
Sometimes, the email might even include a special offer or discount code to incentivize you to complete your purchase. This can be a great way to save some money on your purchase!
How to use Shopify’s abandoned cart default editor
To access the order confirmation email template in Shopify, you only need to follow four simple steps. Here’s how:
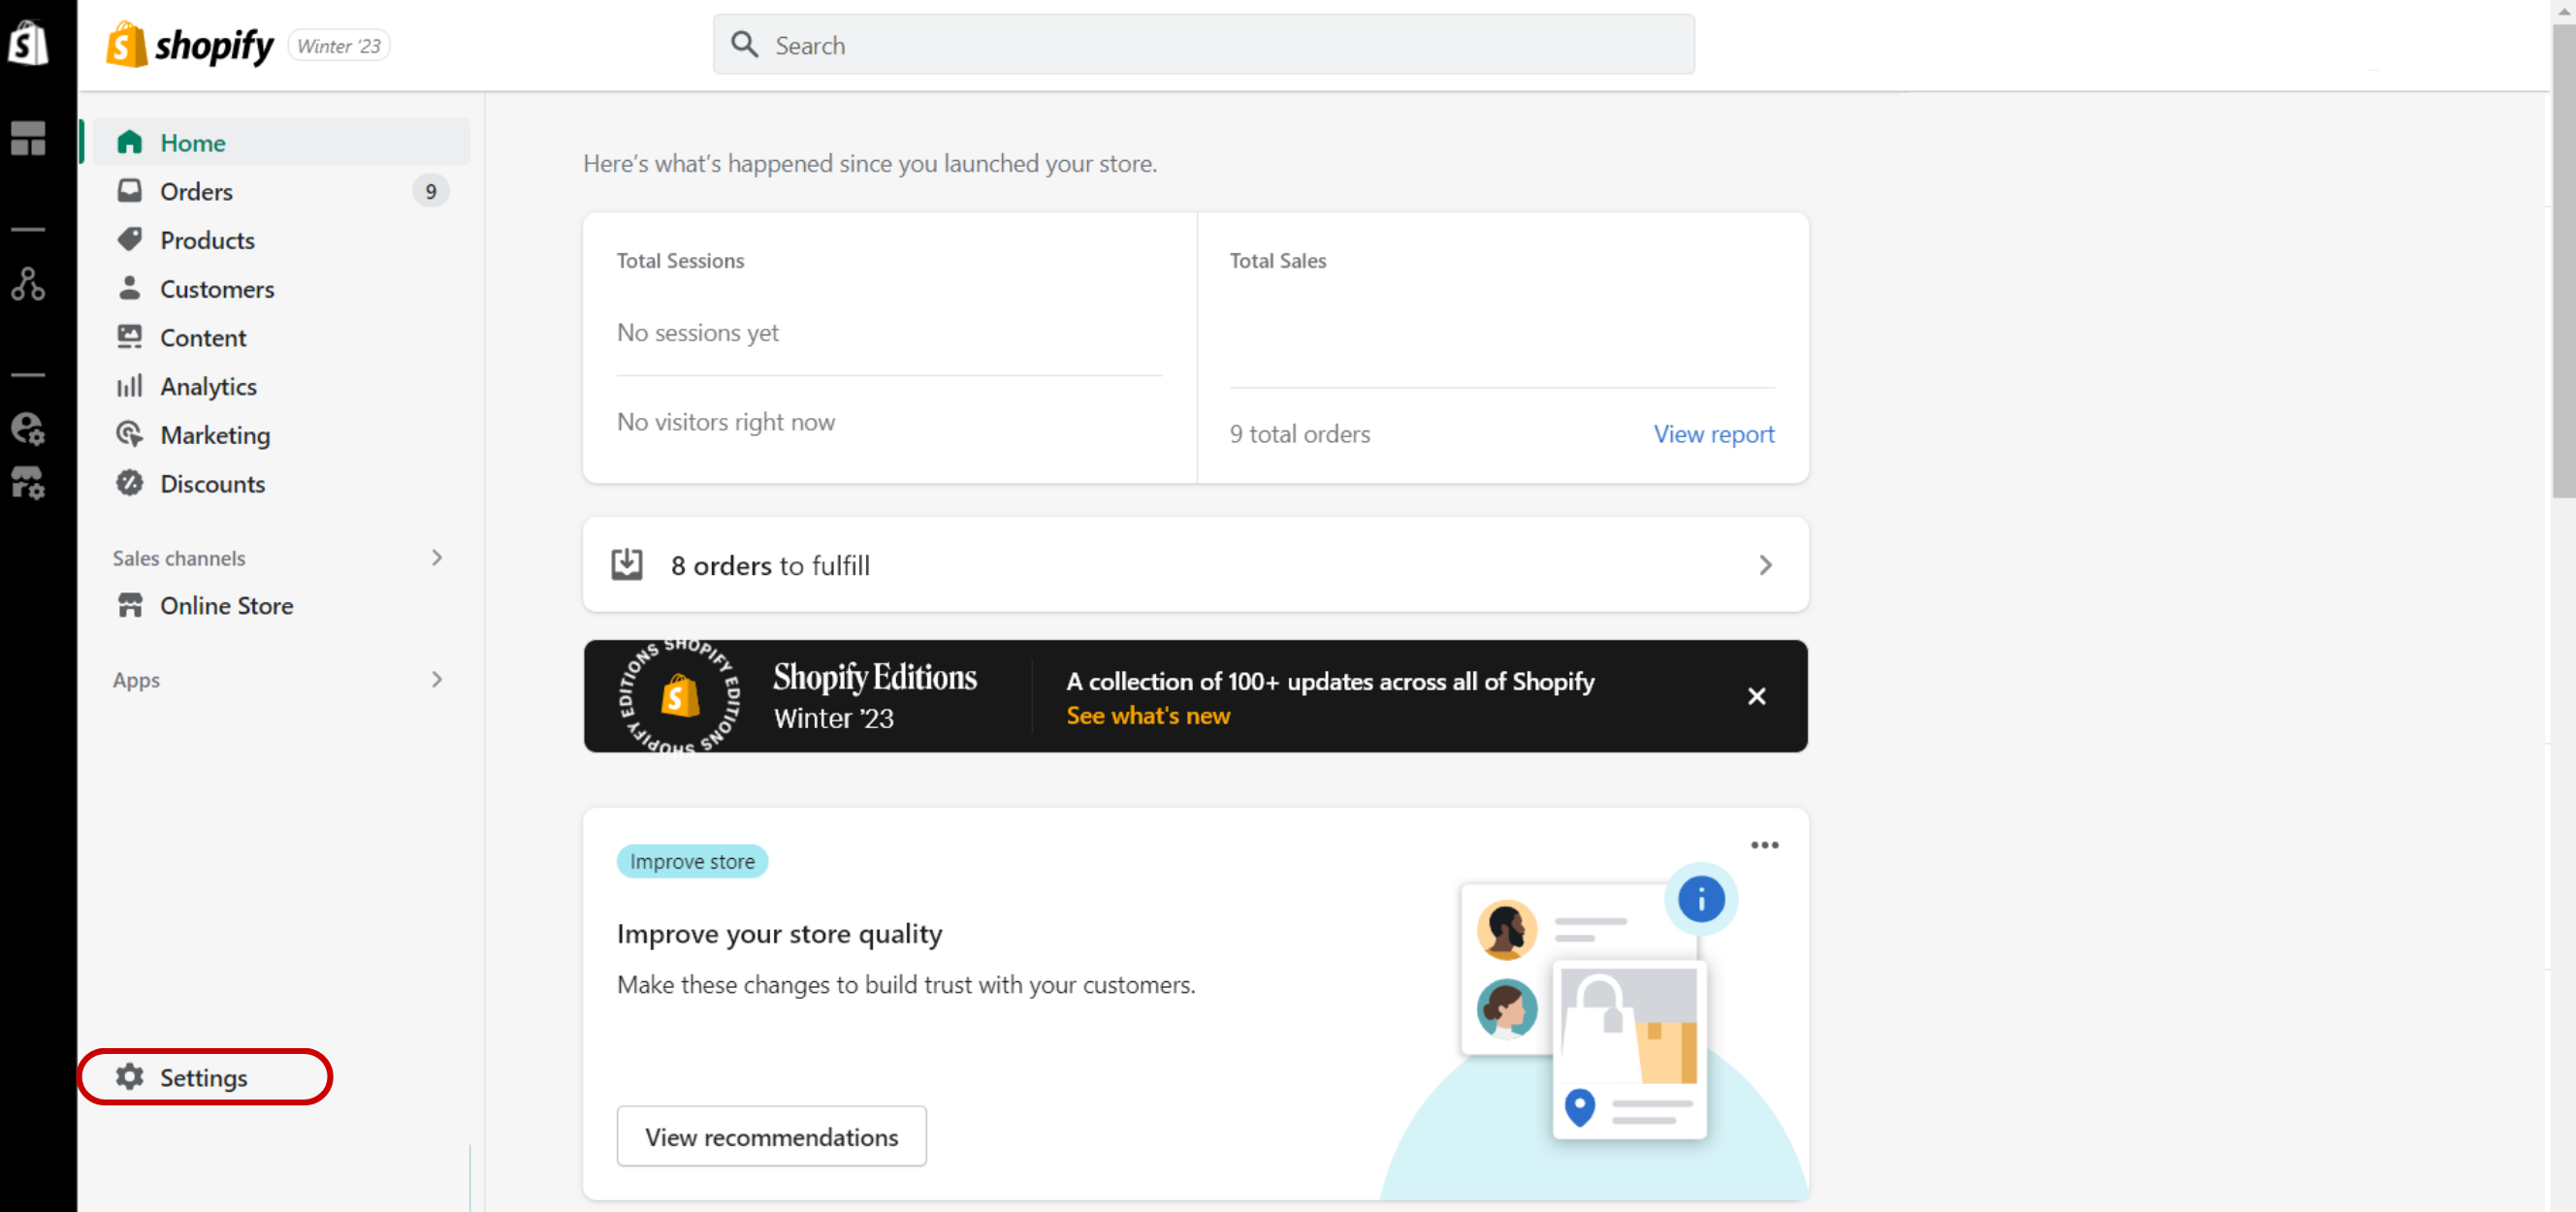
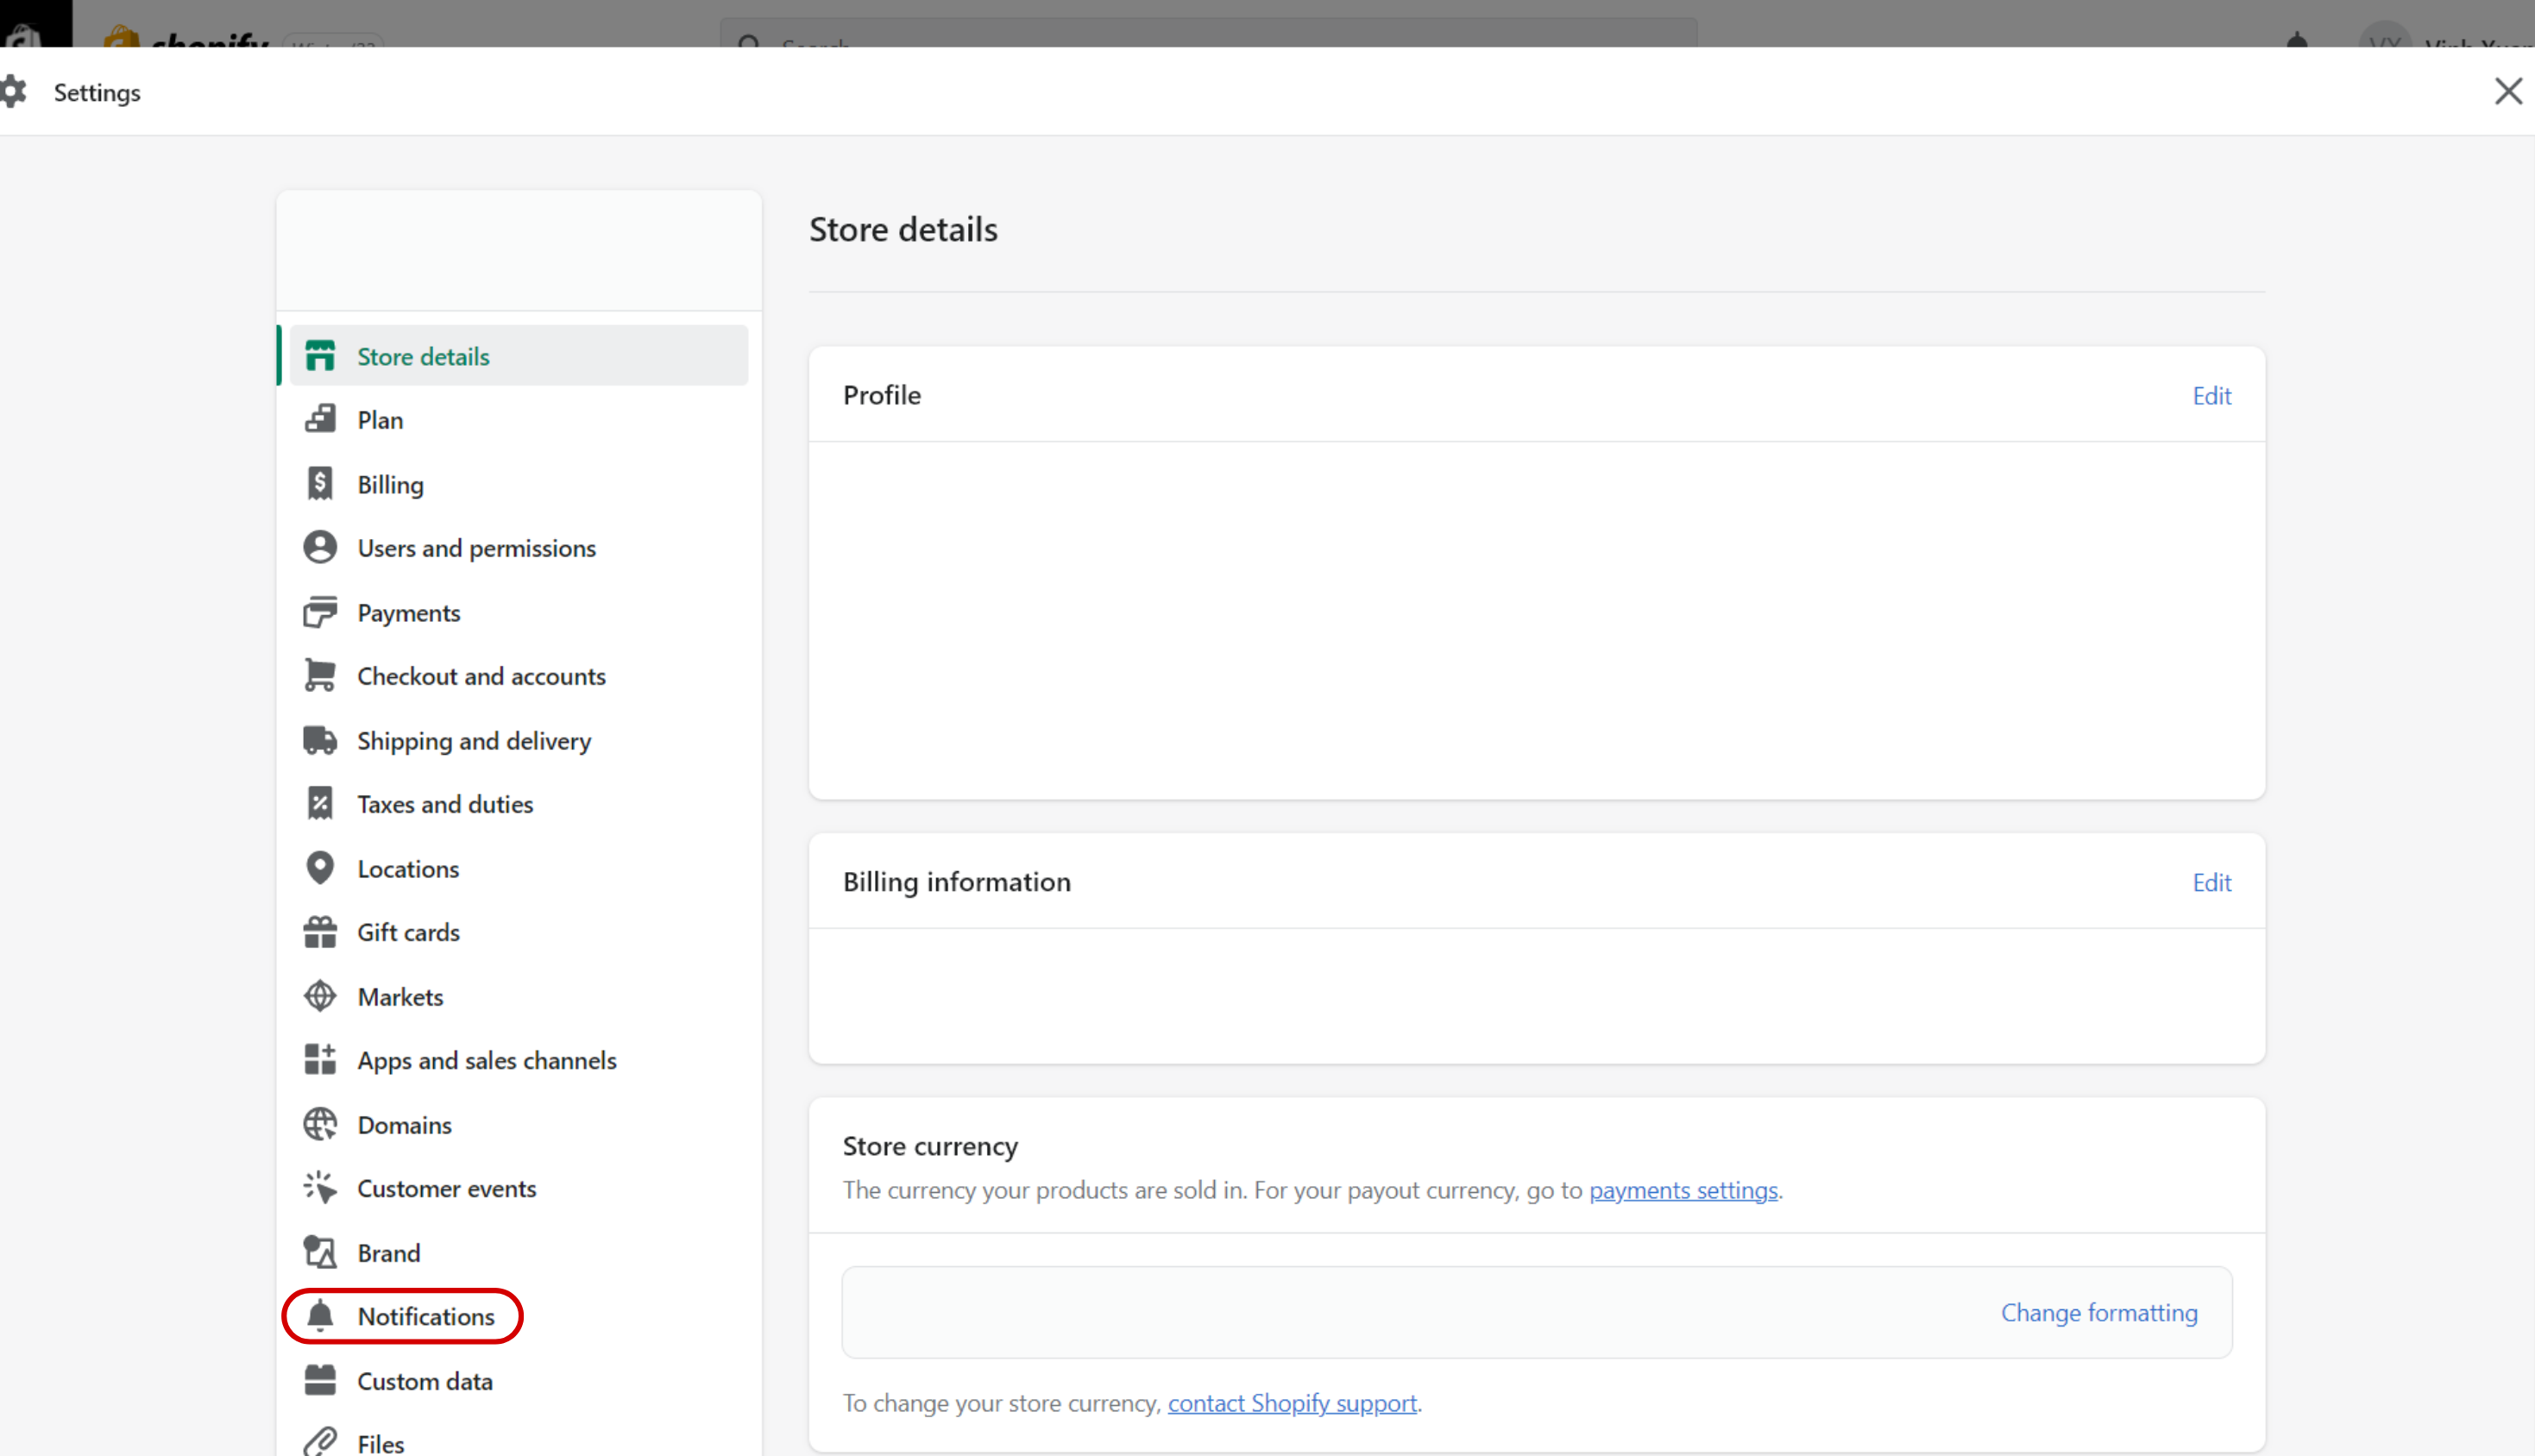
Step 1. Log in to your Shopify admin panel and access the “Settings” tab. This tab is located on the left-hand side of the screen.
Step 2. Scroll down until you see the “Notifications” button near the bottom of the list. Click on it to proceed.
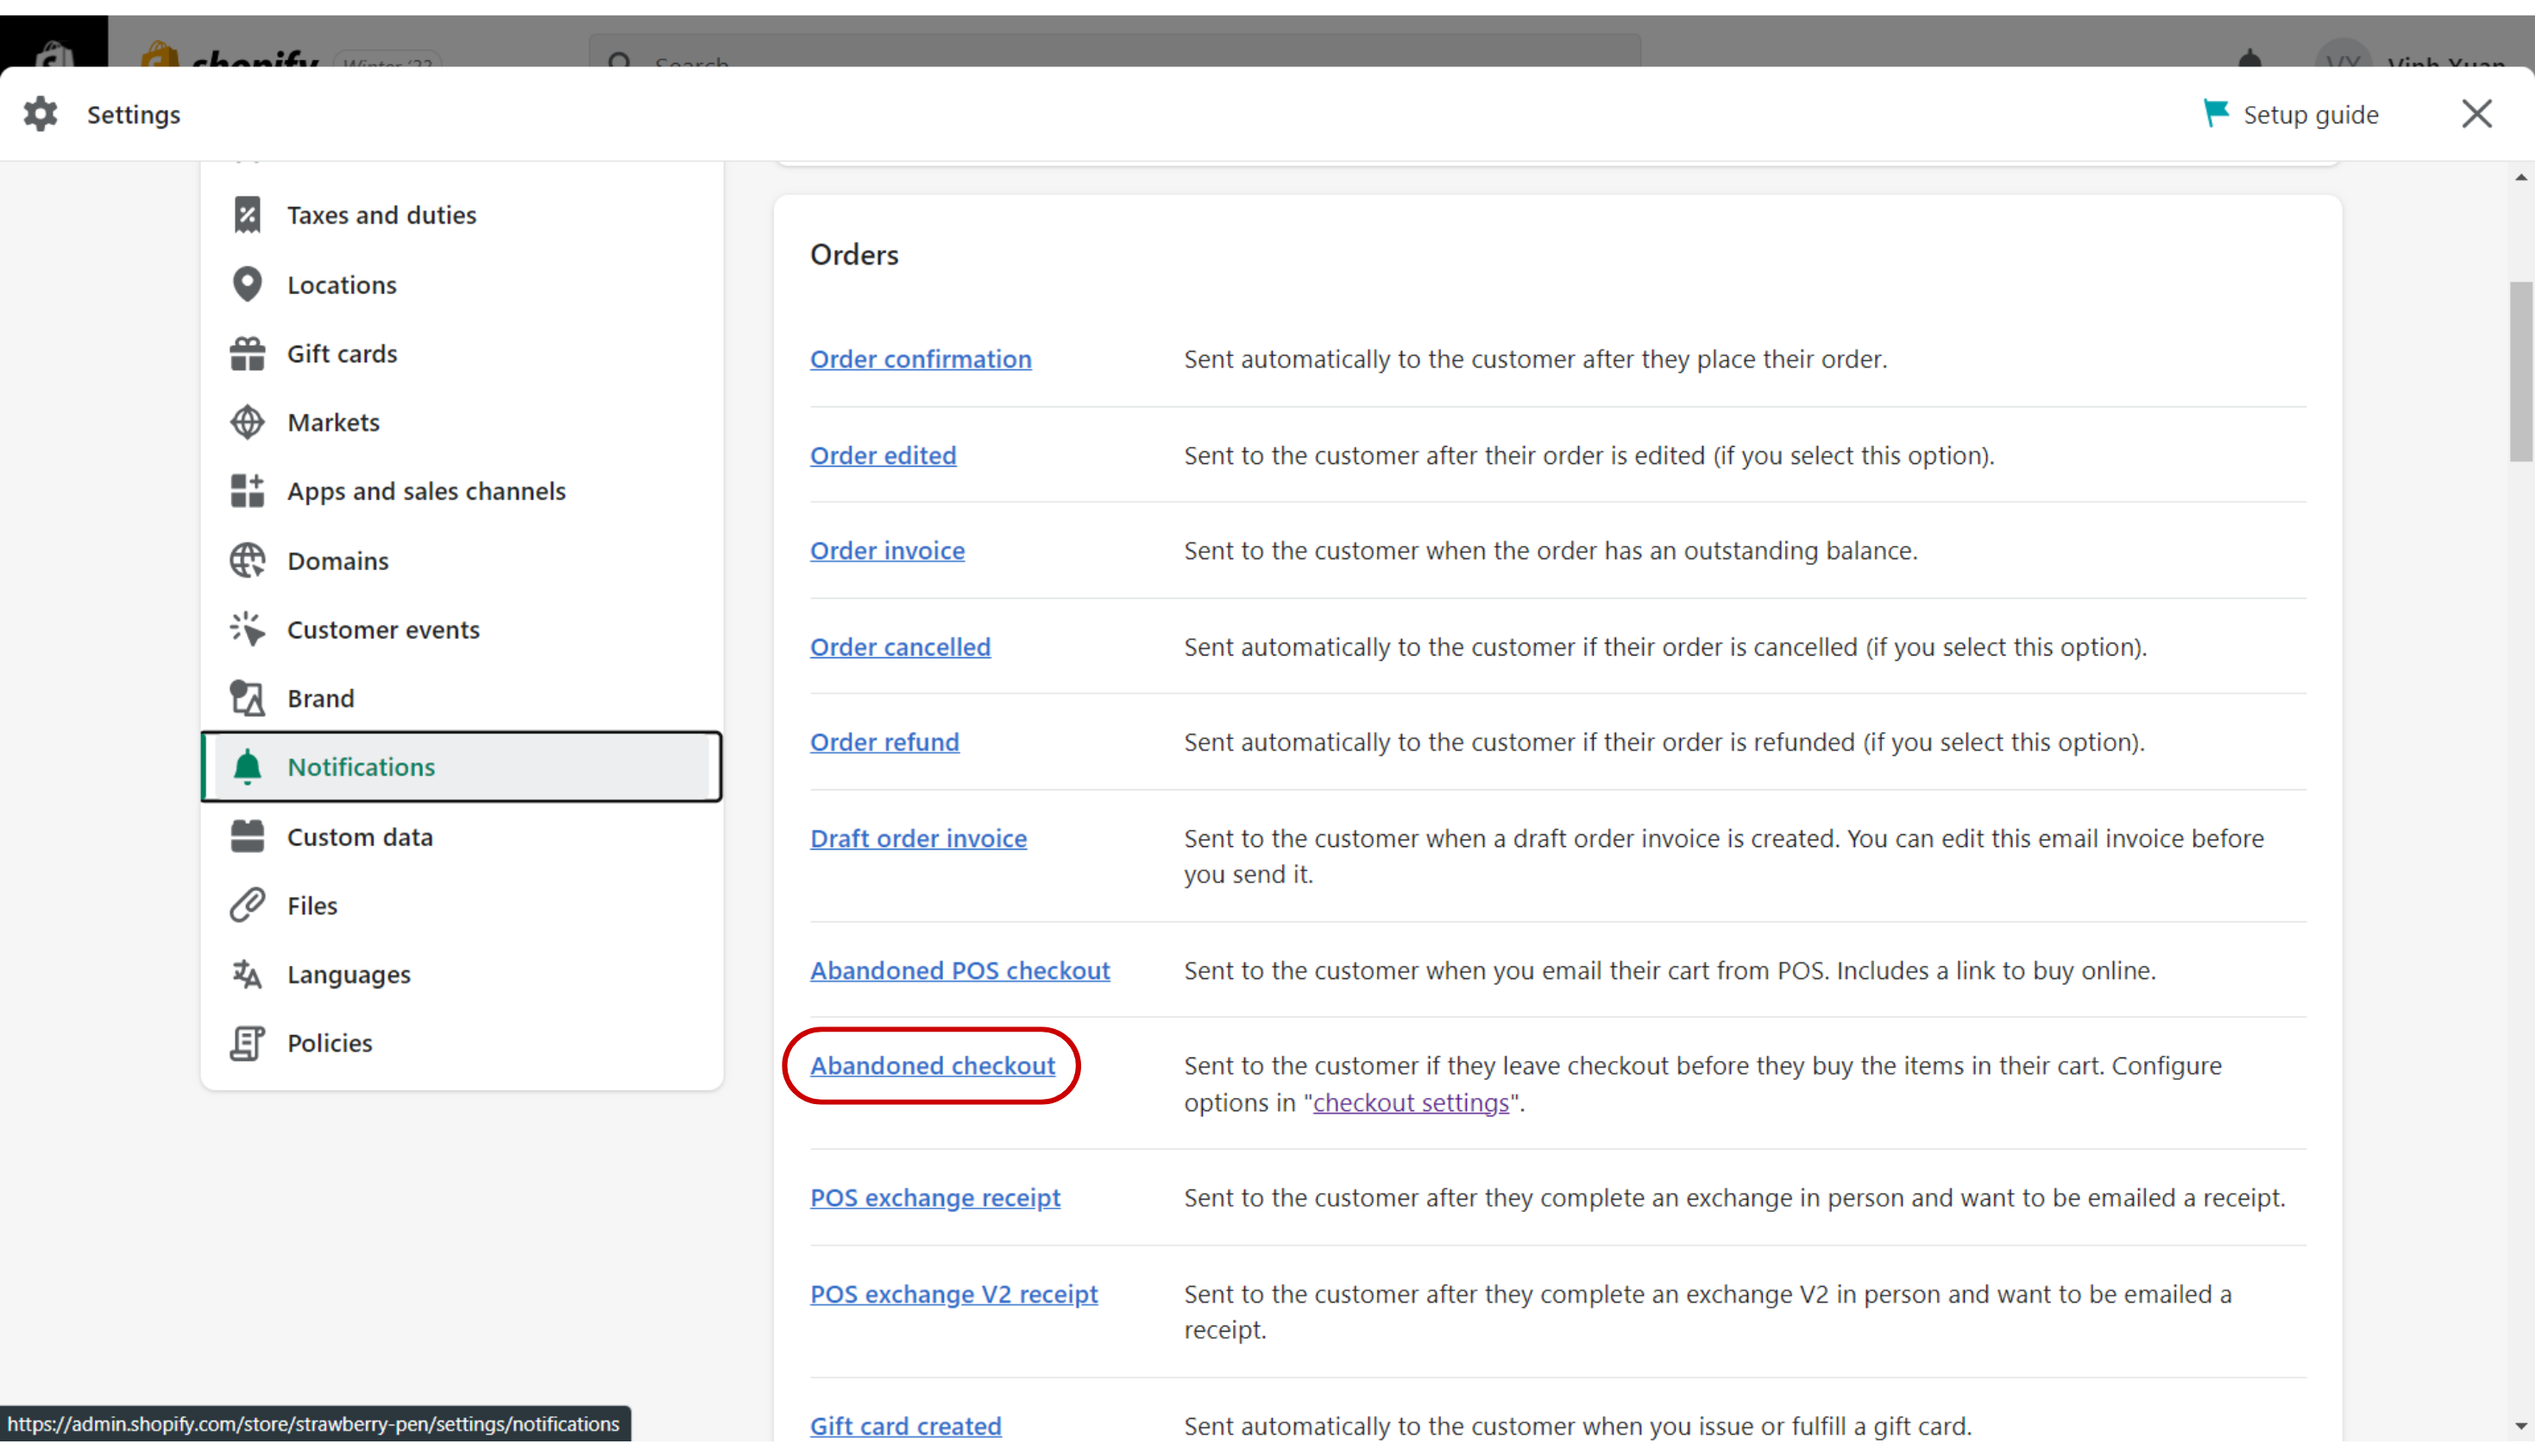
Step 3. Among the email variations listed, locate and click on the “Abandoned checkout” section.
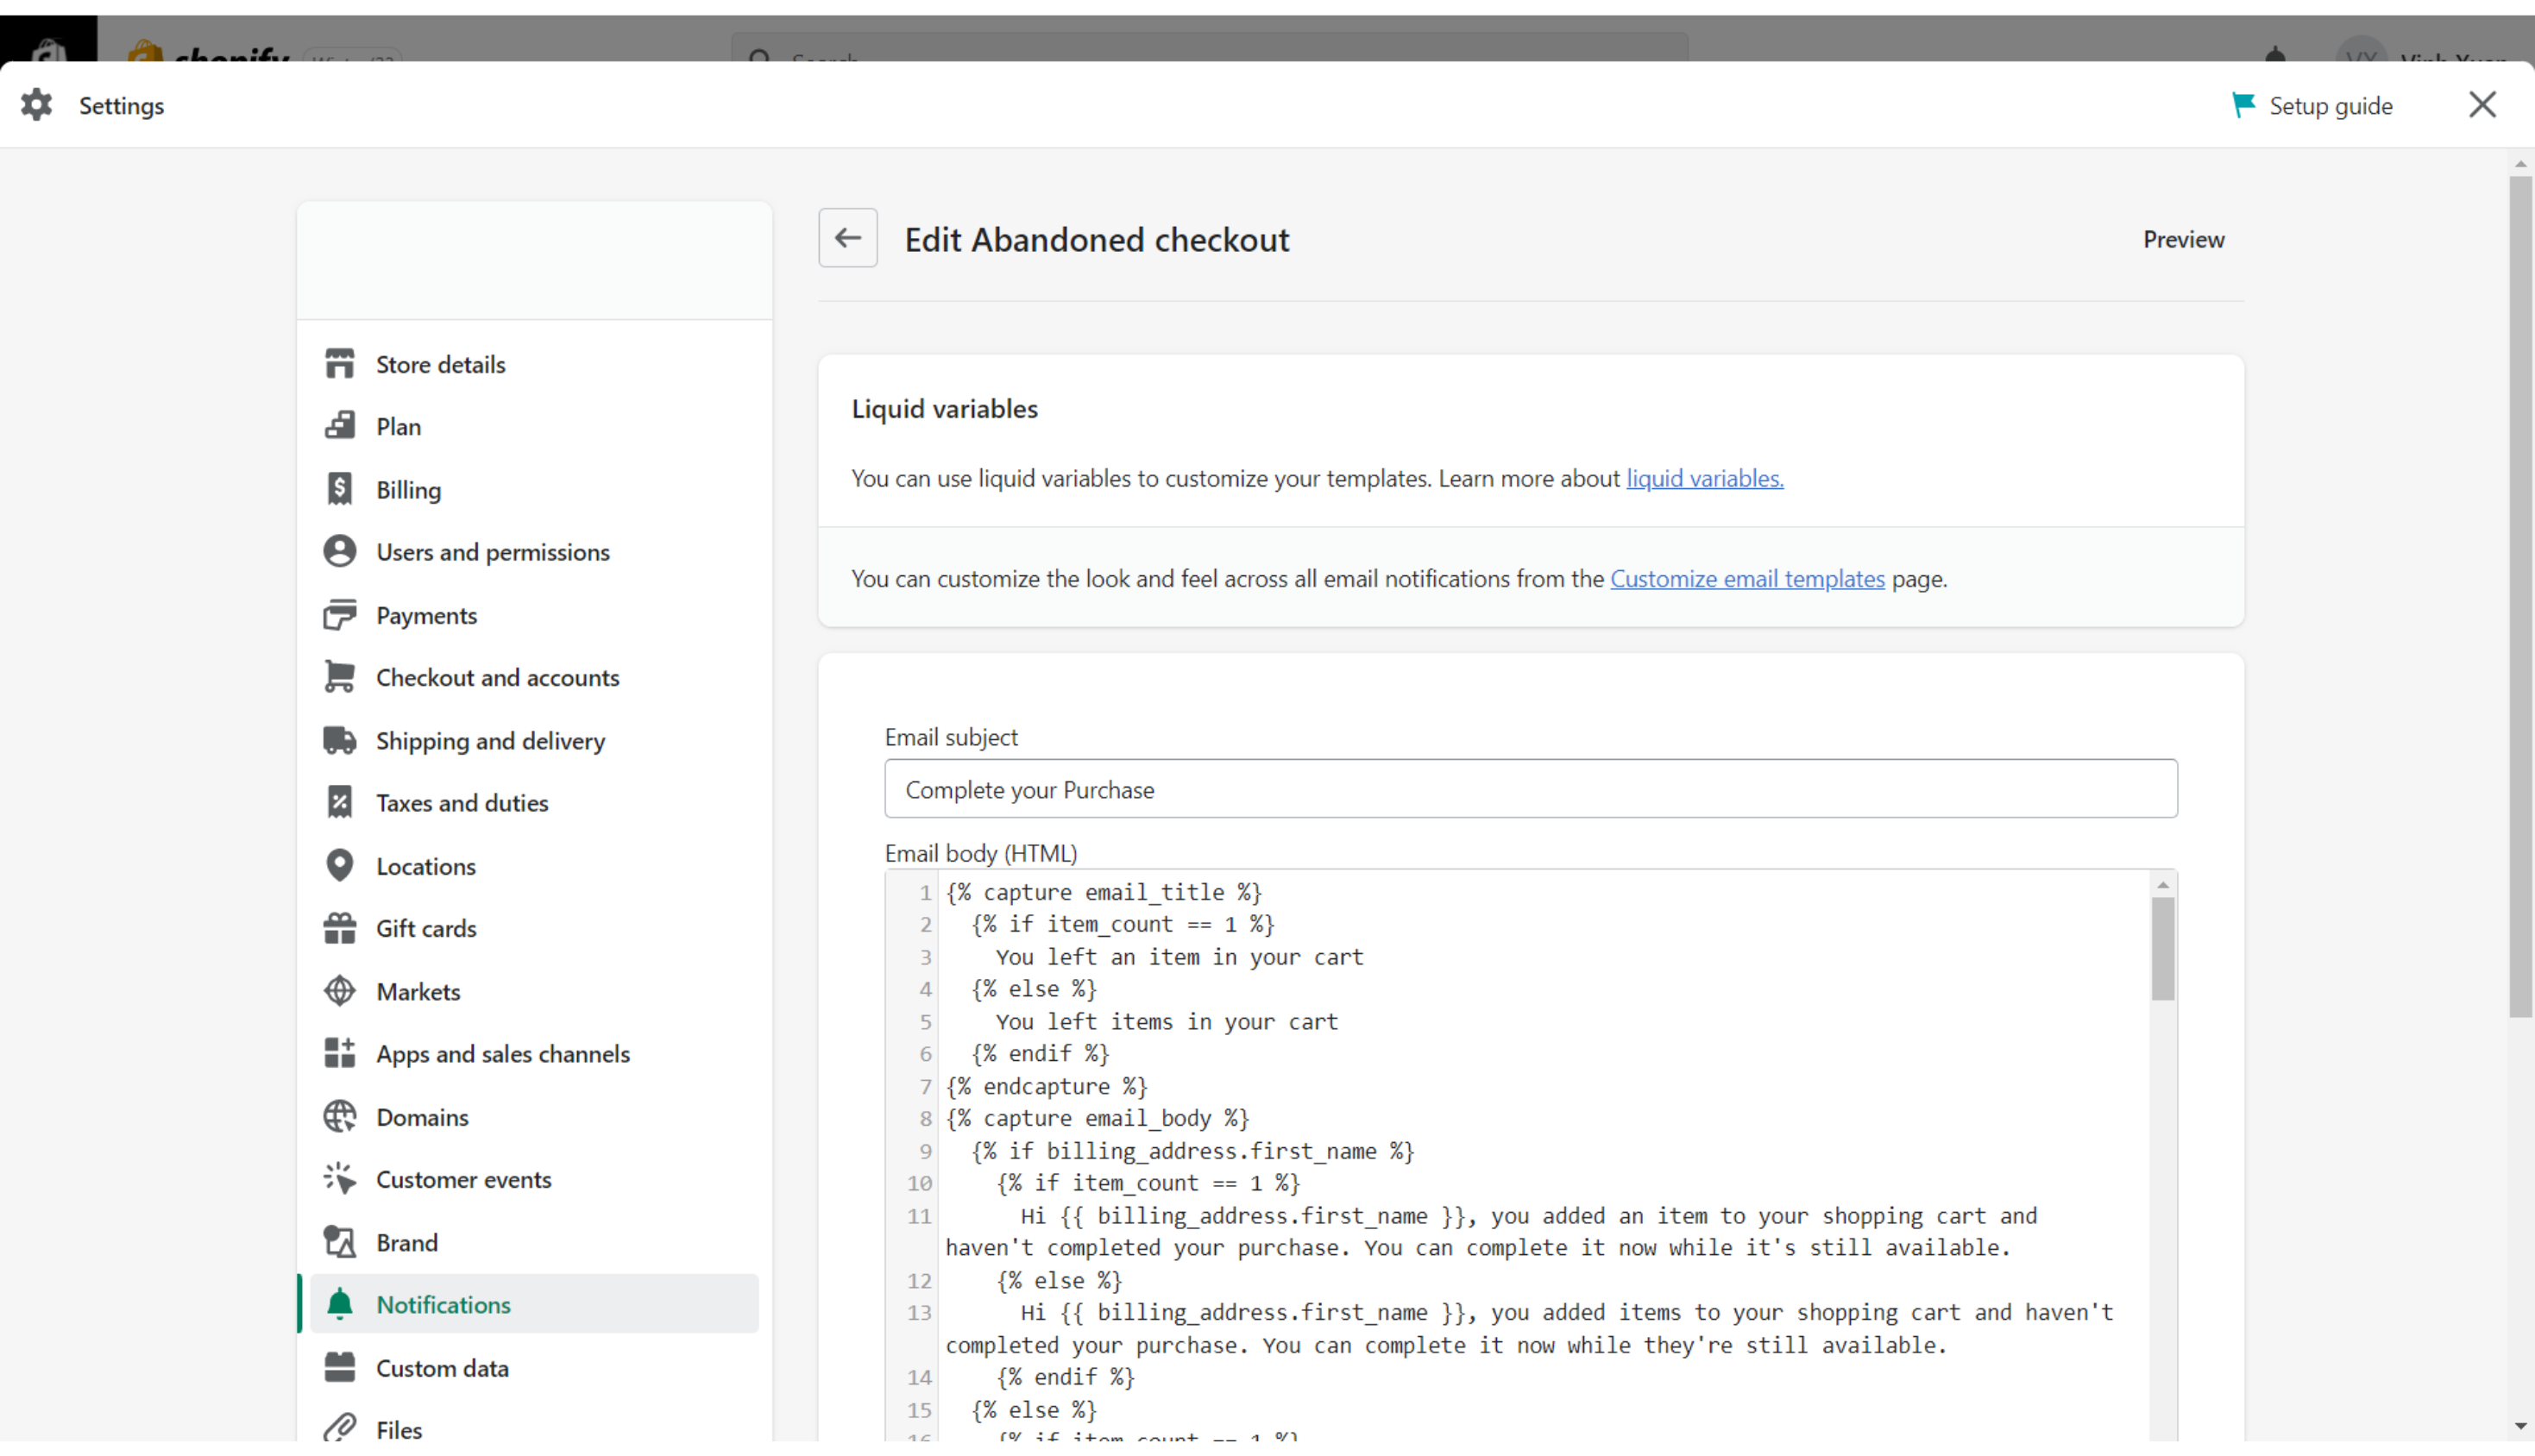
Step 4. Click on the green button labeled “Edit code” in the upper-right corner.

If all the previous steps were done correctly, you will be taken to the email template editor. This is where you can modify the email’s subject line, body, and basic formatting.
However, we would not suggest you use Shopify’s default email editor. If you don’t know HTML, you might find it hard to create the exact email you want. Also, the editor doesn’t have a lot of features to make your email look pretty or “aesthetic”.
Another problem is that the default editor doesn’t allow you to create a personalized automation flow. This means that you can’t set up a series of emails to be sent to customers who abandon their carts.
So, what’s the solution? Well, if you want to create beautiful, personalized emails for your customers, you should look for another Shopify email marketing app.
There are plenty of options out there that are easy to use and offer more features than Shopify’s default editor. If you are looking for a suggestion, then we highly recommend you to check out NestSend.
How to customize your Shopify abandoned cart email
NestSend is probably the best app you can find to create your Shopify abandoned cart email flow. It has all the features to make your creation of an email automation flow just like a walk in the park.
To establish your abandoned cart email flow, just follow these seven steps:
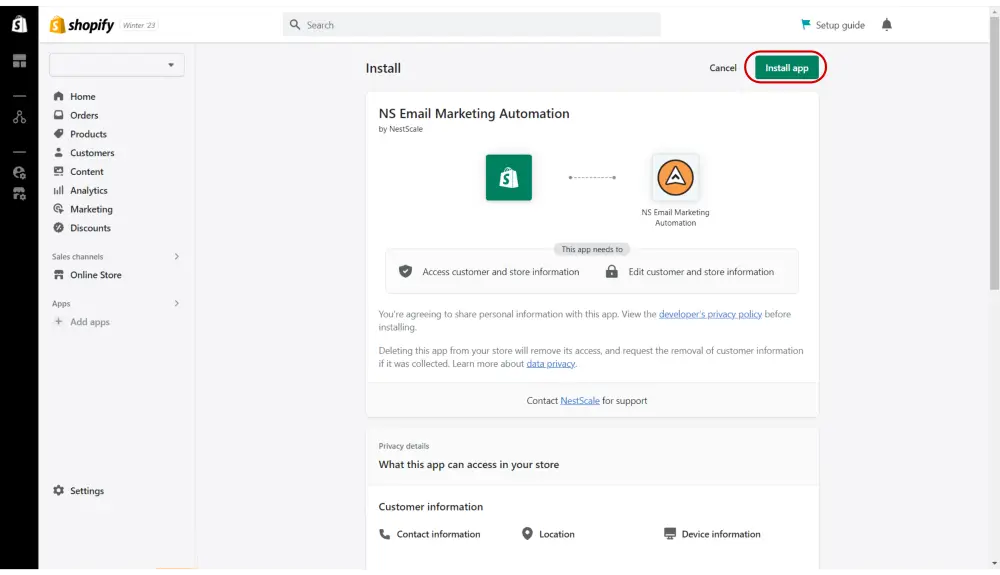
Step 1. Install NestSend from your Shopify app store
You can search for the app in the Shopify app store, or to simplify your life, just click the button below.
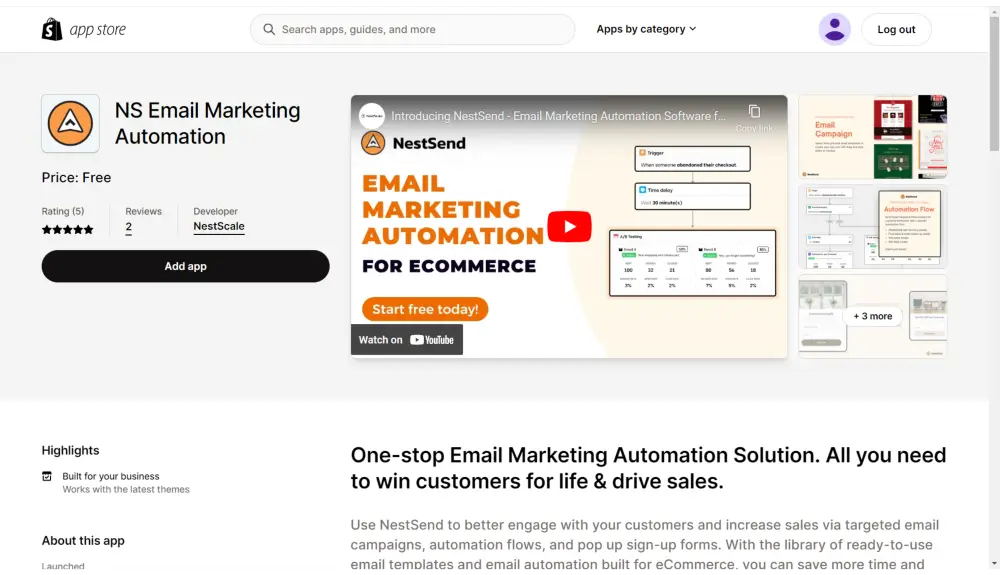
The next step involves integrating this application with your existing Shopify store. Just click on “Install app” to proceed.
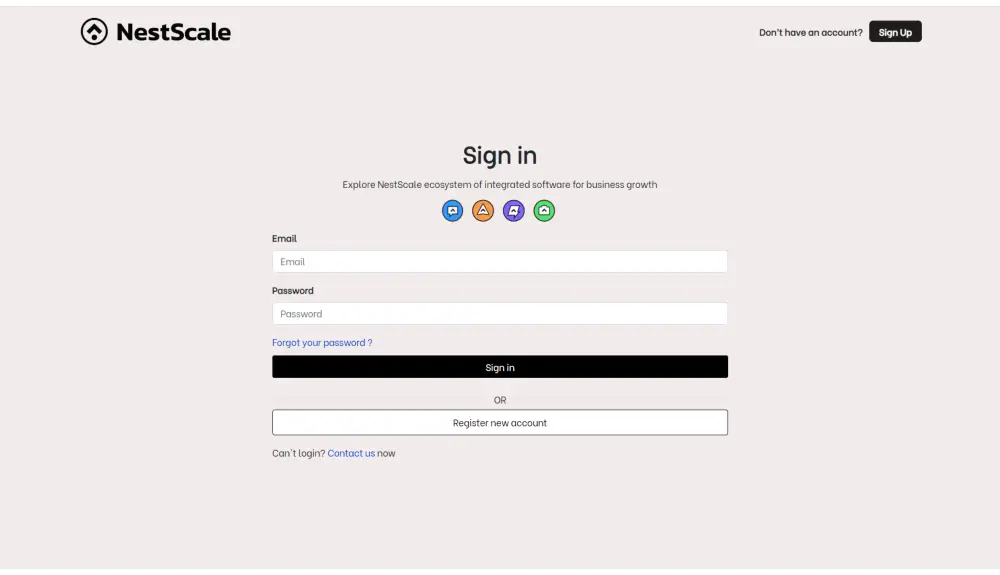
Step 2. Sign up
Once you have clicked on the “Install app” button, the subsequent step would be to sign in to your NestScale account. In the event that you do not possess a NestScale account, you will be prompted to create one at this point.
It is imperative to note that having a NestScale account enables you to access NestScale’s app ecosystem. We highly suggest you utilize all of them for seamless Shopify management.
Step 3. Access automation flow
After you have done every previous step, look for the “Automation Flow” section on the left side of the screen, then click on “Create Automation Flow”.
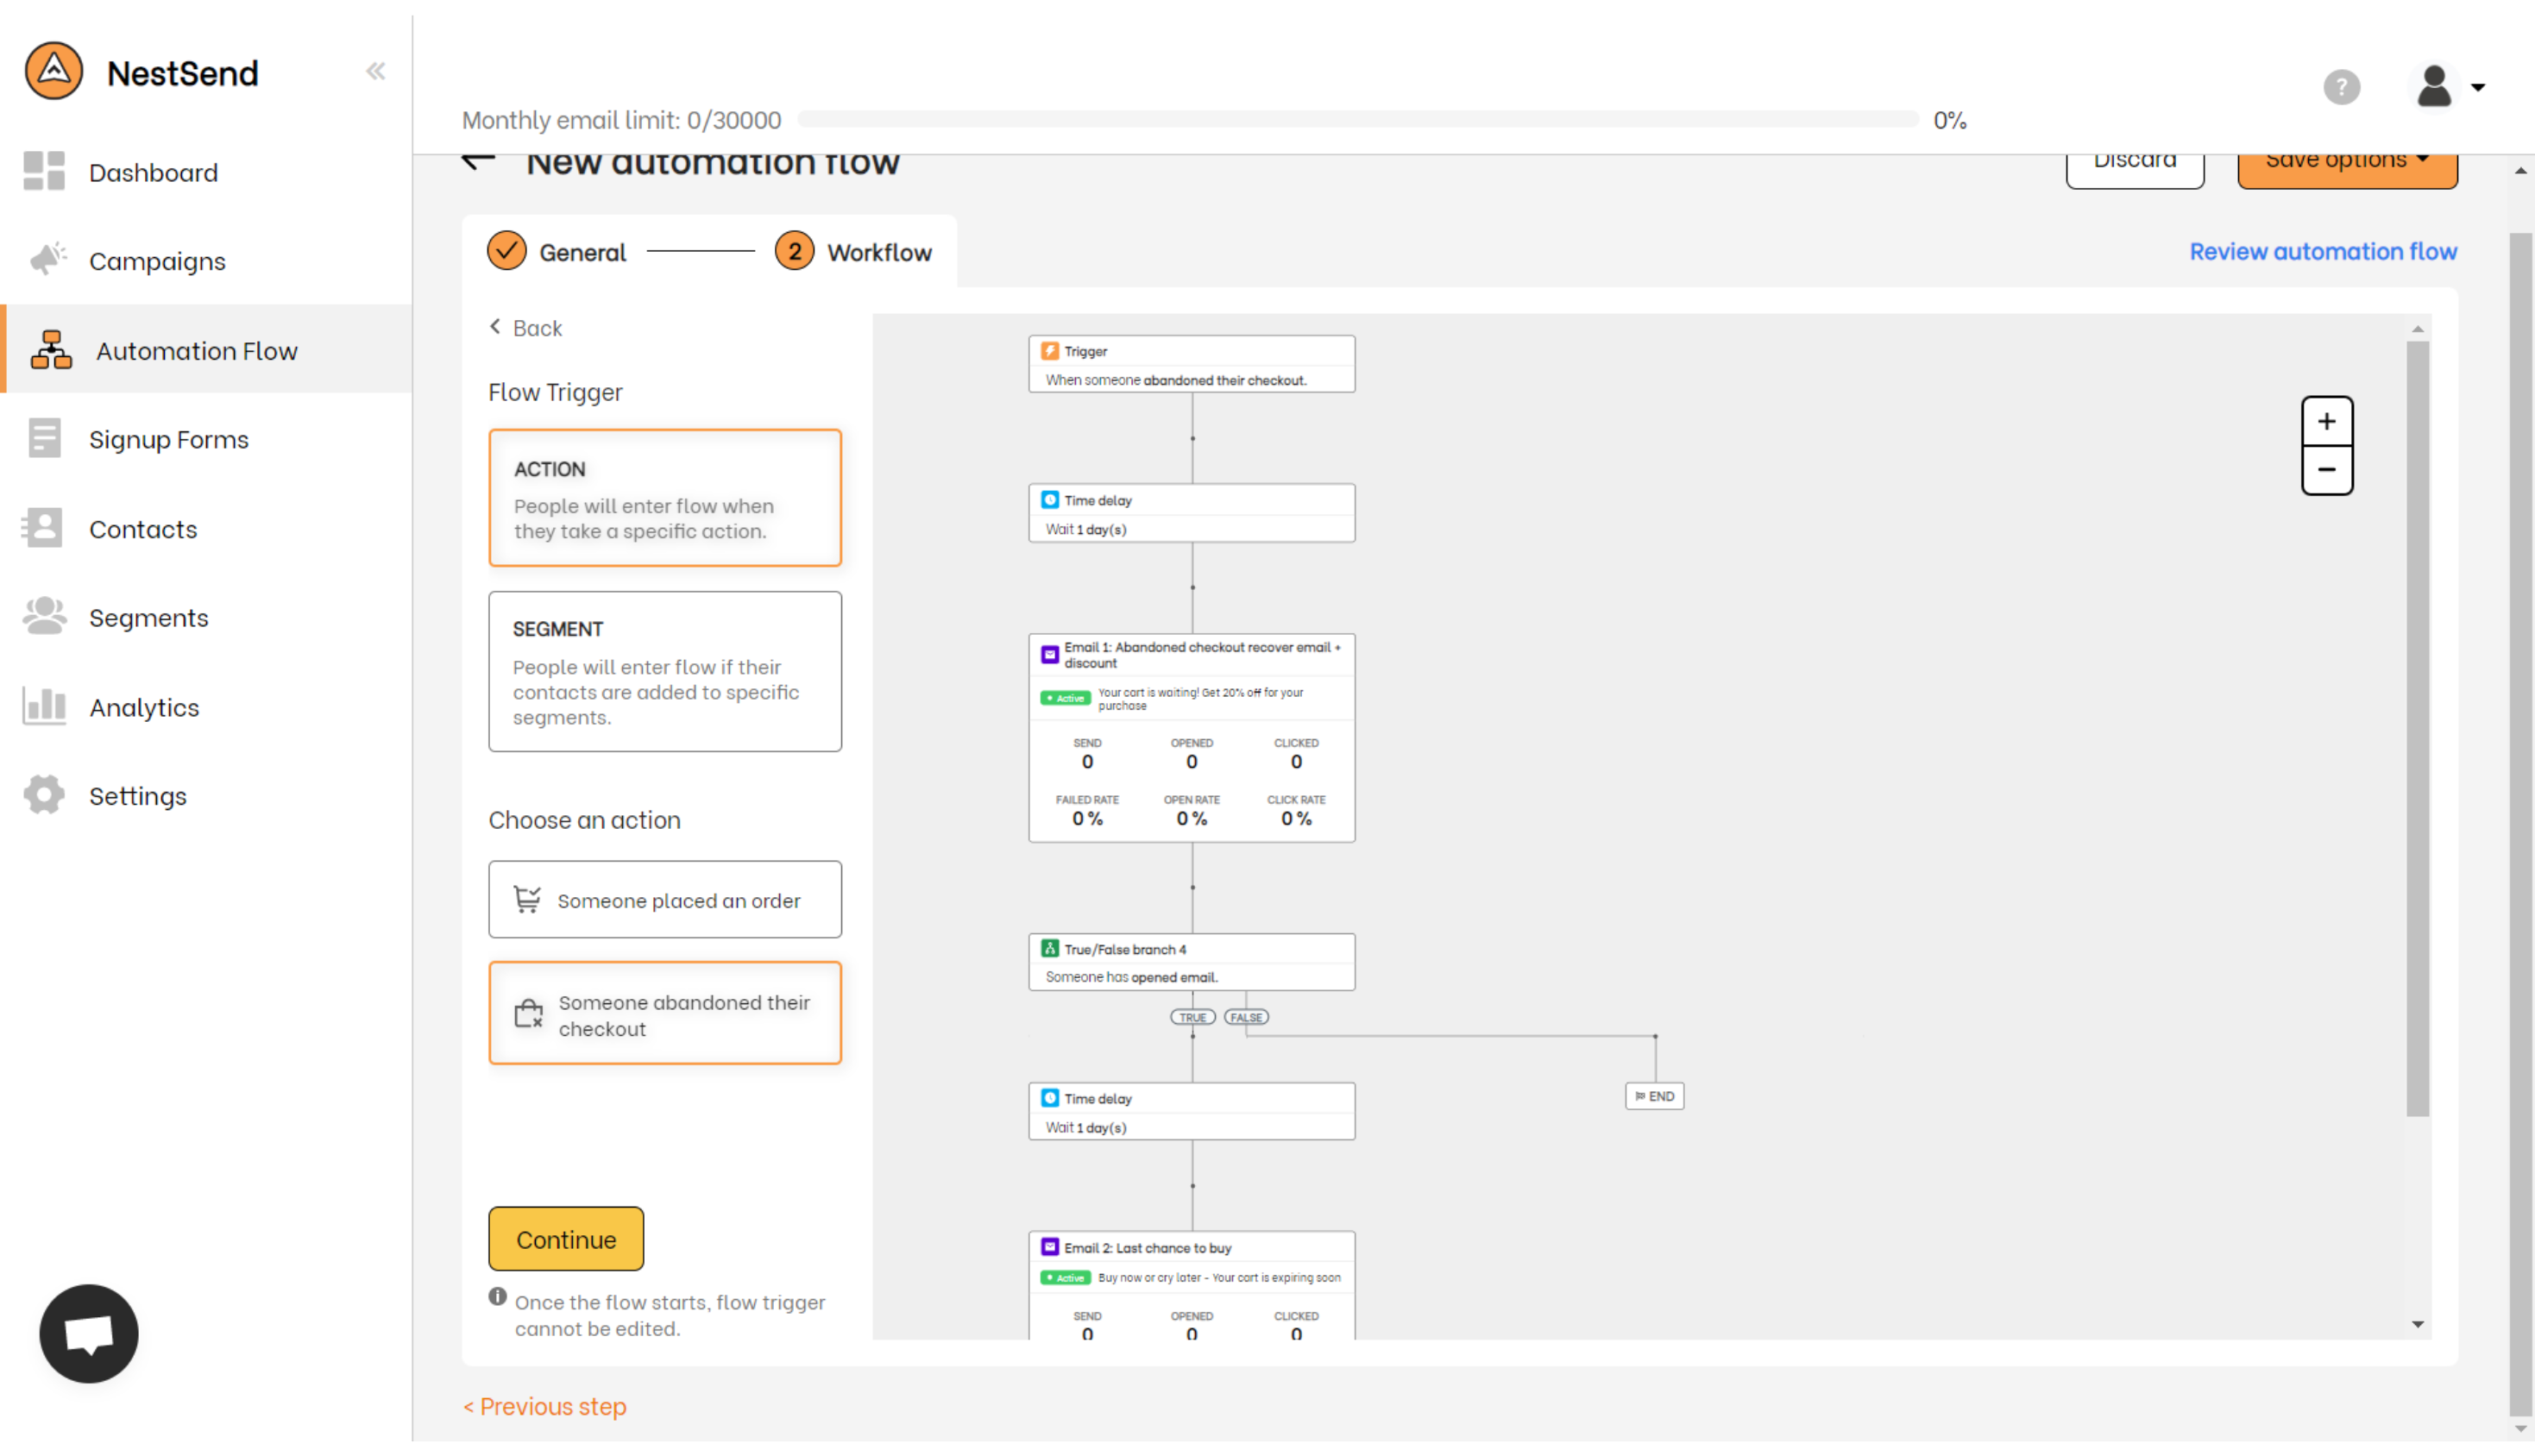
Step 4. Create your abandoned cart email flow
At this step, there are 2 options for you. You can either choose the pre-built flow to save your time, or you can create your own flow. If you decided to go with the former option, then you can go straight to step 6.

Step 5. Add trigger and email nodes
If you have chosen to create the whole flow from scratch, then the next step after you are done filling up the flow information is to set up your trigger node.
Just do as the below image then you would be all set.

The next step is to include an email node in your automated workflow.
Step 6. Customize your email
Now comes the exciting part, you finally got to create your email!
NestSend’s email editor offers you a wide range of features and components to help you make your email more appealing than ever before. So, you are now able to customize your abandoned cart email however you like without any limitations.

Step 7. Further customize your automation flow
To enhance the customer experience, it’s recommended to further personalize the automation email flow based on your customers’ preferences. You can achieve this by utilizing time delay or true/false features to tailor the email flow that best suits their needs.
It is pretty simple to set up, right? However, if you need some help, feel free to contact NestSend’s experts.
3 best practices to create the best Shopify abandoned cart email
Dynamic content
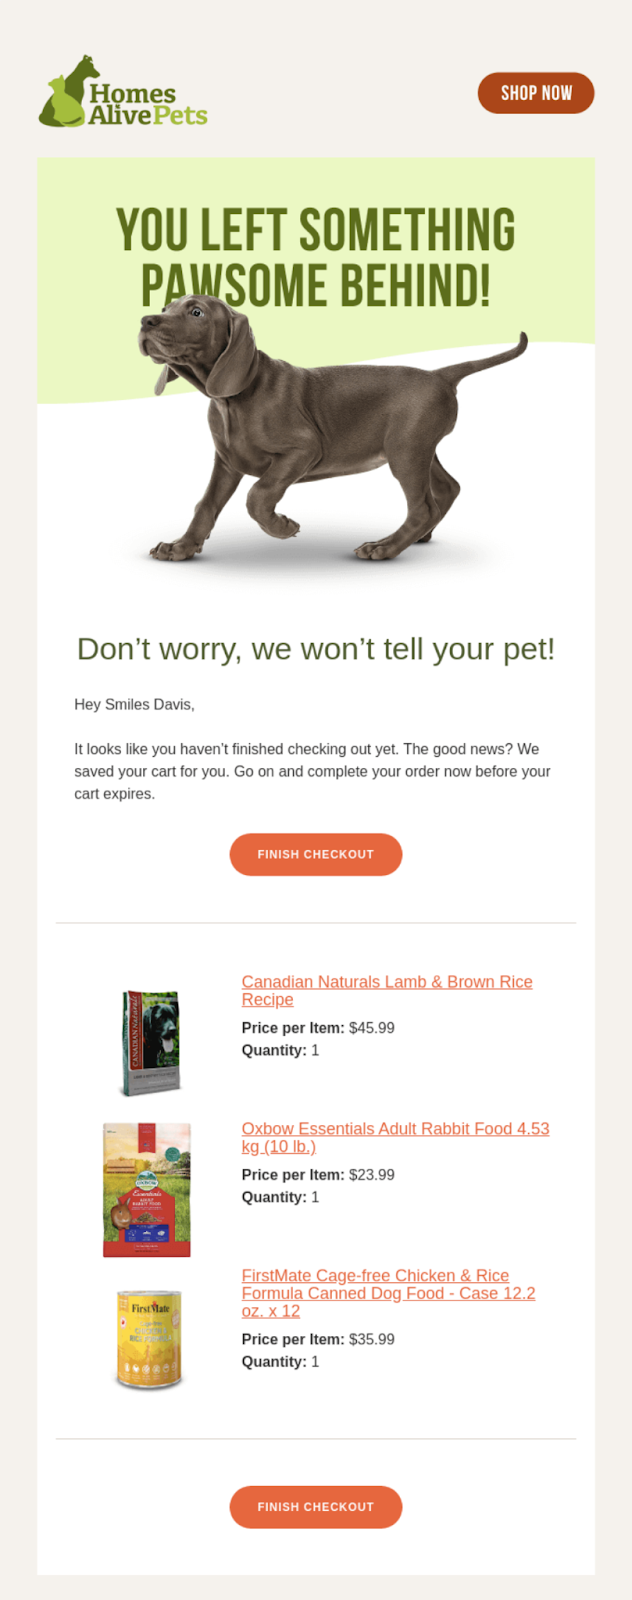
Automated content that adapts to the user’s preferences and actions is known as dynamic content. In the case of abandoned cart emails, dynamic content can include details about the items left behind by your contacts.
By incorporating such dynamic content in your emails, you can remind your contacts of the items they left in their cart, thereby increasing the likelihood of them making a purchase.
An example of an abandoned cart email with dynamic content is one sent by Homes Alive, which includes three items left behind by the contact: a recipe, rabbit food, and dog food.
Product benefits education
Sometimes, potential customers may decide to leave their shopping carts behind because they aren’t fully convinced they need the items in them. However, a little bit of education can go a long way in changing their minds!
When sending an abandoned cart email, take the opportunity to highlight the amazing qualities of your products and explain how they will benefit the customer. Consider addressing their specific pain points and demonstrating how your product can fulfill their desires. Don’t be afraid to promote your product’s strengths and benefits!
To make your email as persuasive as possible, carefully craft your copy to appeal to the customer’s needs and desires. The language you use could be the deciding factor in whether or not they return to complete their purchase.
For inspiration, take a look at Everlane’s abandoned cart email featuring a t-shirt:
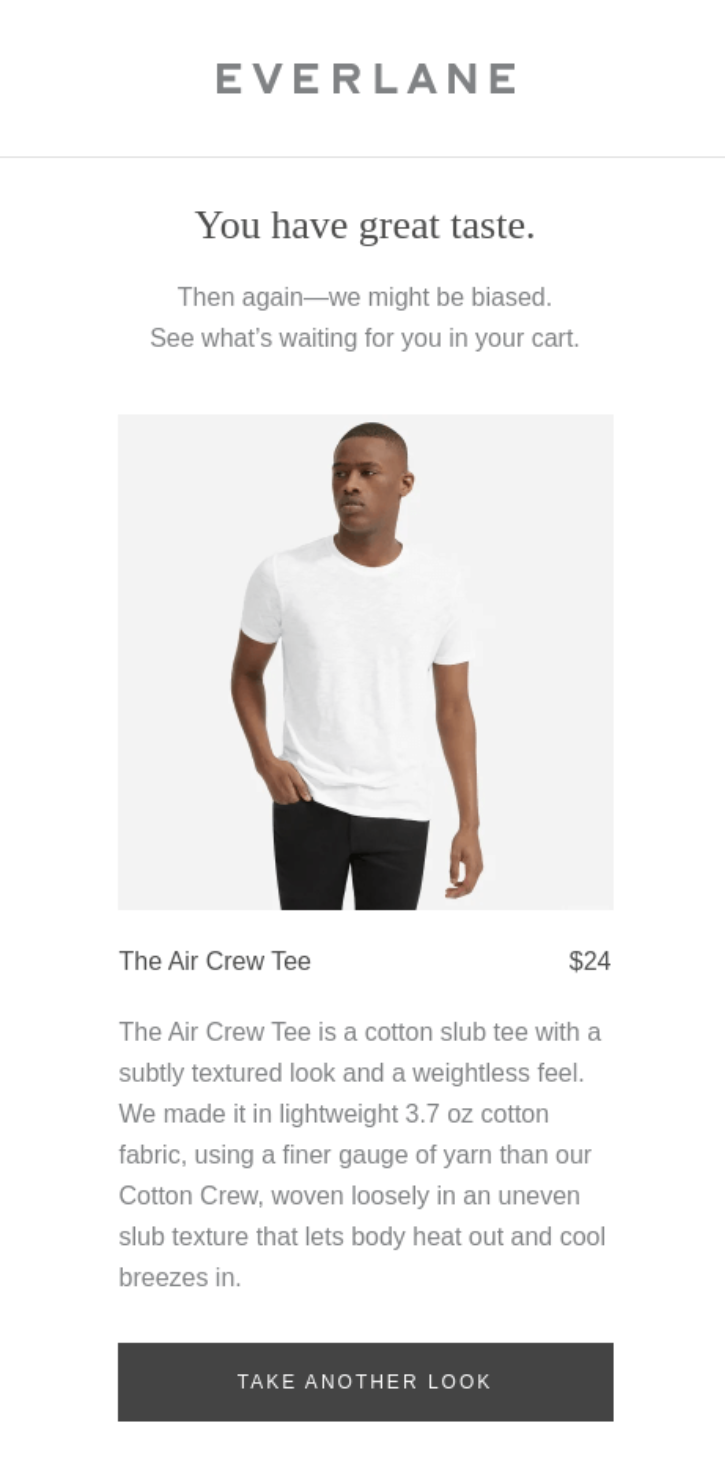
The email does an excellent job of educating customers about the tee’s specifications and benefits. For example, the email mentions that the tee is made from a lightweight cotton fabric that allows body heat to escape and cool breezes to come in.
By providing this type of valuable information, you might be able to persuade customers to purchase the product they left behind. So the next time a customer abandons their shopping cart, use the opportunity to educate them about your products and how they can benefit from them.
Special offers
Offering a special deal is a proven method to encourage people to make purchases, and it can be just as effective when it comes to saving abandoned carts. You can make your offer a part of an ongoing promotion that applies to all customers or make it exclusive to those who left items in their carts.
You have several options for what form the offer can take, such as a discount, free shipping, or a complimentary item.
To motivate your contacts to complete the checkout process as soon as possible, it’s essential to create a sense of urgency. You can achieve this by embedding a countdown timer into your email that counts down to the expiration of the offer. Alternatively, you can use words that trigger FOMO (fear of missing out), such as “Your items are about to be sold out!”
To illustrate, let’s take a look at Manana’s email that employs a special offer:
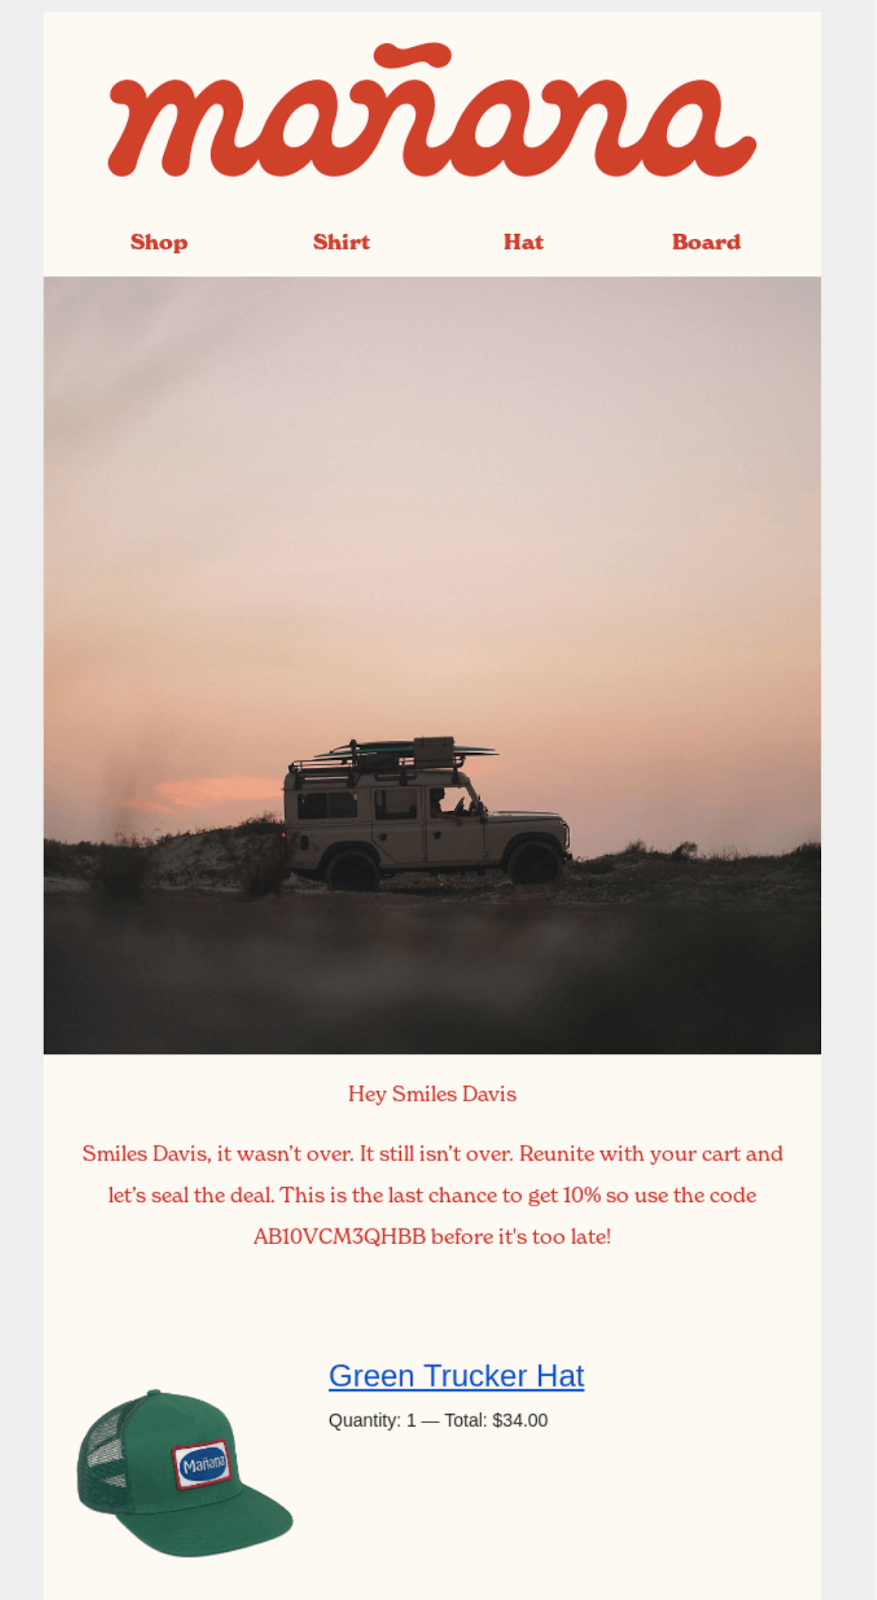
The email informs contacts that they can use a discount code to get 10% off their purchase. The message also emphasizes that they must claim the discount “before it’s too late!”
Remember, creating a special offer for abandoned carts can be an effective way to recover lost sales. By adding a little urgency and FOMO to your message, you can convince your contacts to complete their purchases and prevent abandoned carts.
FAQs
How to turn off abandoned cart email Shopify?
- Log in to your Shopify account and navigate to the Settings page.
- Click on the Checkout and accounts tab and scroll down until you find the Abandoned checkout emails section.
- Uncheck the box next to the option that says “Automatically send abandoned checkout emails”.
- Click on the Save button to apply the changes.
How to resend abandoned cart emails Shopify?
- Go to the Orders page in your Shopify admin
- Select the order you want to resend the email for
- Click on the Send Order Receipt button
- Choose the option to resend the abandoned cart email from the popup
- Click the Resend Email button to complete the process
How to test abandoned cart emails Shopify?
- Log in to your Shopify account and navigate to the Settings page.
- Click on the Notifications tab and scroll down until you find the Abandoned checkout section, then click it.
- Here you would find the Send test button next to the Edit code button, click the Send test button then you are all set.
Best Shopify abandoned cart email to gain sales from those lost sales!
In today’s highly competitive e-commerce landscape, abandoned cart emails can make a significant difference in recovering lost sales and improving customer retention. By utilizing NestSend – Email automation tool and the best practices outlined in this guide, you can create compelling abandoned cart emails that resonate with your customers and drive them back to your store to complete their purchases.
So don’t let abandoned carts hurt your bottom line – take advantage of this powerful tool and start recovering those lost sales today.