If you want your Shopify store to succeed, you have to create a seamless customer experience. And one way to do it is by creating a unique Shopify order confirmation email. This email serves as a confirmation of the customer’s purchase and is an excellent opportunity to continue building a positive relationship with them.
By reading this blog, you’ll know how to edit order confirmation emails in Shopify and the best way to customize them. So, let’s dive right into the blog now!
Why do you even bother to edit the order confirmation email?
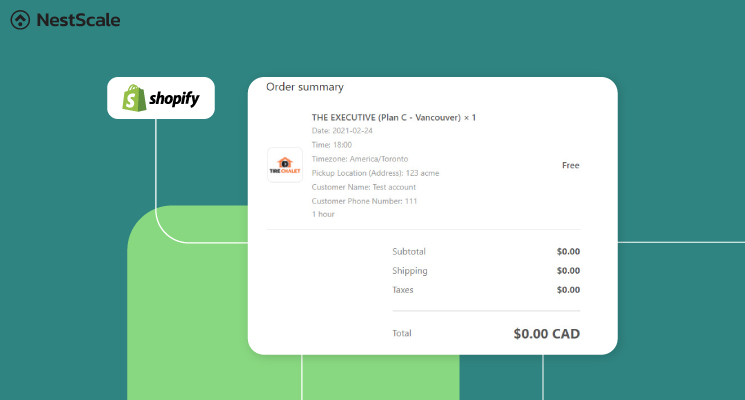
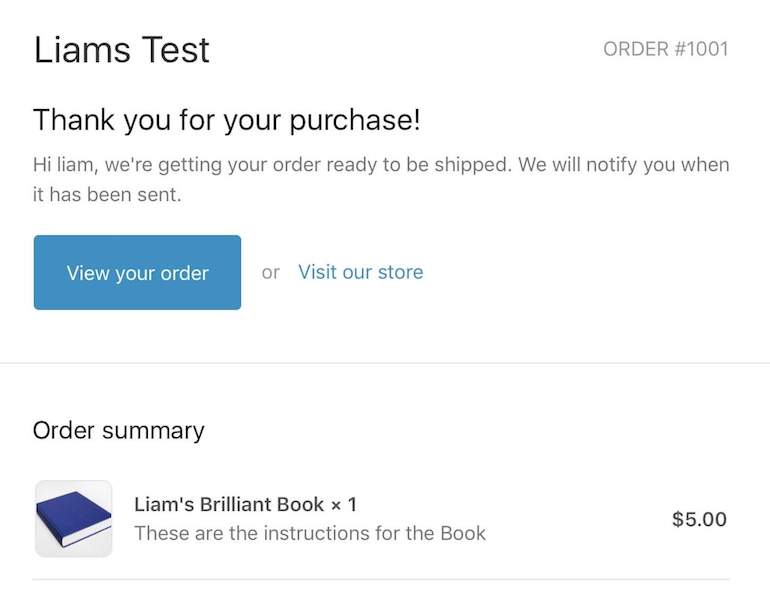
As a customer places an order on a Shopify store, they receive an order confirmation email. This email includes important details about the order, such as the items purchased, the total cost, and the estimated shipping date.
However, you may want to edit this email to include additional information or branding that reflects their business identity. For example, adding a personalized message to thank the customer for their purchase, or include links to related products or social media pages.
By editing the order confirmation email, you are creating a more engaging and memorable customer experience. Which can help to build brand loyalty and encourage repeat purchases.
How to edit the Shopify order confirmation email?
First, you need to access the order confirmation email template in Shopify, there are 4 simple steps to do it:
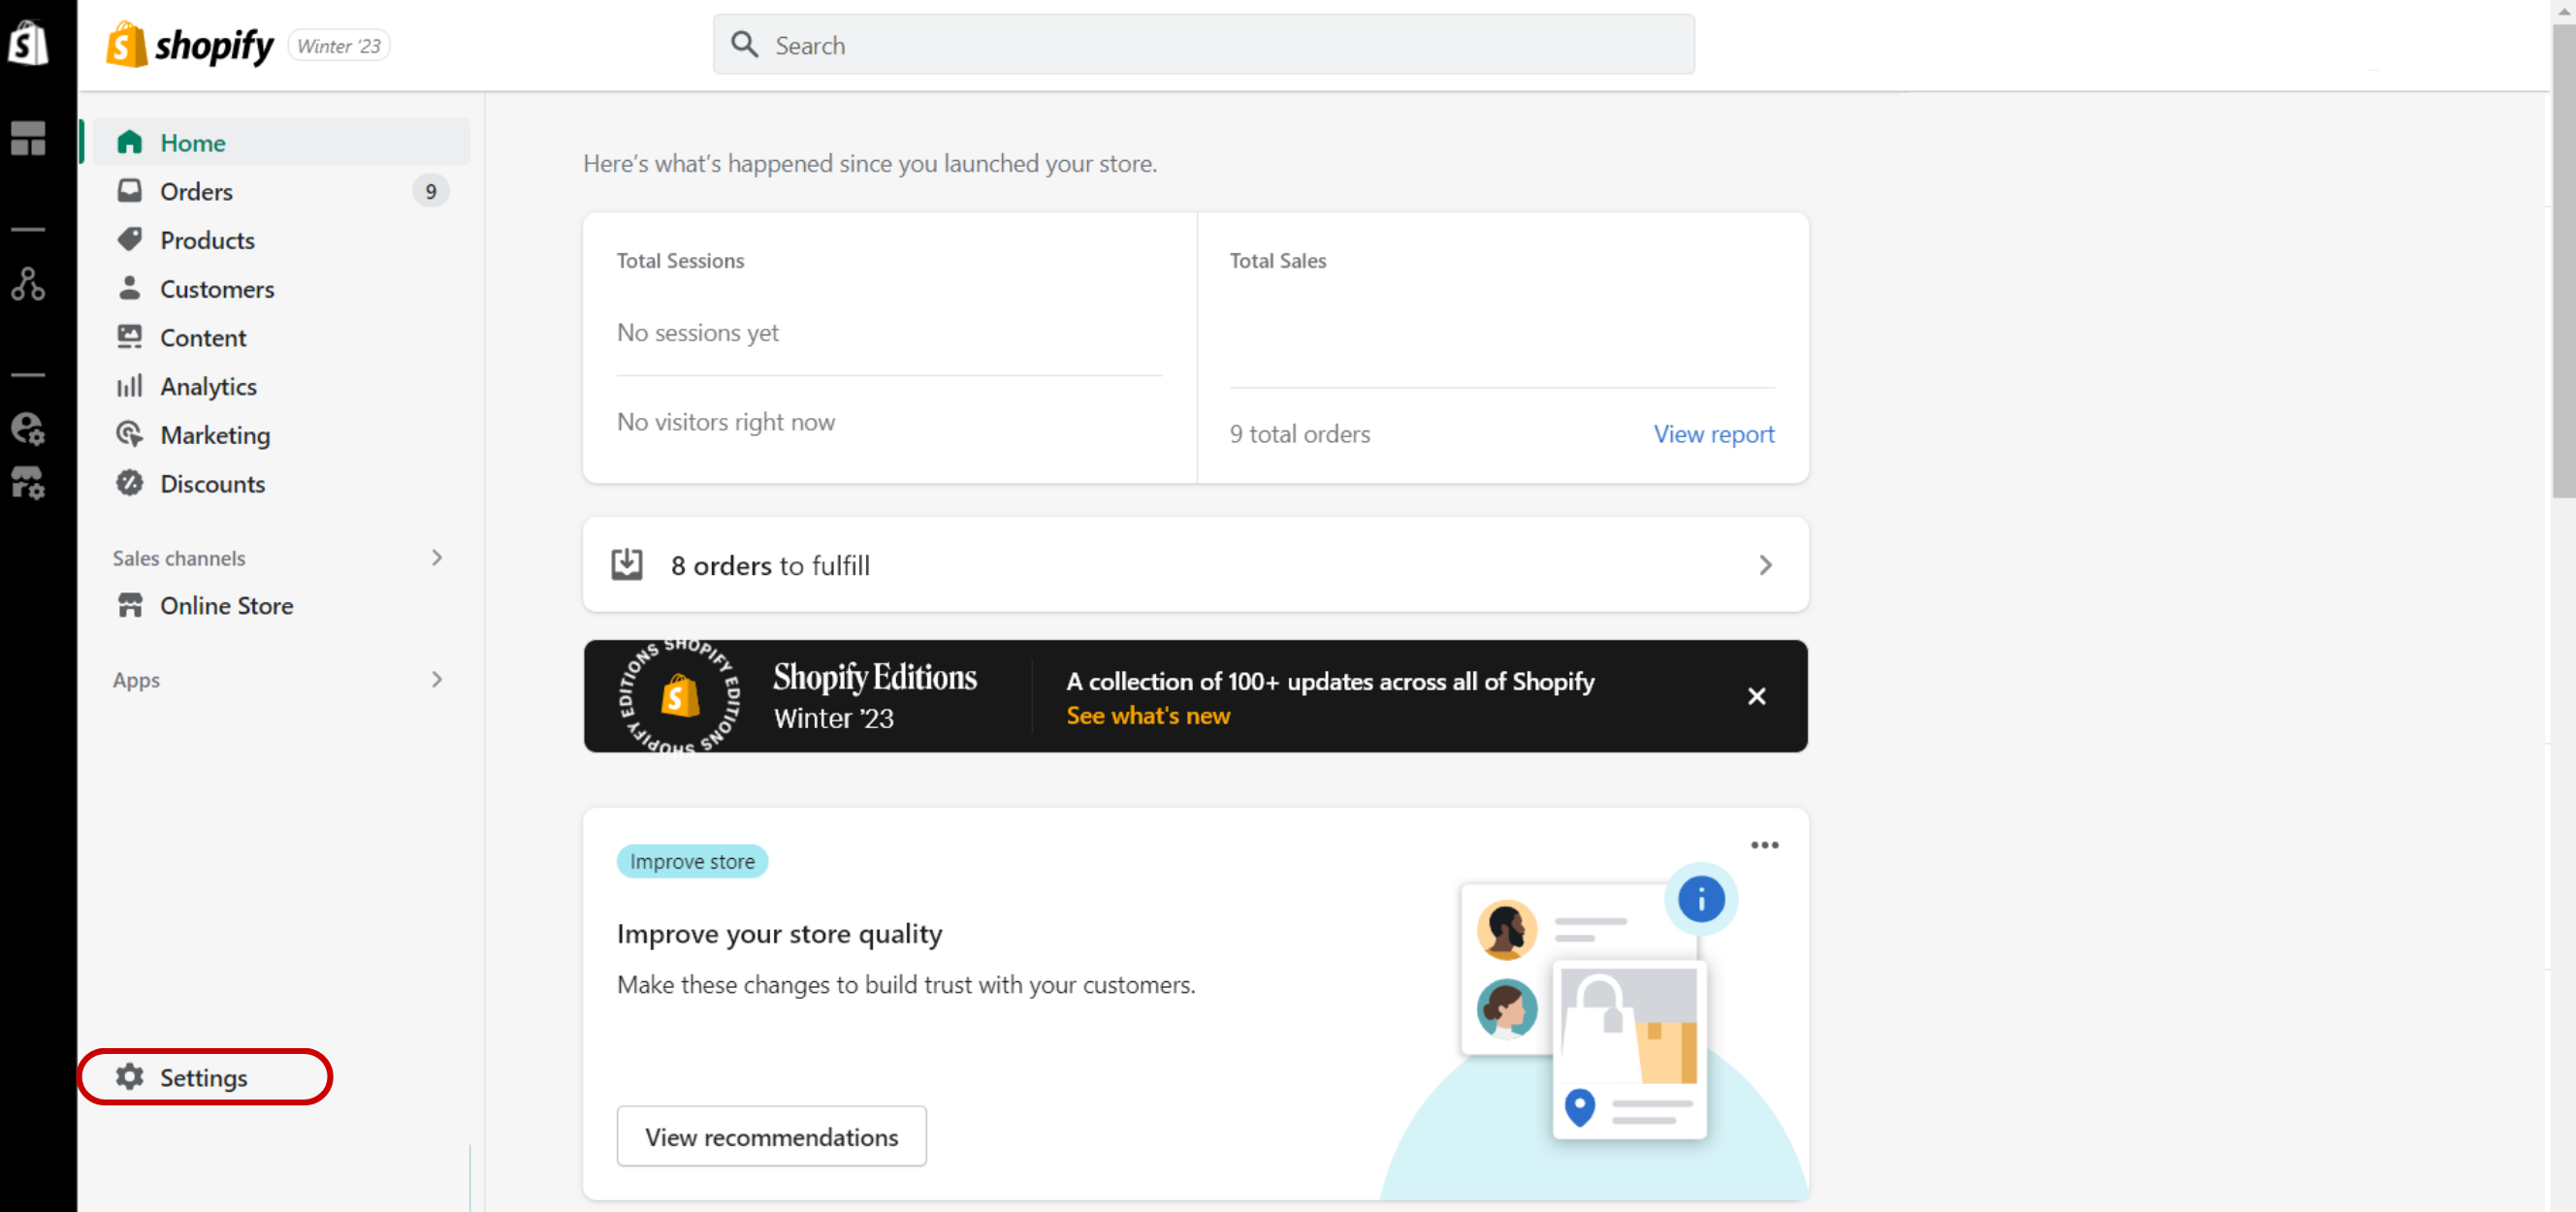
Step 1: Access Shopify admin’s “Settings” tab
Log in to your Shopify admin panel & click on the “Settings” tab on the left-hand side of the screen.
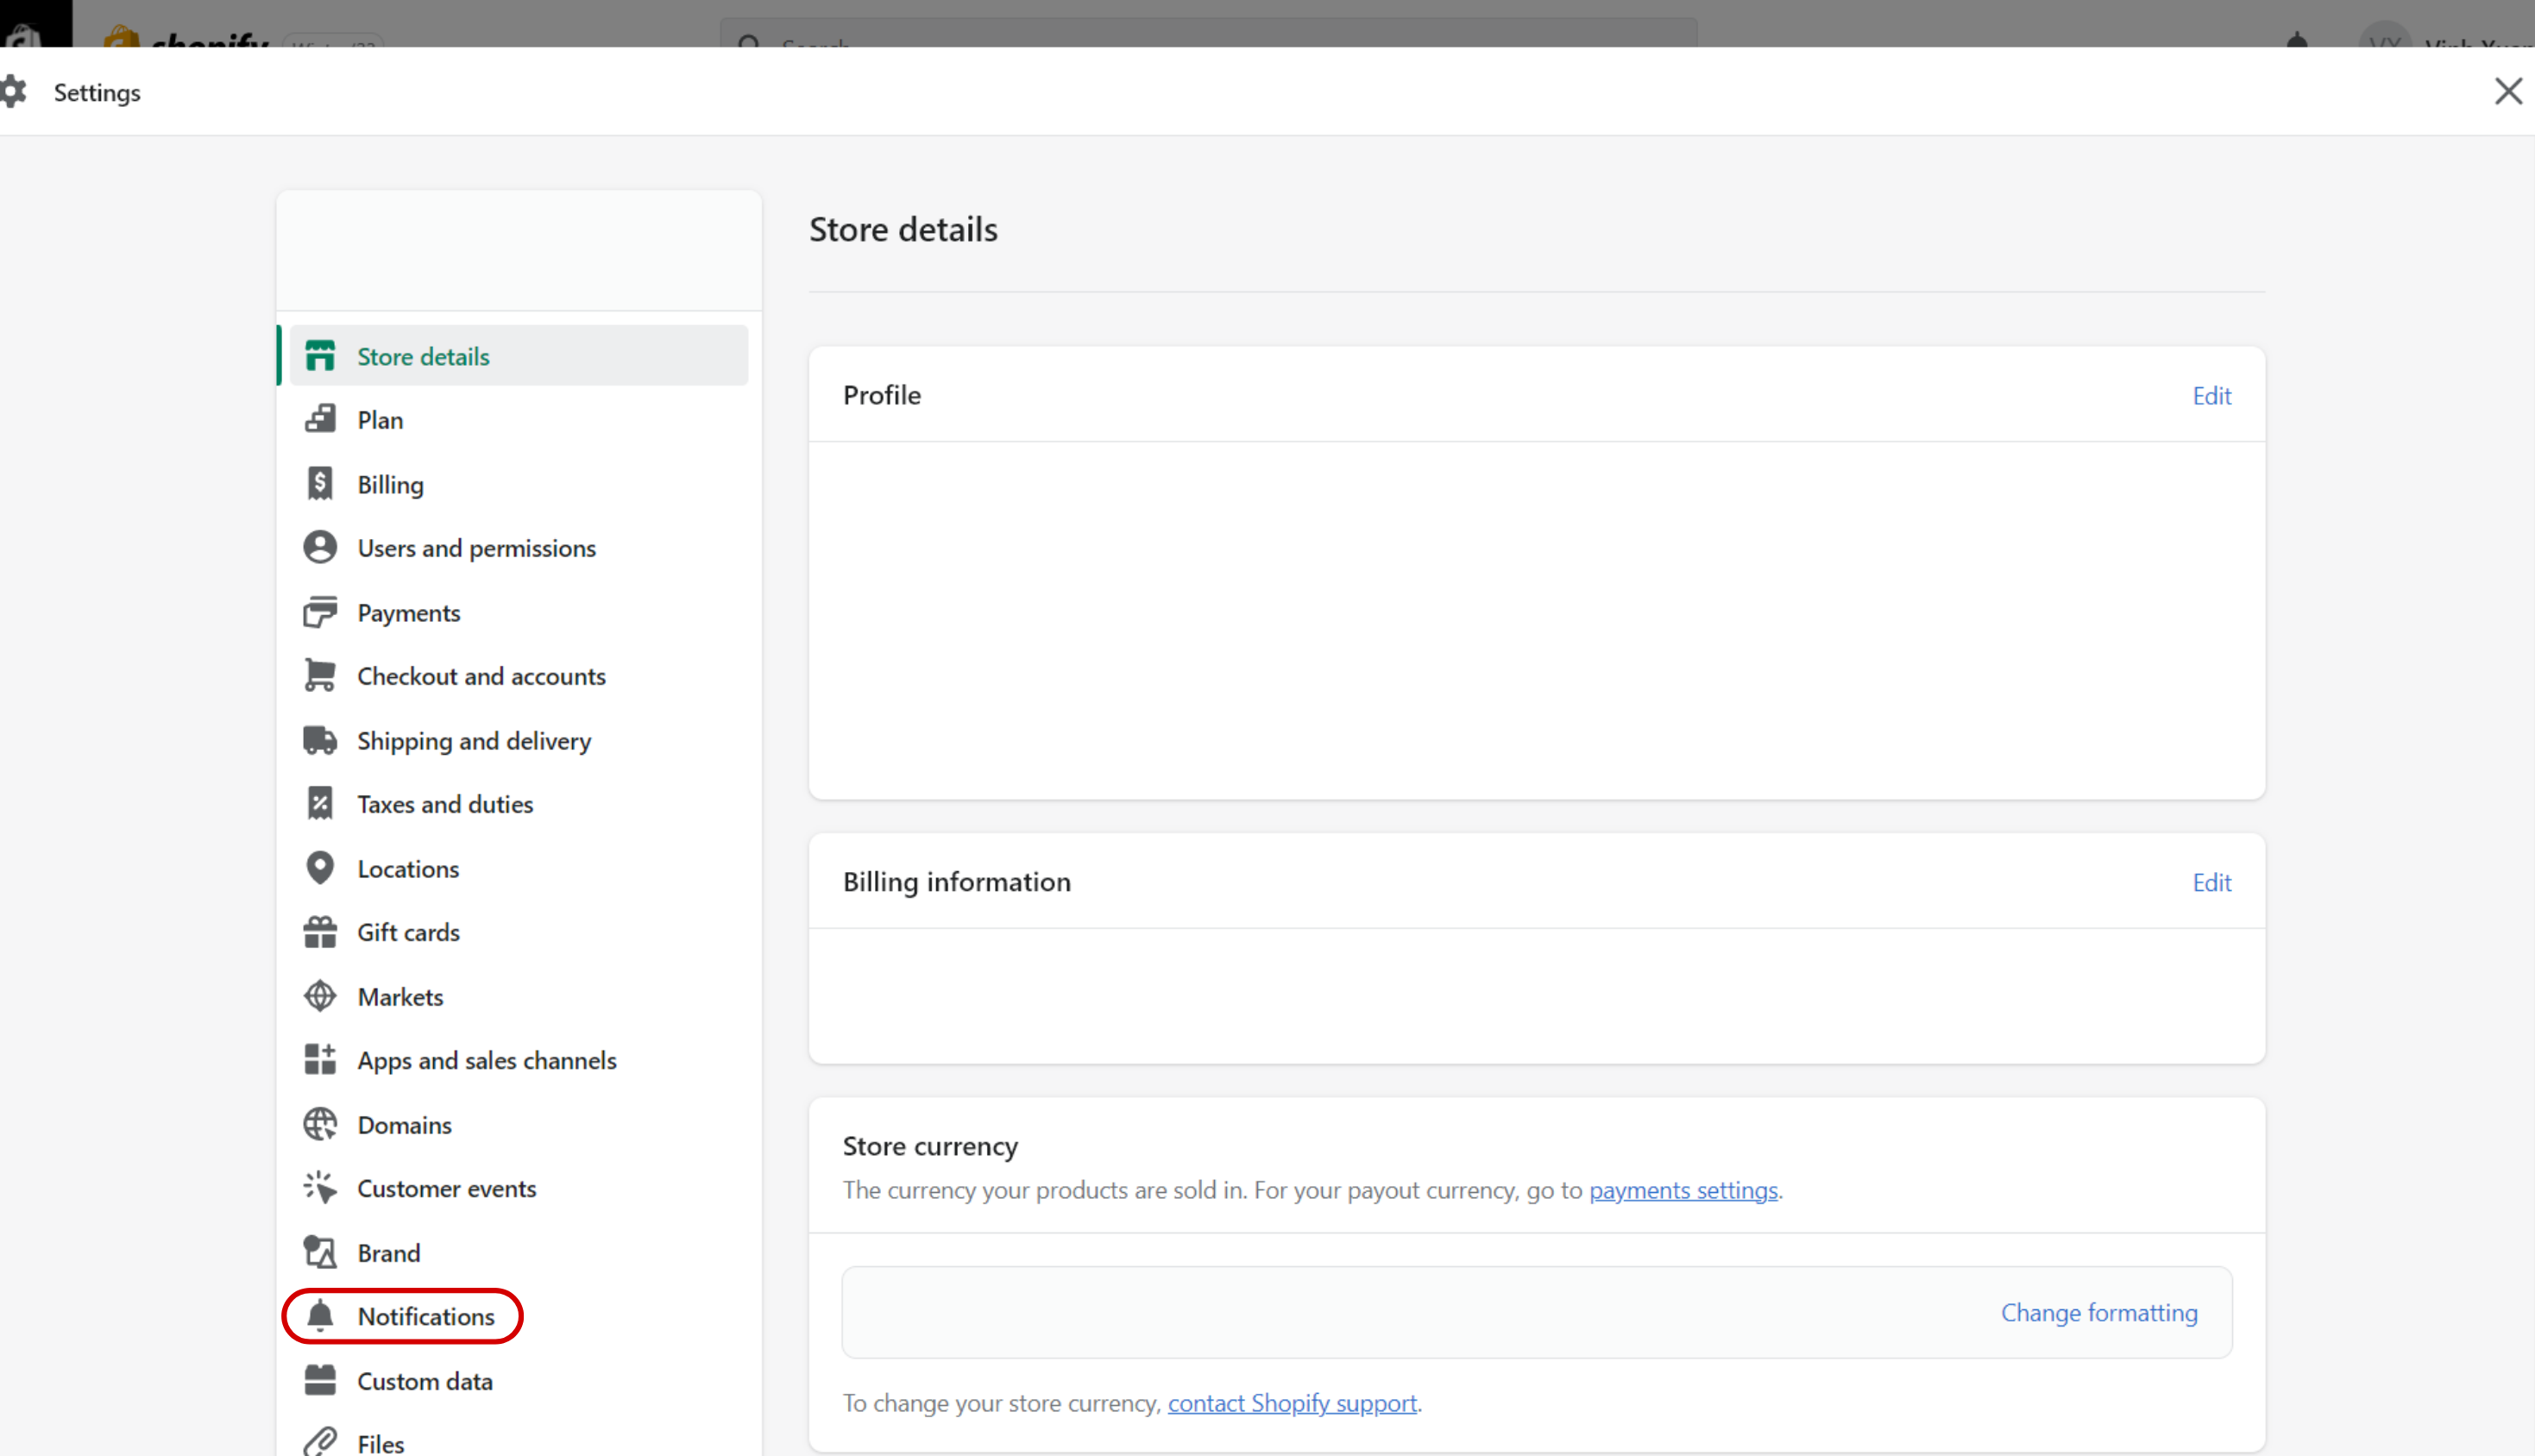
Step 2: Select “Notifications” from the menu.
Scroll down a bit, you see the “Notifications” button close to the end of the list.
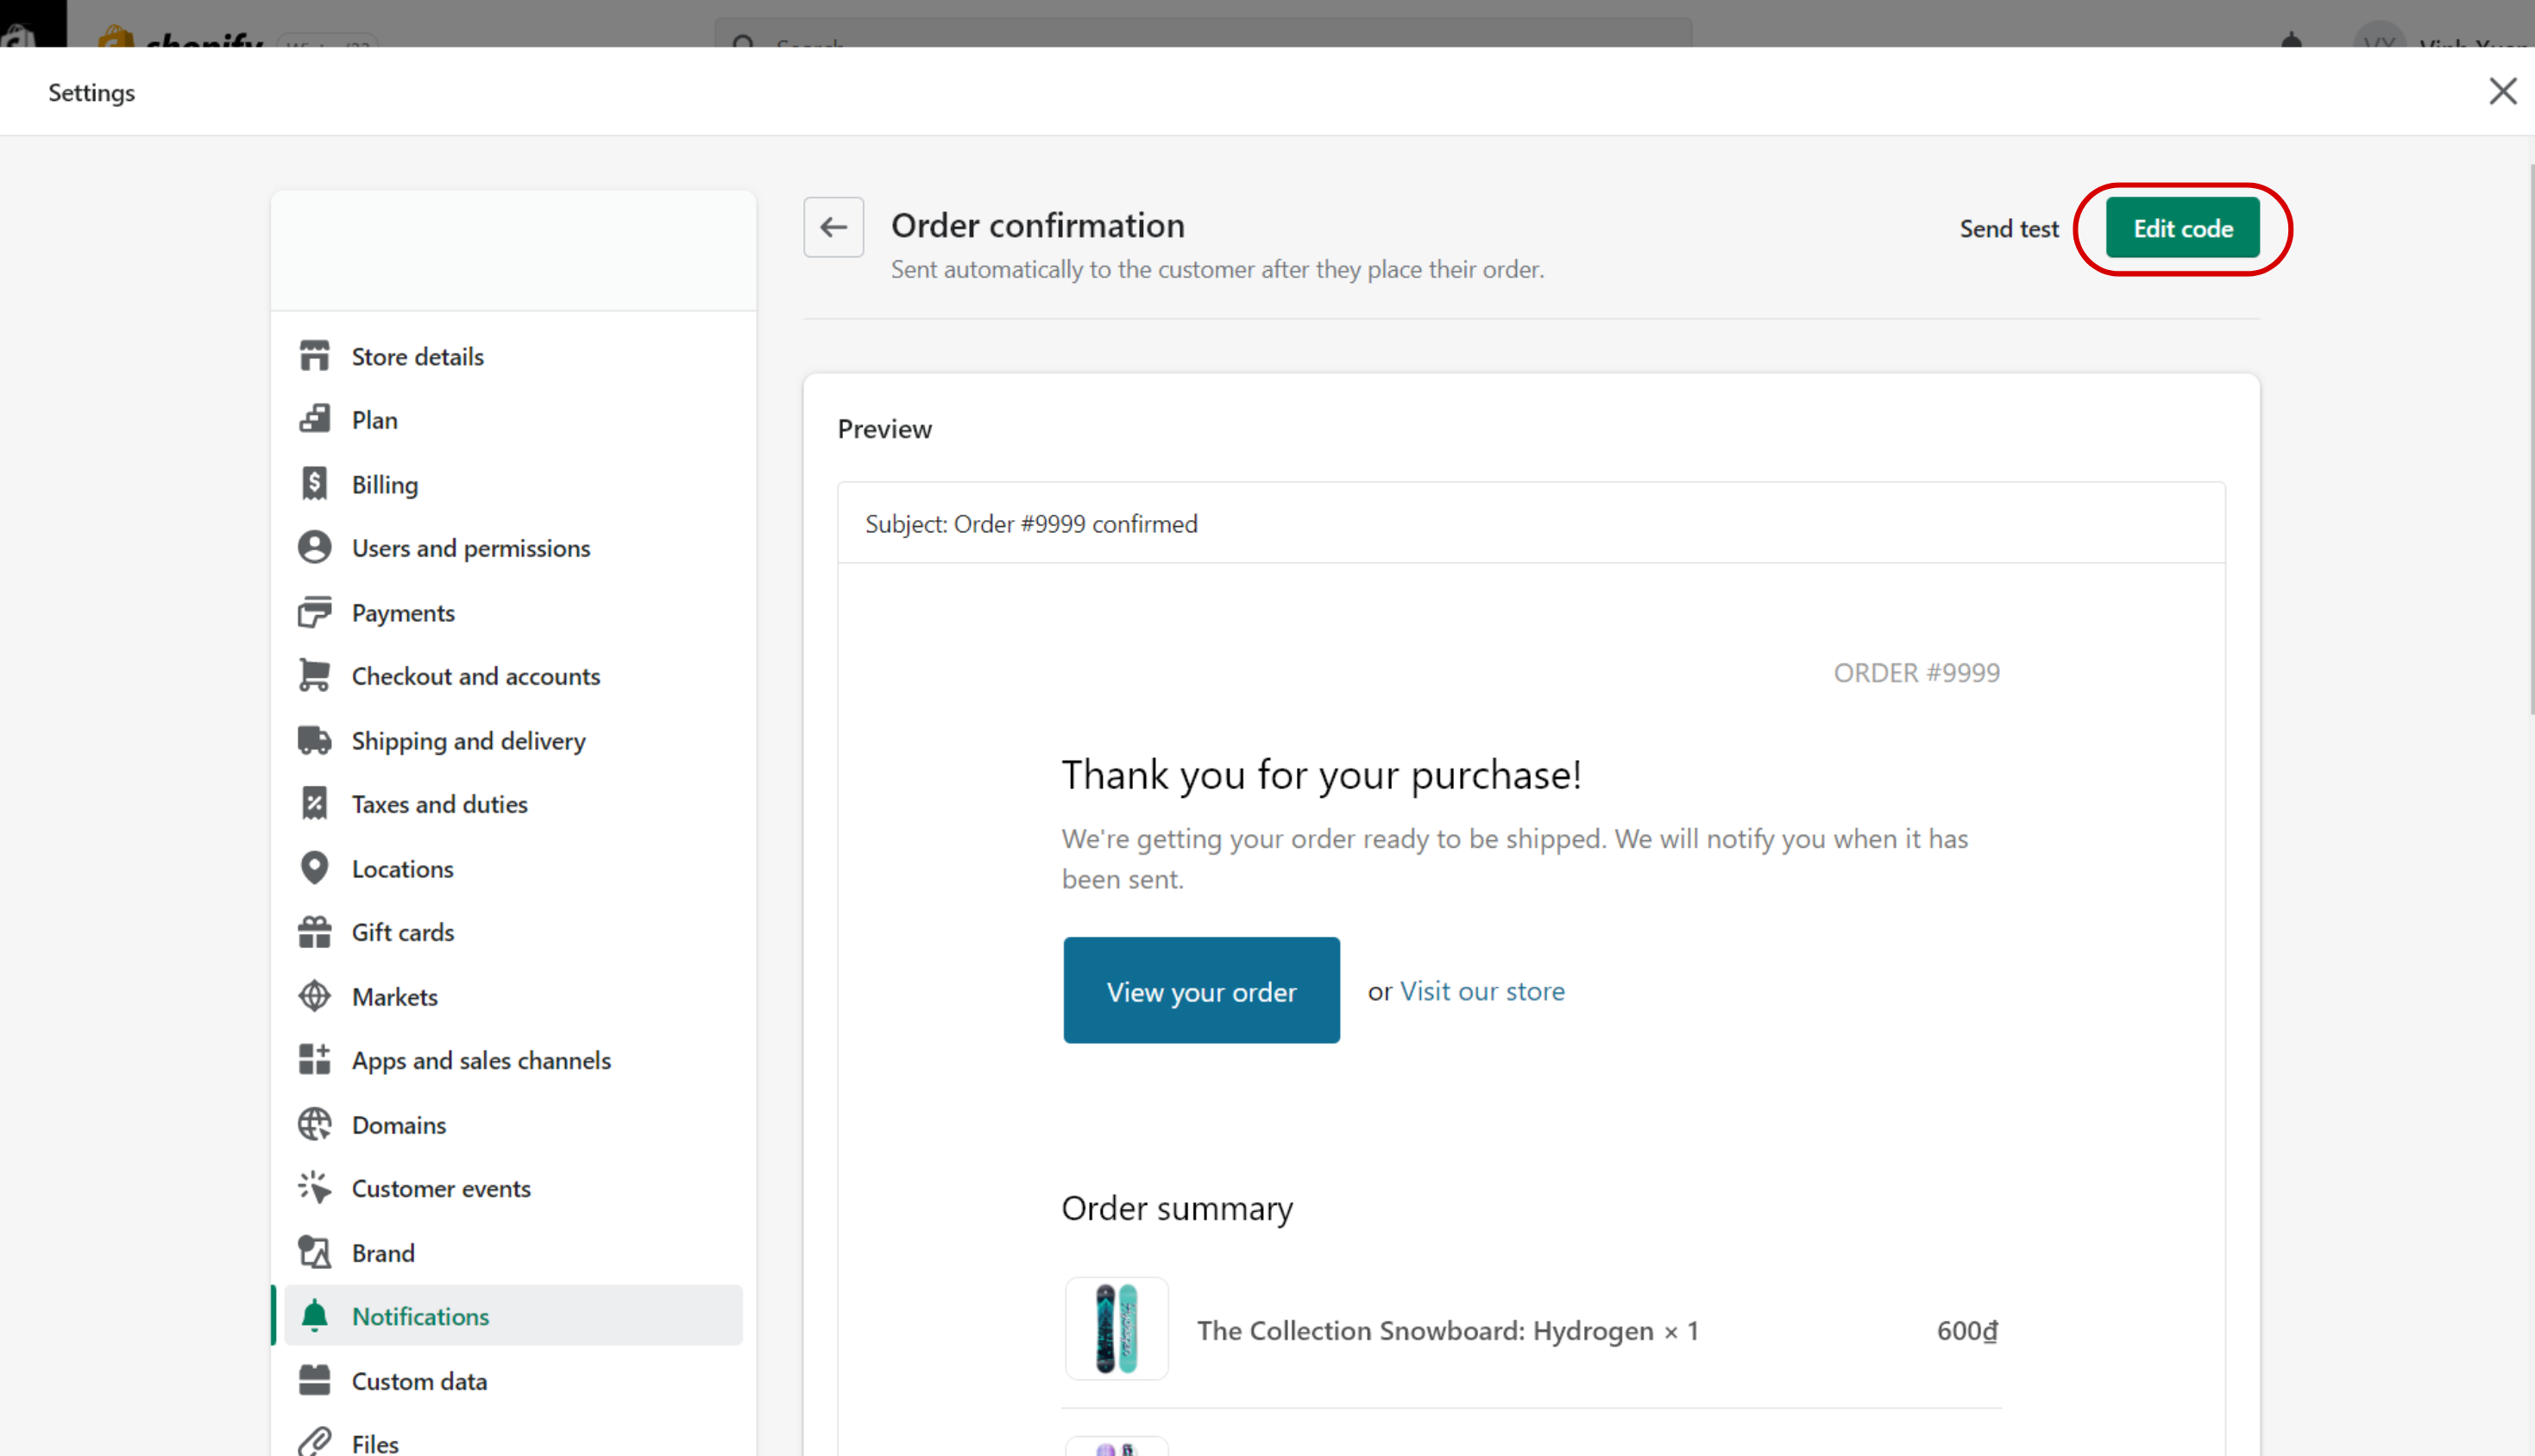
Step 3: Click the “Order Confirmation” section
It should be the first email variation on the list.

Step 4: Select the “Edit code” option
Look at the upper-right corner and click on the green button that said “Edit code”
If you have done all the steps correctly, you should be taken to the email template editor. Here, you can make changes to the subject line, email body, and basic formatting of the email.
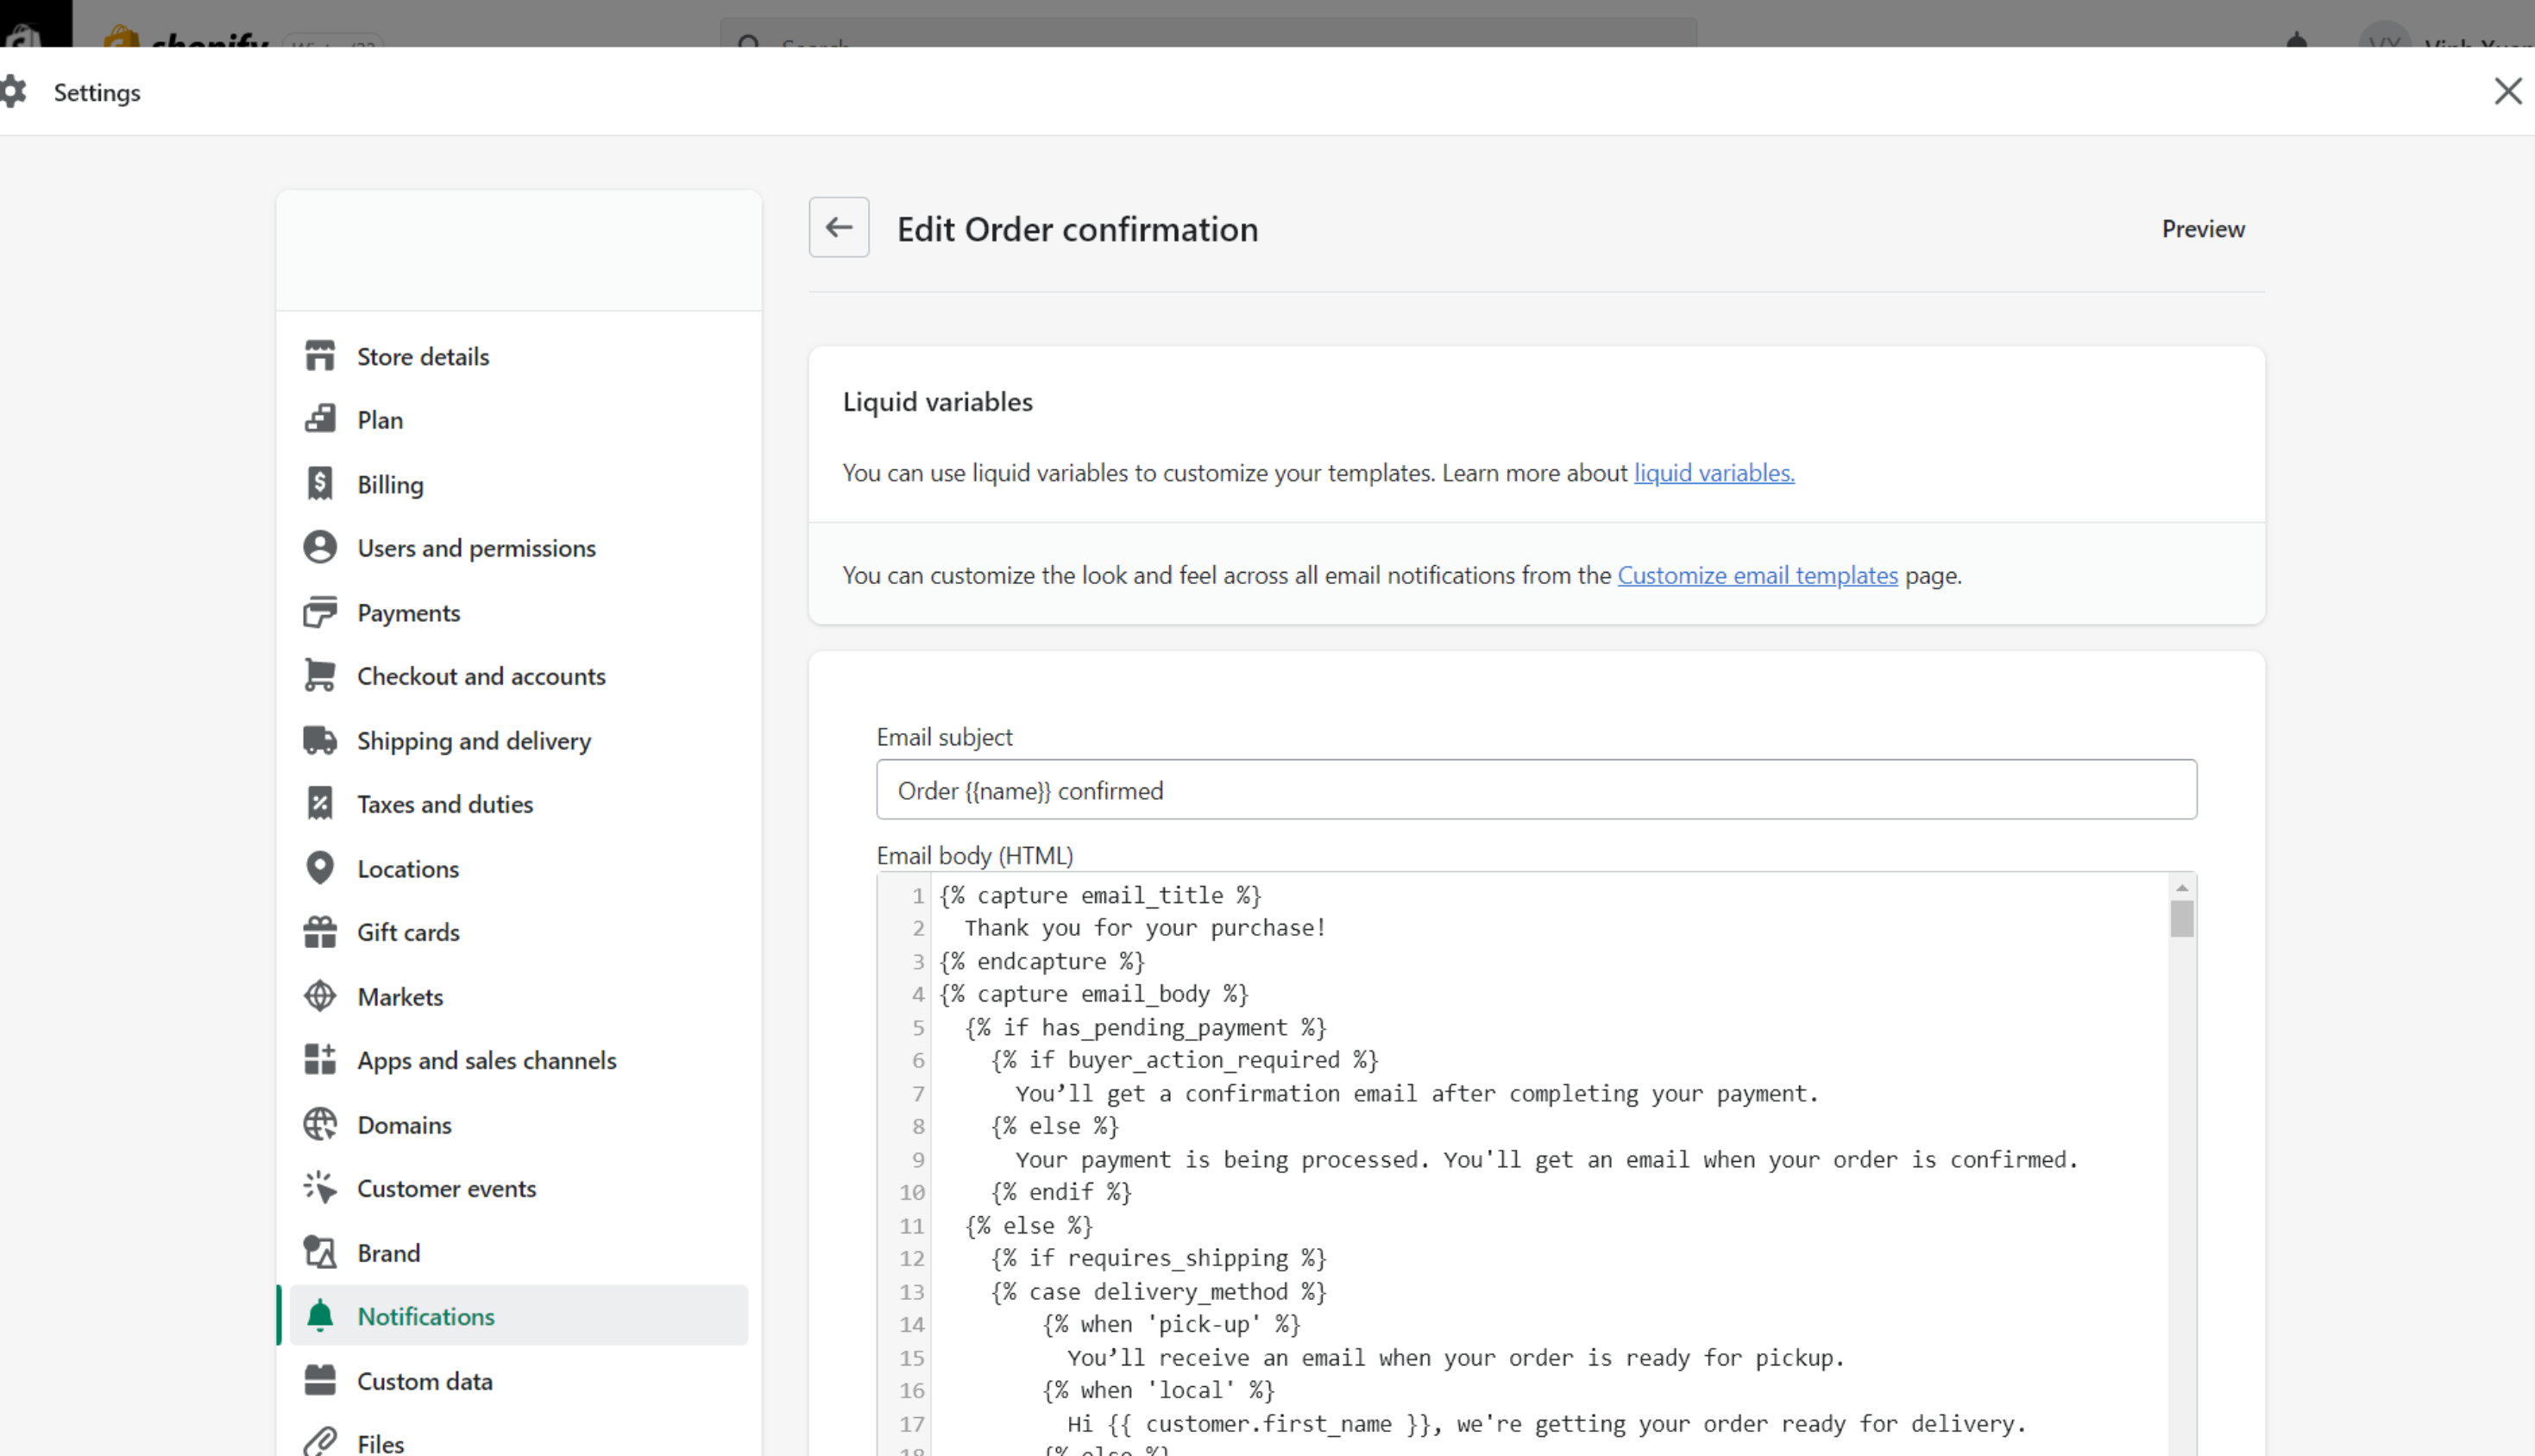
However, to edit comfortably, you would need to have some HTML knowledge. Suppose you possess proficiency in HTML, then the ideal approach to personalize your order confirmation email is by utilizing the < p >, < b >, and < u > tags to format the text. Employing these tags enables you to command the font style, size, color, and other attributes of the text.
This method provides you with complete control over the visual presentation of the email, ensuring that it aligns with your brand’s image and style. But the problem is, the Shopify default edit template only allows you to edit so much, which won’t be sufficient for a good Order Confirmation Email.
For more freedom in customization, we suggest you try using NestSend. This Email Marketing app would allow you to add images, edit layouts, and even add functional buttons.
Why is NestSend a perfect app for Email Marketing?
User-friendly drag-and-drop email editor
NestSend Drag-and-Drop is very easy to use and navigate, making it perfect for both beginners and experienced website builders alike. This editor makes it possible to create beautiful websites without needing any coding knowledge.
One of the biggest benefits of NestSend Drag & Drop editor is its simplicity. It allows you to add, remove, and move elements around your website without having to worry about the technical aspects of web development. All you need to do is simply drag and drop the elements you want to use onto your page.
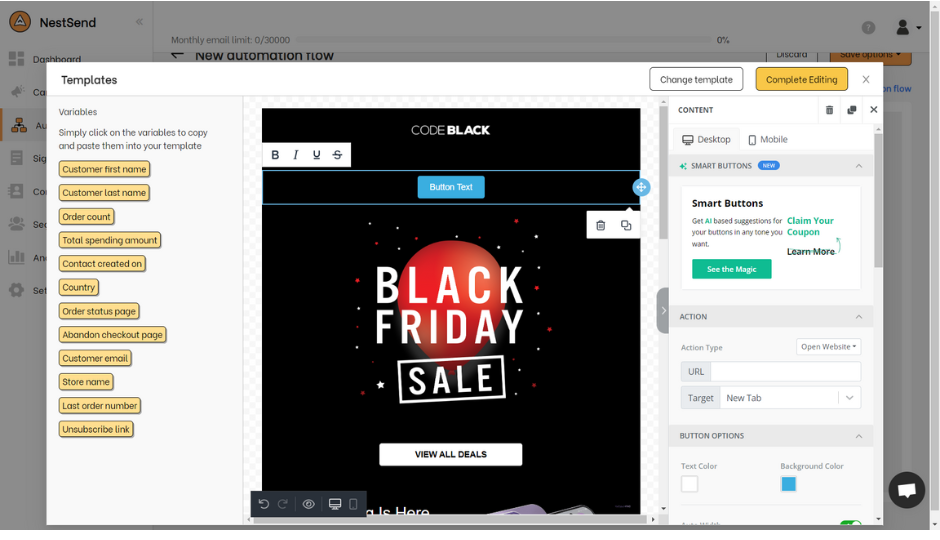
This feature is also perfect for those who don’t have any coding knowledge. With the NestSend Drag & Drop editor, you don’t have to worry about writing any complicated code. You can create your website without any prior knowledge of HTML, unlike Shopify’s default email editor.
Furthermore, NestSend Drag & Drop editor has many tools and features that provide you with creative freedom. You can easily customize the layout, fonts, colors, and images on your website to create a unique look that reflects your brand.
The editor also includes various widgets and plugins that allow you to add extra functionality to your website, such as contact forms, social media integration, and more.
Free pre-built email templates
NestSend’s free pre-built email template is a fantastic feature that can make a huge difference for individuals and businesses looking to streamline their email marketing efforts.
With a plethora of templates available for various occasions, including holidays, promotions, and newsletters, users can easily select a template that fits their needs and quickly customize it with their unique content and branding.
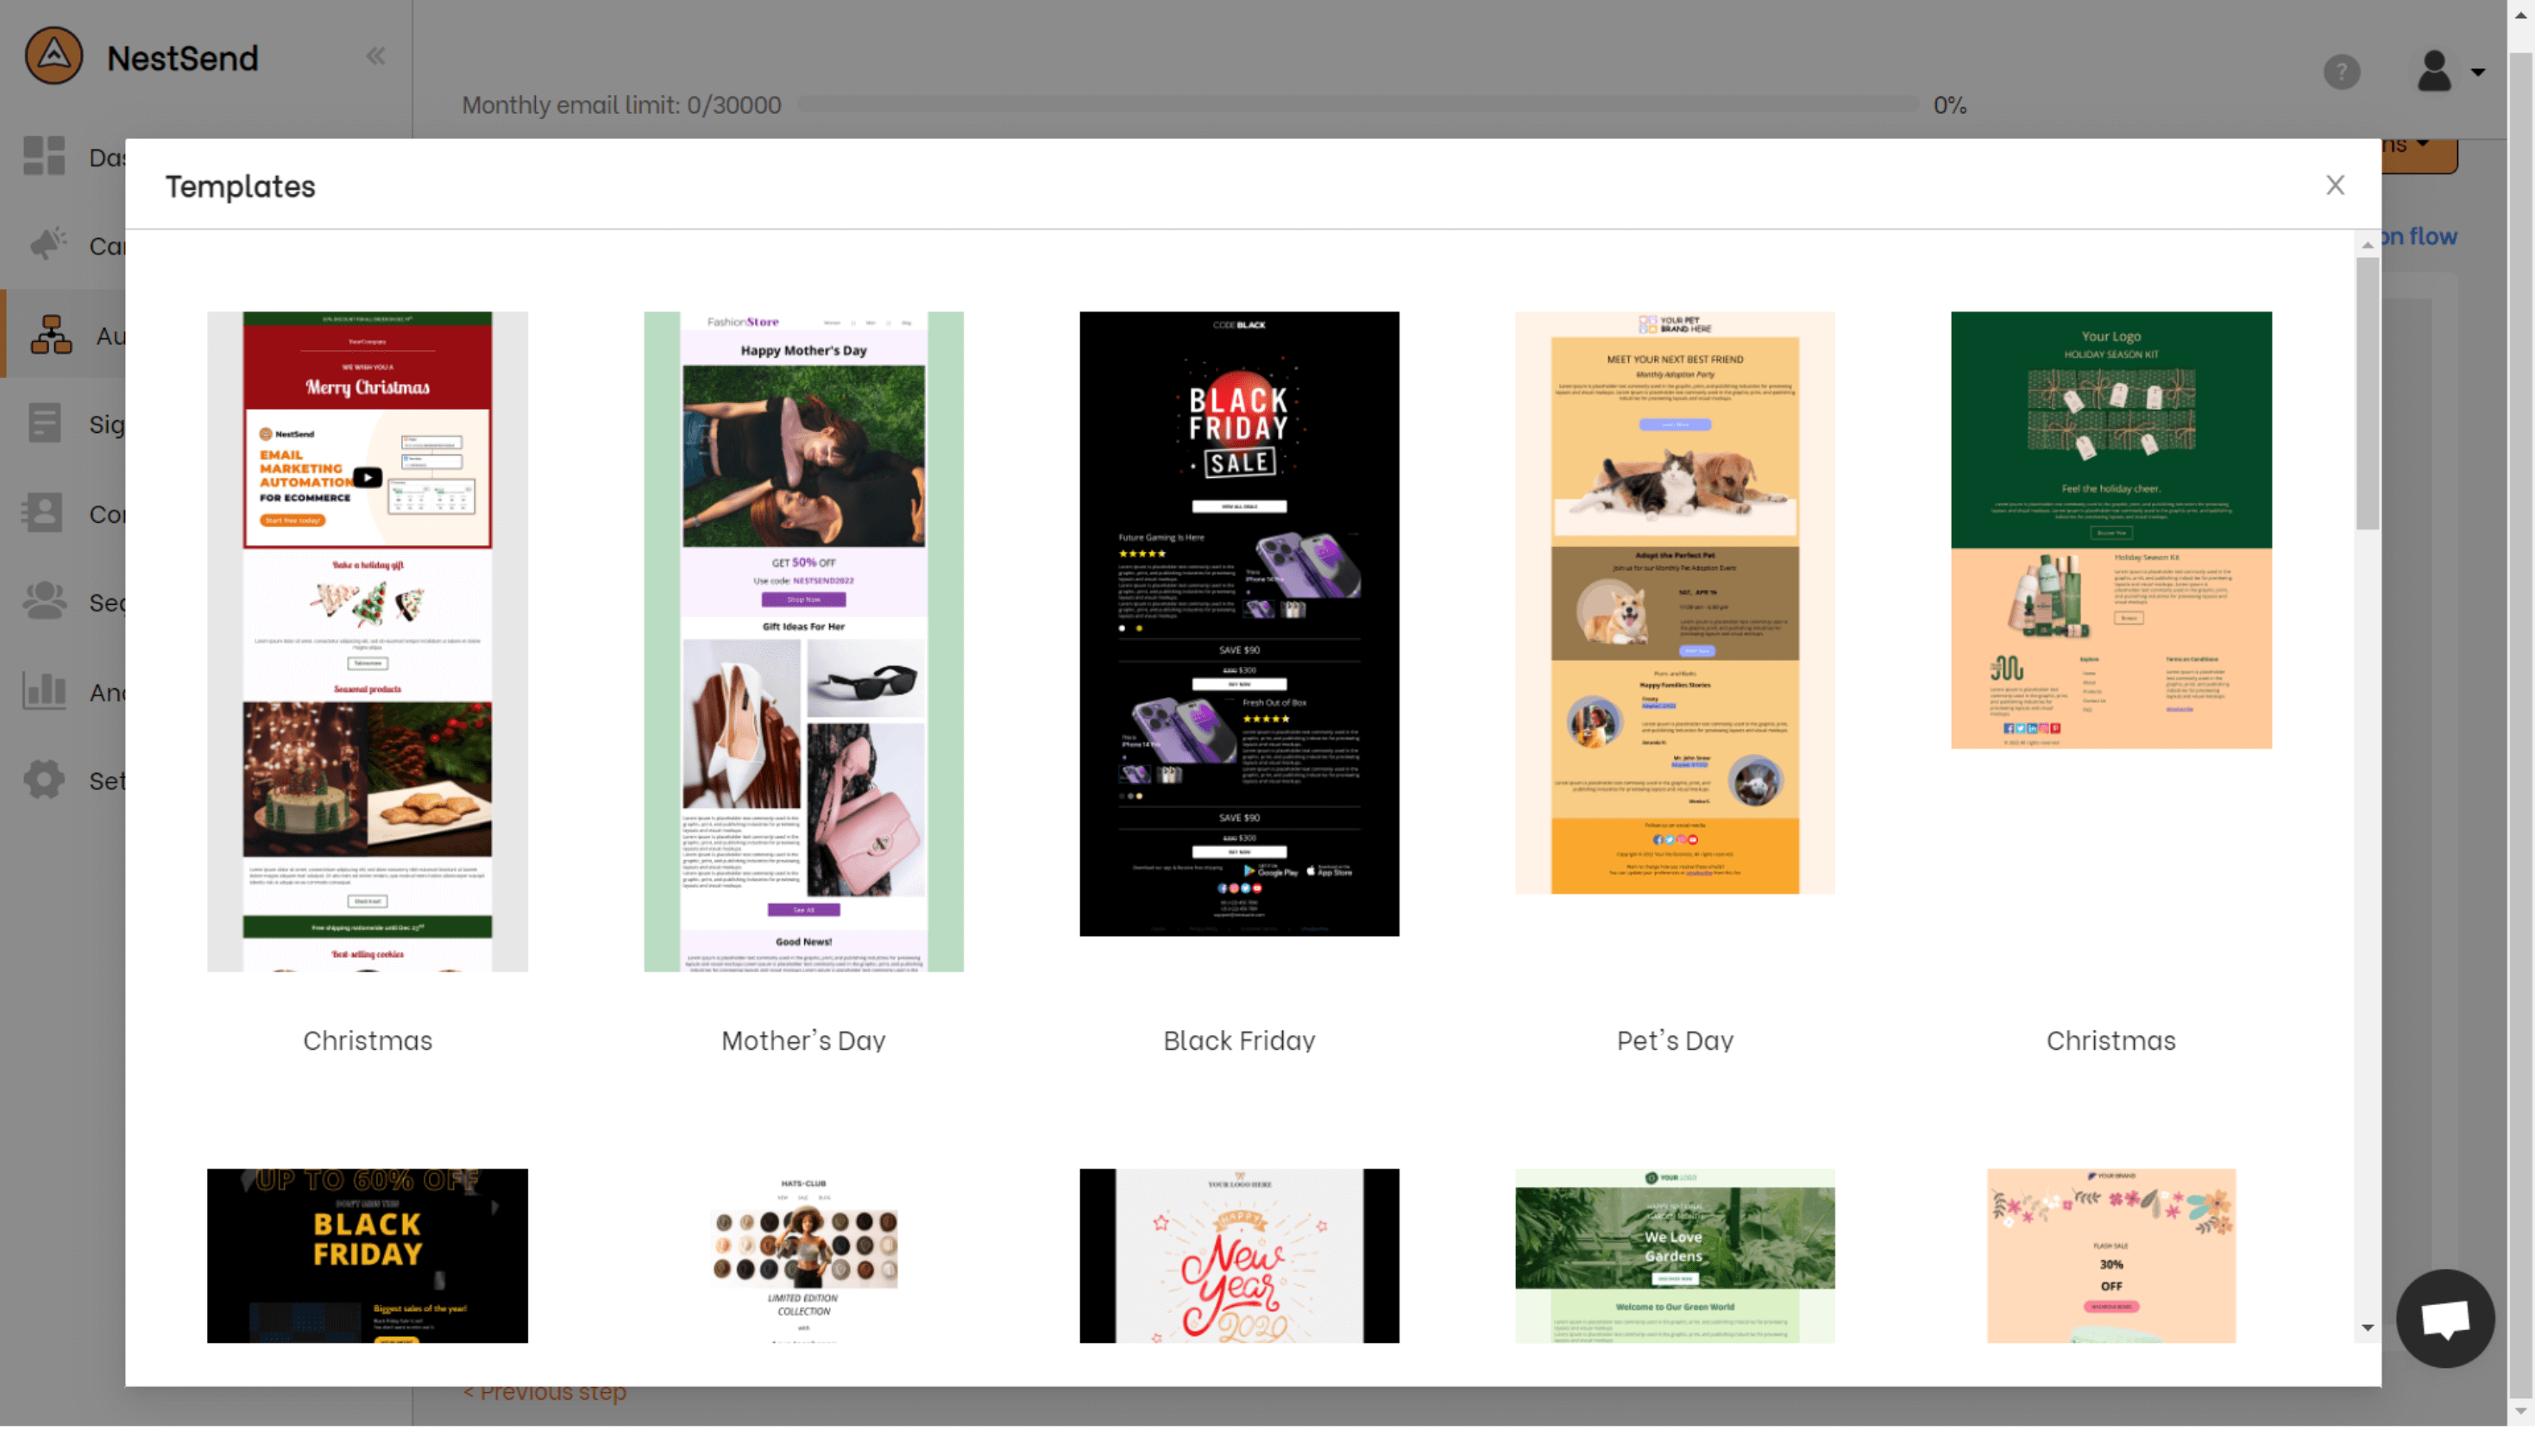
One of the most significant advantages of using pre-built email templates is the time they save. No more spending hours designing and formatting emails from scratch! NestSend’s pre-built templates are professionally designed, visually appealing, and well-written, so users can focus on the content and branding without worrying about the layout and design.
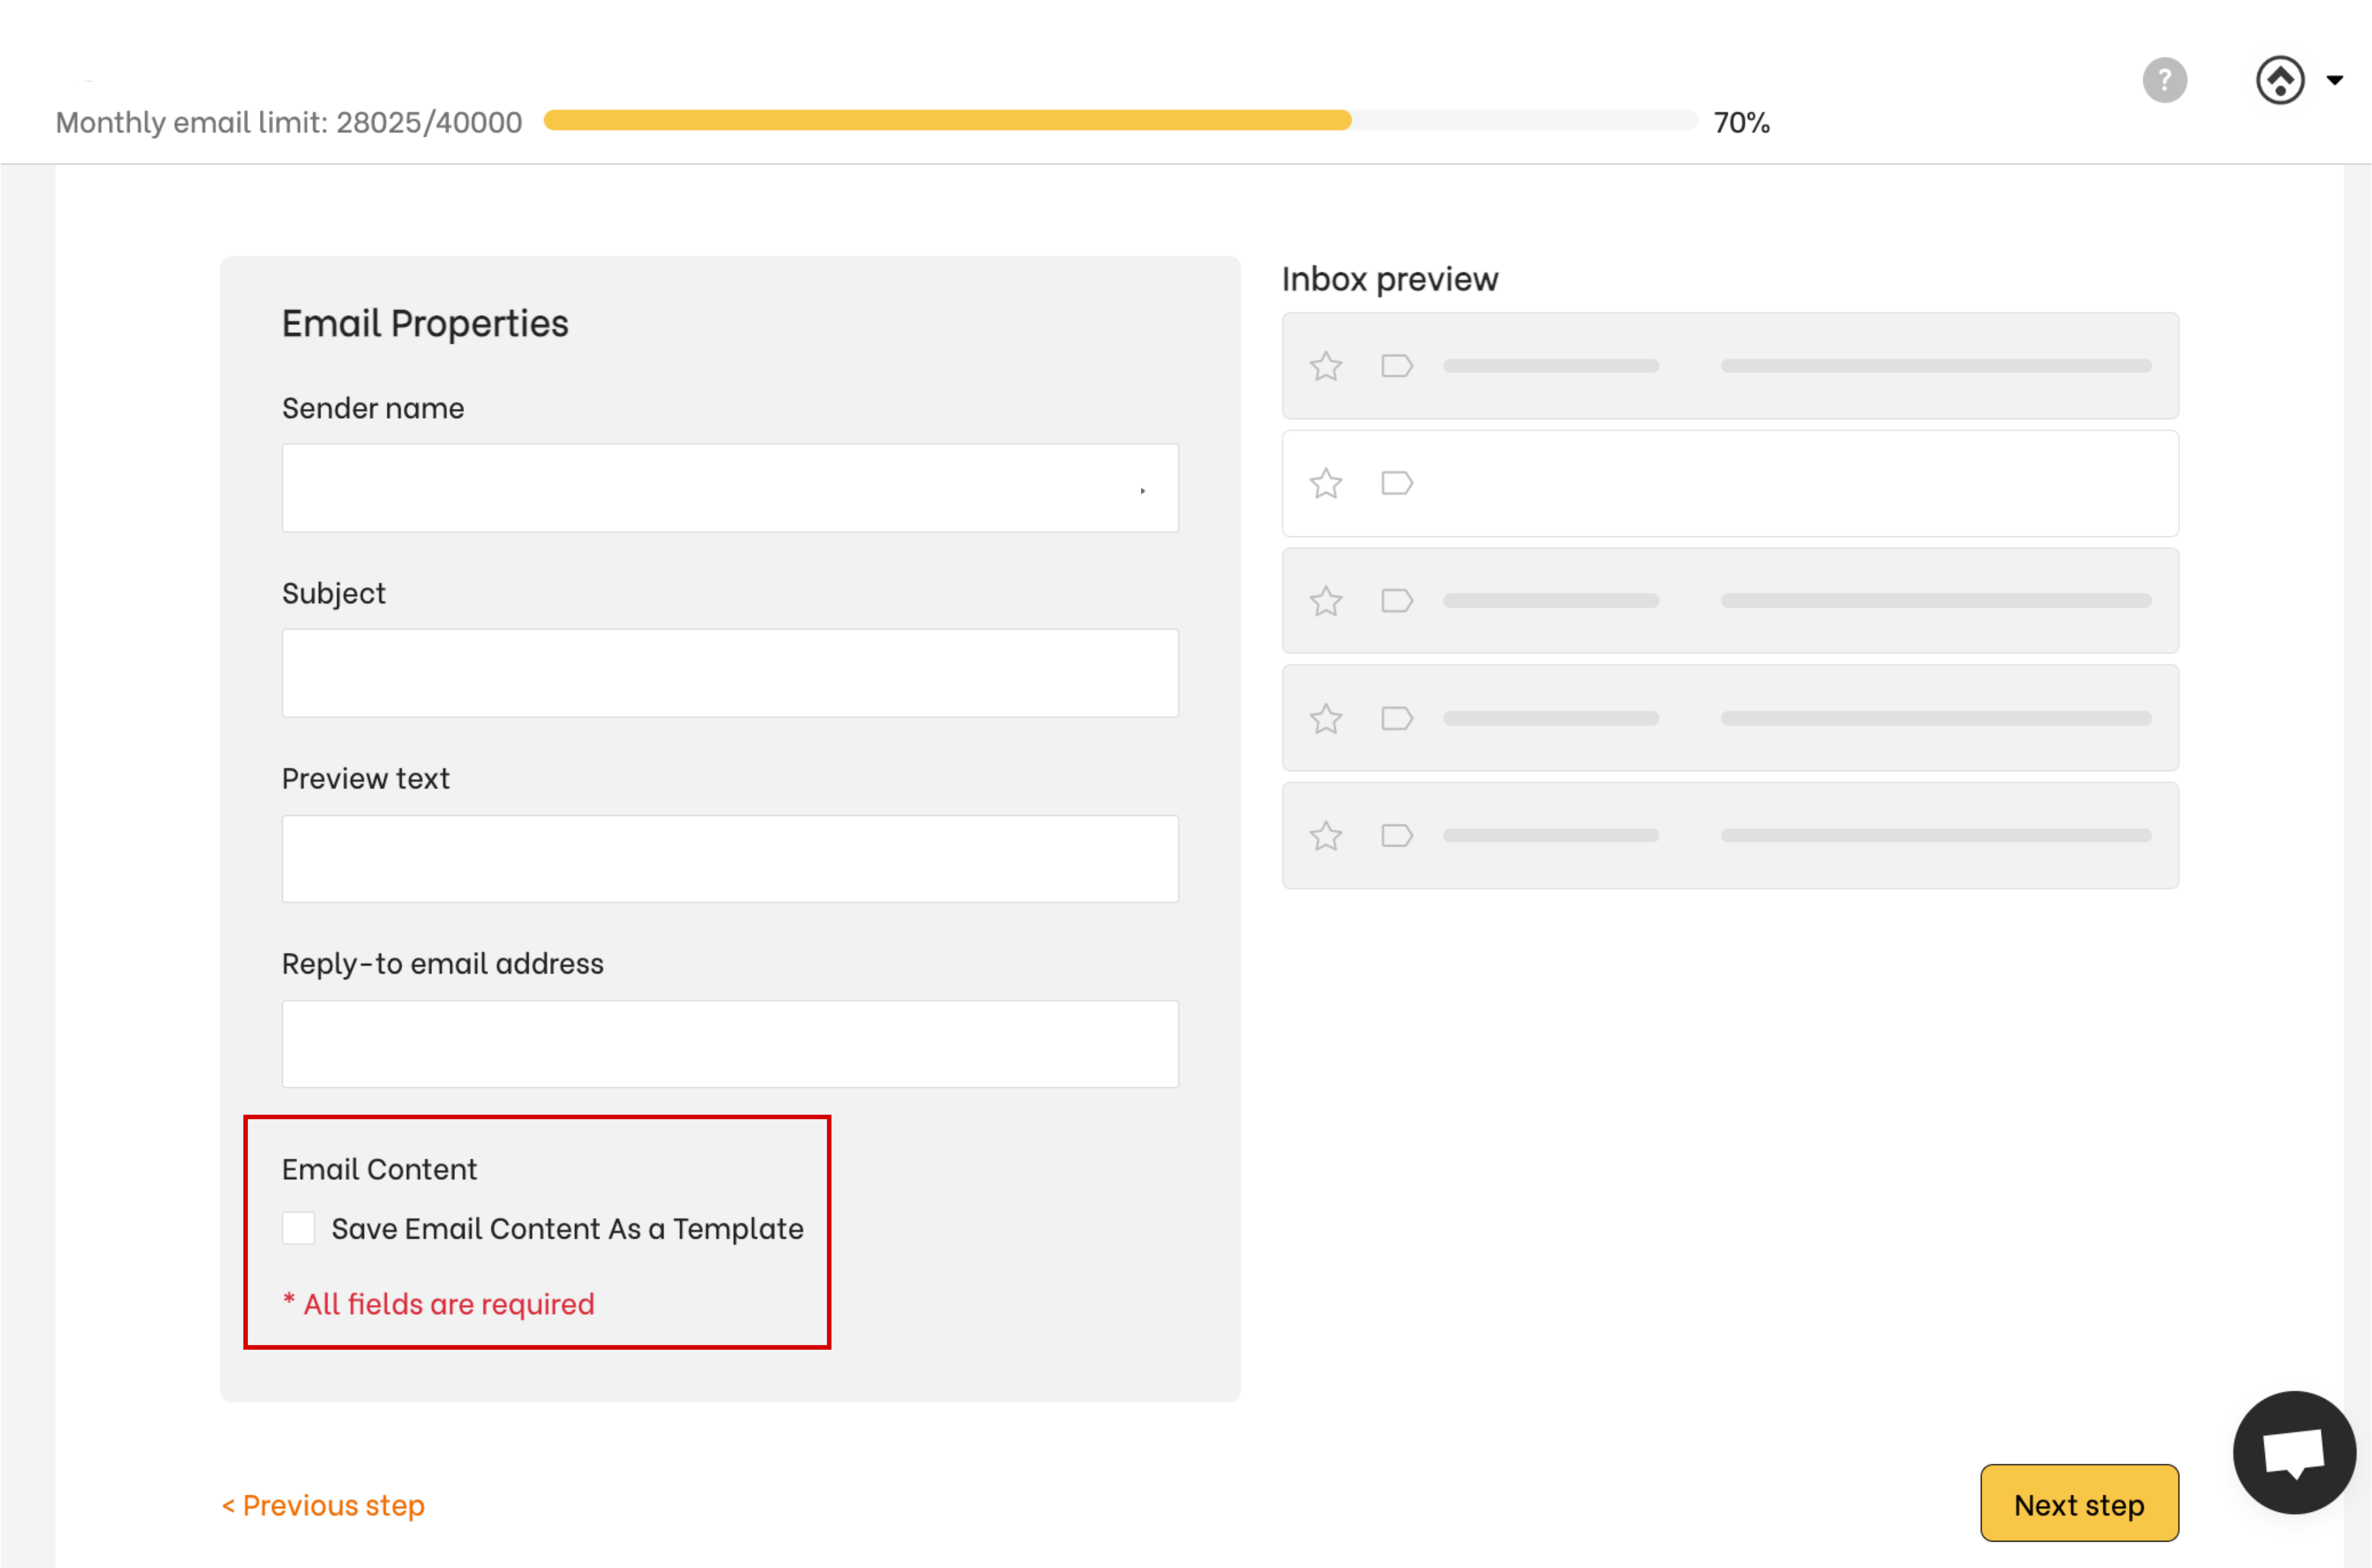
Another impressive feature of NestSend’s free pre-built email templates is the ability to save your whole email campaign, including your design, as a template for later use. This is particularly useful for those who frequently send emails with similar content or branding, as it eliminates the need to start from scratch each time.
Amazing email automation flow with few clicks
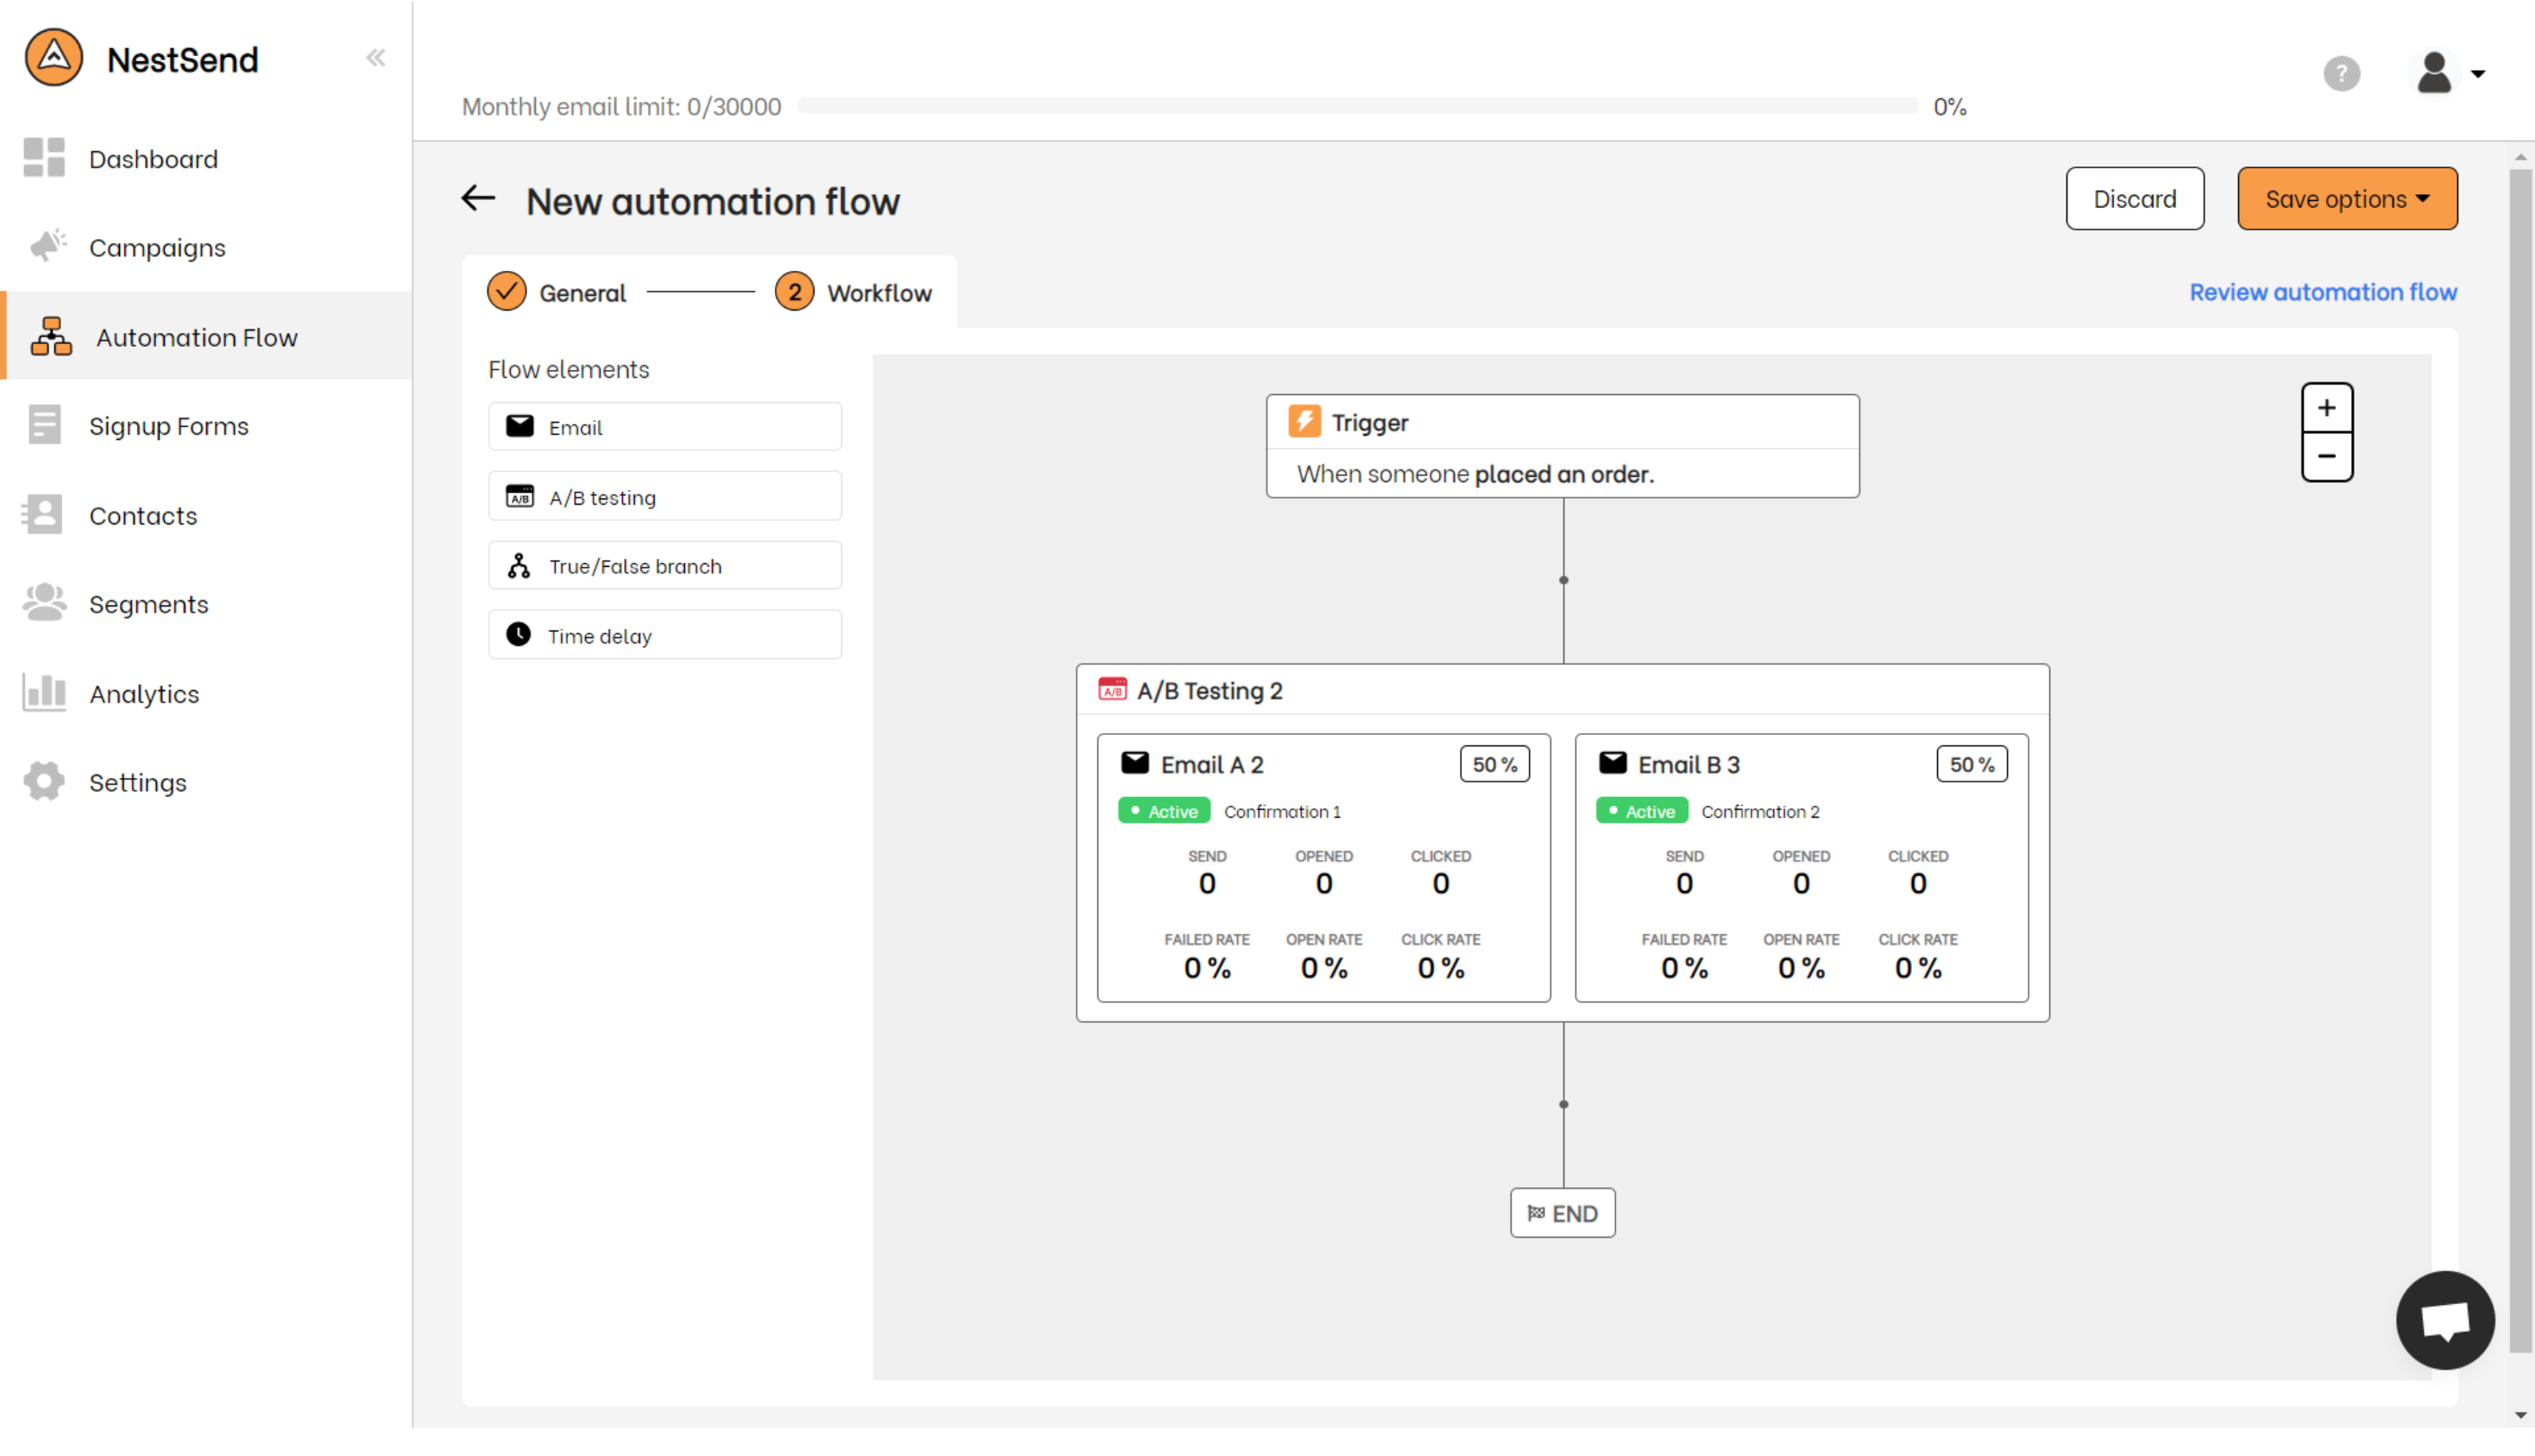
When it comes to email marketing, one of the keys to success is being able to personalize your emails and send the right message at the right time. That’s where NestSend’s Automation Flow feature comes in.
This feature allows you to create a series of automated emails that are triggered by certain actions or events, such as a new subscriber joining your list or a customer making a purchase.
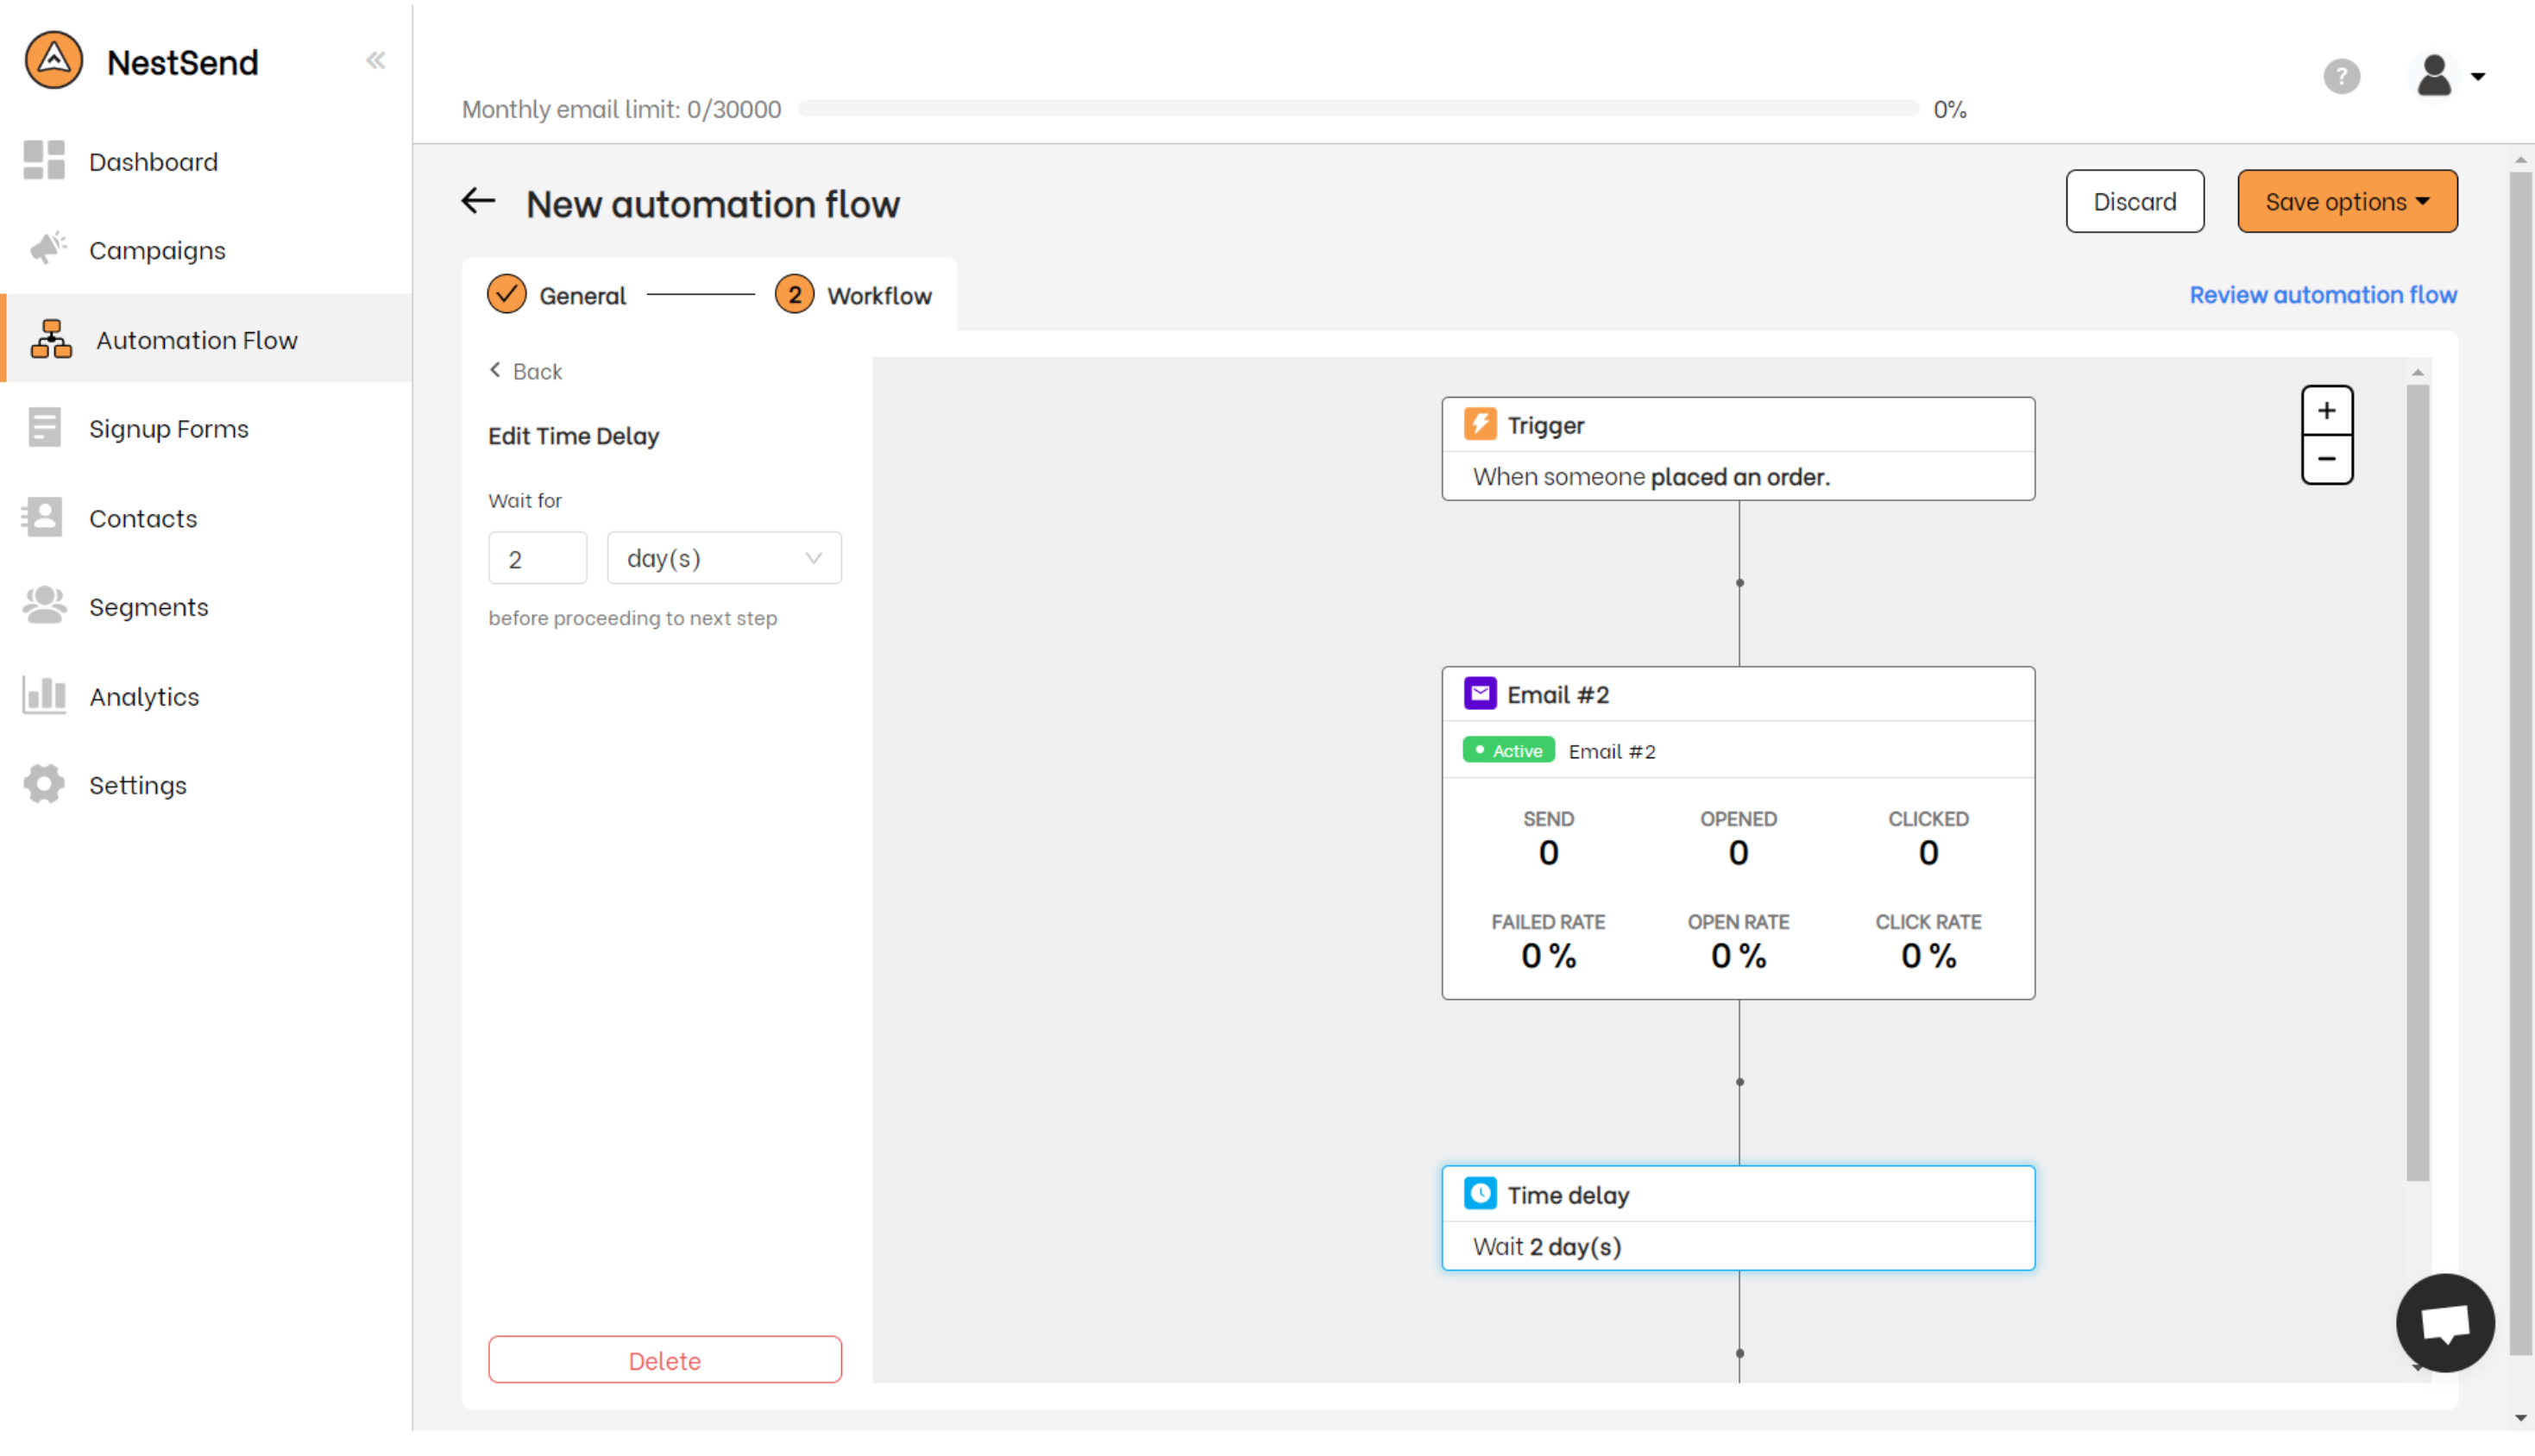
One of the benefits of using the Automation Flow feature is that it gives you more customization abilities. For example, you can set up follow-up emails to be sent after a customer makes a purchase, which can help increase customer loyalty and encourage repeat business.
Another benefit of NestSend’s Automation Flow feature is that it includes A/B testing functionality. This means you can test different variations of your emails to see which ones perform better, and then make adjustments based on the results.
For example, you could test different subject lines and email content, or send times to see what resonates best with your audience.
It’s worth noting that these kinds of automation and customization features aren’t typically available with Shopify’s default email settings. By using NestSend, you can take your email marketing to the next level and drive better results for your business.
However, seeing is believing, you can experience the app yourself by simply clicking the button below.
Useful tips for best performance Shopify order confirmation email
The order confirmation email is an excellent opportunity to continue building a positive relationship with your customer. Here are a few tips for making sure your order confirmation email performs at its best:
Keep it concise
Your customer has just made a purchase and is likely excited to receive their order. They don’t want to wade through a lengthy email to find the information they need. Keep your email short and to the point, focusing on the essential details of the order. This might include the order number, the items purchased, shipping information, and any relevant instructions.
Make it visually appealing
Your order confirmation email should be visually appealing and consistent with your brand. Use images, colors, and formatting to make your email engaging and easy to read. Make sure your email design is simple, with a clear and easy-to-read font. Avoid clutter and unnecessary information that could distract from the key details.
Include upsell opportunities
An order confirmation email is an excellent opportunity to include a call-to-action (CTA) or product recommendations. You can use this opportunity to upsell additional products or services or to encourage customers to follow your social media channels. Make sure your CTA is prominent, and that any recommended products are relevant to the customer’s purchase.
Personalize the email
Personalization is an excellent way to make your order confirmation email feel more personal and engaging. Use the customer’s name in the email, and make sure the content is tailored to their specific purchase. This will help create a stronger connection with the customer and make them feel valued.
FAQ(s)
How to disable Shopify order confirmation email?
Shopify sends automated order confirmation emails to customers when they complete their checkout, which cannot be disabled. These emails serve as the official receipt of the purchase and contain vital information such as the order number and shipping address. Therefore, disabling them is not an option to maintain a seamless and satisfactory customer experience.
How to put logo in order confirmation email on Shopify?
Customizing your notification emails can give your business a professional touch and create a strong brand identity. You can easily add your logo to all templates in one go. Here’s a step-by-step guide to help you do it:
Step 1: Go to the ‘Settings’ tab on the main menu and select ‘Notifications.’
Step 2: Click on ‘Customize’ and then choose the ‘Choose File’ option to upload your logo to the email template.
Your logo will now be displayed in all the notification emails that you send out.
How to change accent color in order confirmation email on Shopify?
You can also change the accent colors of your email templates to match your brand identity. Here’s how you can do it:
Step 1: Go to the ‘Settings’ tab on the main menu and select ‘Notifications.’
Step 2: Click on ‘Customize’ and then change the accent colors by using the color picker or entering the correct color code that you want to use.
You can use this feature to reflect the colors used in your website or brand, creating a cohesive and professional look across all platforms.
How to test Shopify order confirmation emails?
To guarantee a seamless and positive experience for your customers when purchasing items from your online store, it’s important to conduct testing, including sending a test email. You can test the performance of your email by clicking “Send test” on the left-hand side of the “Edit code” button, you can review the email content as it would appear to your customers.
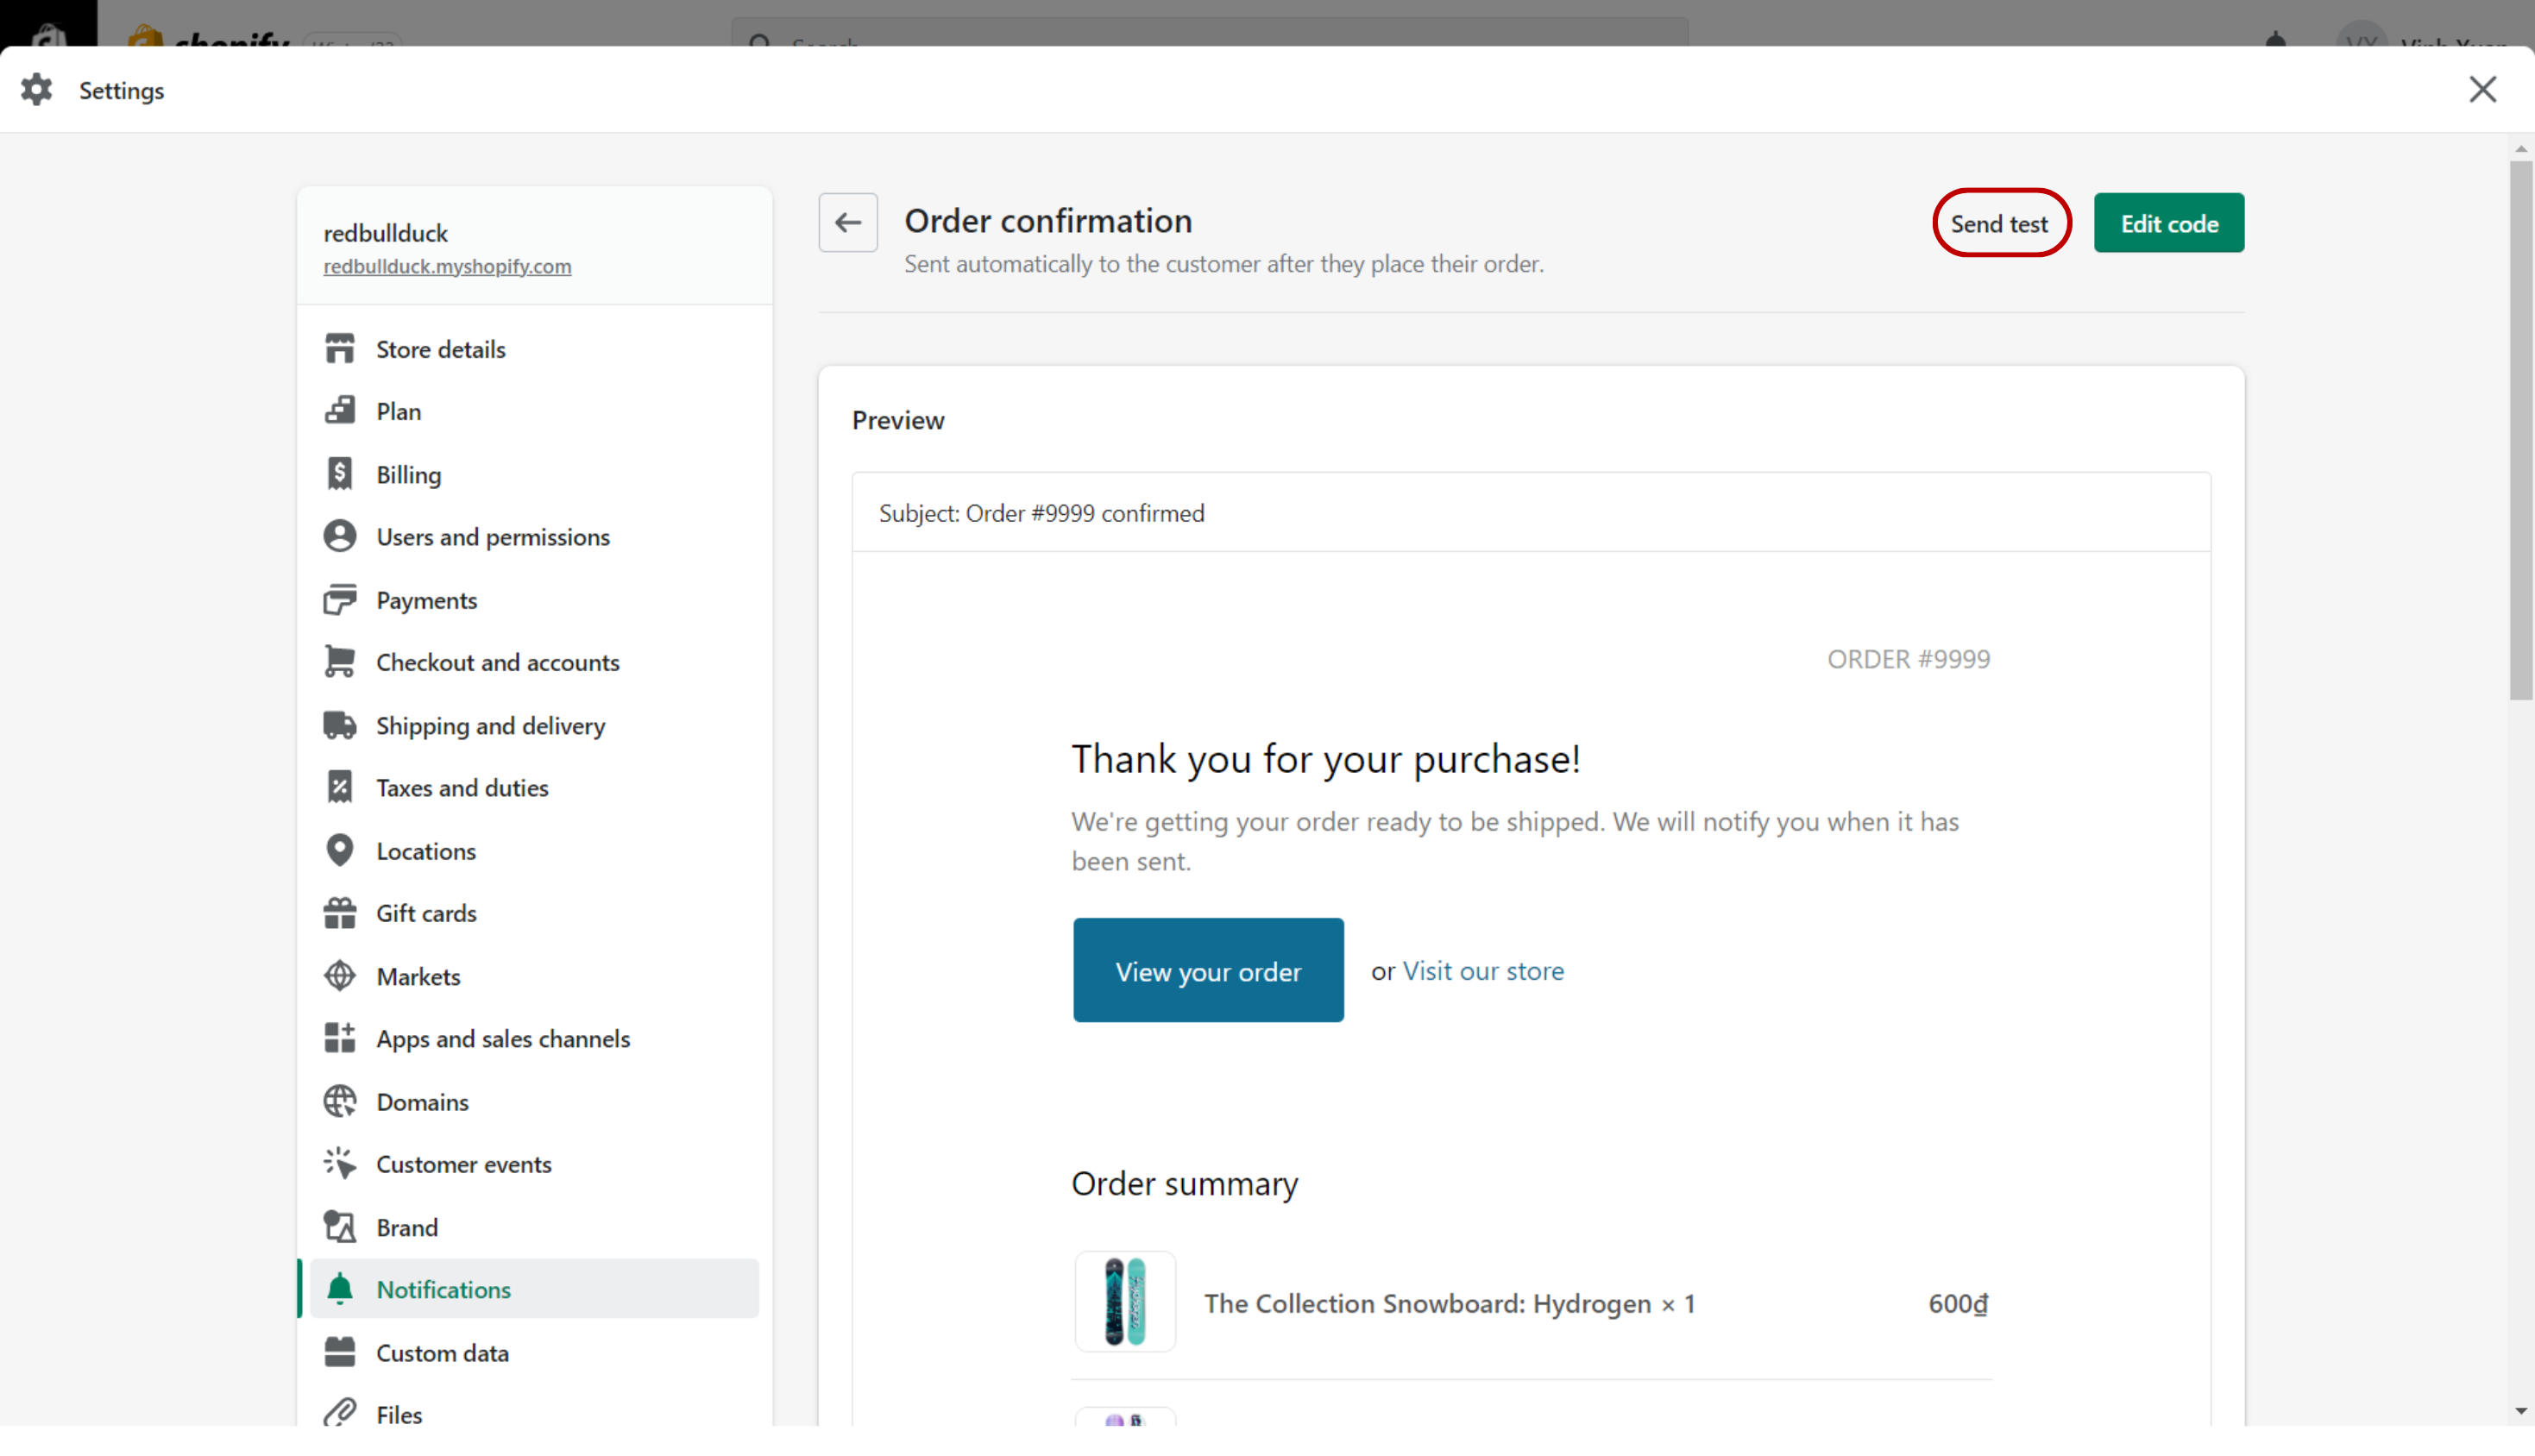
This step can prevent any potential issues or glitches that could lead to customer dissatisfaction. Taking the time to test your emails before sending them out can have a significant impact on the success of your online store, as it can enhance your customers’ satisfaction and perception of your brand.
How to fix order confirmation emails for Shopify going to spam?
In case you are facing the problem of your welcome email getting stuck in the spam folder of the recipient, there are a few steps you can take to avoid it. One effective way is to customize your email’s subject line and message to steer clear of any spam trigger words. These words can flag your email as suspicious or unsolicited by the email service providers.
Best Shopify order confirmation email ever to gain repeat buyers
All in all, customizing your order confirmation email is a simple but effective way to create a better customer experience. By following the steps outlined in this article, you can make sure your email is on-brand, visually appealing, and contains all the necessary information. With these tips, you’ll be well on your way to creating a memorable and positive experience for your customers.