Looking to build trust with your customers and reduce hesitation at checkout? A great way to do that is by showing clear delivery timelines on your product pages, especially when you need to configure delivery dates for pre-order or backorder products in Shopify. Whether you’re shipping right away or managing extended lead times, displaying estimated delivery dates can make all the difference in improving the buying experience.
Here’s a quick preview of what you’ll learn:
- How to display the delivery date widget on product pages for pre-order and back-order items
- Ways to tailor the message and design to match your store’s style
- How to account for different time zones, holidays, and cut-off times, ensuring accurate delivery estimates for all types of products, whether in stock or on backorder
Step 1: Install and Set Up the NS Estimated Delivery Date App
Getting started is a breeze! Just follow these simple steps to have the NS Estimated Delivery Date app up and running on your Shopify store in no time:
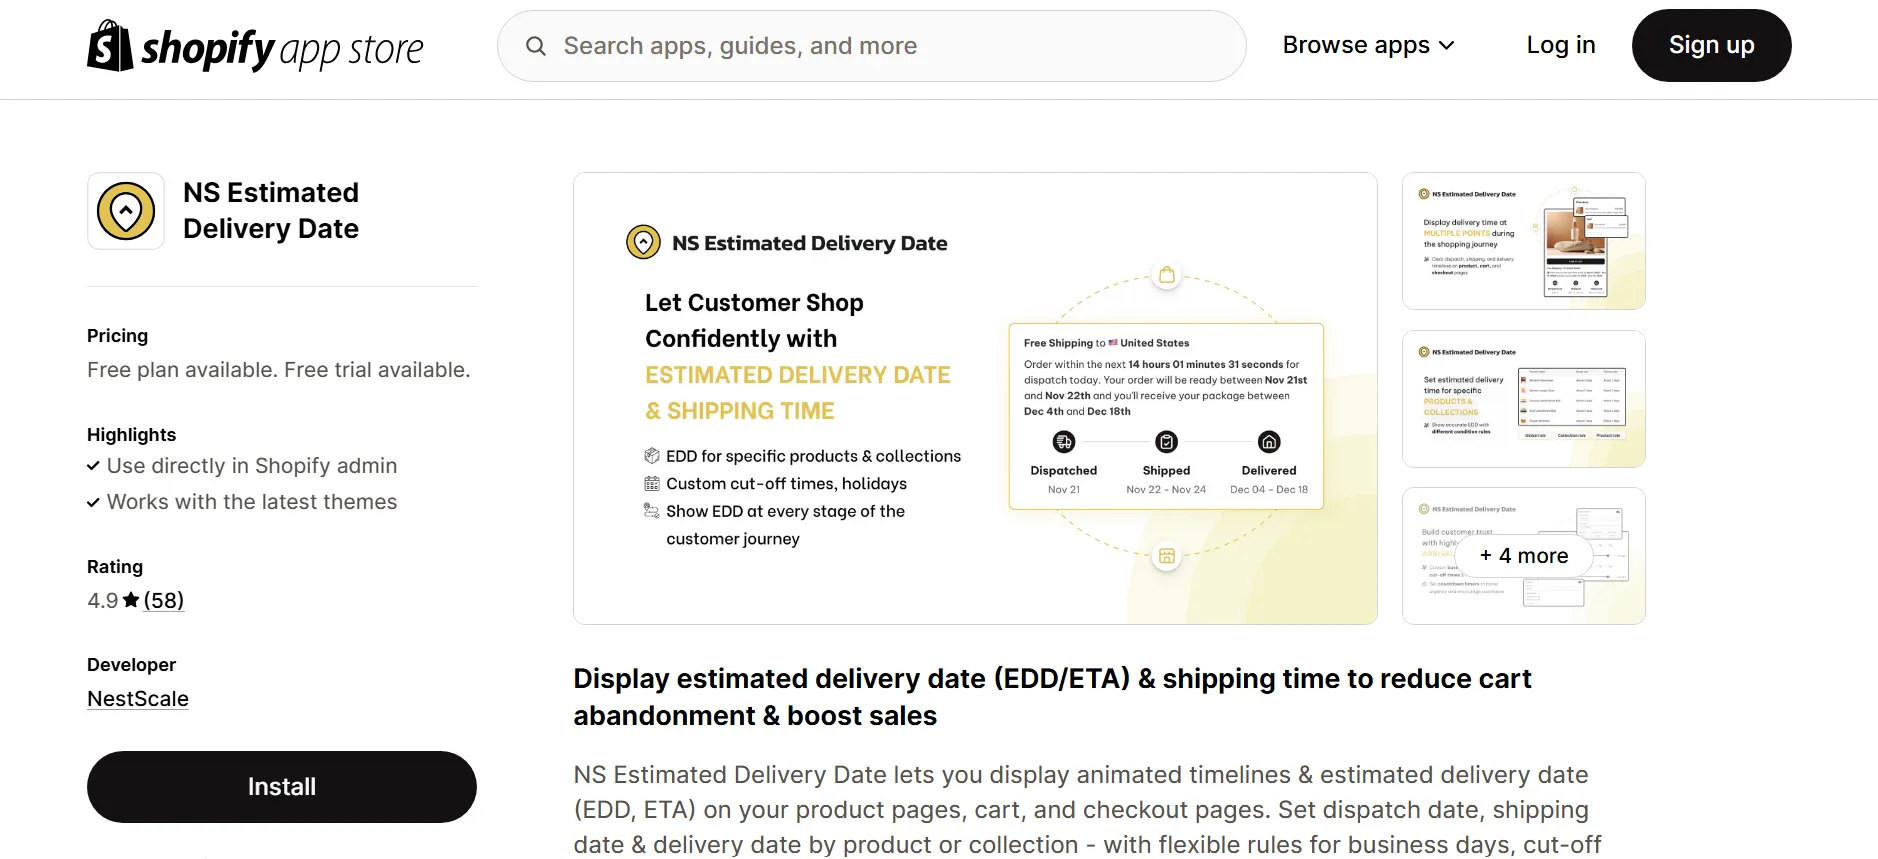
- Install the App
Head over to the Shopify App Store and install NS Estimated Delivery Date. It’s quick and easy!
2. Launch and Onboard
Open the app, and follow the intuitive onboarding process to get everything set up.
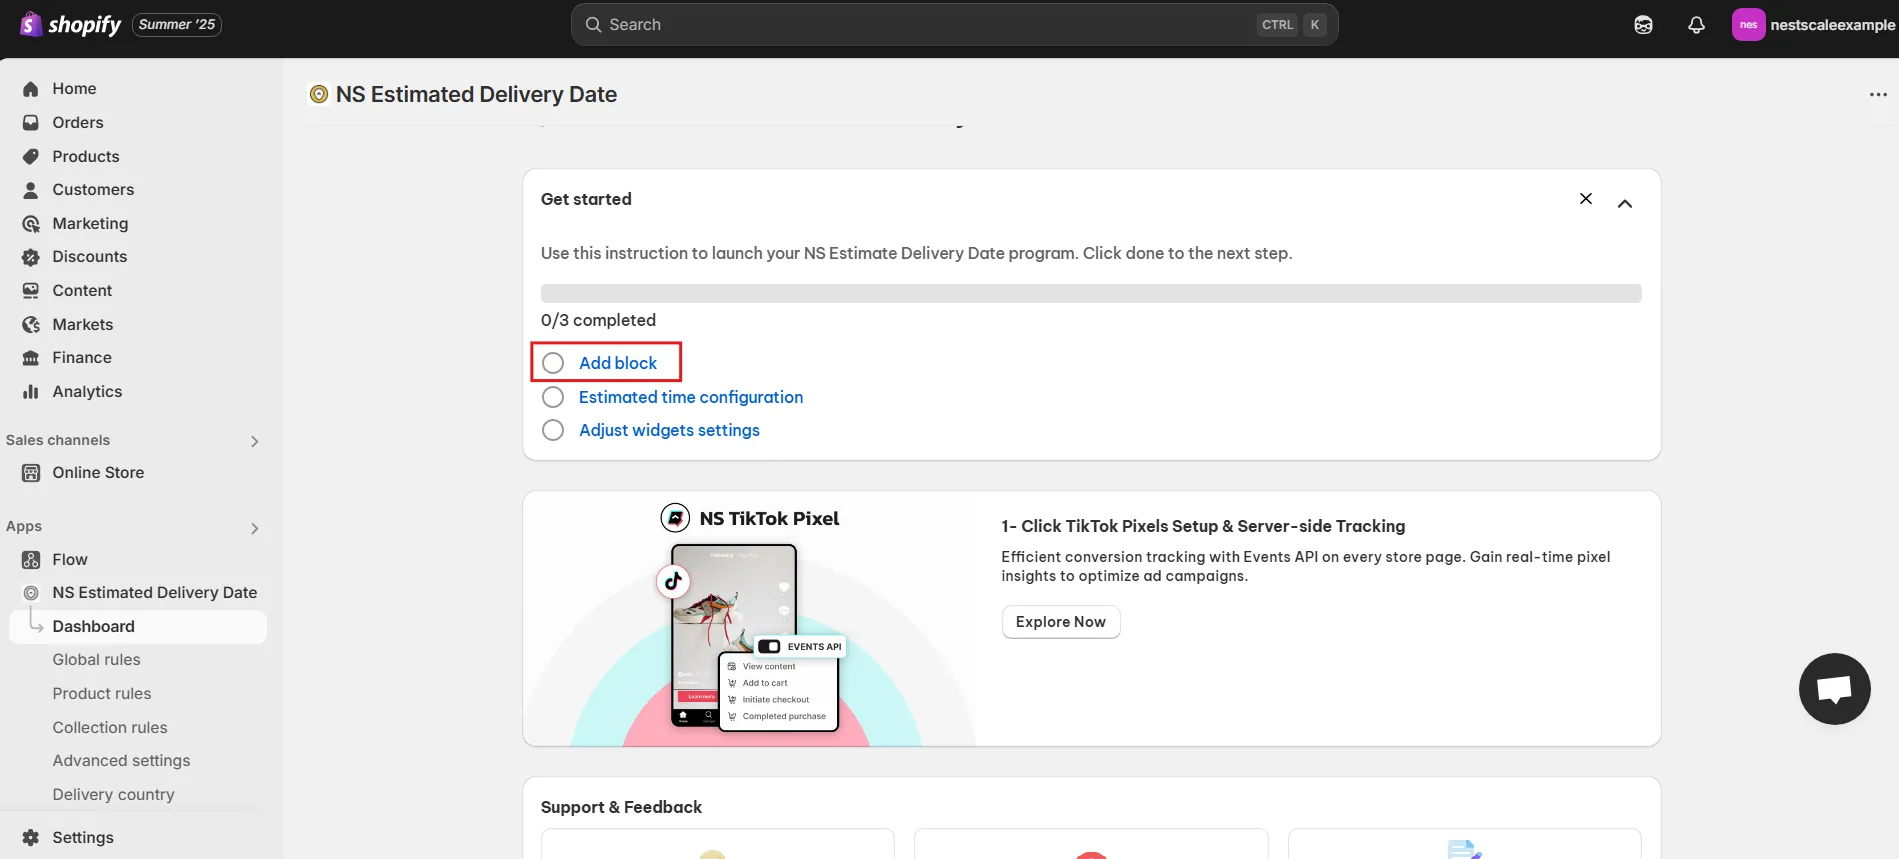
3. Customize Your Product Page
Click Add Block to start customizing how the delivery date appears on your product pages.
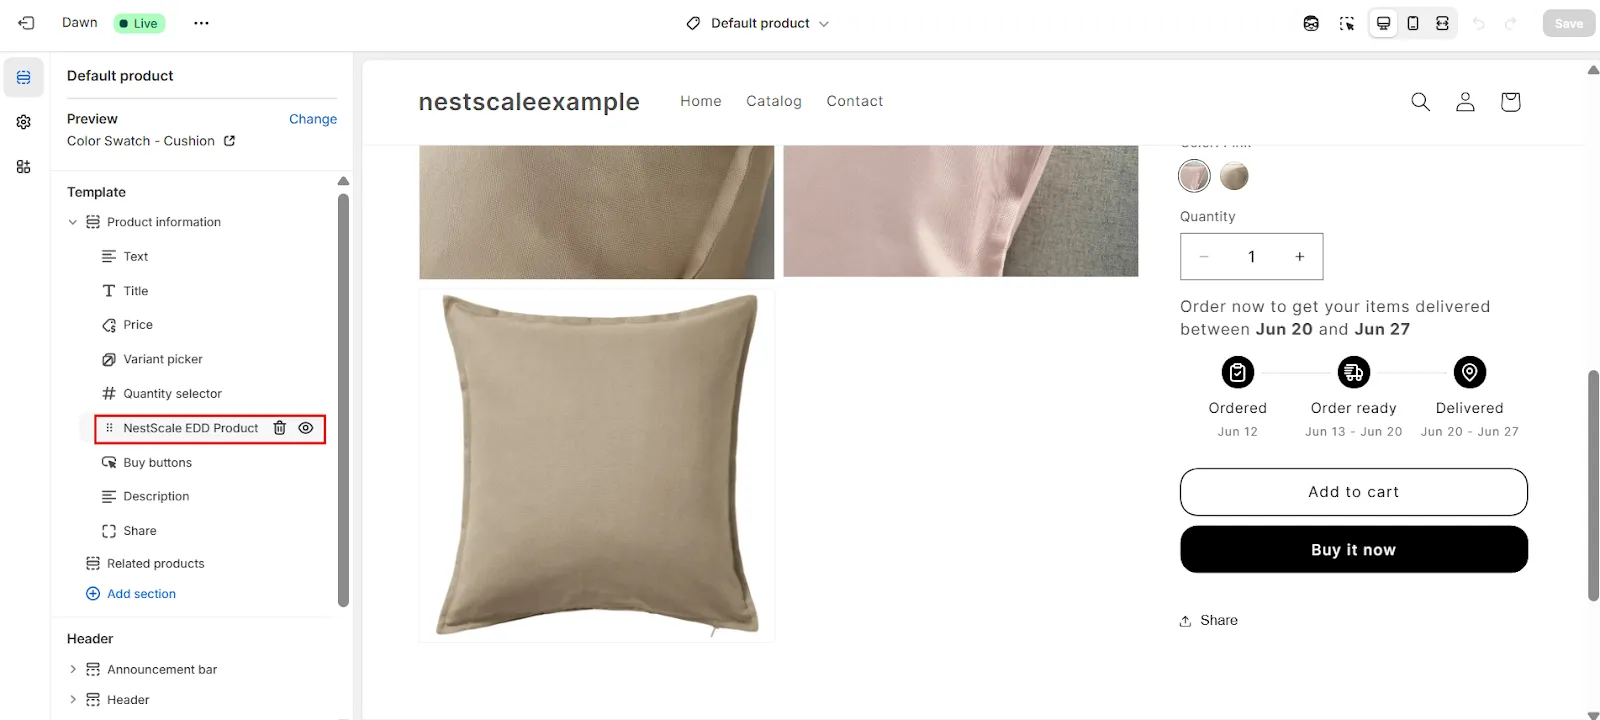
4. Add the EDD Widget
You’ll be directed to your Product Page Editor. Select Add Section > Apps > NS Estimated Delivery Date and drag the widget to the spot you want it to appear.

5. Save Your Changes
Once you’re happy with the placement, hit Save to make your changes live and ready to go!
Step 2: Set Estimated Delivery Dates for Pre-order and Back-order products
If you’re selling pre-order or back-order items, Product Rule & Collection Rules are suitable in this case.
Instead of setting the same EDD for every product, these rules allow you to set specific shipping and delivery messages for one or a group of products that are pre-order or back-order items. Thereby, you can give your customers a clearer and more accurate expectation of when to receive the orders. Here’s how to set it up:
First, Let’s Walk Through Product Rules:
1.Click on Product Rules
Navigate to the Product Rules tab in the app.
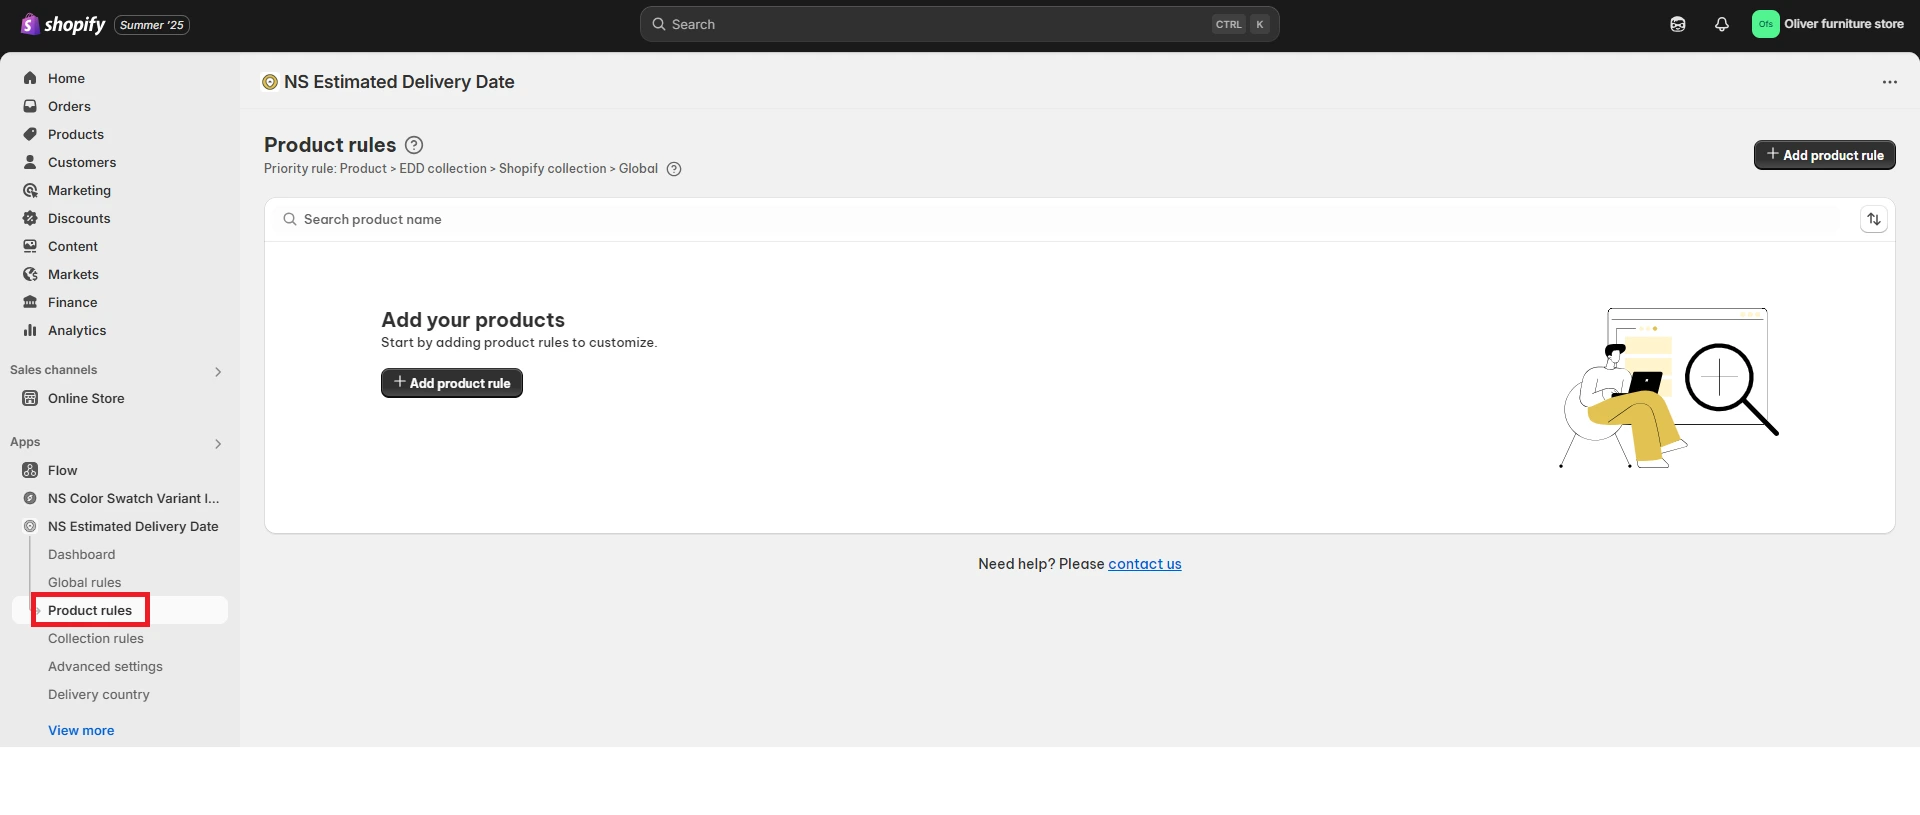
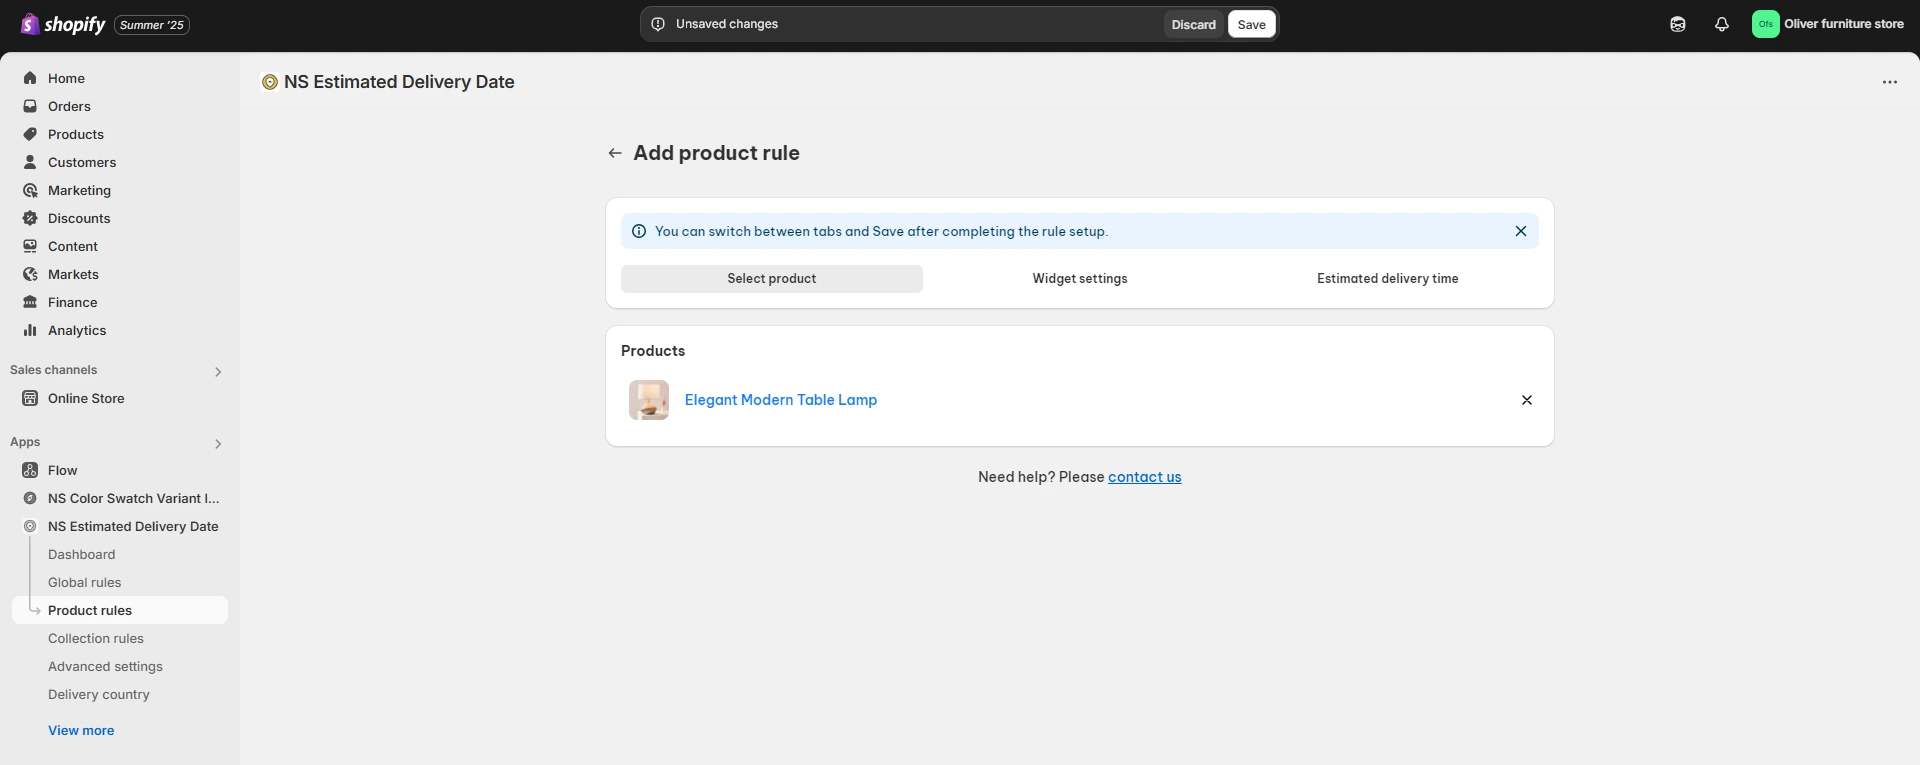
2. Add a Product Rule
Click Add Product Rule, then select a product. For example, let’s say you’re setting it up for a table lamp.
Now, for Collection Rules:
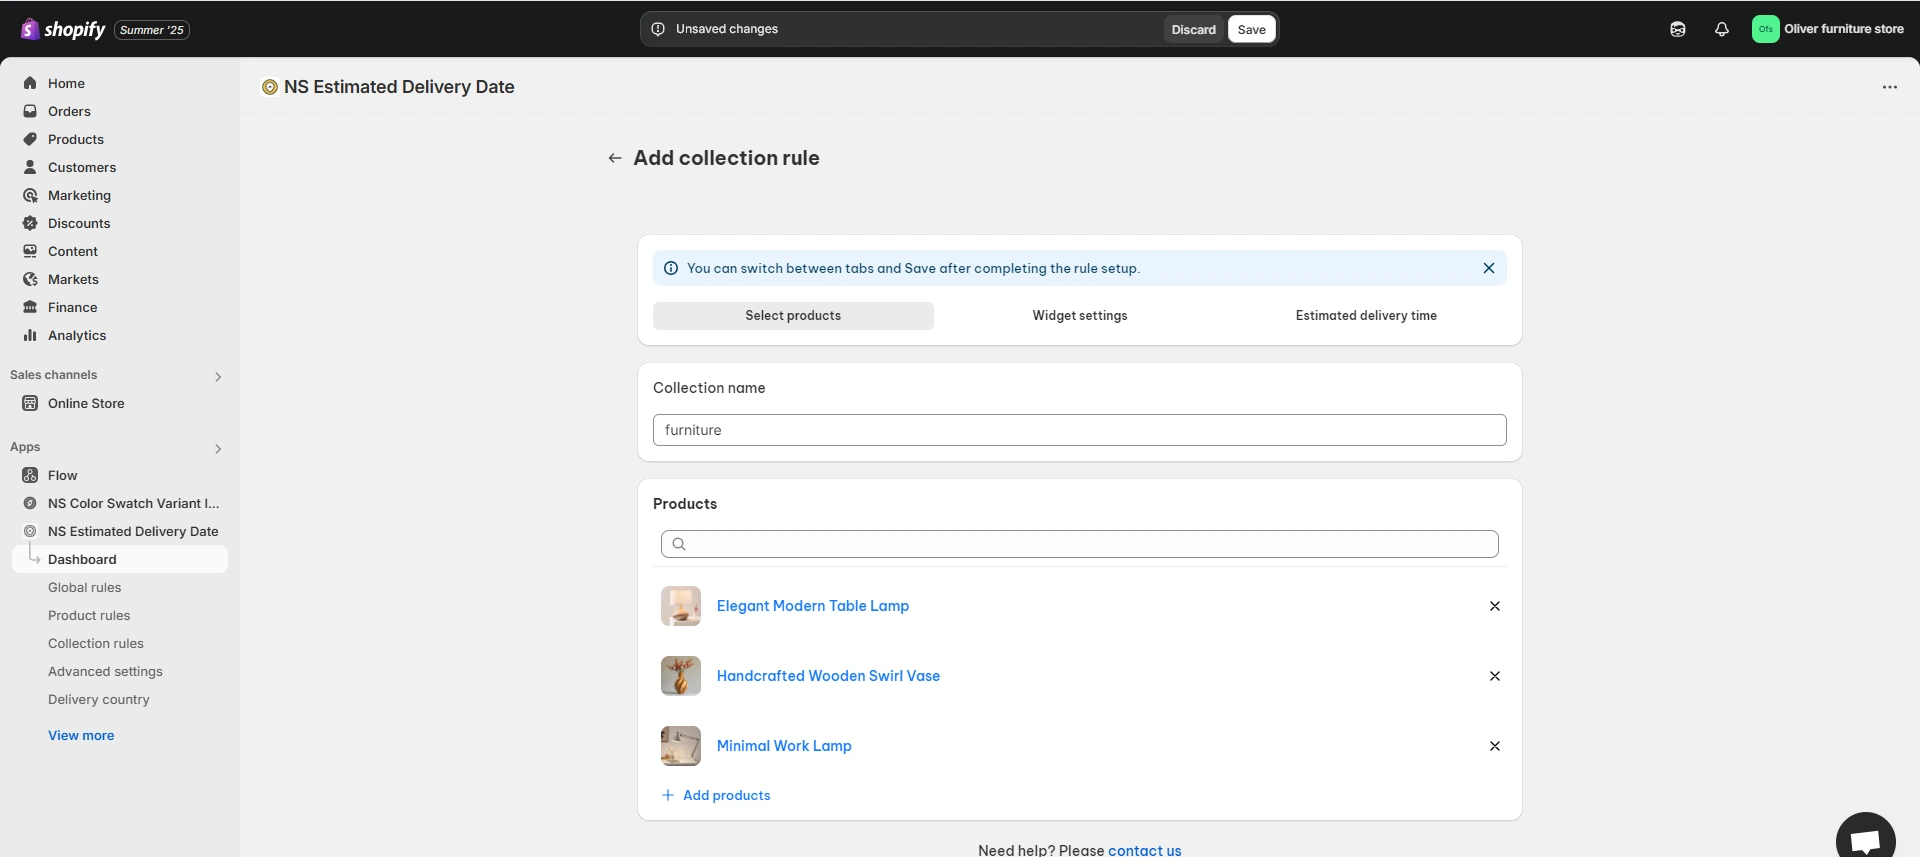
1. Click on Collection Rules
Navigate to the Collection Rules tab.
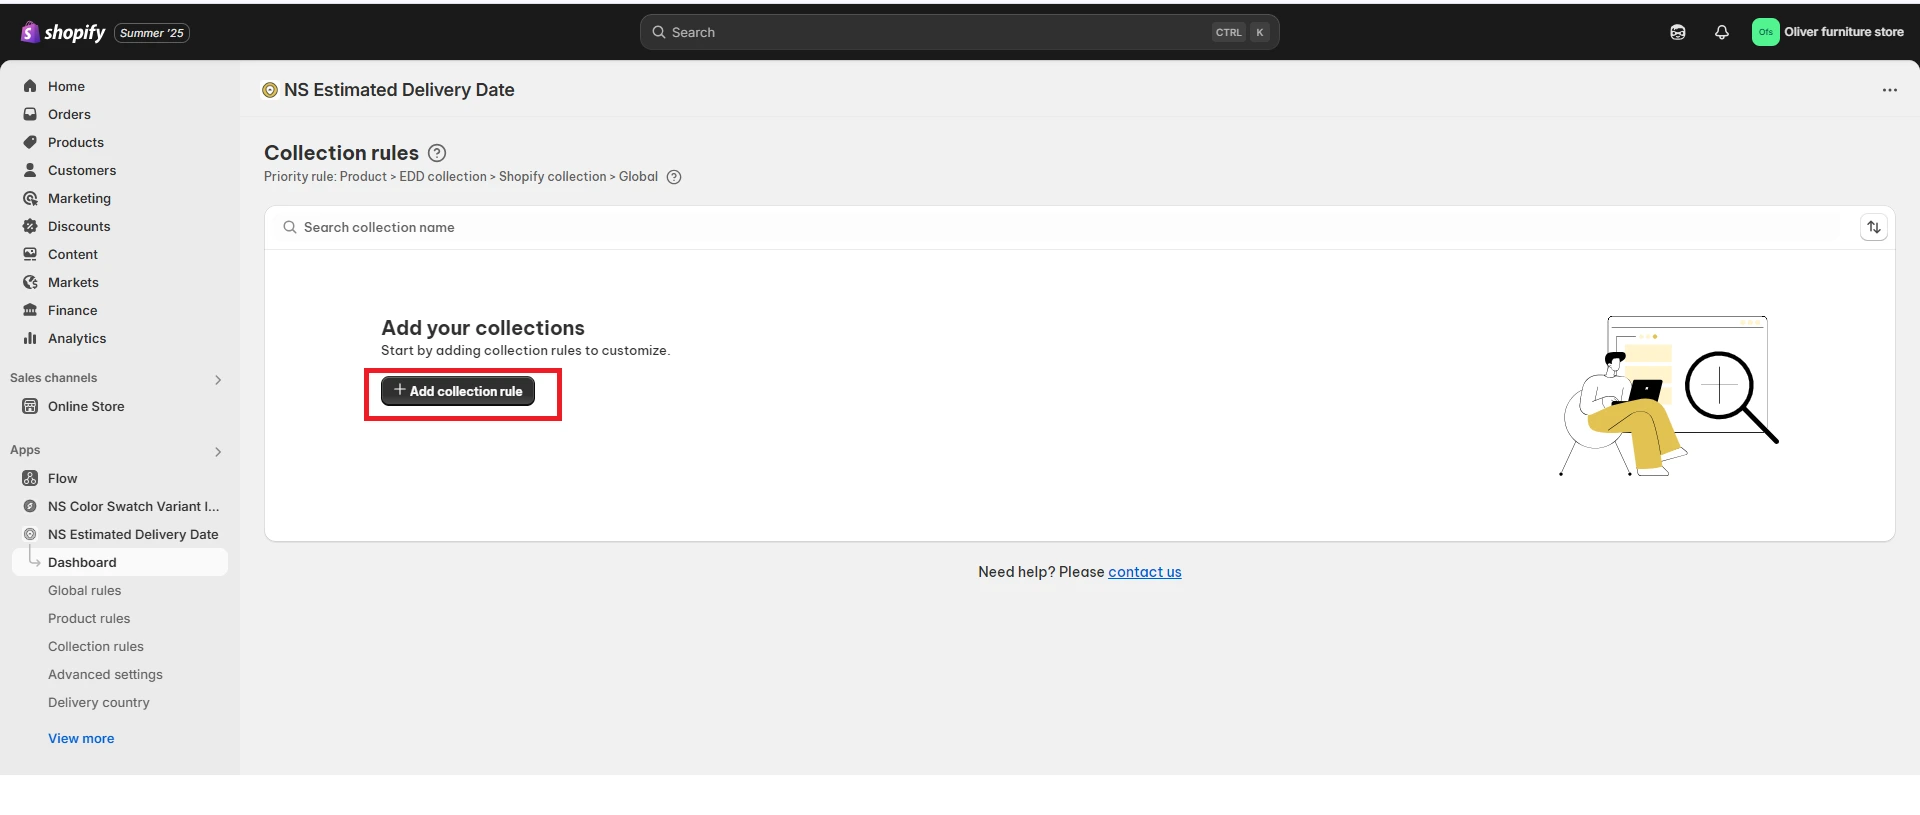
2. Add a Collection Rule
- Click Add Collection Rule, then manually create a collection rule:
- Add a collection name
- Select the products you want to group together
Step 3: Personalize Your EDD Widget
Both Product Rule & Collection Rule share the same widget settings, so the process for personalizing the EDD widget is identical. This is where the fun begins! You can easily customize the delivery date message to match your store’s branding and keep it engaging.
Customize Your Message
Enter a custom delivery message that speaks in your brand’s voice, ensuring it aligns with your store’s style and tone.
Add Dynamic Elements
To make your message more personal and engaging, consider adding the following:
- Country flags
- Visitor’s country
- Countdown timer (to show cut-off times)
- Other relevant details
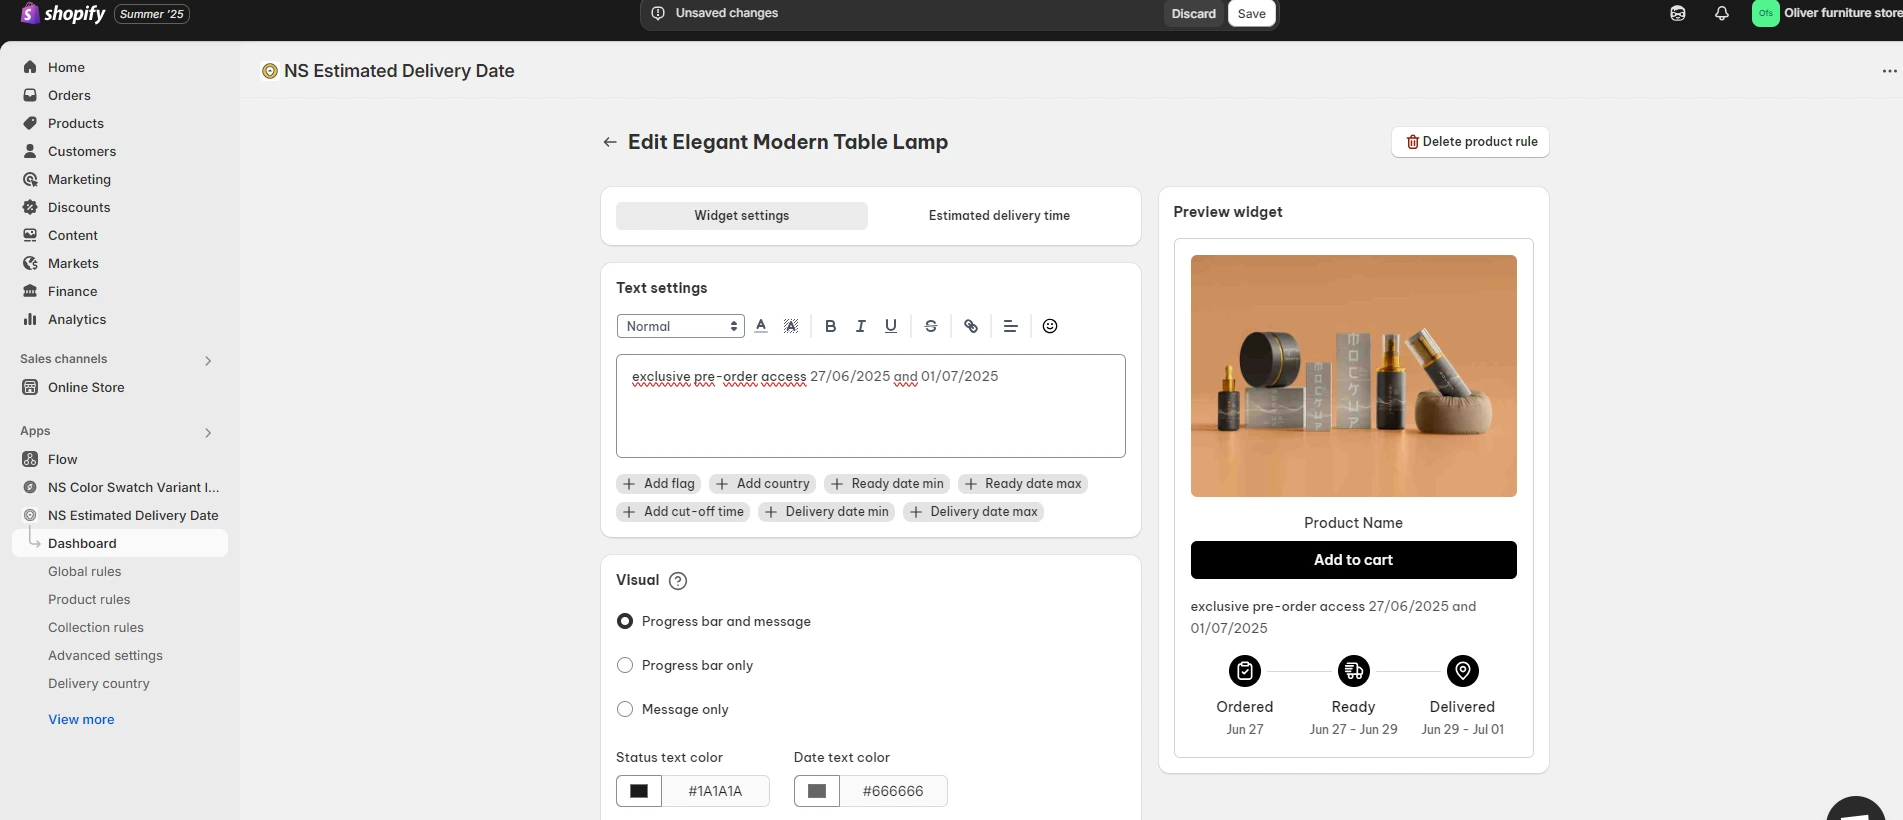
💡 Tips for Pre-order and Back-order:
For pre-order and back-order items, customize your message to keep your customers excited about their purchase. Consider phrases like “exclusive pre-order access” or “your order is in high demand, thank you for waiting!” This keeps the excitement high while managing customer expectations. Also, providing regular updates and thank you notes for their patience can turn potential frustration into a positive experience.
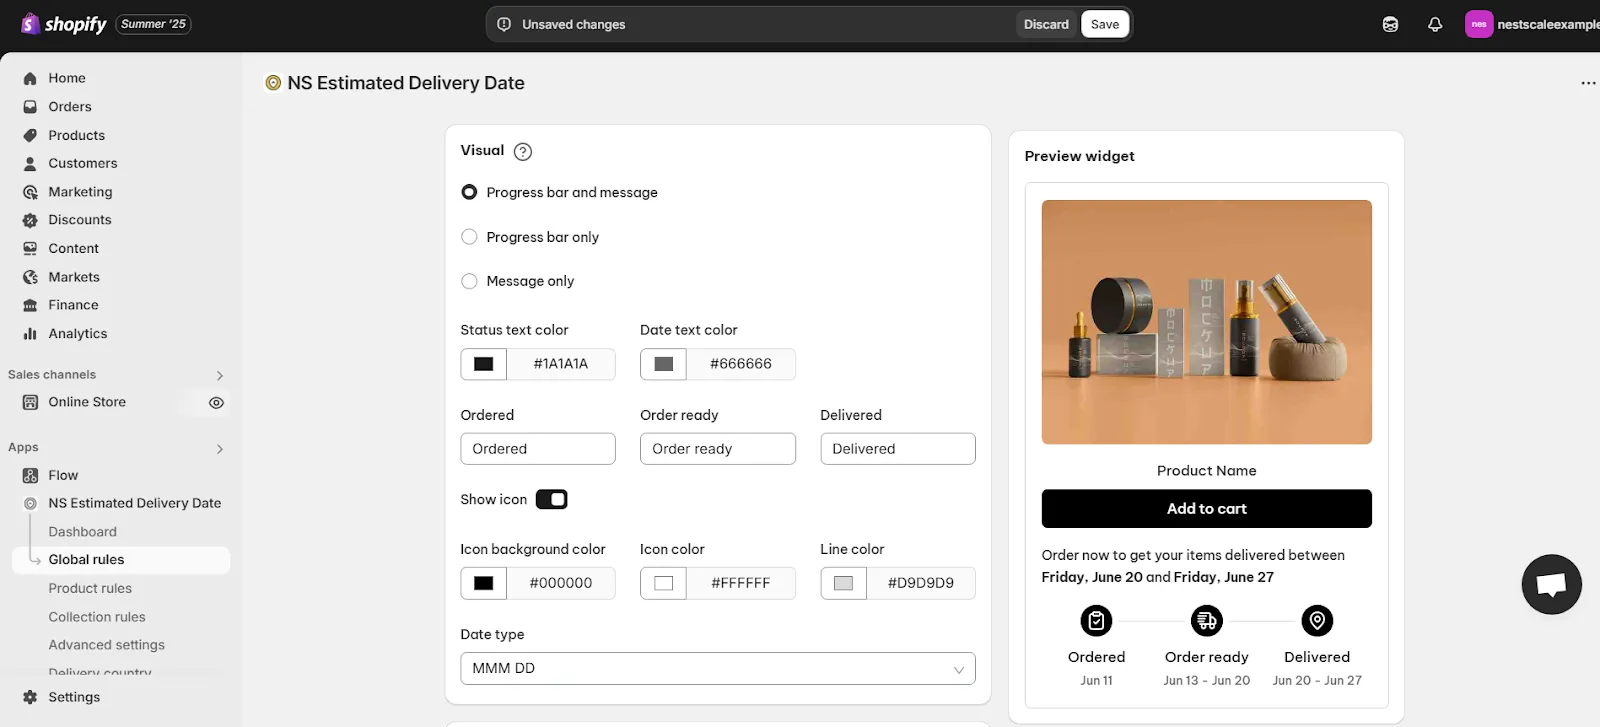
Adjust the Visual Appearance
In the Visual section, decide how you want the EDD widget to appear:
- Message only
- Timeline only
- Both (this is recommended for optimal clarity and branding)
You can also fine-tune the design by adjusting:
- Icons
- Text labels
- Date format
- Layout spacing using the Padding section
💡 Tip: Use the Preview tab to instantly see how your changes look.
Set the Date Format and Language
- Choose your preferred Date Format (e.g., DD/MM/YYYY).
- From the Language dropdown, select the language you want to display for the EDD.

Configure Timezone Settings
The Timezone Settings ensure that delivery times are displayed accurately no matter where your customers are located:
- Automatic Timezone Detection: Toggle on Automatic Convert Timezone to adjust delivery dates based on the visitor’s location via IP address.
- Fixed Timezone: If you prefer to display a consistent time for all regions, you can select a fixed timezone.
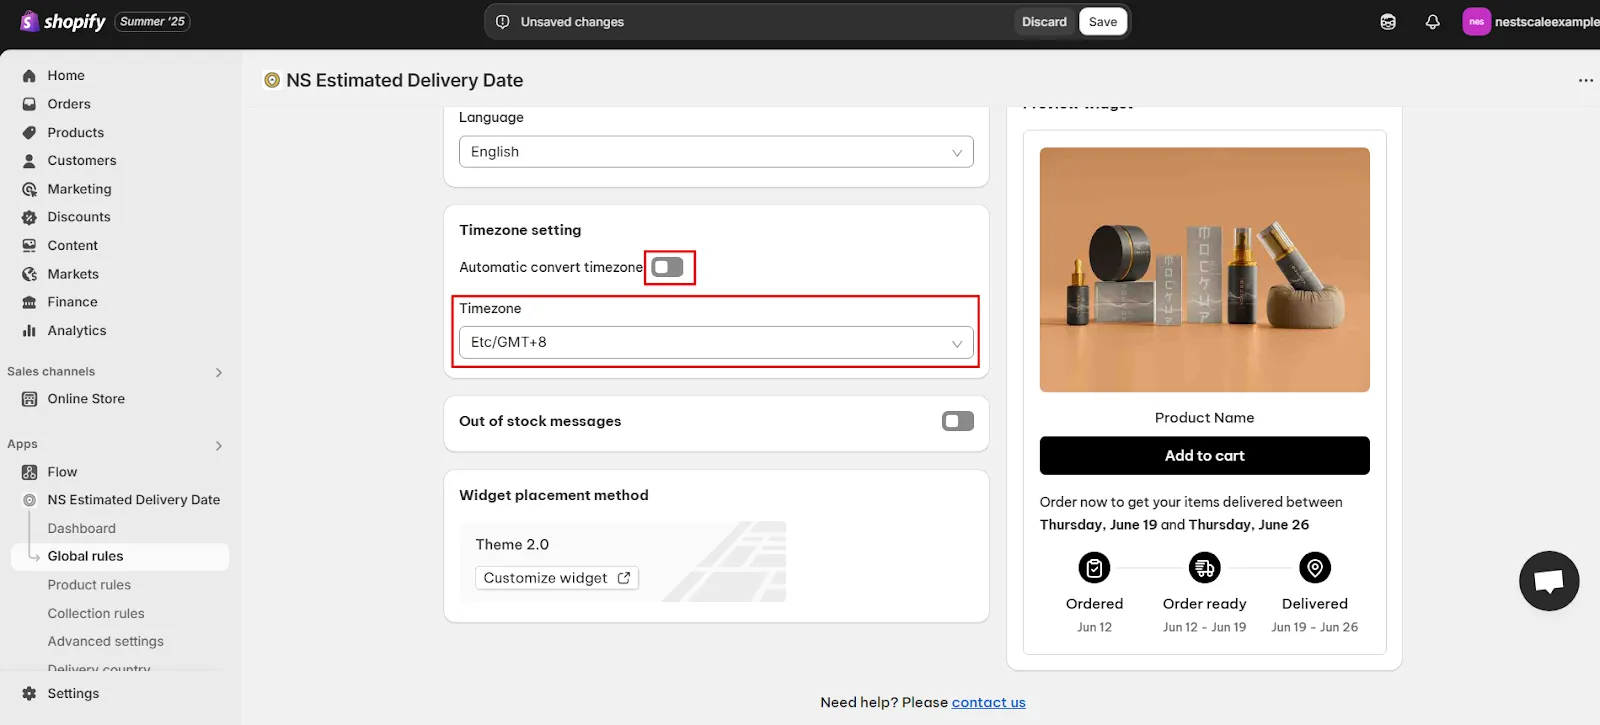
Display a Message for Out-of-Stock Products
If an item is out of stock, let your customers know with a personalized message. This could include:
- When the product will be restocked
- Availability of pre-orders
- Estimated fulfillment times
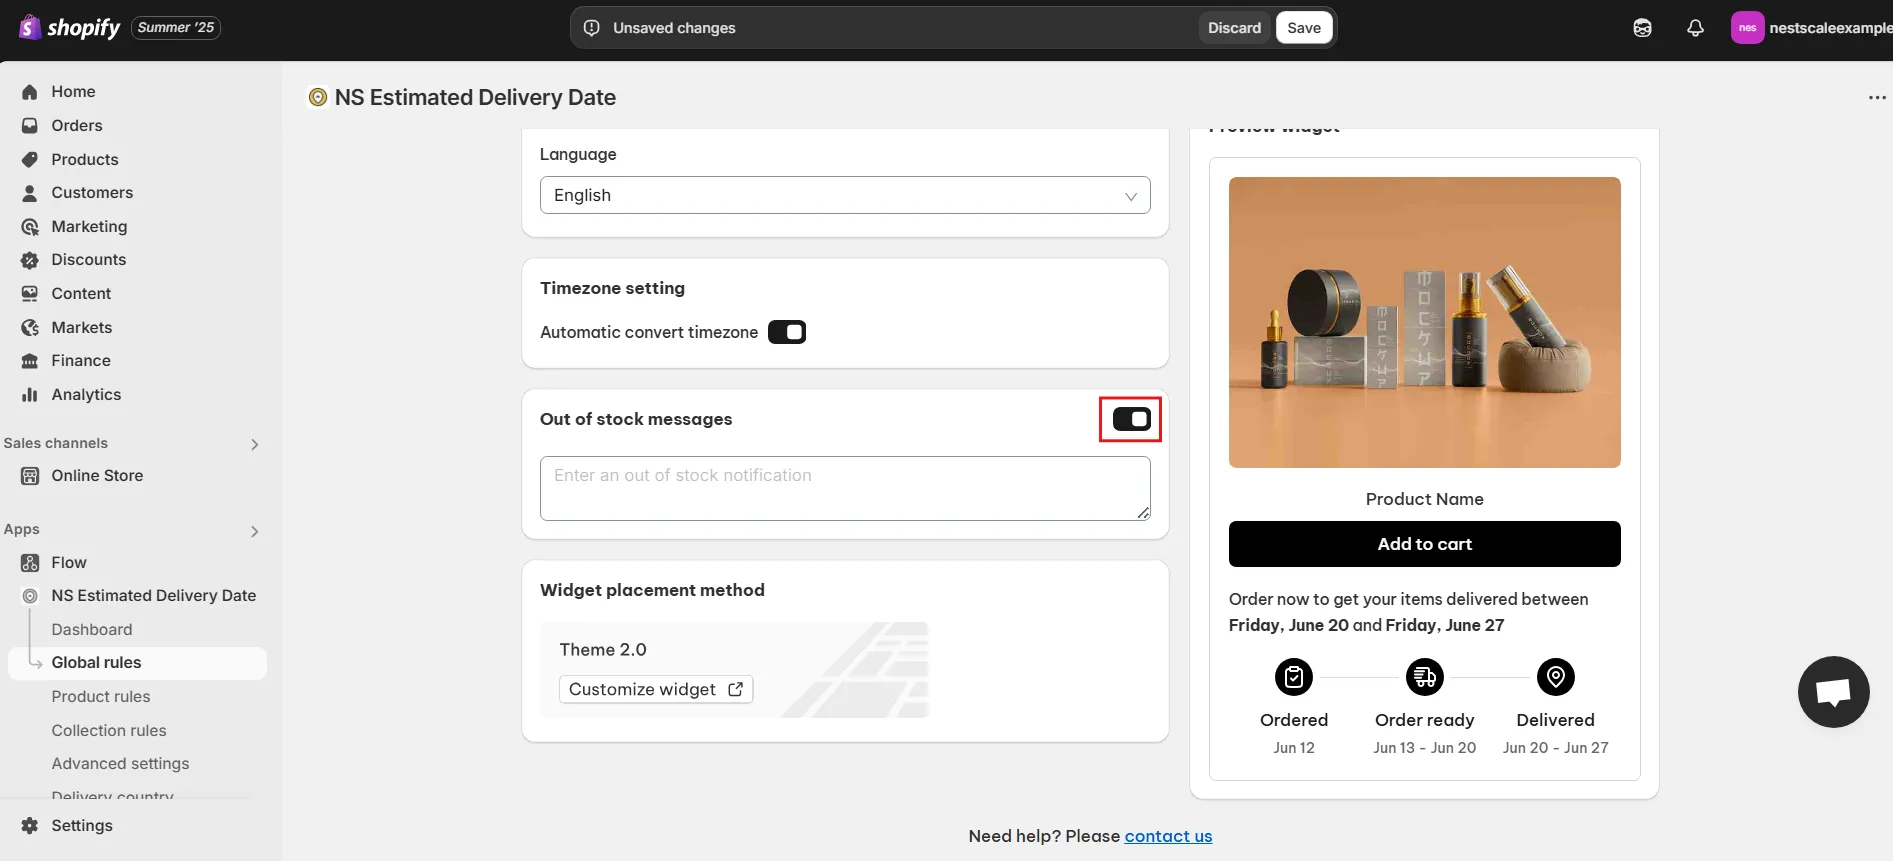
Once your message is set, click Save to apply it!
Set Estimated Delivery Timing
Now let’s refine the Estimated Delivery Timing to ensure it’s as accurate as possible.
Set Fulfillment Time
- Go to the Estimated Delivery Time section.
- Define the delivery time range based on your actual fulfillment and shipping timelines.
- If needed, exclude weekends or non-working days by checking the box.
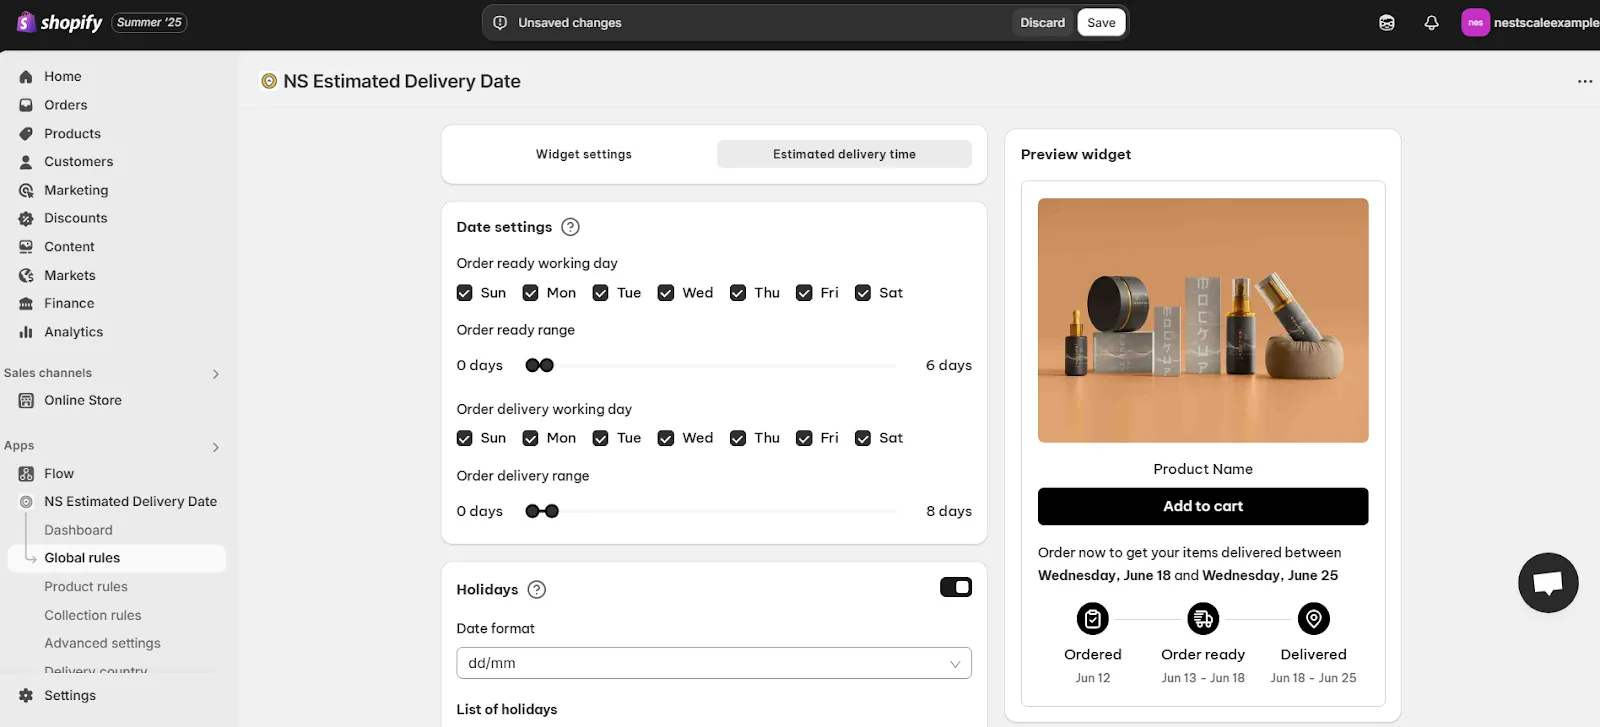
Exclude Holidays
- Turn on the Holidays feature.
- Click Add Date, then enter the holiday name, select the date, and click Done.
💡 Tip: The system will automatically skip these dates when calculating the EDD.


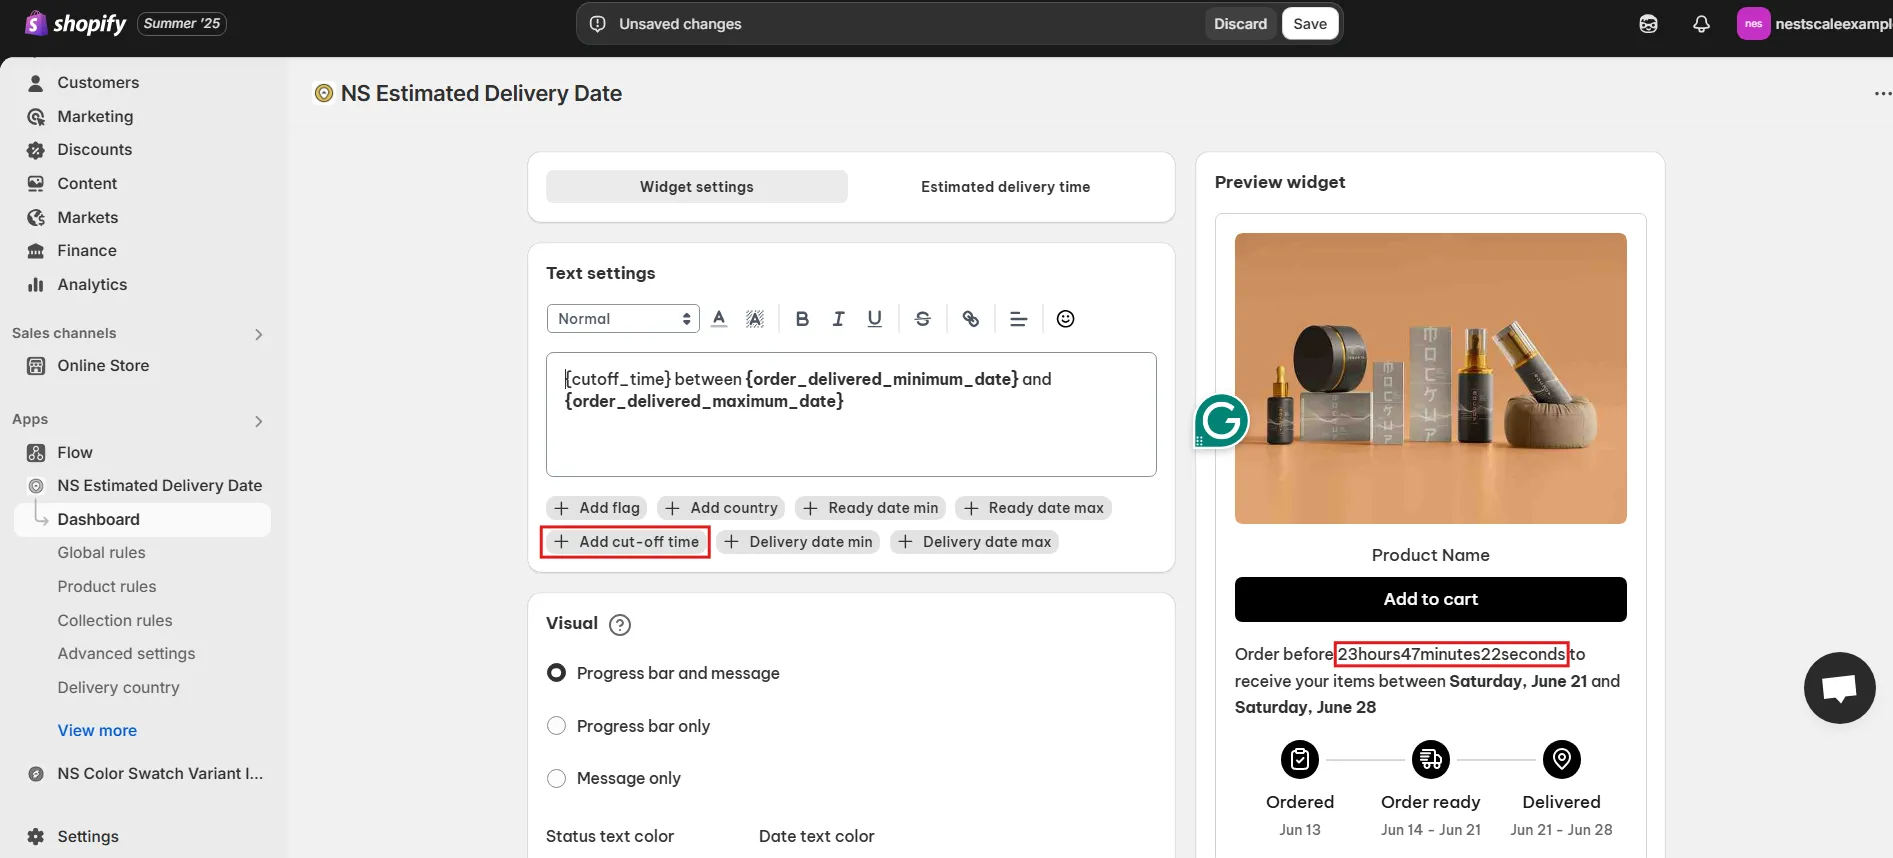
Set Cut-Off Times
- In the Cut-off Times section, set up a countdown timer to create urgency.
- Customize the message and choose your preferred time format.
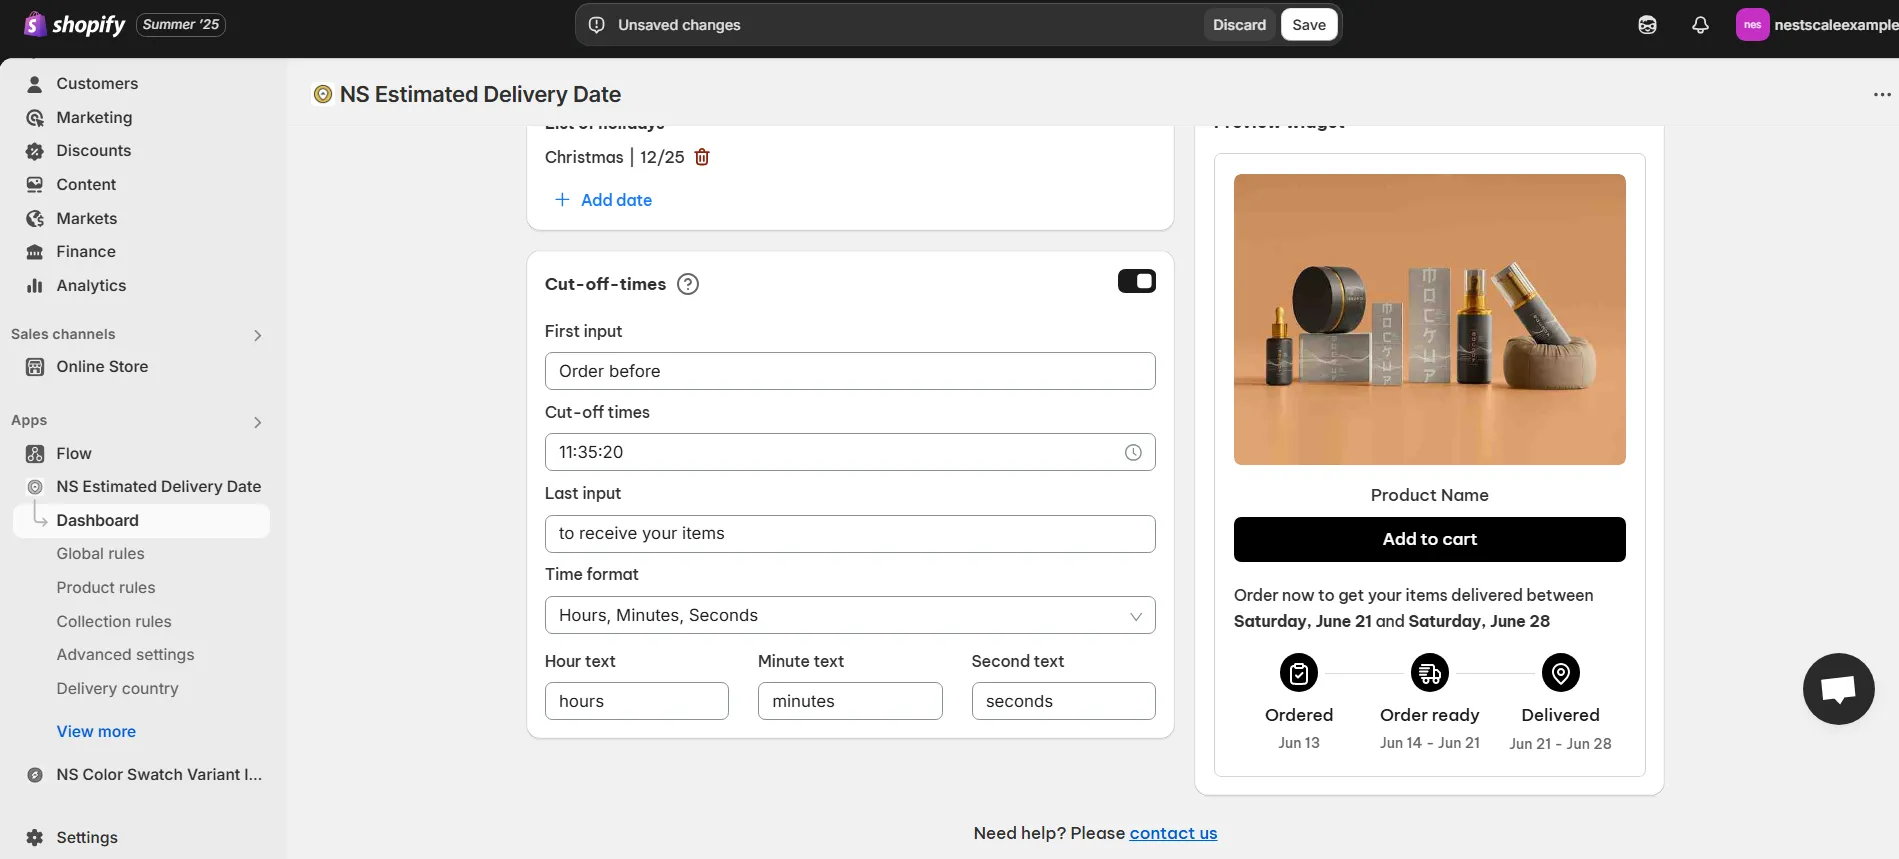
- Hit Save to apply the settings.
- Go back to the widget settings tab, click Add Cut-off Time, and save again to finalize.
✨ With NS Estimated Delivery Date, you can do so much more to enhance your customers’ shopping experience:
- Customize EDD for Global Rules: Tailor delivery dates for specific countries to make sure the information is accurate, no matter where your customers are shopping from.
- Keep Customers Informed Across the Journey: Display delivery messages directly on cart and checkout pages, so your customers are always in the loop with up-to-date delivery estimates.
- Set EDD by Country: The app automatically detects your customer’s location using their IP address and adjusts the estimated delivery date to match their country.
- Multi-language Support for Global Shoppers: Show personalized delivery messages in various languages, based on your visitors’ language preferences, ensuring a smooth and localized shopping experience.
FAQs
How do I display delivery dates for customers in different countries?
You can set the EDD by Country using the NS Estimated Delivery Date’s automatic location detection based on the visitor’s IP address. The app will adjust the delivery date accordingly, so customers from different countries will see the most accurate shipping information.
What if I want to show delivery dates in multiple languages?
No problem! The NS Estimated Delivery Date app supports multi-language functionality. You can customize and display delivery messages in various languages, depending on your visitors’ language settings, providing a localized shopping experience for international customers.