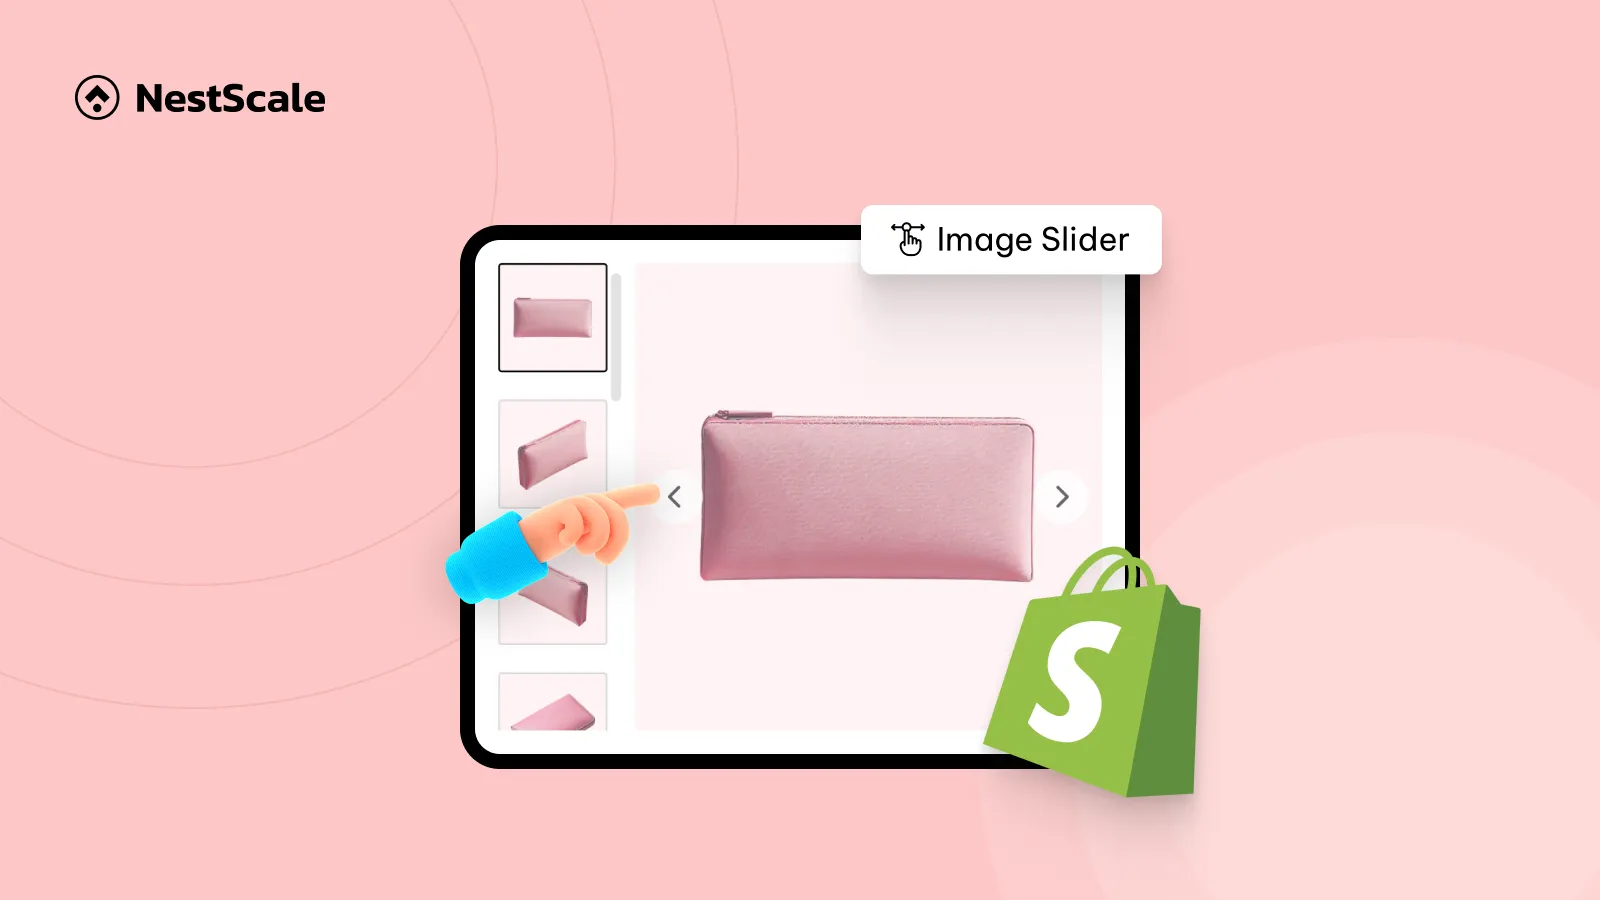
This guide shows you how to add the image slider to your Shopify product pages. It includes everything you need to set up and customize your slider for a smoother shopping experience across devices.
Here’s what you’ll learn in this tutorial:
- How to customize the image slider for desktop and mobile
- How to add product image zoom on hover and zoom on click
- Pro tips on optimizing the image slider for mobile experience
- How to show the selected variant images with the product slider
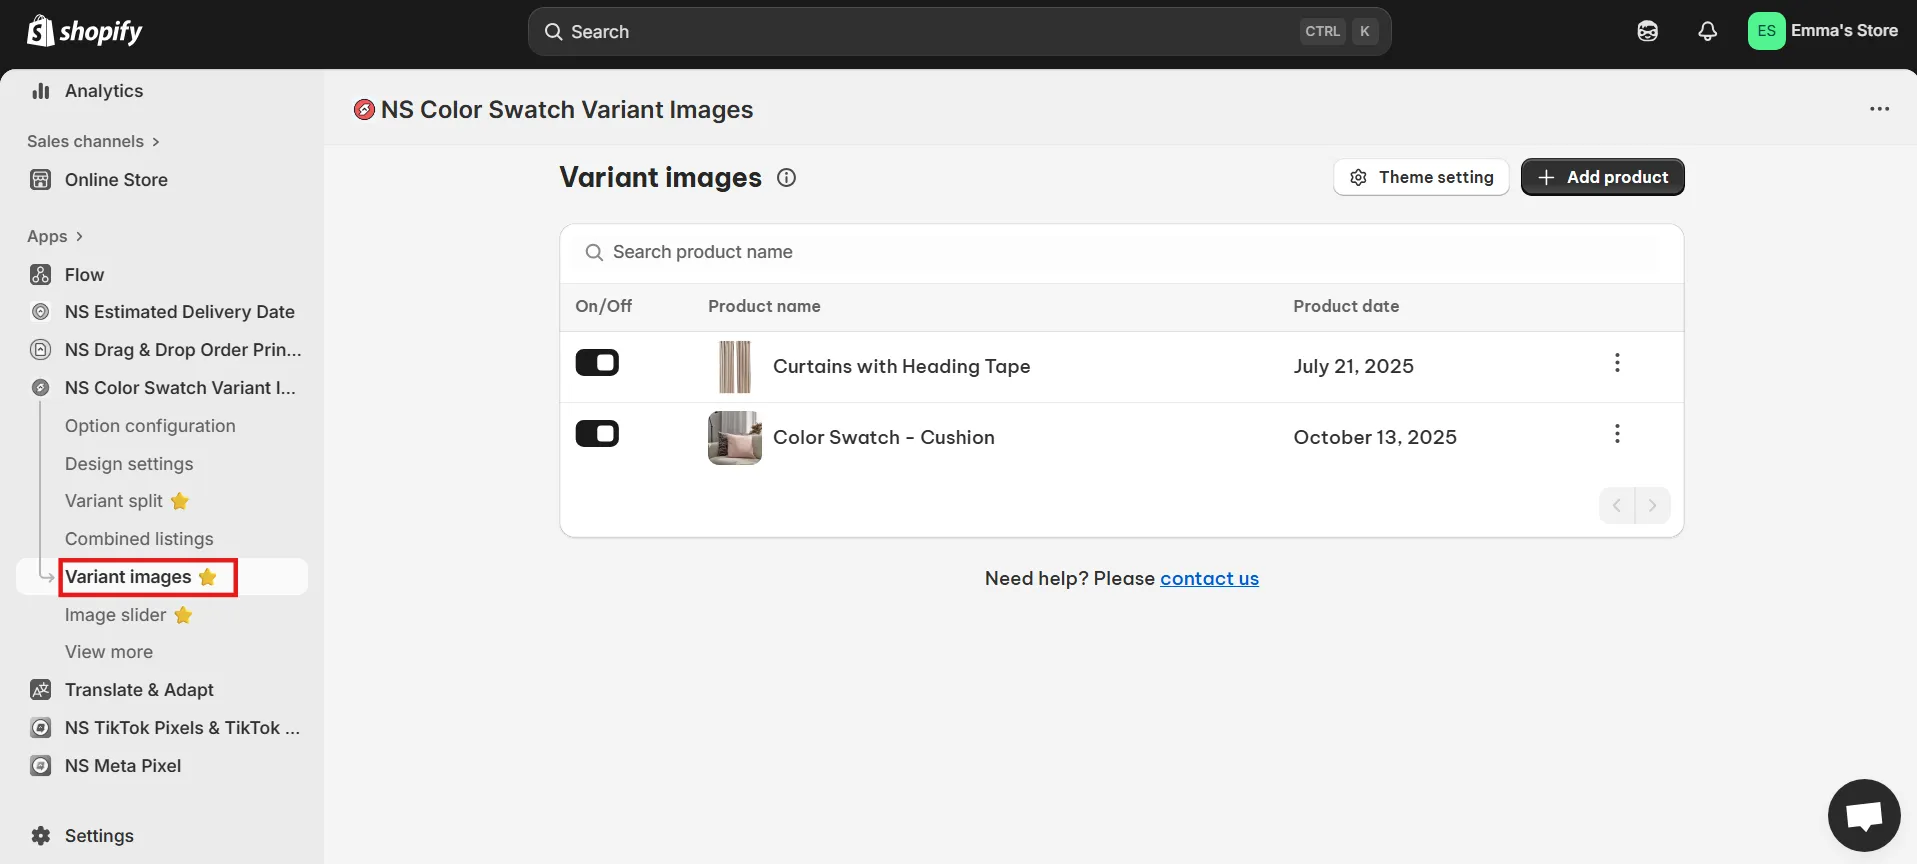
Step 1: Install & embed NS Color Swatch Variant Images on your Shopify store
1. Install NS Color Swatch Variant Images from the Shopify App Store.
2. Open NS Color Swatch Variant Images, follow our onboarding steps to embed the app so the image slider can appear on your storefront.
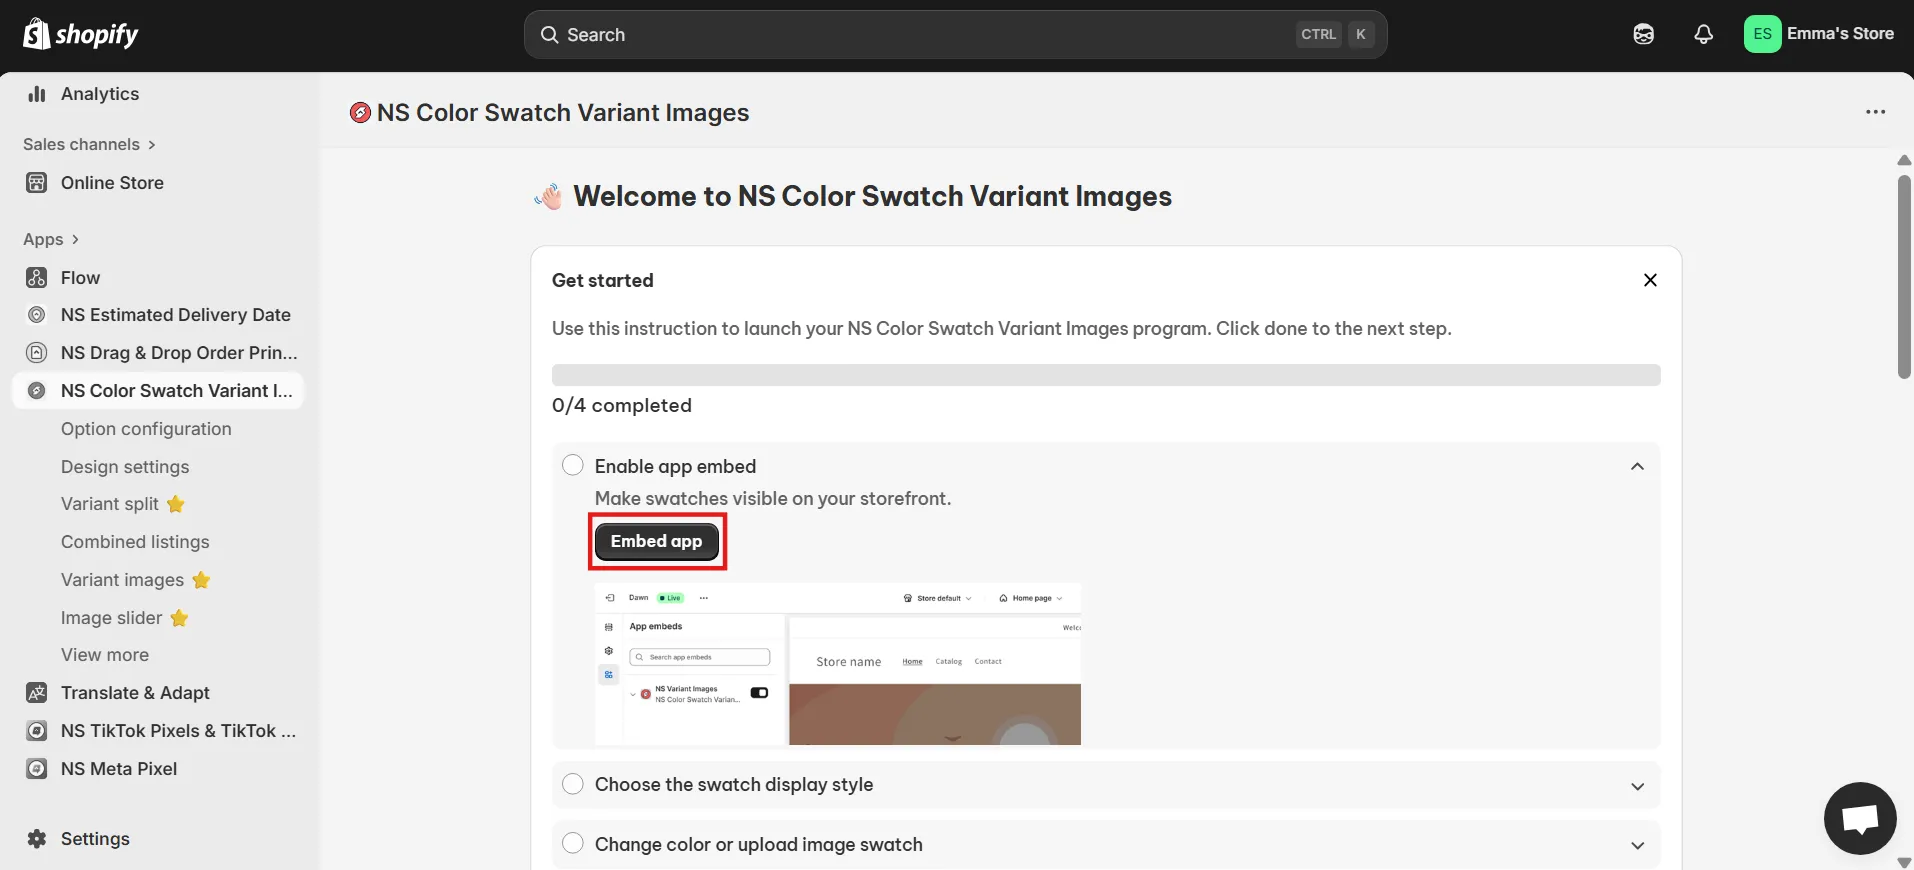
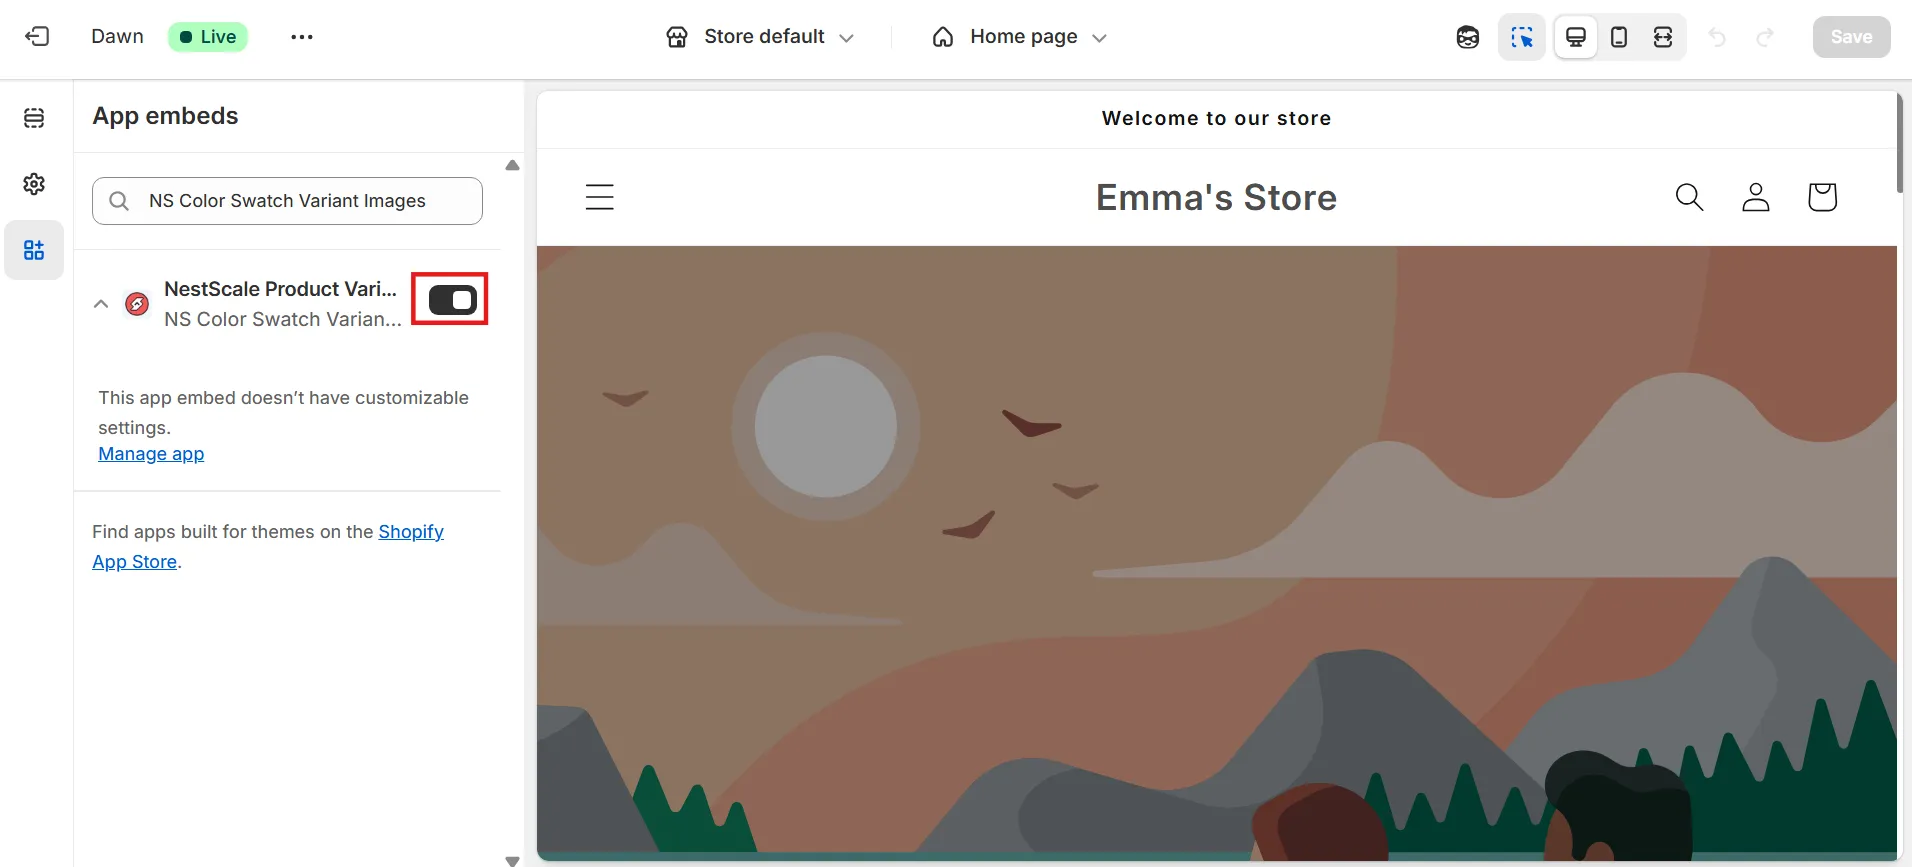
Don’t forget to click Save.
Step 2: Enable the image slider on desktop and mobile
1. In the app’s main menu, click Image Slider.
2. From here, you’ll see options to control where the slider appears:
- Desktop only
- Mobile only
- Both
You can also customize the desktop and mobile sliders separately to create a smooth shopping experience across devices.

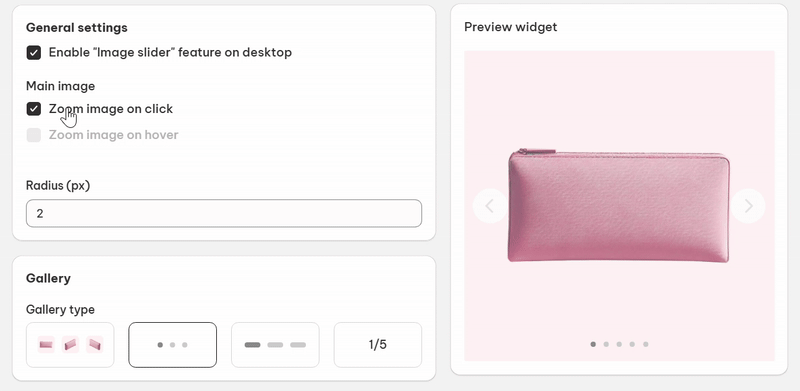
Step 3: Enable product image zoom on hover or click
Make your product images even more interactive by adding a zoom feature. You have two options:
- Zoom on Click
- Zoom on Hover
As you test these options, use the live preview panel on the right-hand side to instantly see how it looks.
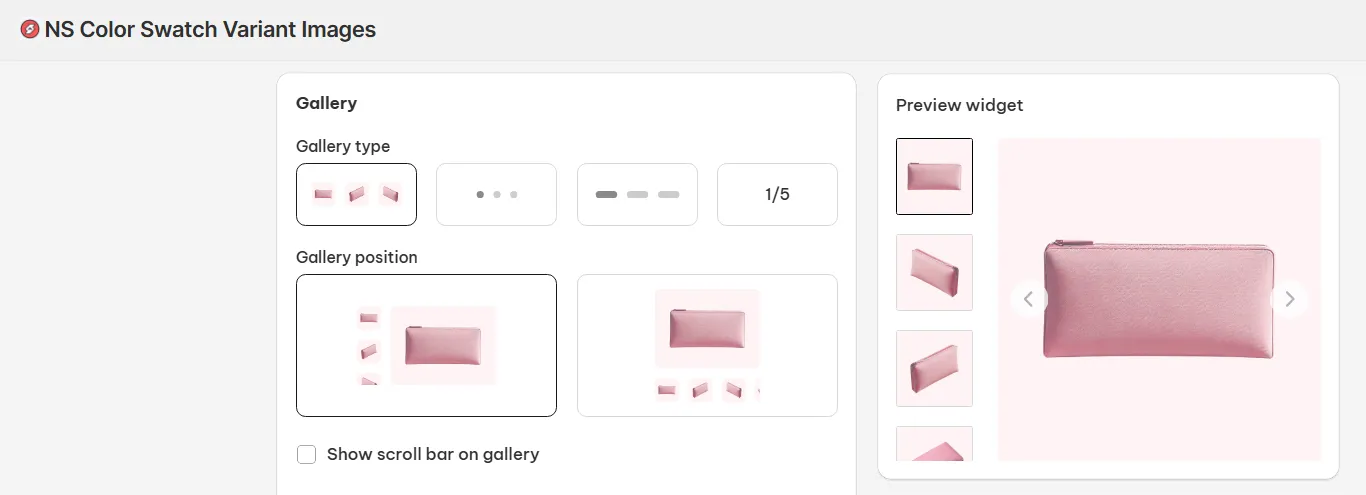
Step 4: Customize the slider and navigation arrows
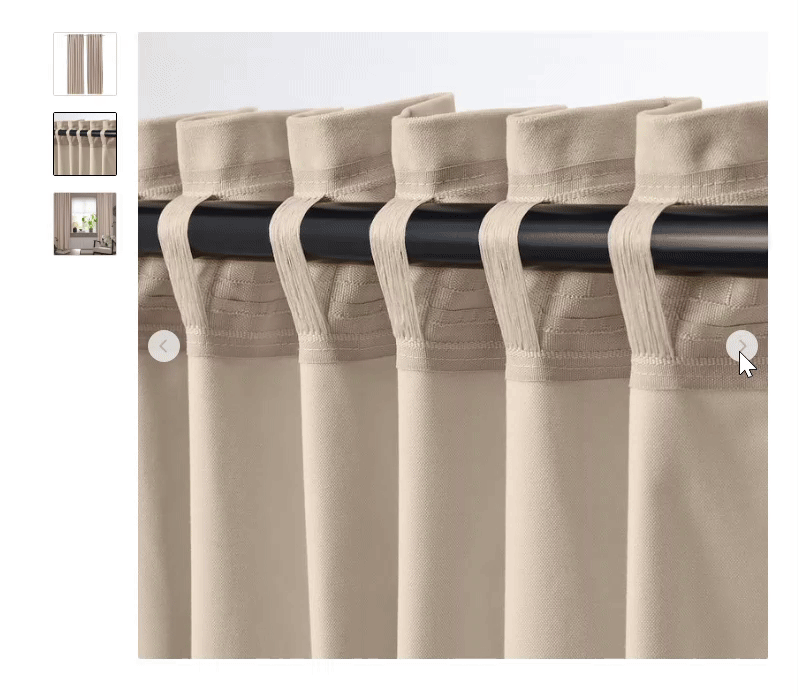
1. Pick the slider style that best fits your product layout. You can choose from:
- Thumbnails (vertical or horizontal)
- Dots
- Progress bar
- Numbered slides
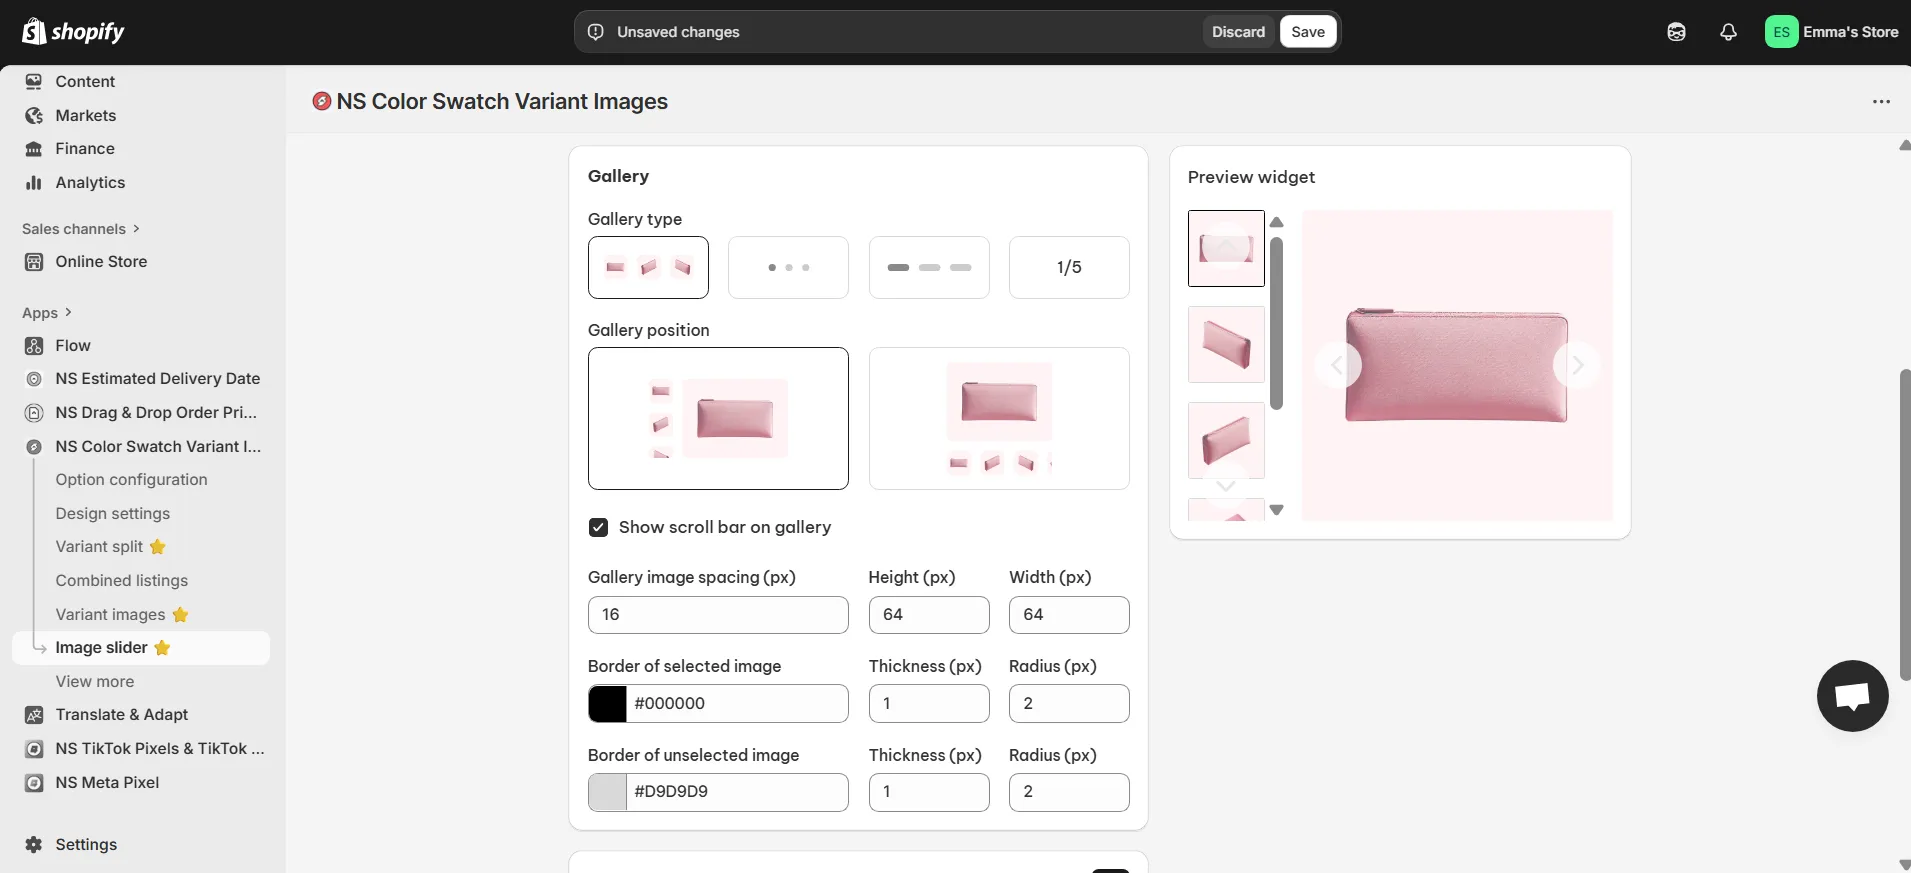
2. Make navigation easy for shoppers by enabling arrows on your slider, then:
- Adjust the arrow color and size
- Choose whether to display arrows only on the main image or on thumbnails too
- Set the arrow position, either on both sides or in the corners

Step 5: Optimize the image slider for mobile
Once your desktop slider looks great, scroll back to the top and switch to the Mobile tab.
The settings are similar, but it’s worth customizing them separately for a smoother mobile experience.
💡 Pro Tip: For mobile, we recommend using dots, a progress bar, or numbered slides and removing the navigation arrows. This keeps your gallery clean and prevents clutter while shoppers can simply tap to browse through images.

When you’re happy with the setup, don’t forget to click Save.
Now go ahead and preview your product page to see your new image slider in action.
Video tutorial: How To Add Product Images Slider On Shopify without code
In this tutorial, we’ll show you how to add a smooth, responsive product image slider with the NS Color Swatch Variant Images app without writing a single line of code.
FAQs
How to show the selected variant image with the product slider?
With NS Color Swatch Variant Images, you can combine the Variant Image feature and the Image Slider to display only the images related to the selected variant.
When a customer picks a variant, the slider will update to show just the relevant images. You can access to the Variant image feature from the app menu and refer to our tutorial on changing images based on the selected variant.
How to move thumbnails to the left side of the main product image?
Inside the Image Slider settings of NS Color Swatch Variant Images, choose a thumbnail gallery layout, then select the option where thumbnails appear on the left of the main image.