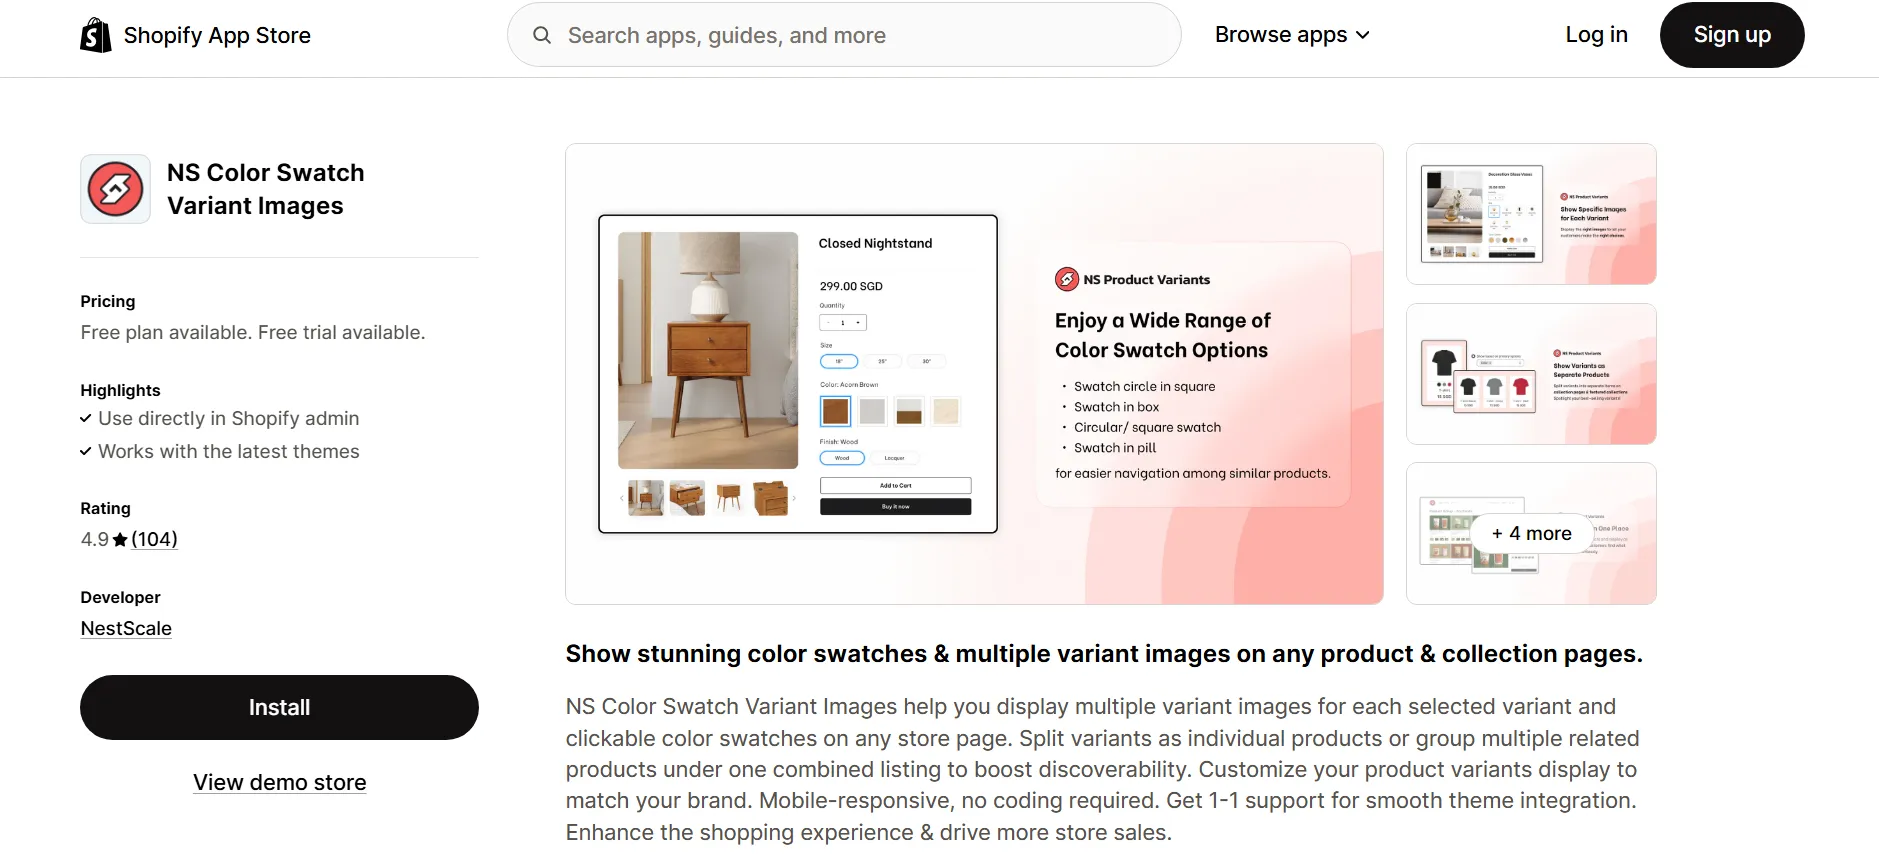
Are you looking to improve your Shopify store’s appearance by showcasing color swatches with custom images or patterns?
Customizing color swatches is an excellent way to create a more engaging shopping experience for your customers. By using the NS Color Swatch Variant Images app, you can easily upload custom images, assign them to specific product variants, and fine-tune their design to match your store’s aesthetic.
In this guide, we’ll walk you through the simple steps to set up and customize your color swatches, so your products stand out and convert better!
Step 1: Install and set up NS Color Swatch Variant Images App
Let’s start by getting the app installed and embedded so your swatches can show up beautifully on your storefront.
1. Visit the Shopify App Store, search for NS Color Swatch Variant Images, and click Install.
2. Open the app from your Shopify Admin and follow the quick Get Started guide.
3. Click Embed app.
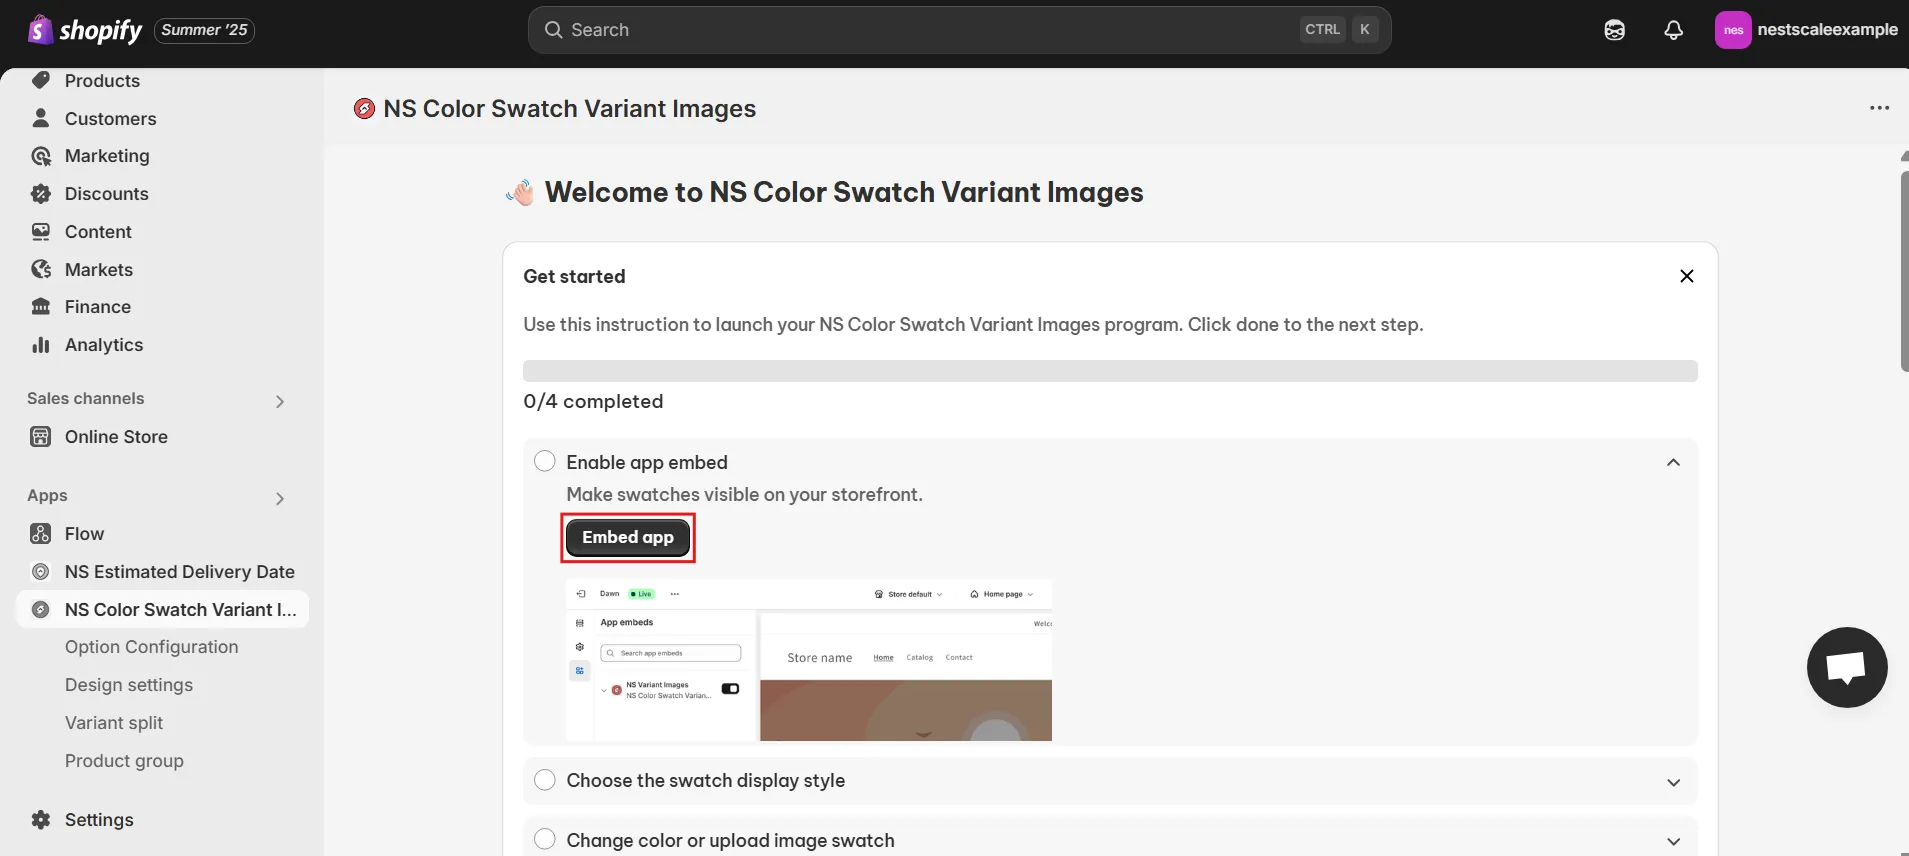
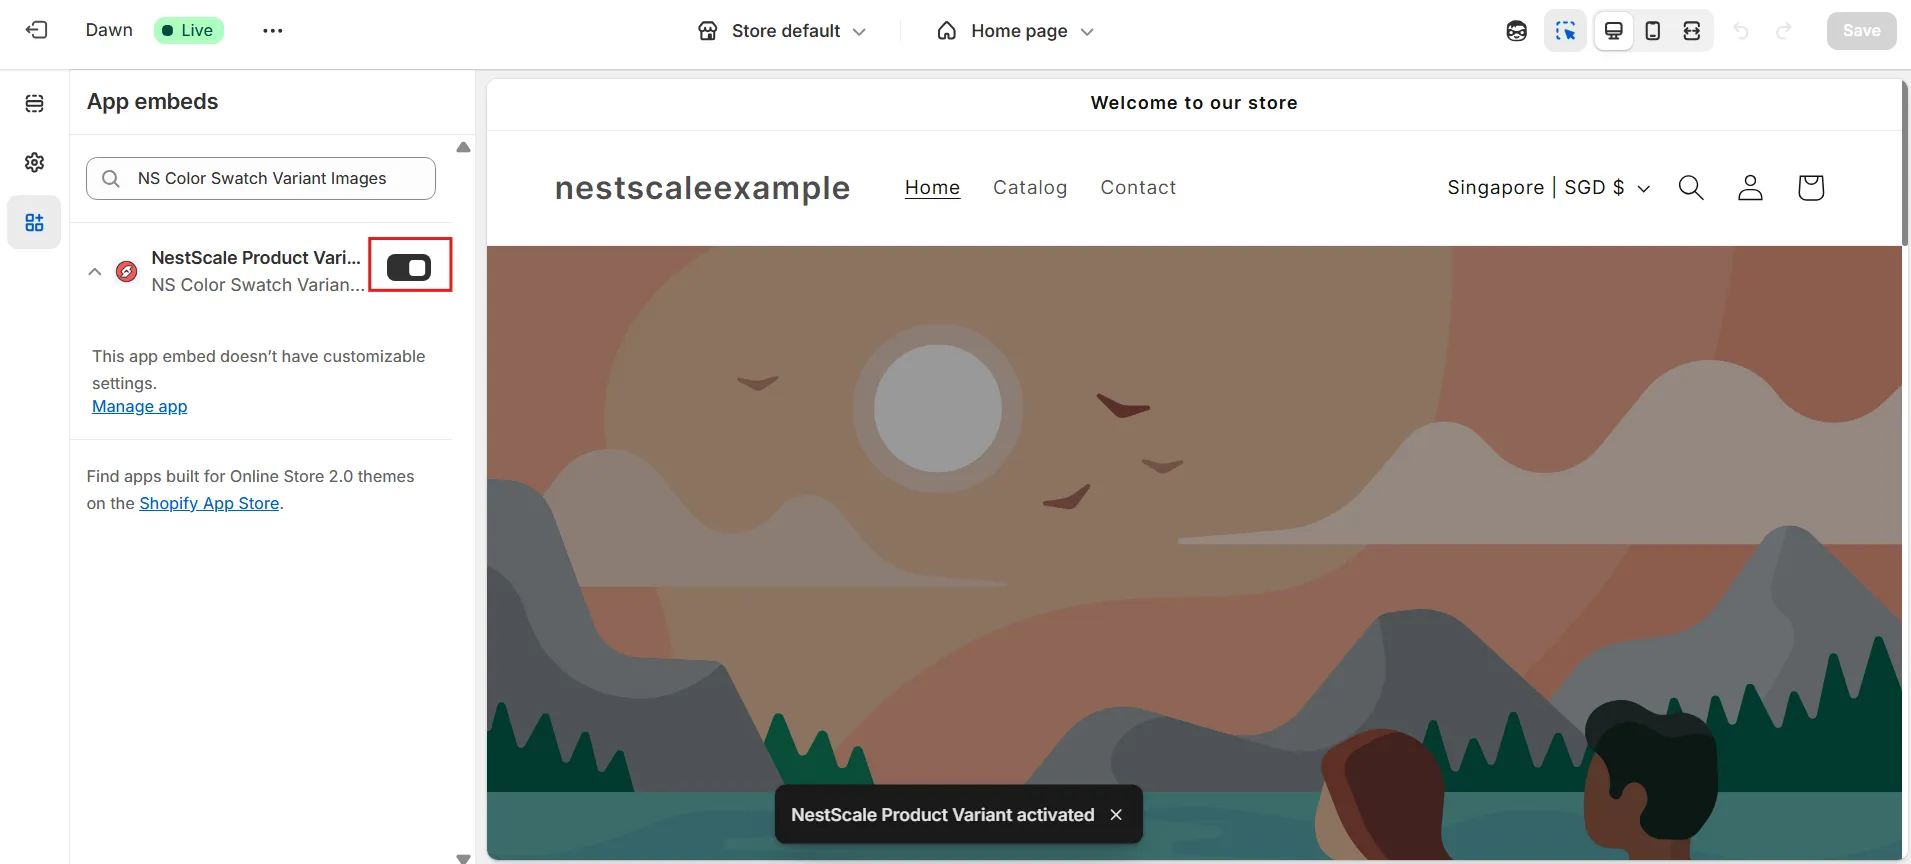
4. You’ll be redirected to Shopify’s theme editor. Simply toggle the switch next to NS Color Swatch Variant Images and save your changes.
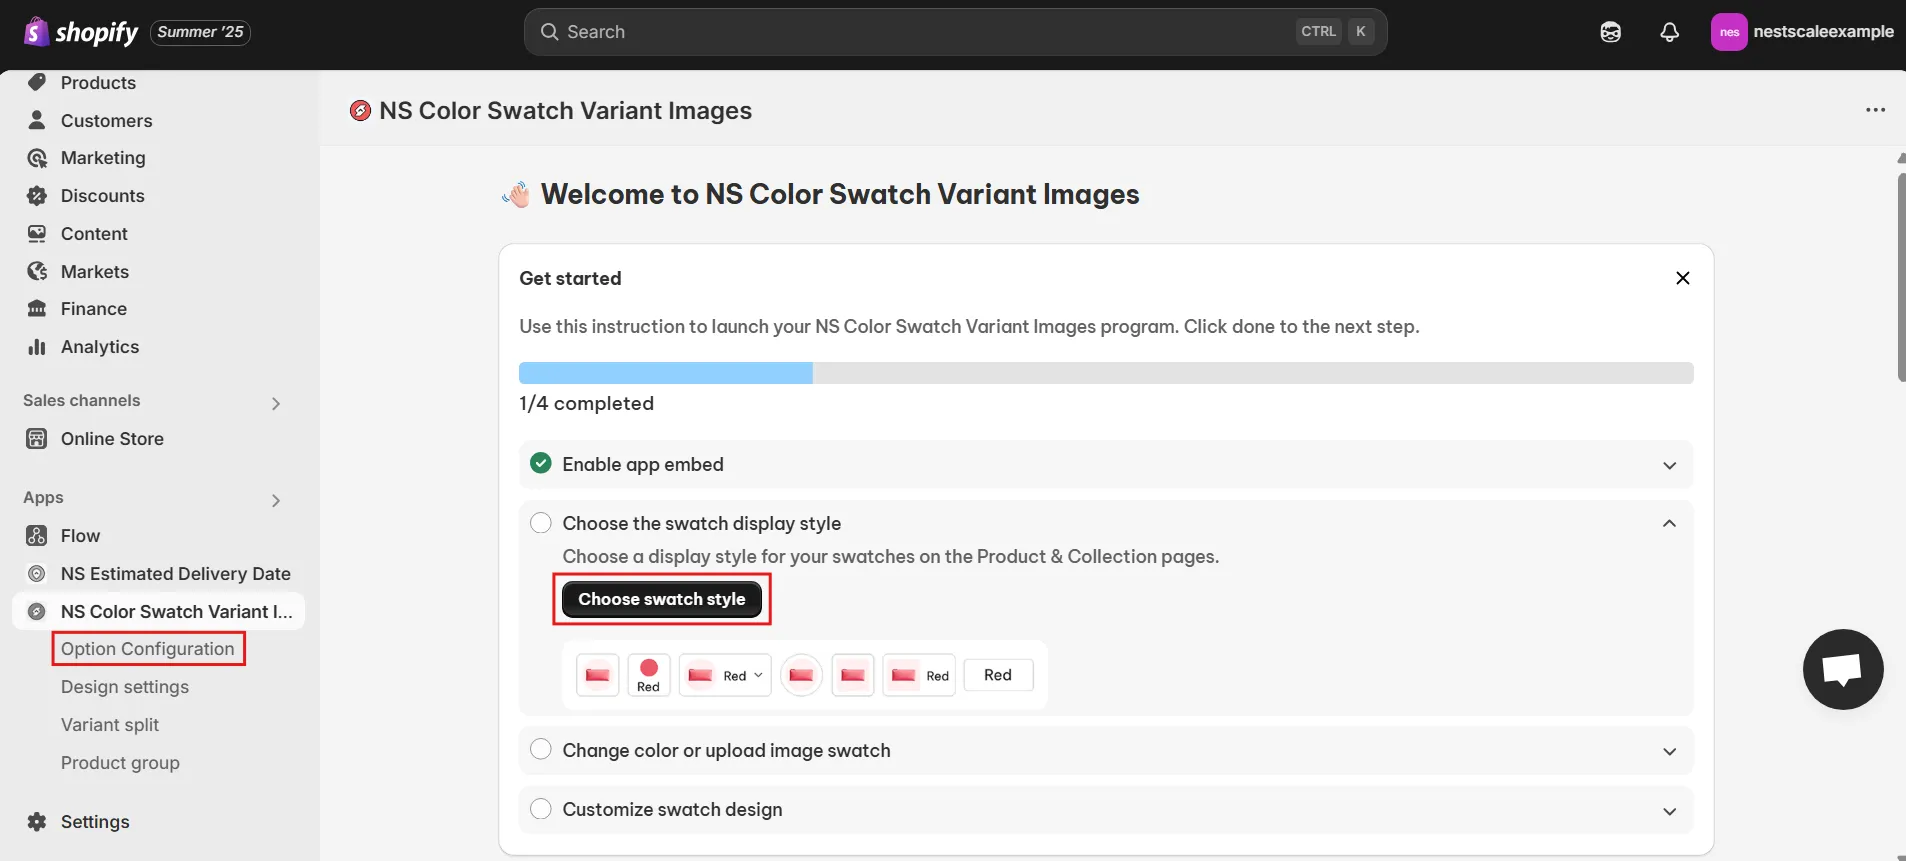
Step 2: Upload custom images for Color Swatches
With the app now active, let’s move on to uploading custom images for your color swatches.
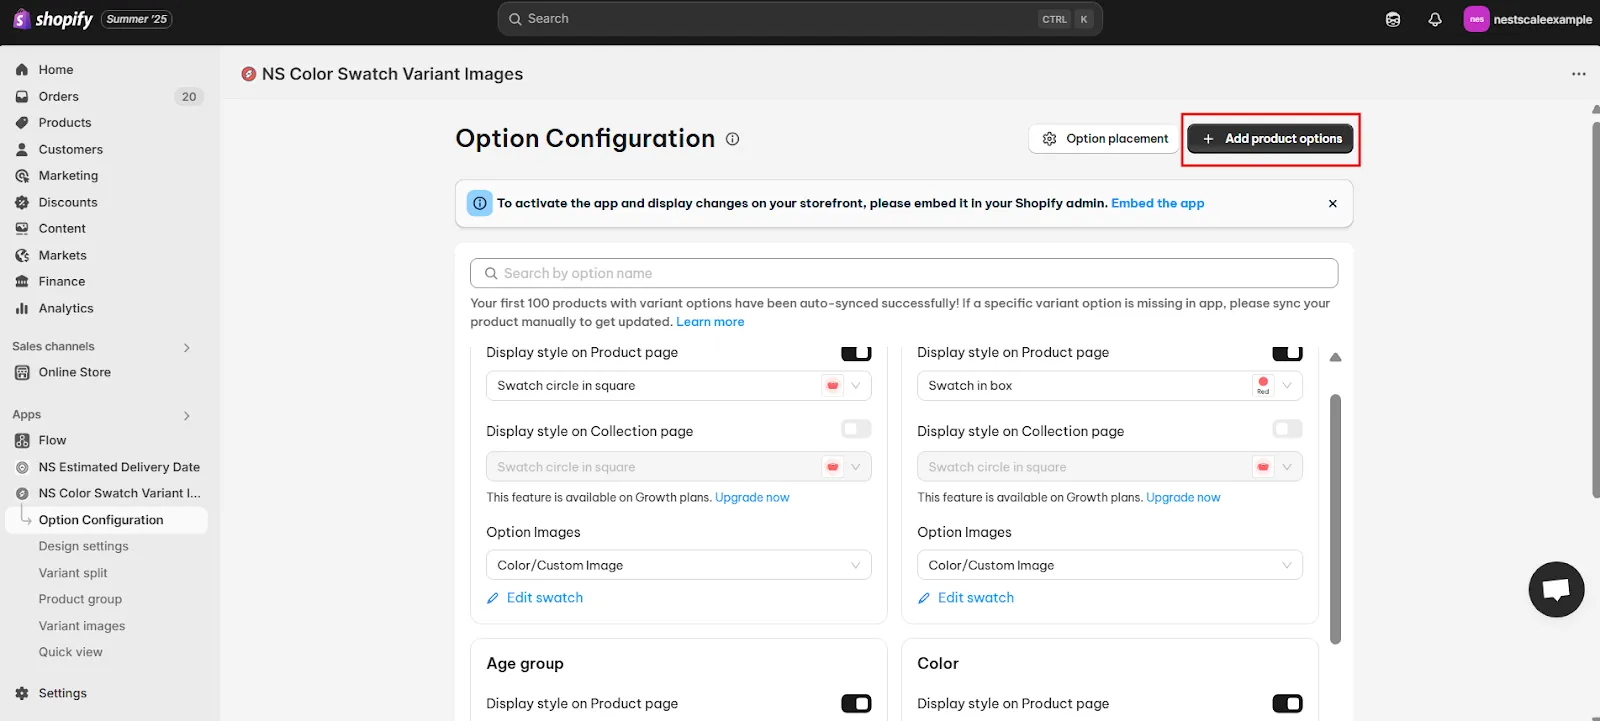
1. On the app’s instruction page, click Choose Swatch Style or go directly to Option Configuration from the left-hand menu.
If the product or option you want isn’t listed, click Add Product Options to manually bring it in.
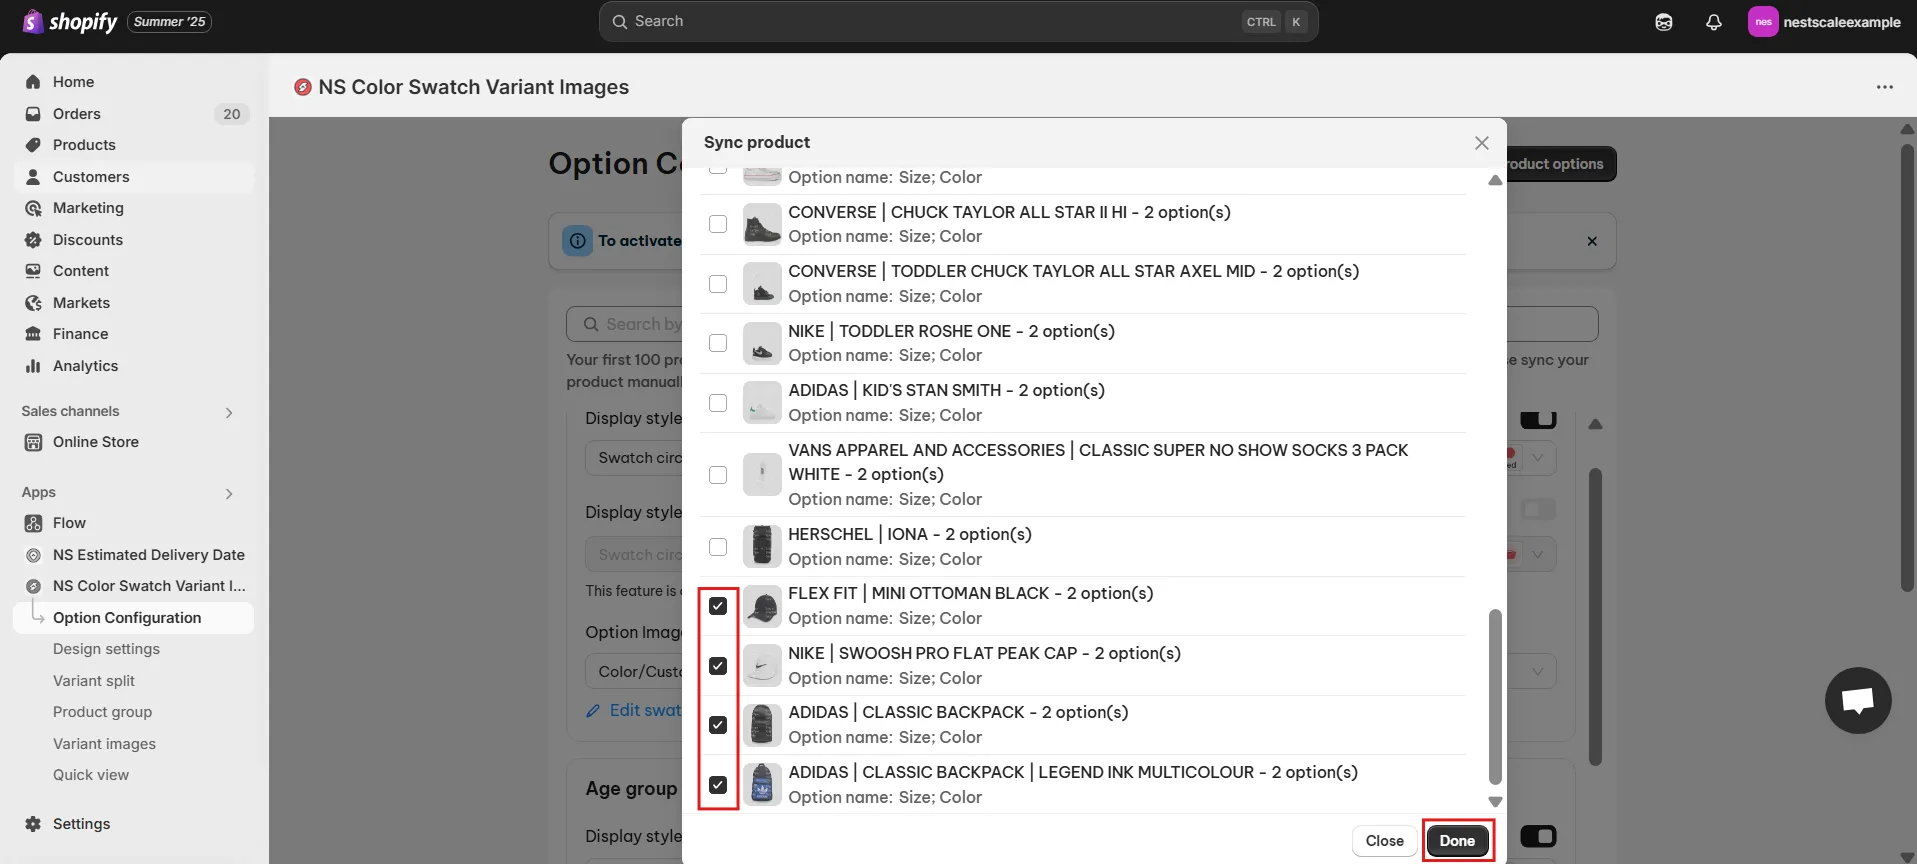
2. A product list will appear. Select the products you’d like to add swatches to, then click Done.
You can select multiple products at once.
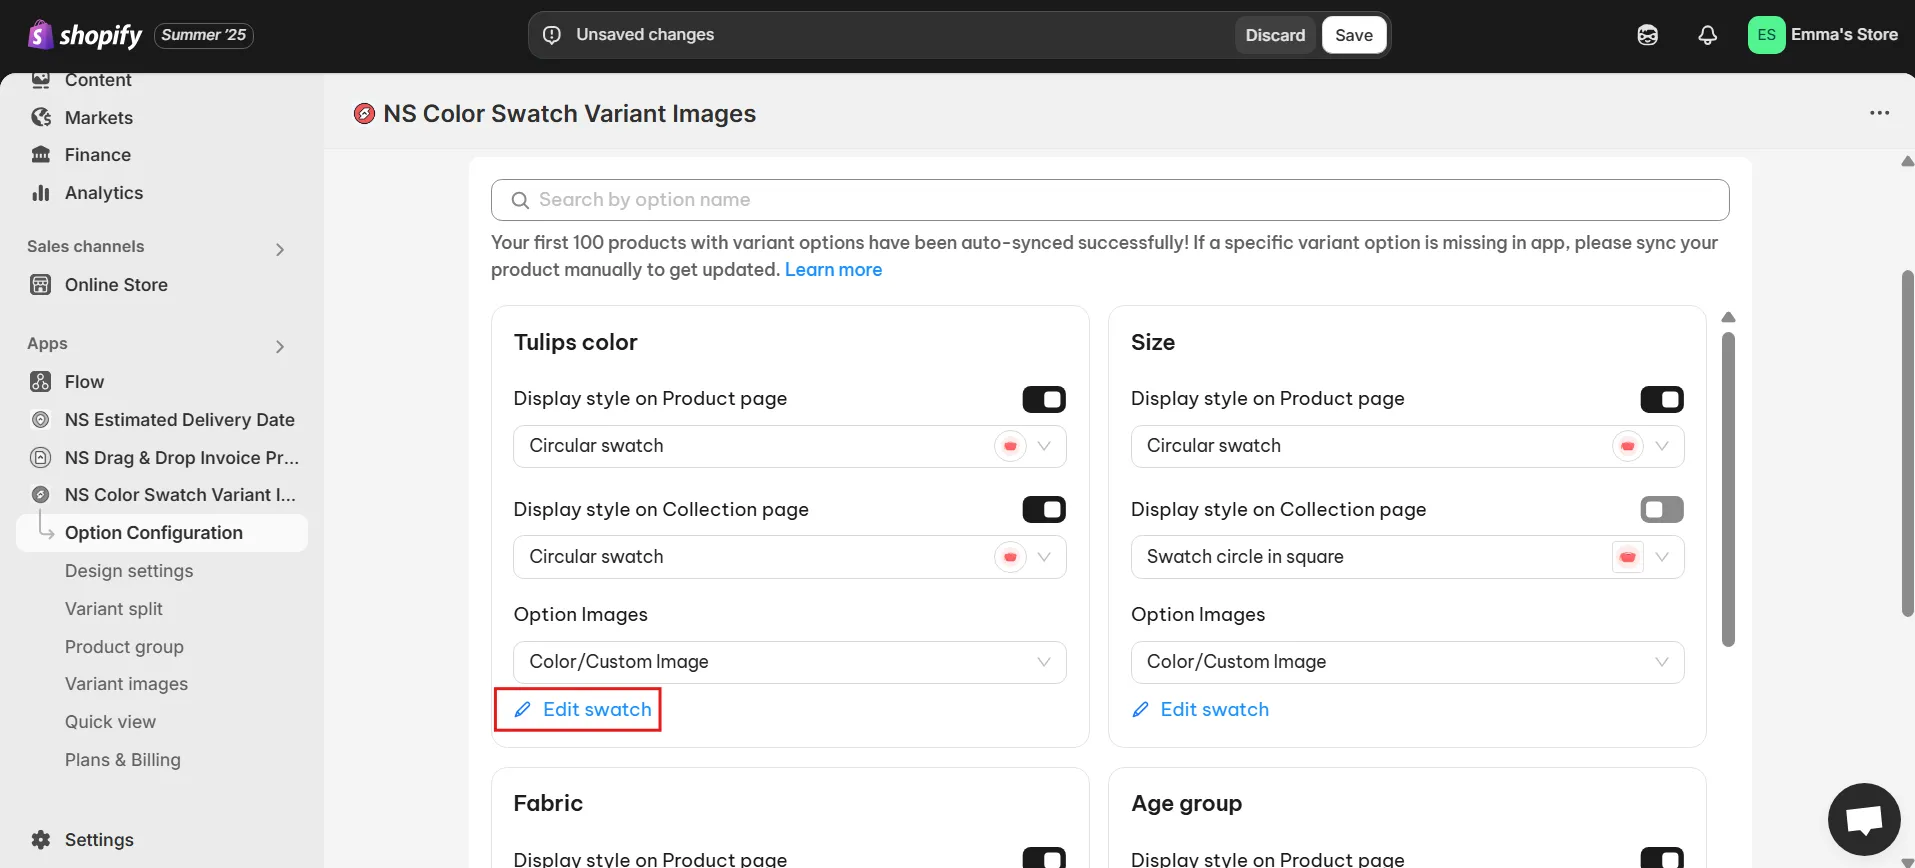
3. In the Option Image section, choose Color/Custom Image. Then, click Edit Swatch to customize the swatch design.
4. In the pop-up window, either assign a color or upload an image for each variant. Ensure each swatch corresponds correctly to the variant name.
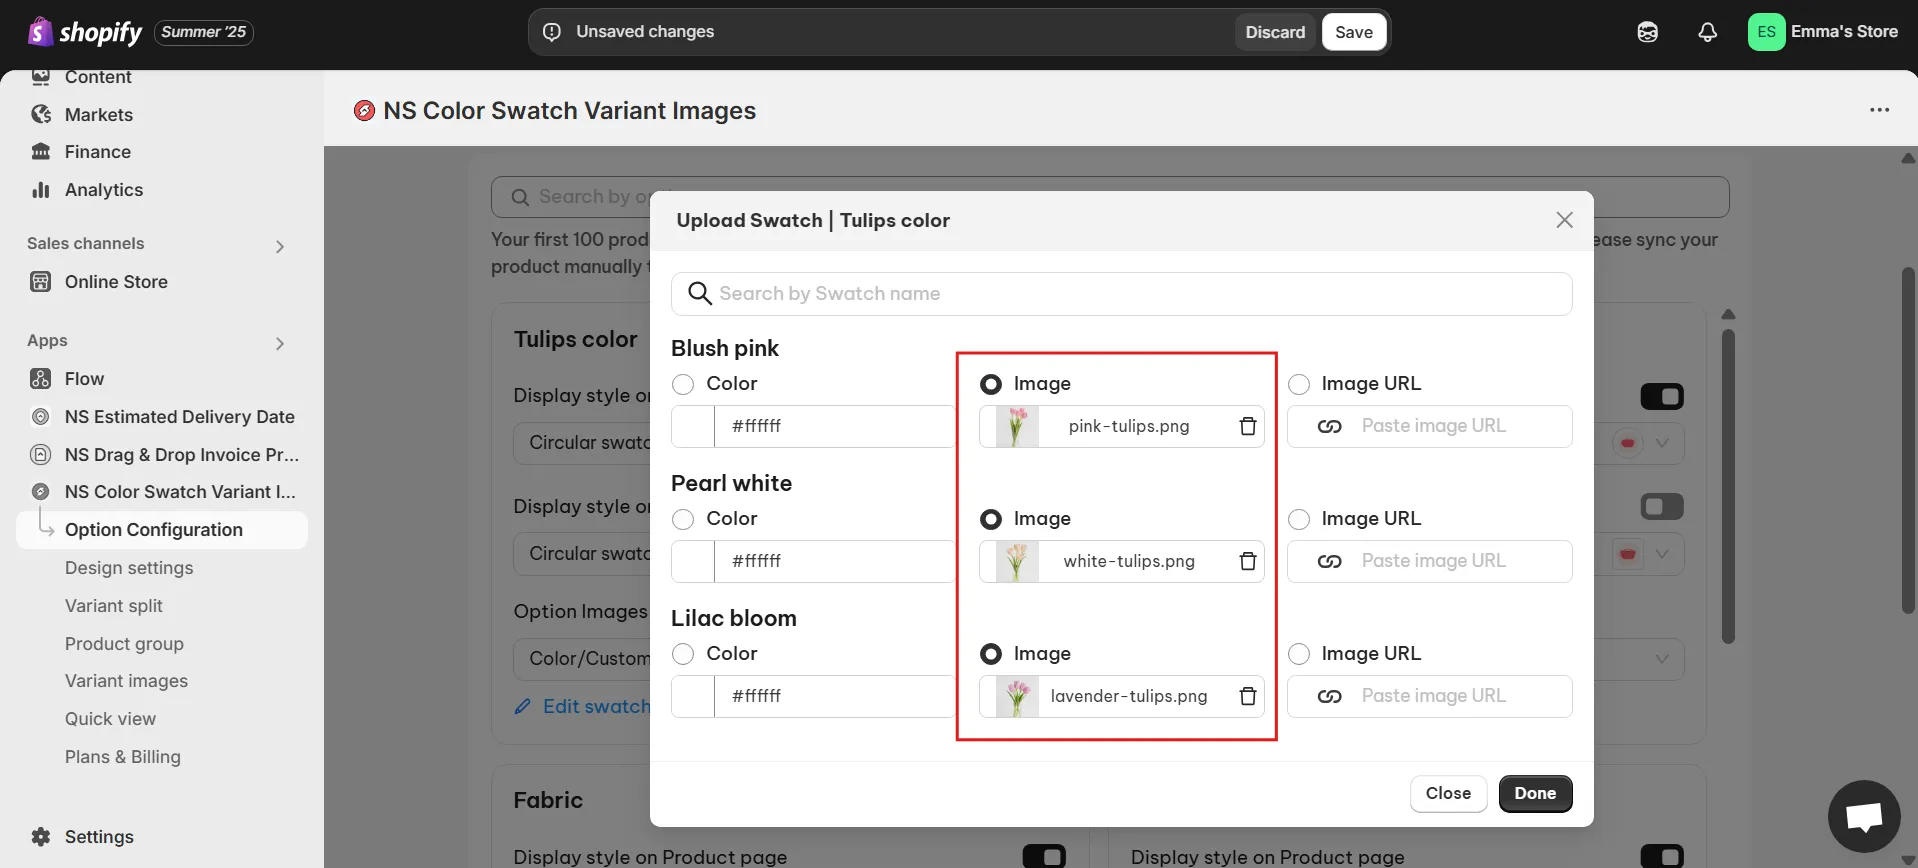
5. Once you’ve finished uploading images, click Done and Save.
Your custom swatches should now be visible on your store. Let’s take it a step further and style them to align with your store’s overall aesthetic.
Step 3: Customize patterns for color swatches
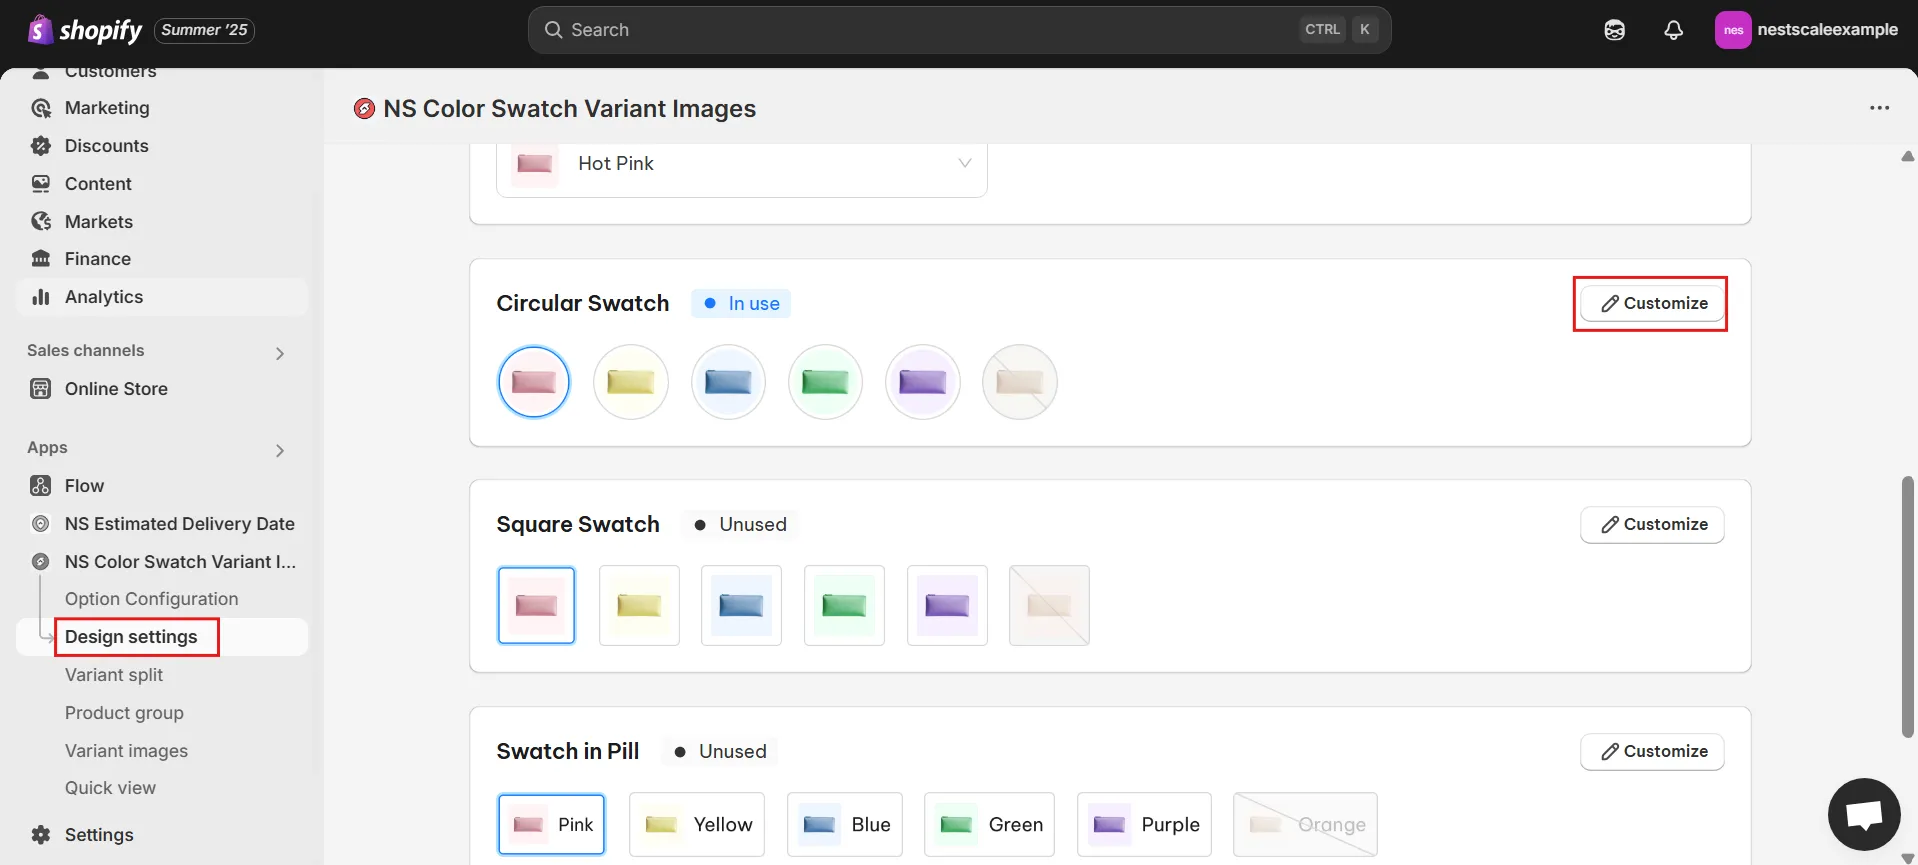
1. In the app’s sidebar, go to Design Settings.
2. Find the swatch style you picked earlier (look for the one marked “In Use”) and click Customize.
I picked Circular Swatch, so I’ll click to customize that style.
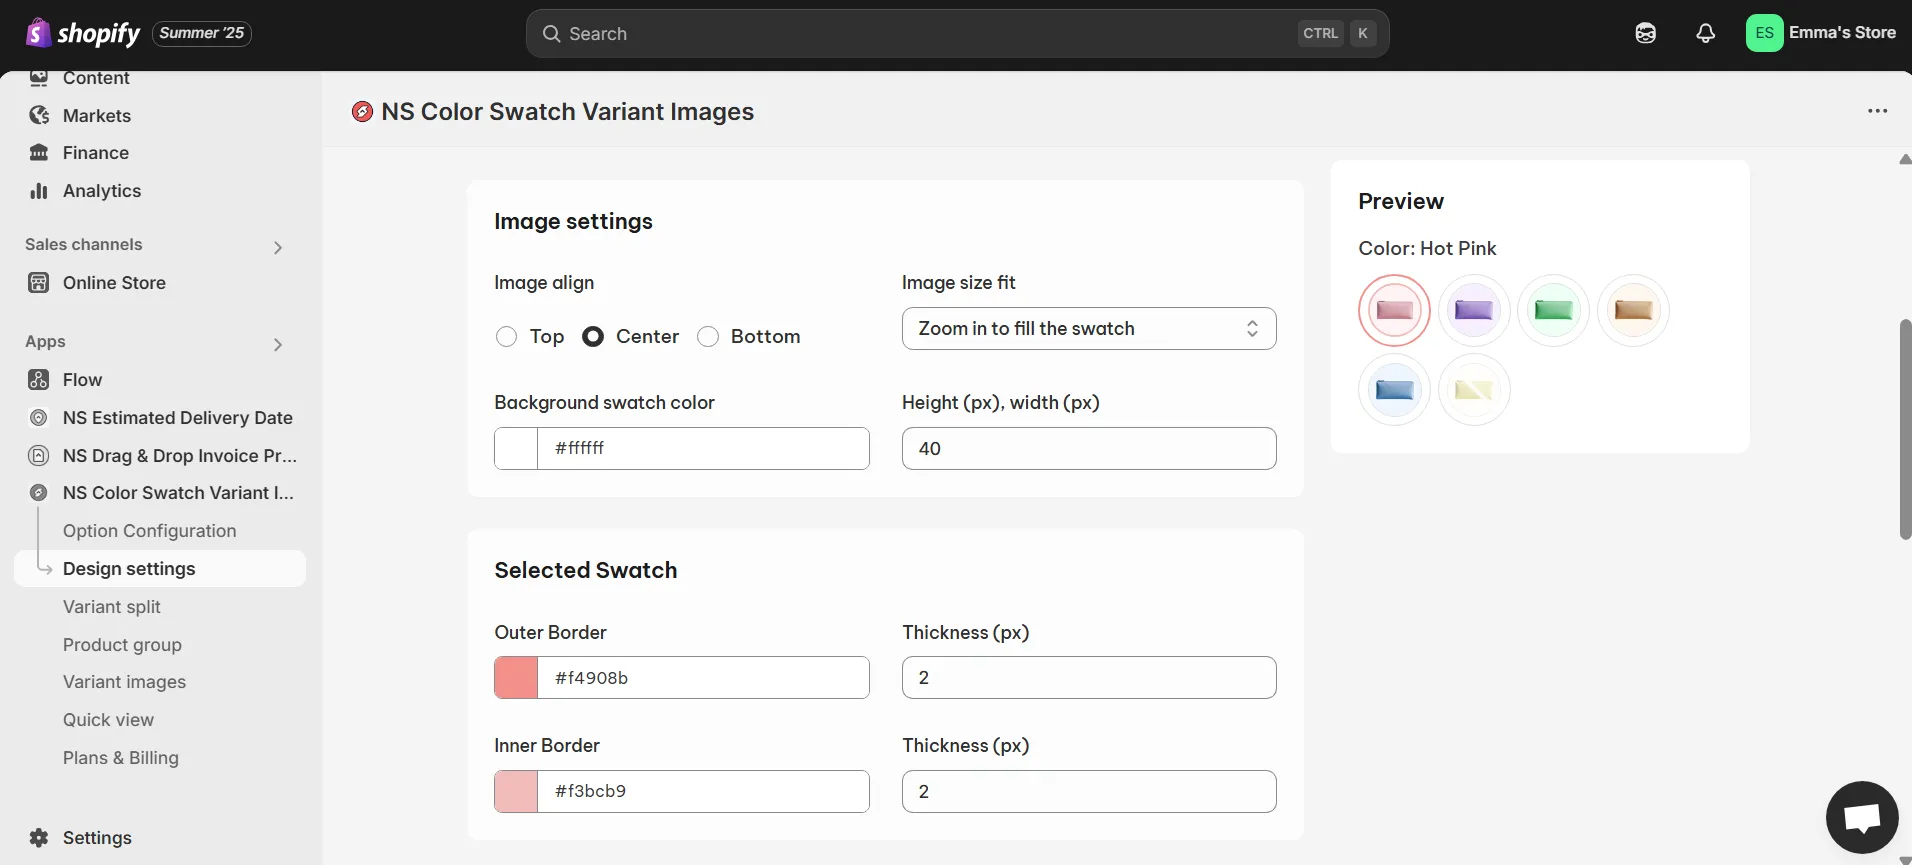
3. You’ll find five sections for design adjustments:
- General Settings: Modify the swatch size, spacing, and border thickness.

- Image Settings: Control how images behave on hover (zoom in/out, position, etc.).
- Selected Swatch: Personalize the selected swatch’s appearance (border color, thickness).
- Unselected Swatch: Define how unselected swatches look.
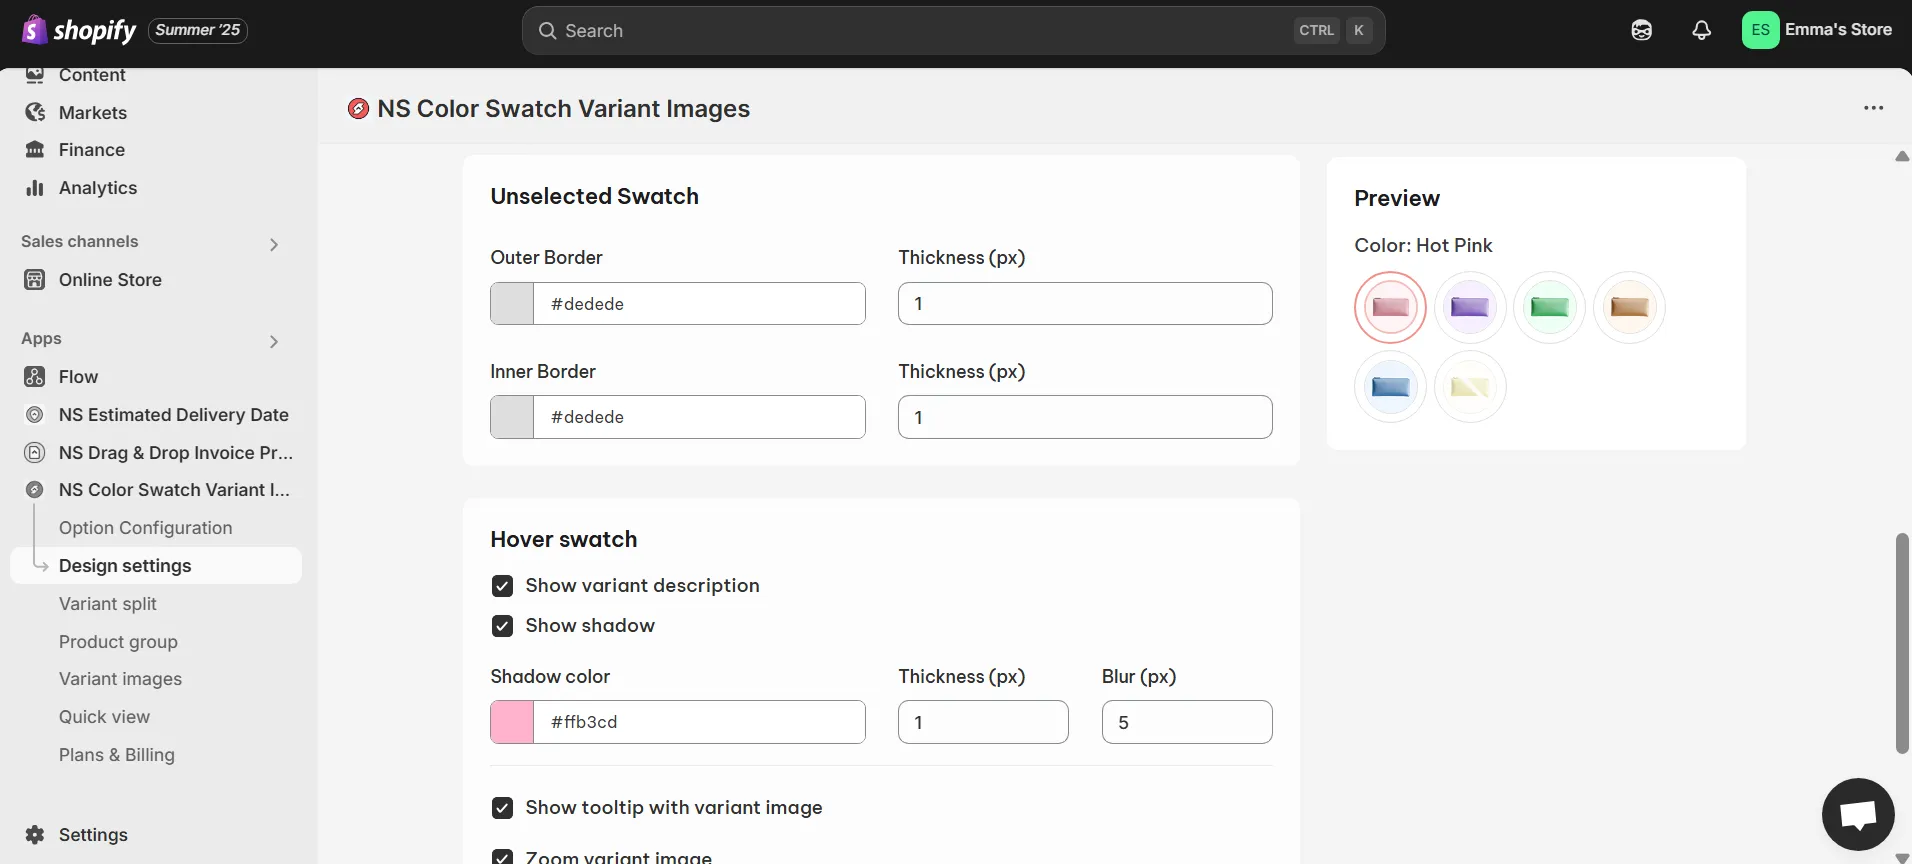
- Hover Swatch: Add effects like variant names, shadows, tooltips, or zoom effects on hover.
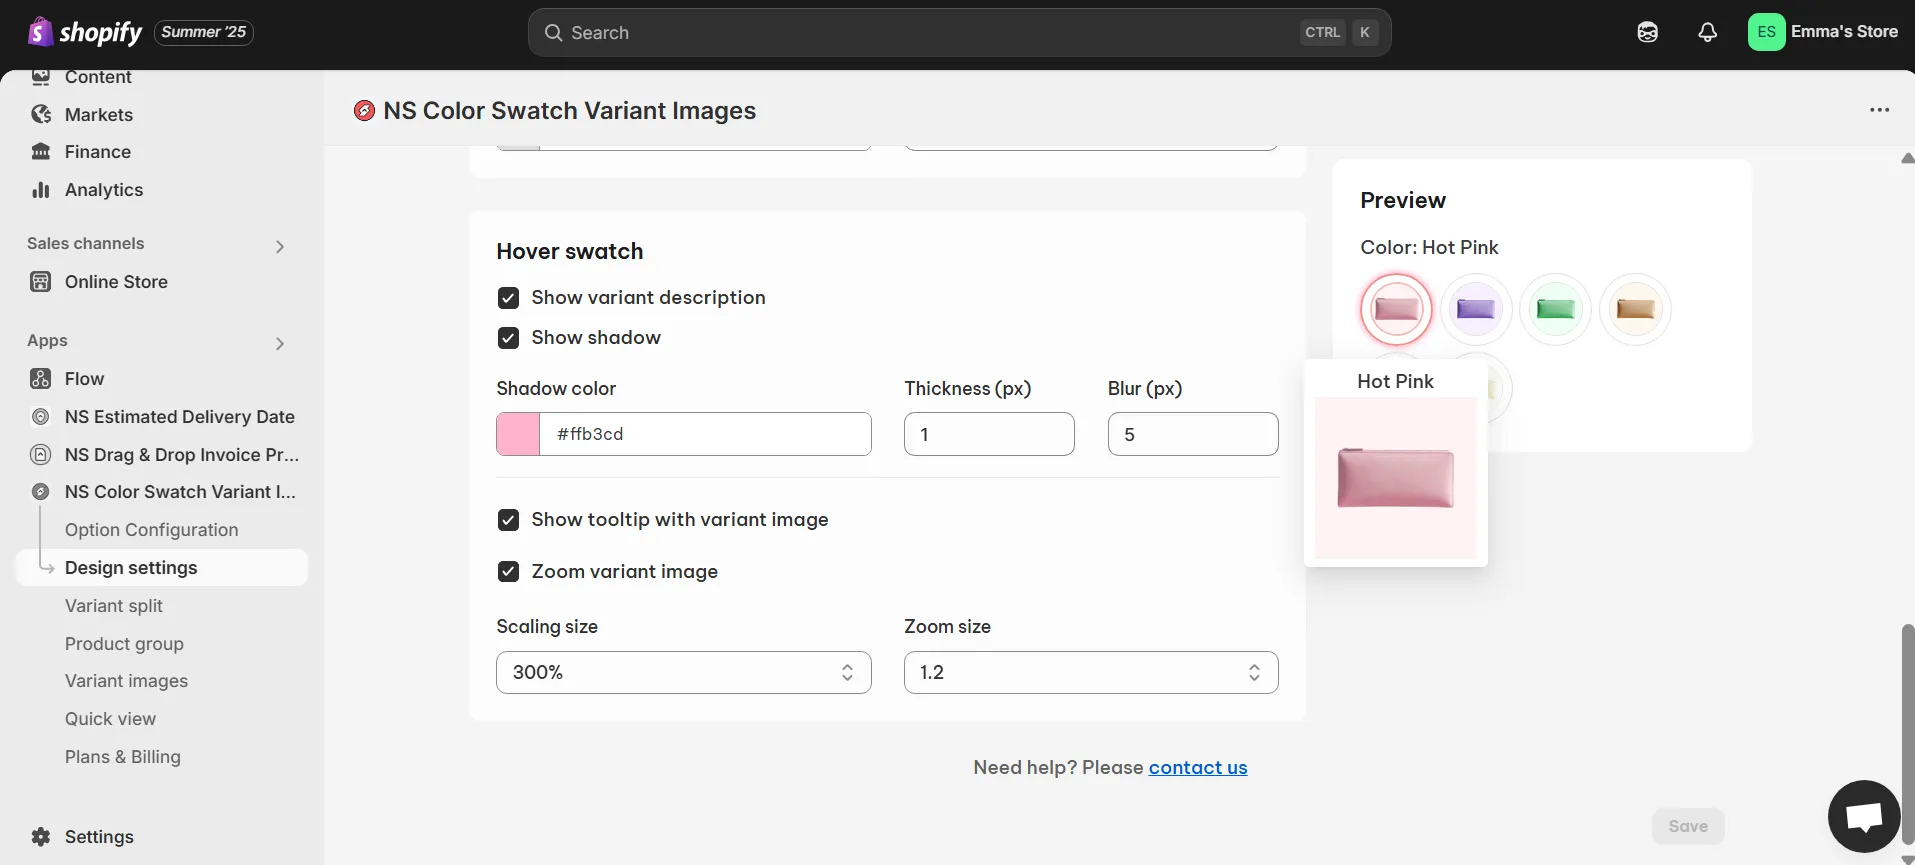
💡 As you customize your swatches, check the Preview to see your updates in real time.
4. Once you’re satisfied with the style, click Save to finalize your changes.
Now, check your storefront to see the newly styled color variants in action!

FAQs
1. Can I display color swatches on my collection pages?
Yes, you can display color swatches on your collection pages with the NS Color Swatch Variant Images app. This feature allows customers to see variant options directly on the collection page, enhancing the shopping experience and encouraging quicker decision-making.
Watch this step-by-step tutorial on how to display color swatches on your Shopify collection pages and enhance your store’s shopping experience.
2. How do I ensure that my swatches appear correctly on all devices?
To ensure that your swatches appear correctly on all devices, including desktops, tablets, and mobile phones, follow these steps:
- Use Responsive Design: Make sure your color swatches are part of a responsive theme. This ensures that the swatches automatically adjust their size and layout based on the screen size.
- Test Across Devices: Regularly test your product pages on different devices to ensure that the swatches display properly. This includes checking that the swatches remain clickable and visible on smaller screens.
- Focus on Mobile Optimization: For mobile users, make sure the swatches are easily clickable and properly sized to prevent any issues with overlap or tiny buttons, enhancing the mobile shopping experience.