


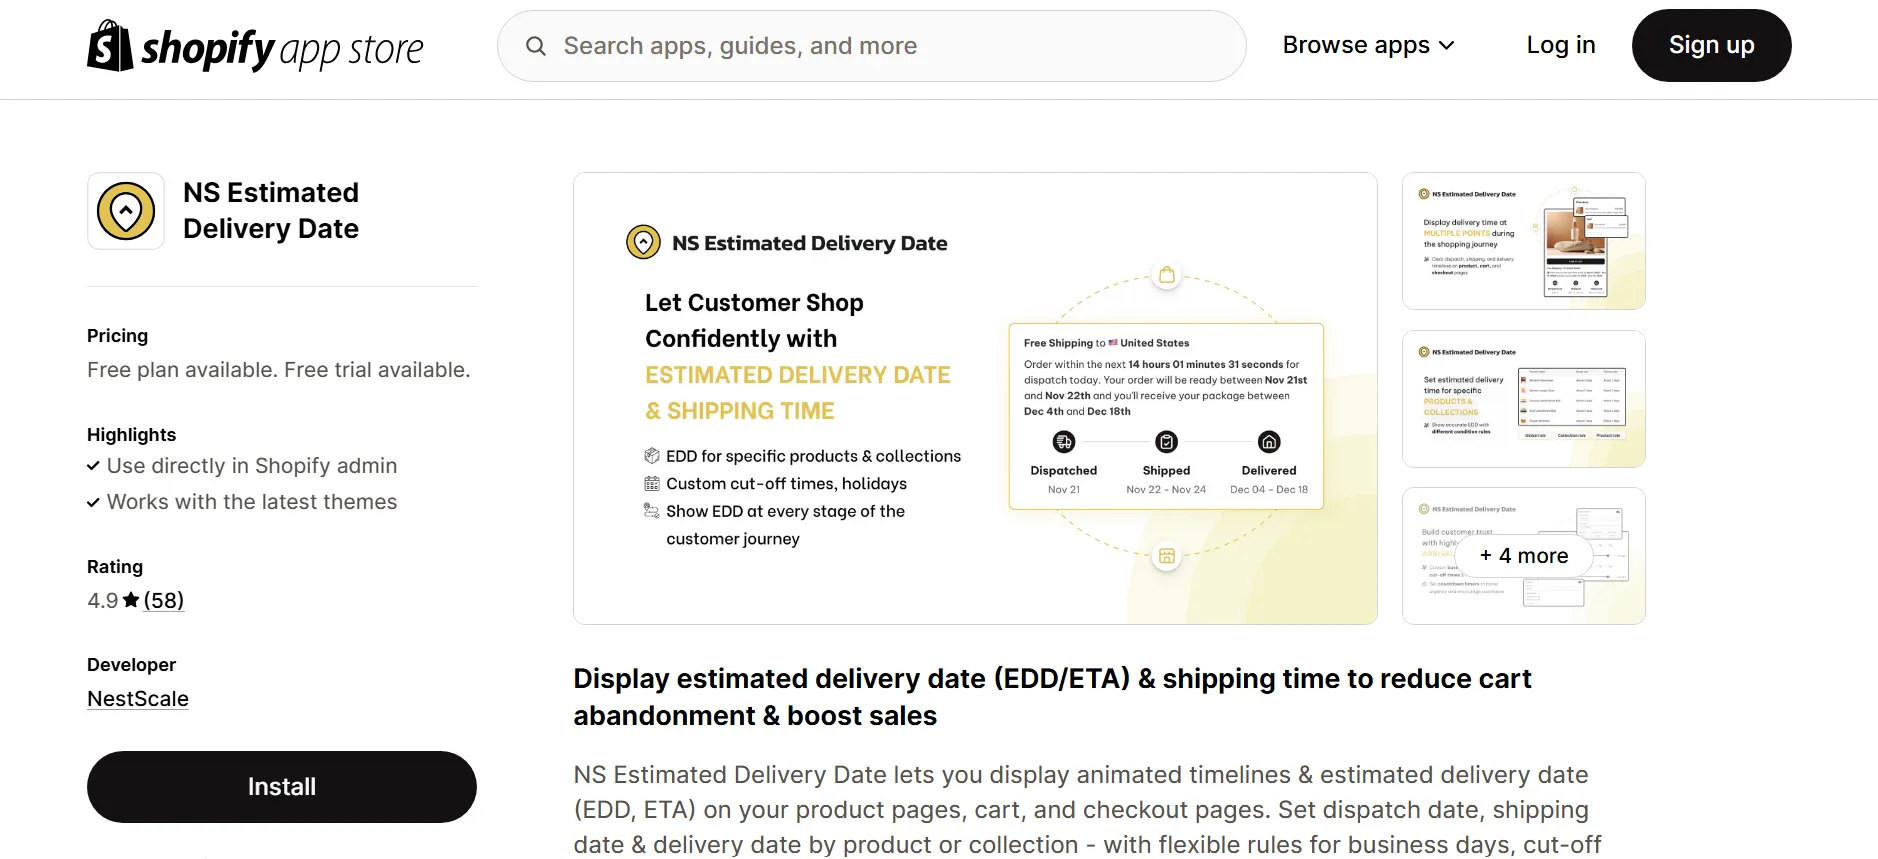
One of the quickest ways to inspire confidence and clear up any last-minute doubts at checkout is by displaying an accurate delivery estimate right on your product pages. In this post, you’ll get a step-by-step walkthrough on how to set different delivery dates for different countries in Shopify, as well as how to install, configure, and style the Shopify Estimated Delivery Date (EDD) widget so shoppers always know exactly when to expect their order. In this tutorial, you’ll learn how to:
- Embed the delivery date widget on your product pages
- Tailor the notification text and visual layout
- Configure unique delivery windows for different countries
Step 1: Add and configure NS Estimated Delivery Date
1. First, head to the Shopify App Store and install the NS Estimated Delivery Date app on your app store.
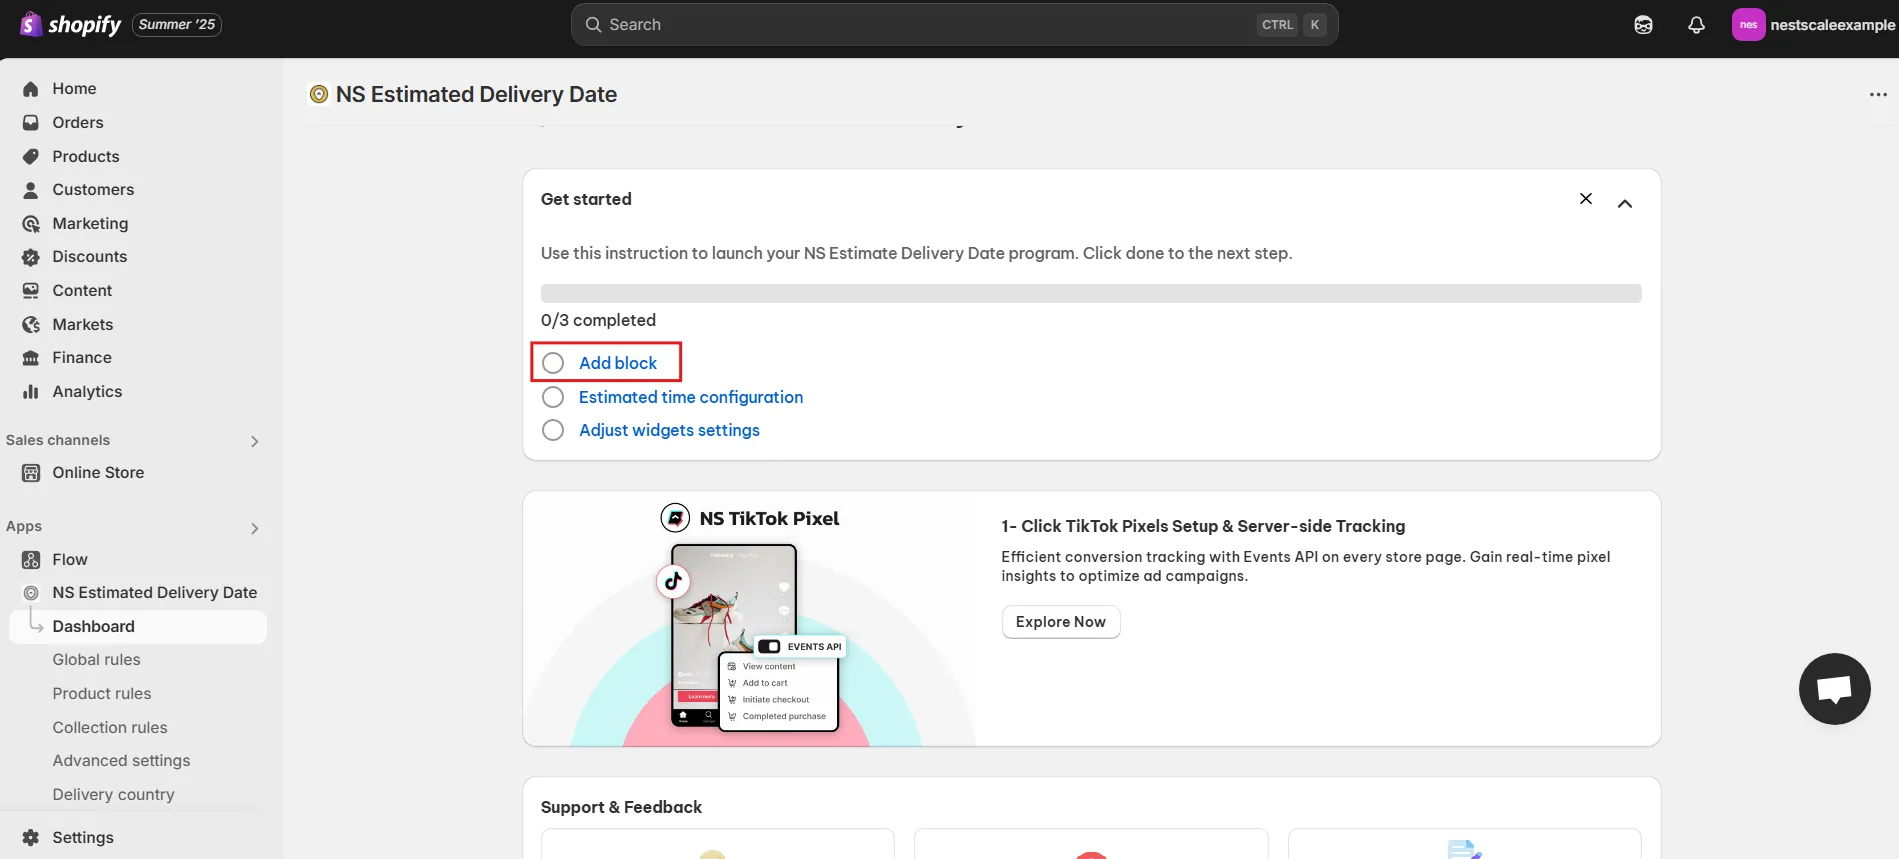
2. Launch the NS Estimated Delivery Date app and complete the guided onboarding steps.
3. Start by clicking Add block.
4. On the redirected page (Product Page customization), Click Add section > Apps > NS Estimated Delivery Date.

5. Drag and drop the EDD widget into your chosen spot on the product page.
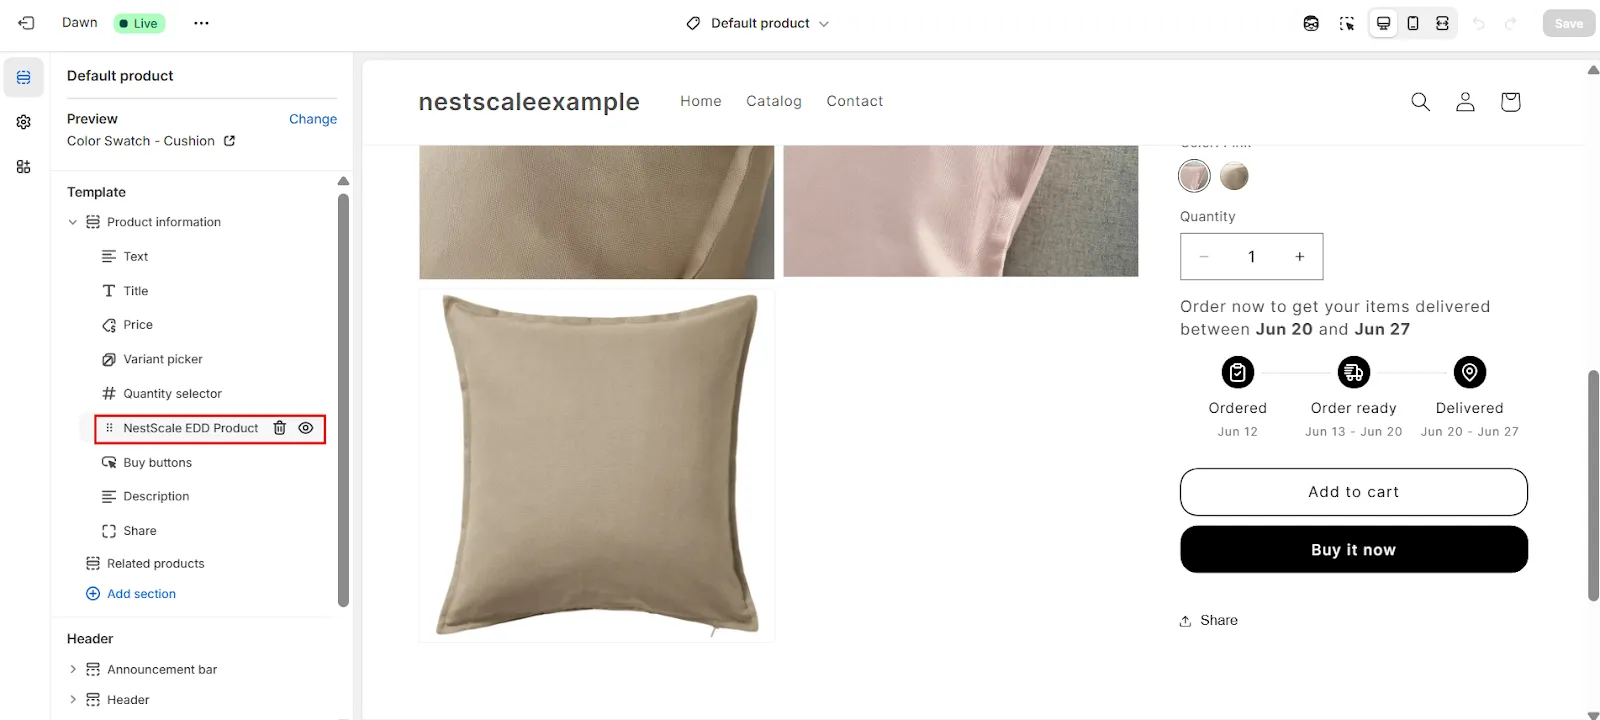
6. Click Save to confirm.
Step 2: Customize EDD widget
Customize the EDD message
1. Reopen the NS Estimated Delivery Date app and select the Global Rules tab.
2. Edit the delivery message copy to match your brand’s unique voice and style.
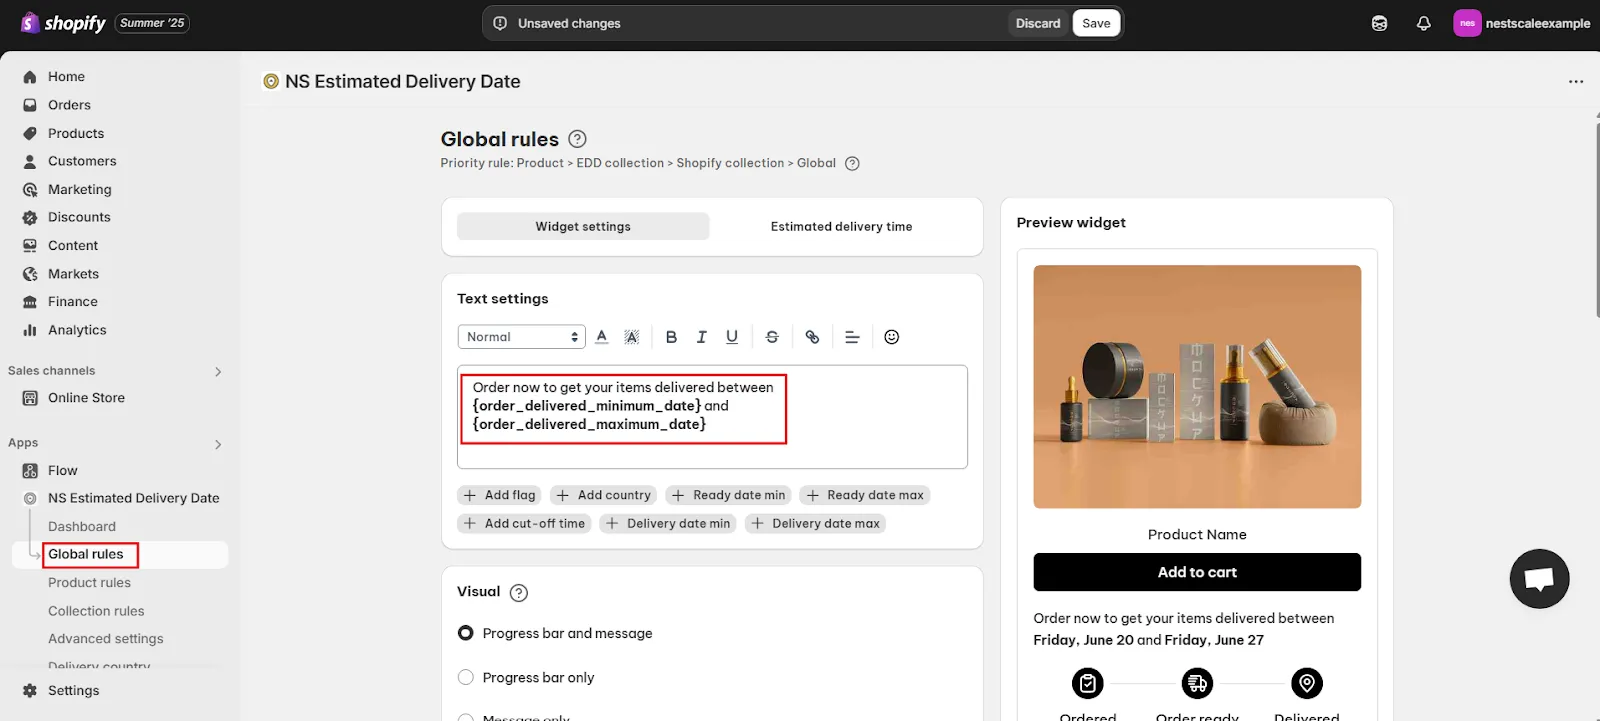
3. You can format the message further by adding: countries, flags, countdown timers (cut-off time), and more.
💡 The EDD widget includes both a message and a delivery timeline.
4. Choose the display option in the Visual section:
Both (recommended if you want more room to explain delivery policies or run promotional messages)
5. Customize widget visuals, including icons, texts, date types.
💡 Use the Preview tab to view your changes live.
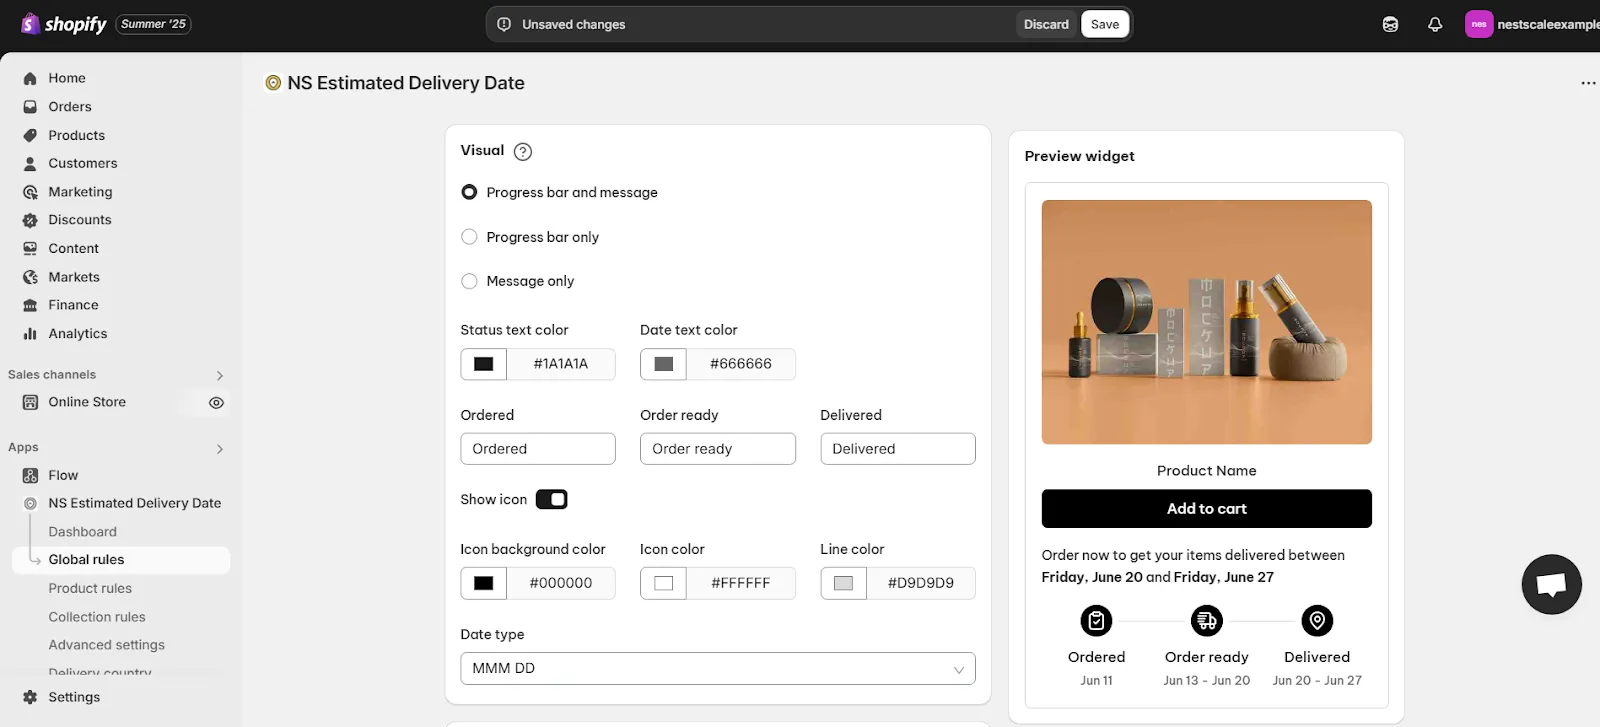
Customize widget visuals
6. Tweak the Padding settings to give the widget some breathing room on your page.
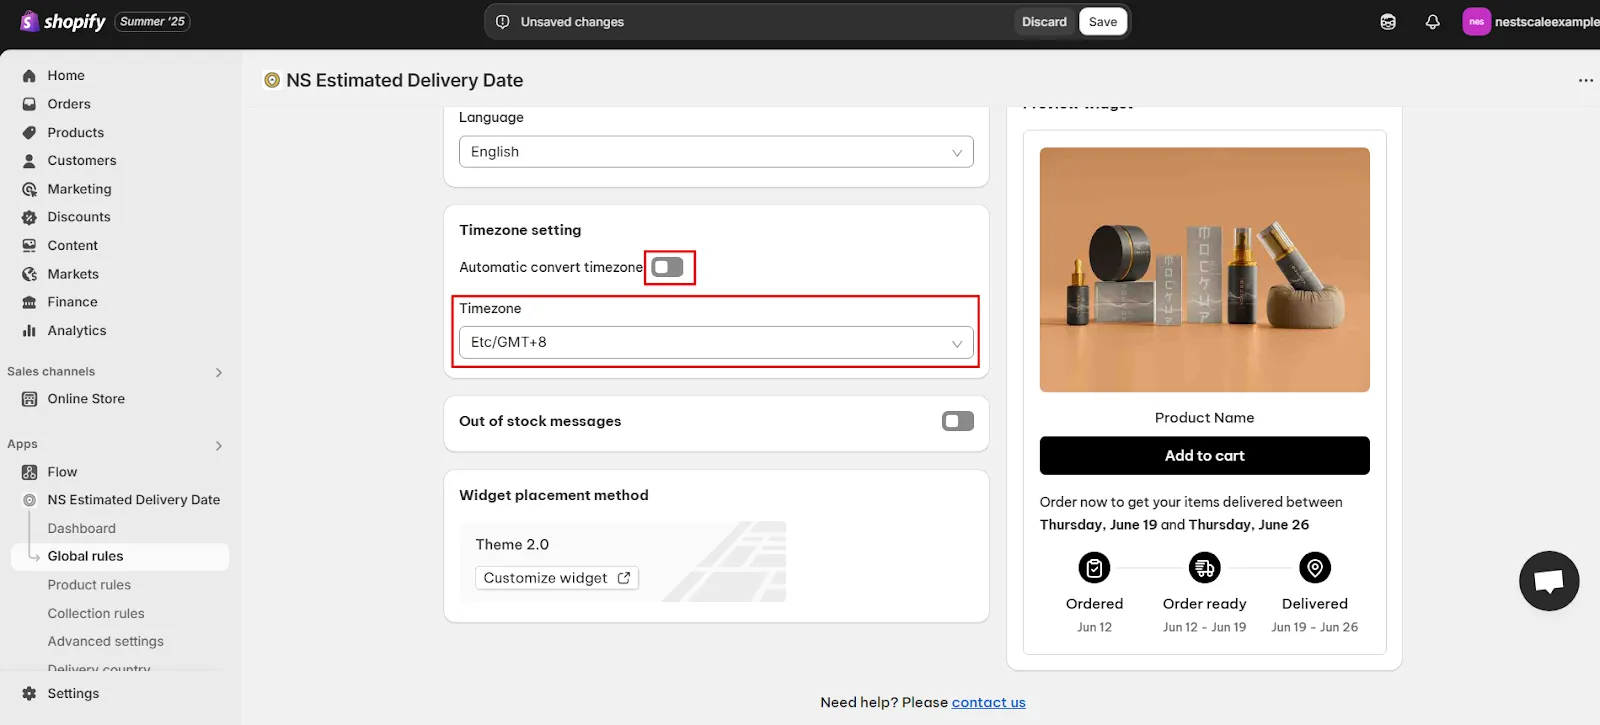
7. Choose your preferred Date Format so delivery dates display in the style you want.
8. Use the Language dropdown to set which language the EDD widget will display.

Set timezone-based delivery estimate
Under Timezone Settings:
- Toggle “Automatic convert timezone” to allow the app to detect the visitor’s IP and show delivery dates based on their local time.
- Or select a fixed timezone for consistent display.
Automatic convert timezone
Enable out-of-stock message
1. You can display a custom message when a product is unavailable. This is helpful for:
- Letting customers know a restock is coming
- Offering pre-order options
- Managing expectations around fulfillment
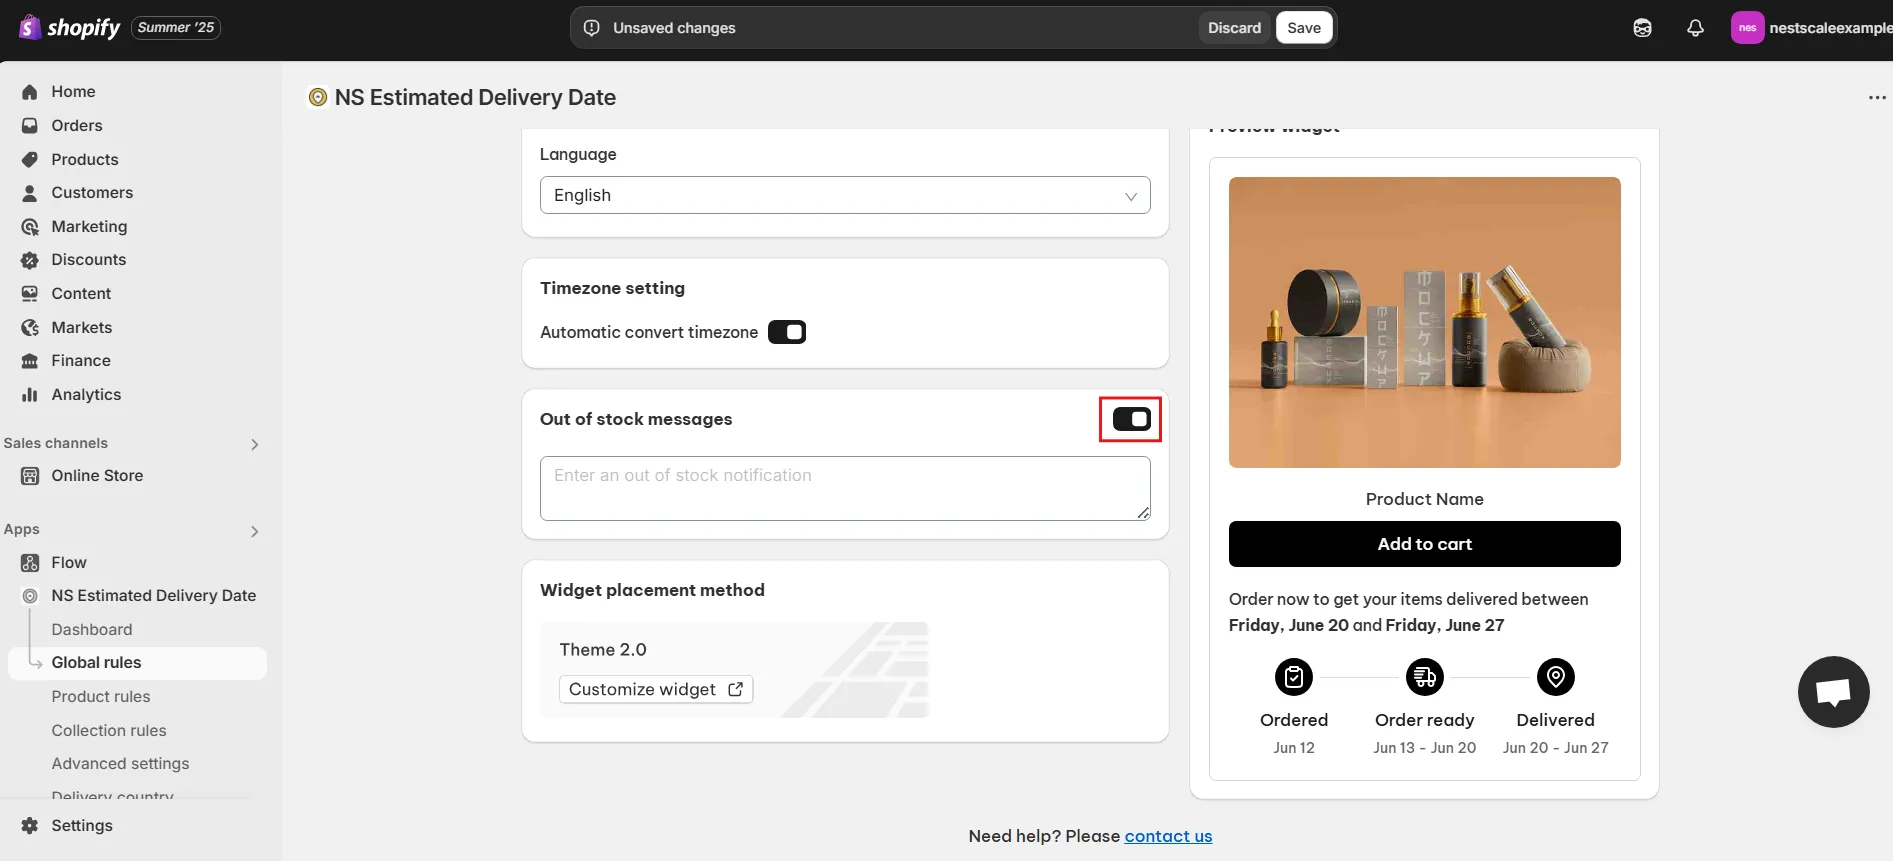
2. Click Save once done.
Step 3: Configure Delivery Windows for Each Country
Let’s tailor your delivery estimates by market so shoppers everywhere get the right ETA. Here’s how to set up country-specific timelines:
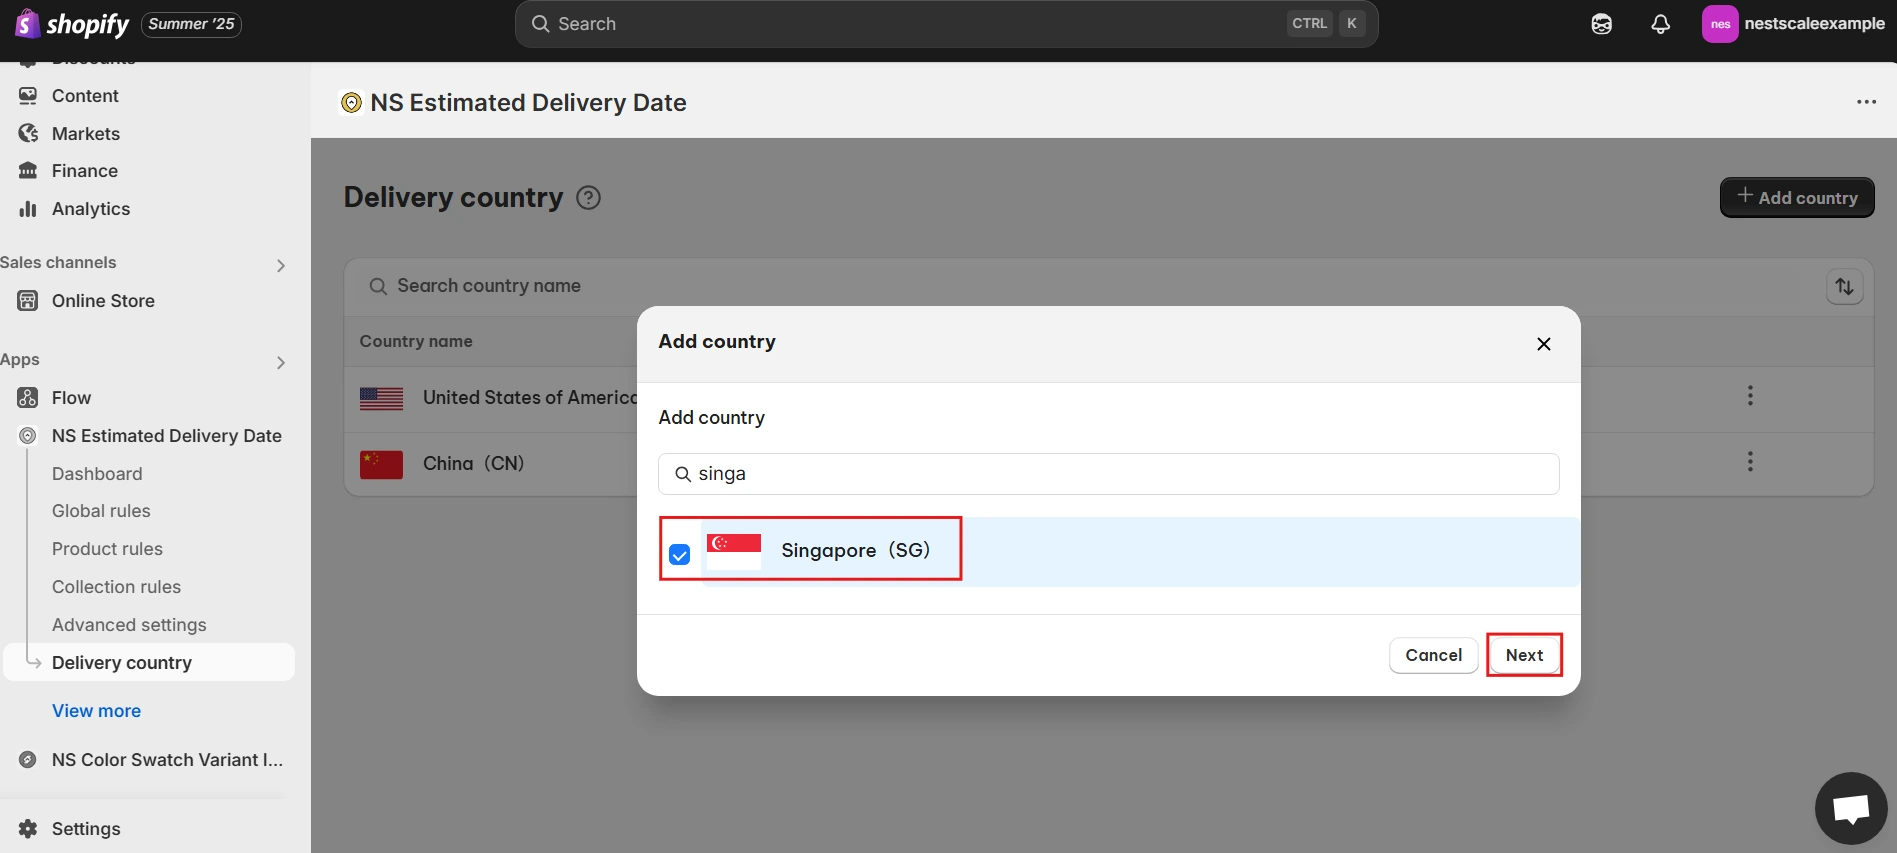
1. Open the Delivery country tab
In the NS Estimated Delivery Date app sidebar, click Delivery country.

2. Add a new country
Hit the + Add country button in the top-right corner.
3. Select your country
In the modal, type the country name (e.g., “Singapore”), tick the checkbox, then click Next.
4. Define your delivery window
Enter the Minimum delivery date (number of days) and the Maximum delivery date, then click S

5. Verify your setup
You’ll see your new entry appear alongside any existing rules (US, China, etc.). The table shows each country’s delivery range at a glance:

6. Edit or remove as needed
To refine a country’s timing later, click the three-dot menu next to its row and choose Edit or Delete.
✨ NS Estimated Delivery Date can do even more:
- Define delivery estimates for individual products or entire collections, perfect if certain items ship on different schedules.
- Show delivery timelines right in the cart and at checkout, so customers stay informed from browsing to purchase.
- Customize delivery windows by country. The app detects a shopper’s location via IP and displays the correct ETA automatically.
- Localize your messaging by creating delivery notices in multiple languages that adjust to each visitor’s language preference.
FAQs
What will happen if I haven’t set up a rule for a shopper’s country?
If there’s no specific rule, the app falls back to your Global Rules settings—so there’s always an ETA on display. You don’t need to worry about gaps in coverage; every customer sees an estimate, even if you’re shipping to a new market.
How does the app know which country rule to use?
NS Estimated Delivery Date uses IP-based geolocation to detect your visitor’s location and automatically matches them to the correct country rule. No extra code or manual tagging required—just set up your rules once, and the app handles the rest.
Can I edit or remove a country rule later?
Yes. In the Delivery country table, click the three-dot menu next to any entry, then choose Edit or Delete. You can refine delivery windows on the fly as your fulfillment capabilities evolve.

Can I display estimated delivery dates in multiple languages?
Yes, you can add multiple languages to your store, and the language will automatically change based on the customer’s country. To do this, first click on Language Configuration, then click Add Language. Select the language you want to display, and finally, click Save.