


Ever selected a color or size on a Shopify product page… only to realize the image didn’t change? That’s not a great experience – not for you, and definitely not for your customer.
This guide will provide you with 4 clear steps to change images based on variants in Shopify. By following these steps, you can enhance your store’s product presentation, improve the shopping experience, and give your customers a clearer view of their options.
So, without any further ado, let’s dive in.
Step 1: Add variant images to each variant in Shopify Admin
1. Go to your Shopify Admin.
2. Navigate to Products
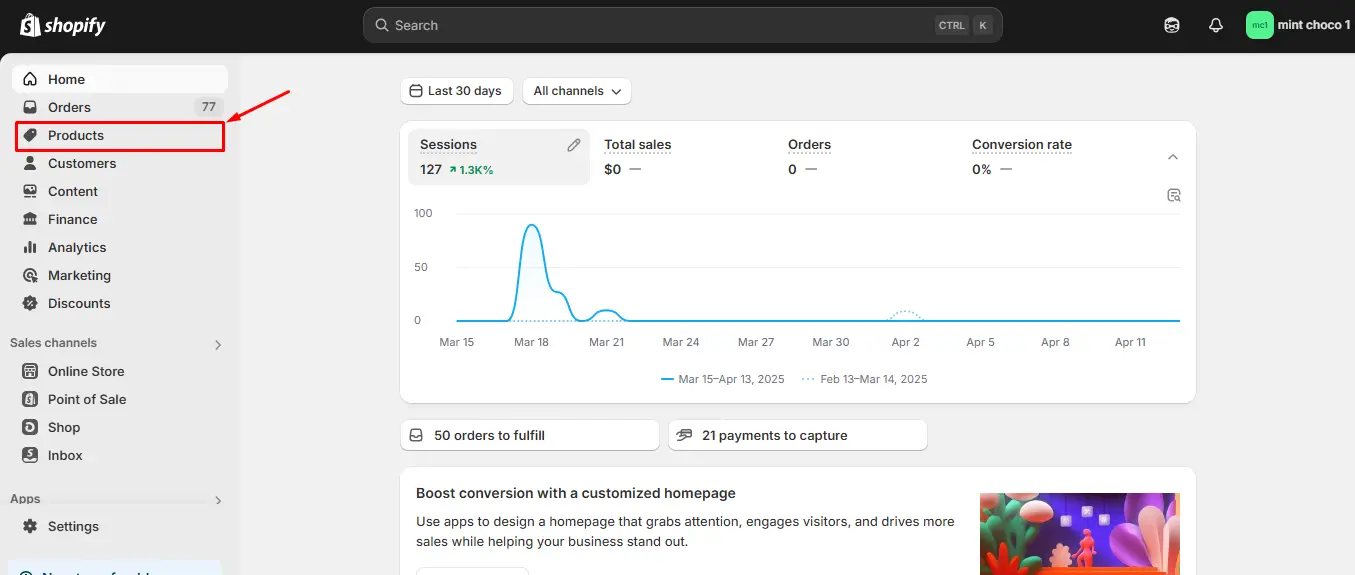
3. Click the product you want to edit.
4. Scroll down to the Variants section and click into each variant.
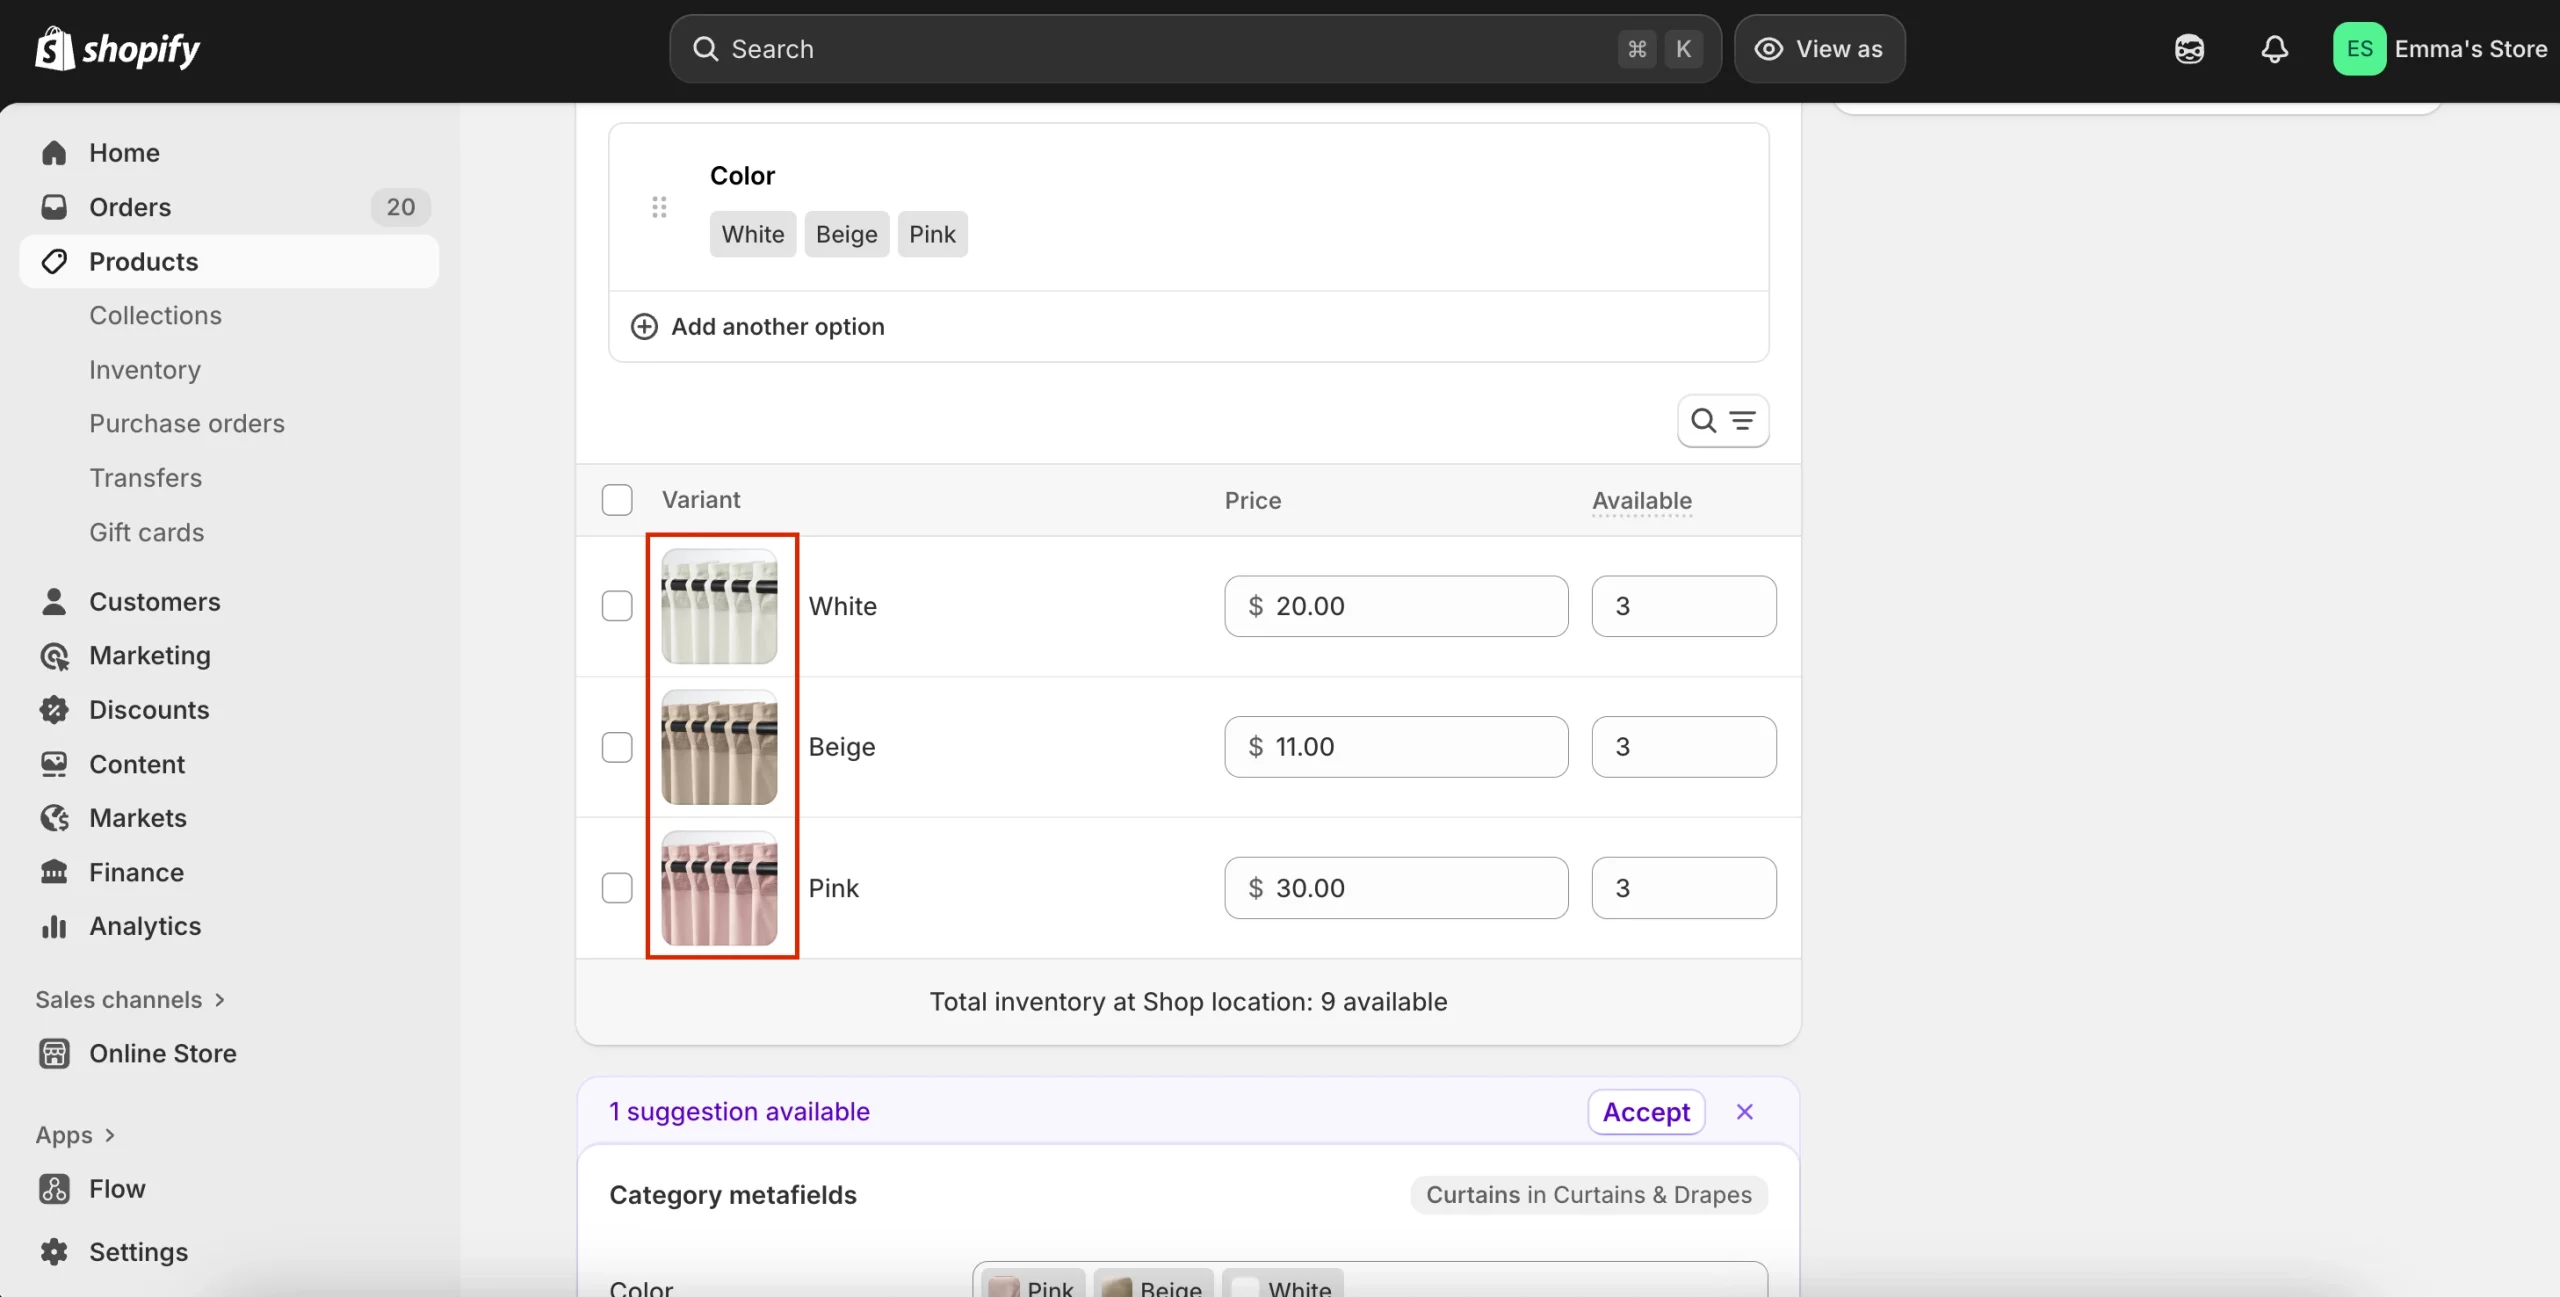
5. Upload a specific image for that variant.
6. Save your changes.
The main product image will now update automatically when a customer selects a variant on your storefront.
Step 2: Show multiple variant images for a selected variant
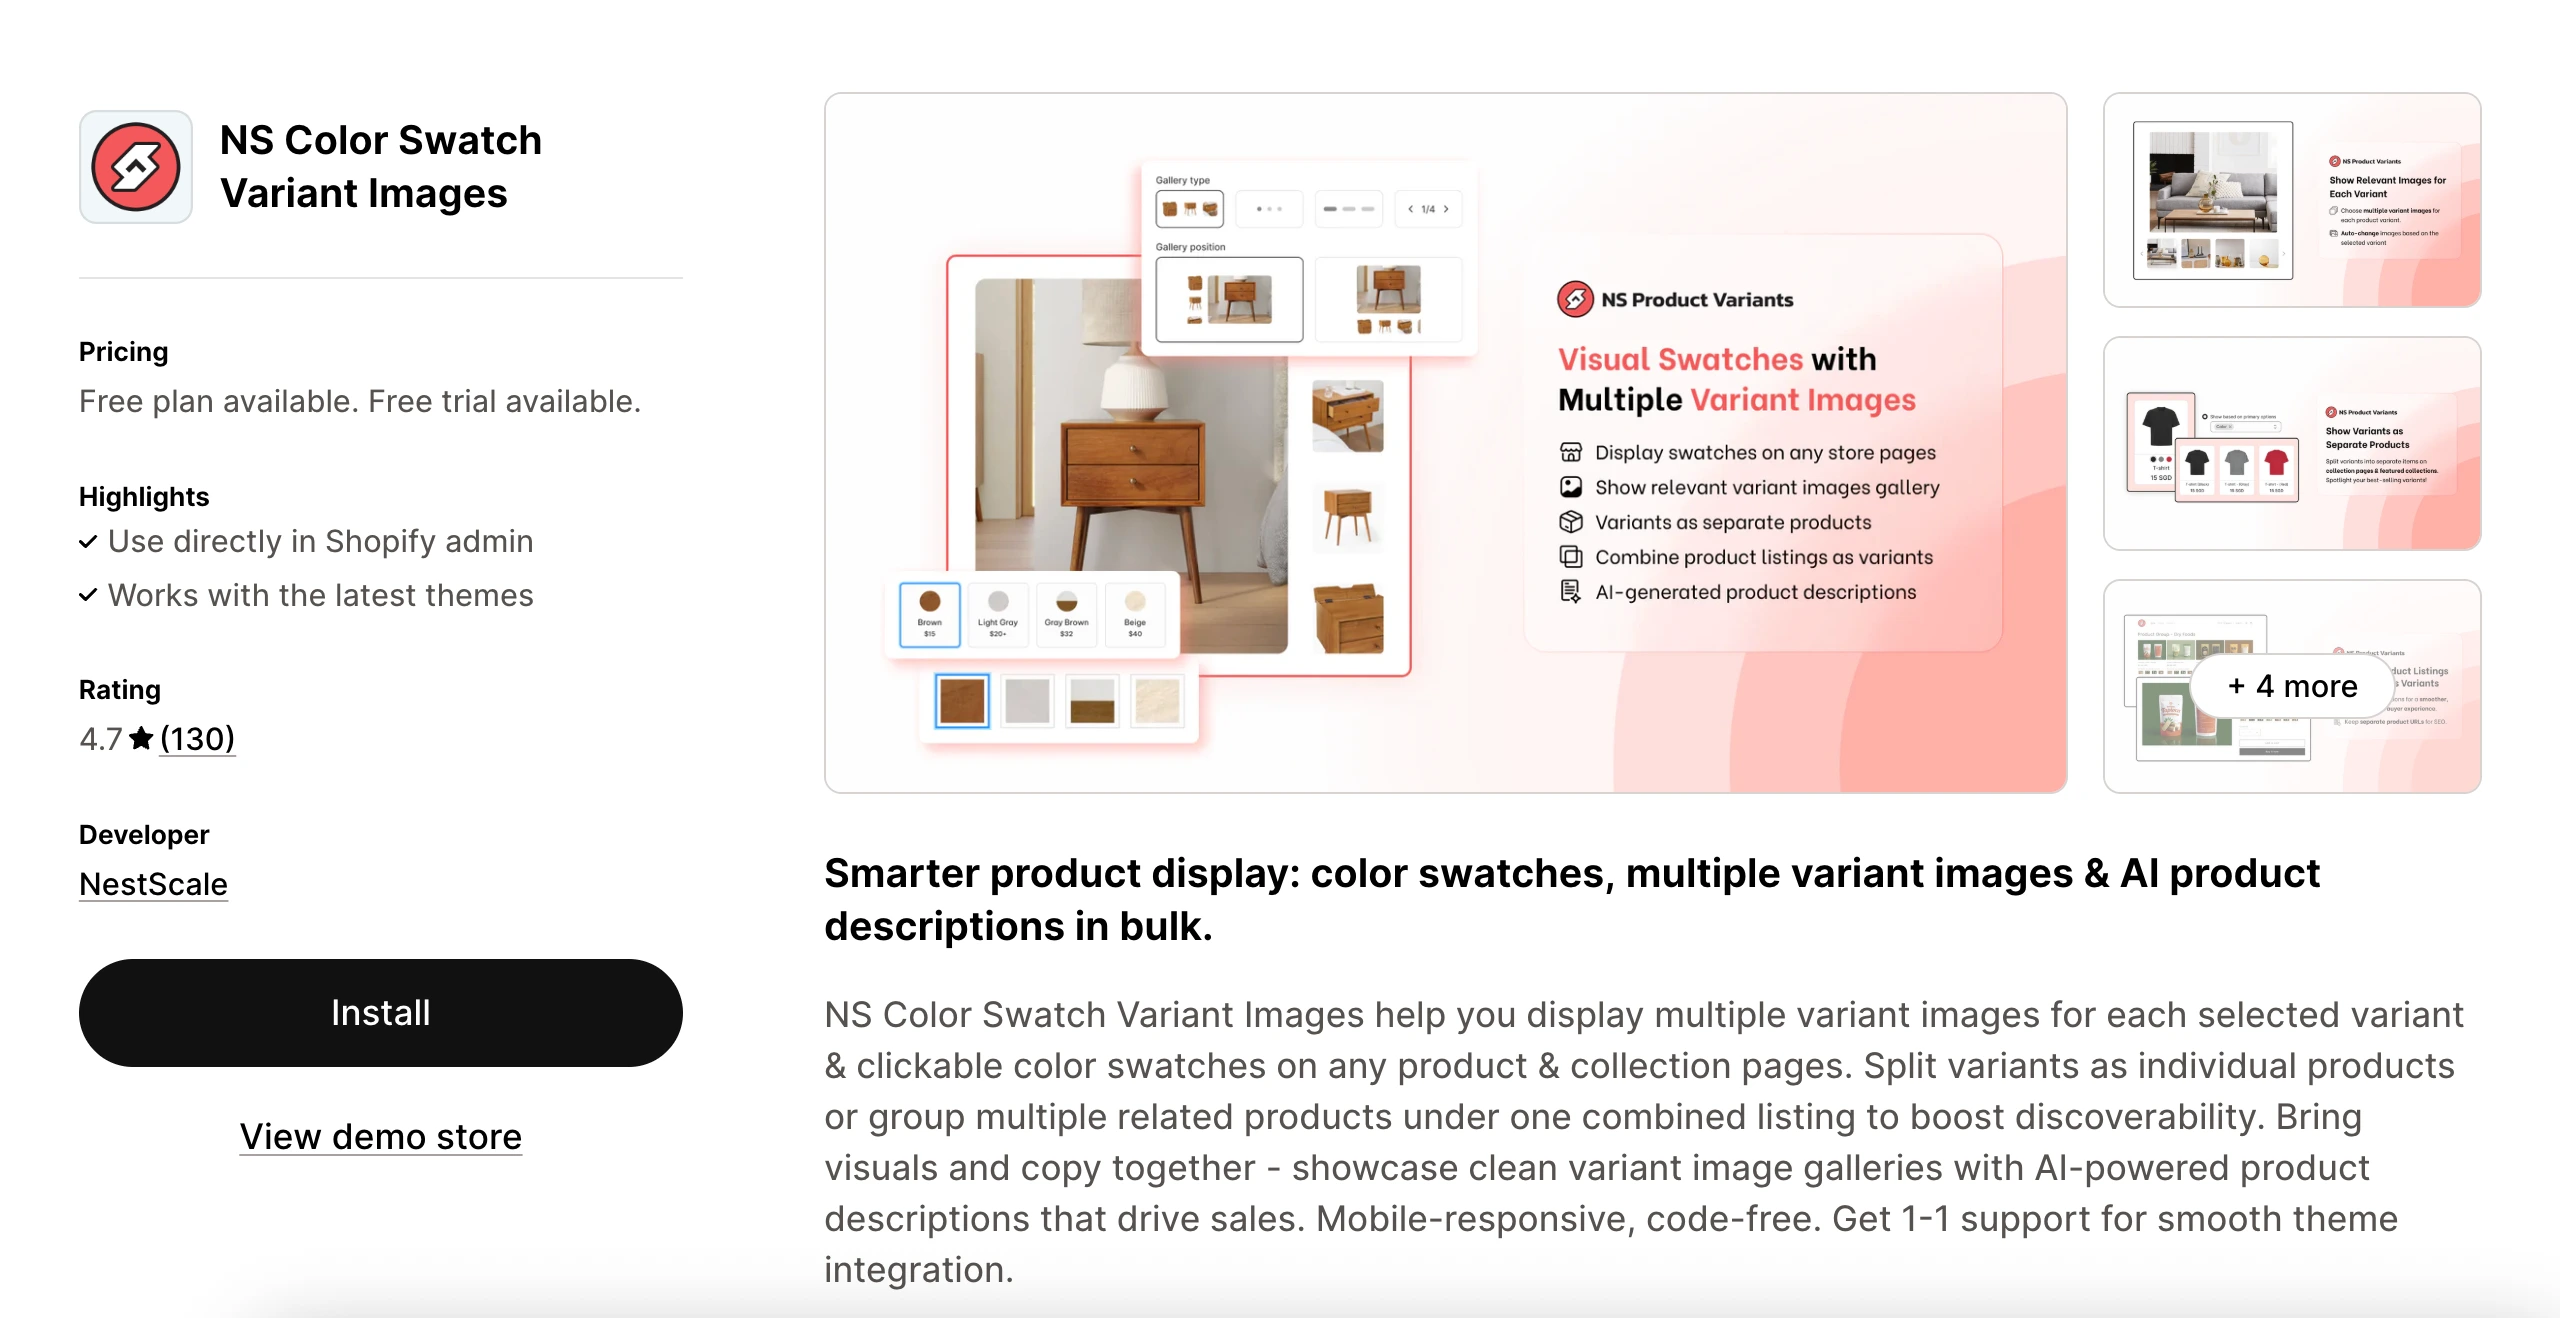
Shopify’s default image-switching is fine, but if you have a unique product image gallery for each variant, it doesn’t support this. Therefore, to show multiple variant images specific to a variant, you need to use a variant image app like NS Color Swatch Variant Images.
So, in this section, we’ll guide you on how to set up multiple variant images with NS Color Swatch Variant Images.
Install NS Color Swatch Variant Images
Let’s start by getting the app installed and activated.
1. Search for NS Color Swatch Variant Images on the Shopify App Store and click Install.
2. Once installed, open the app from your Shopify admin and follow the quick Get Started instructions.
3. Click on Embed App to enable the integration.
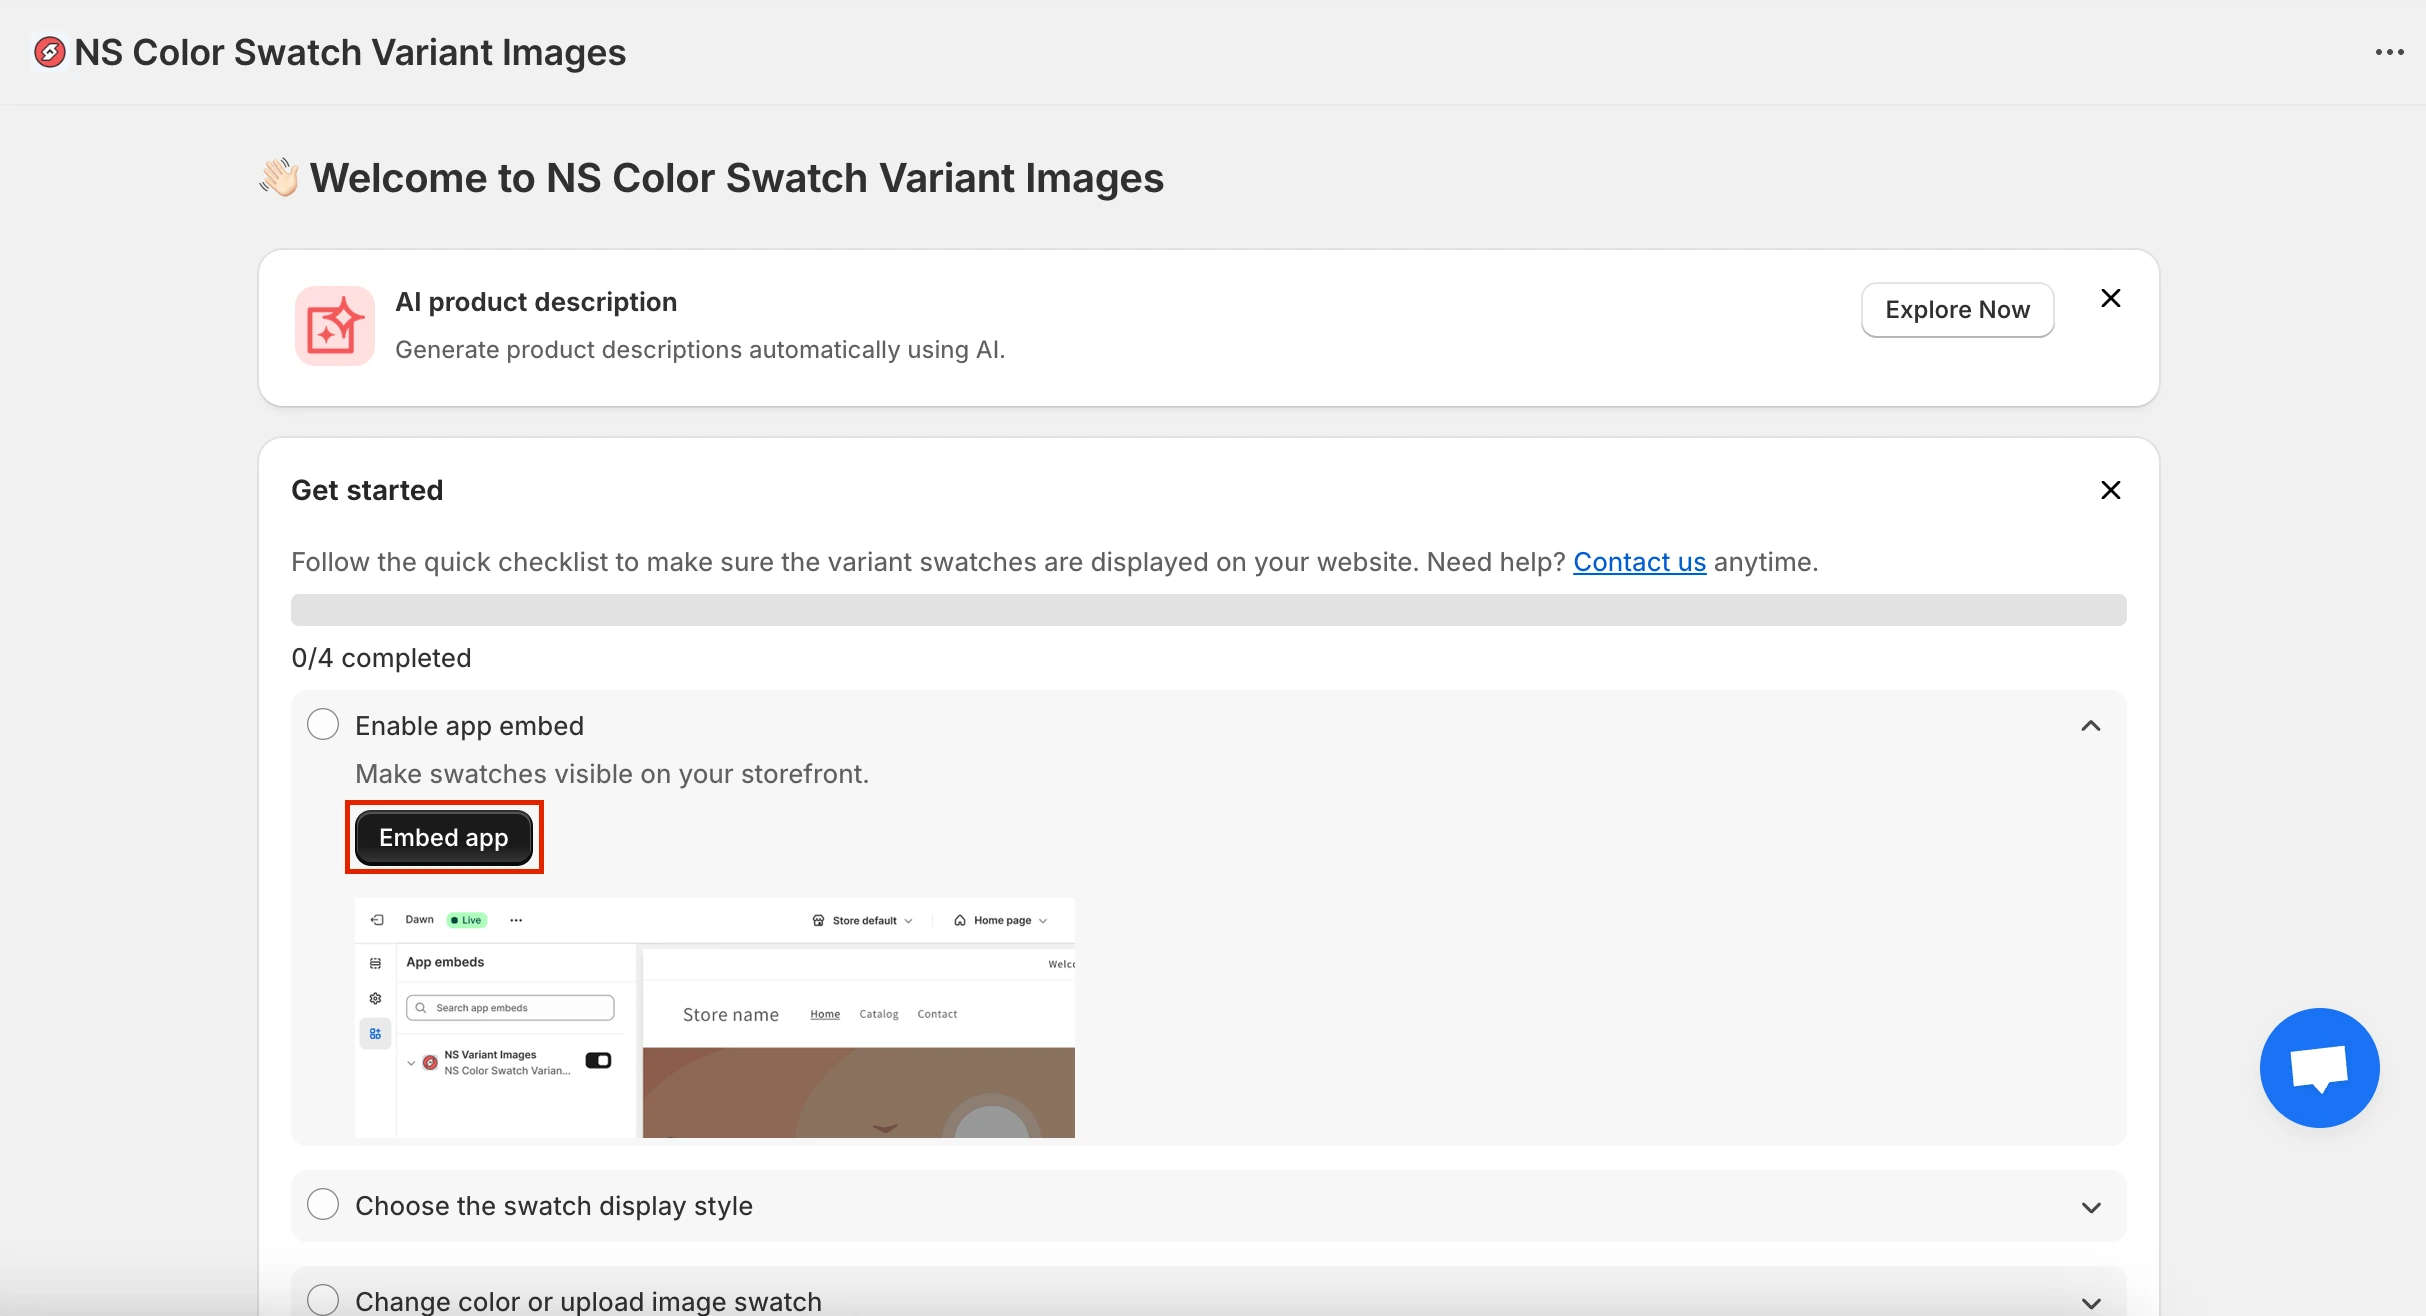
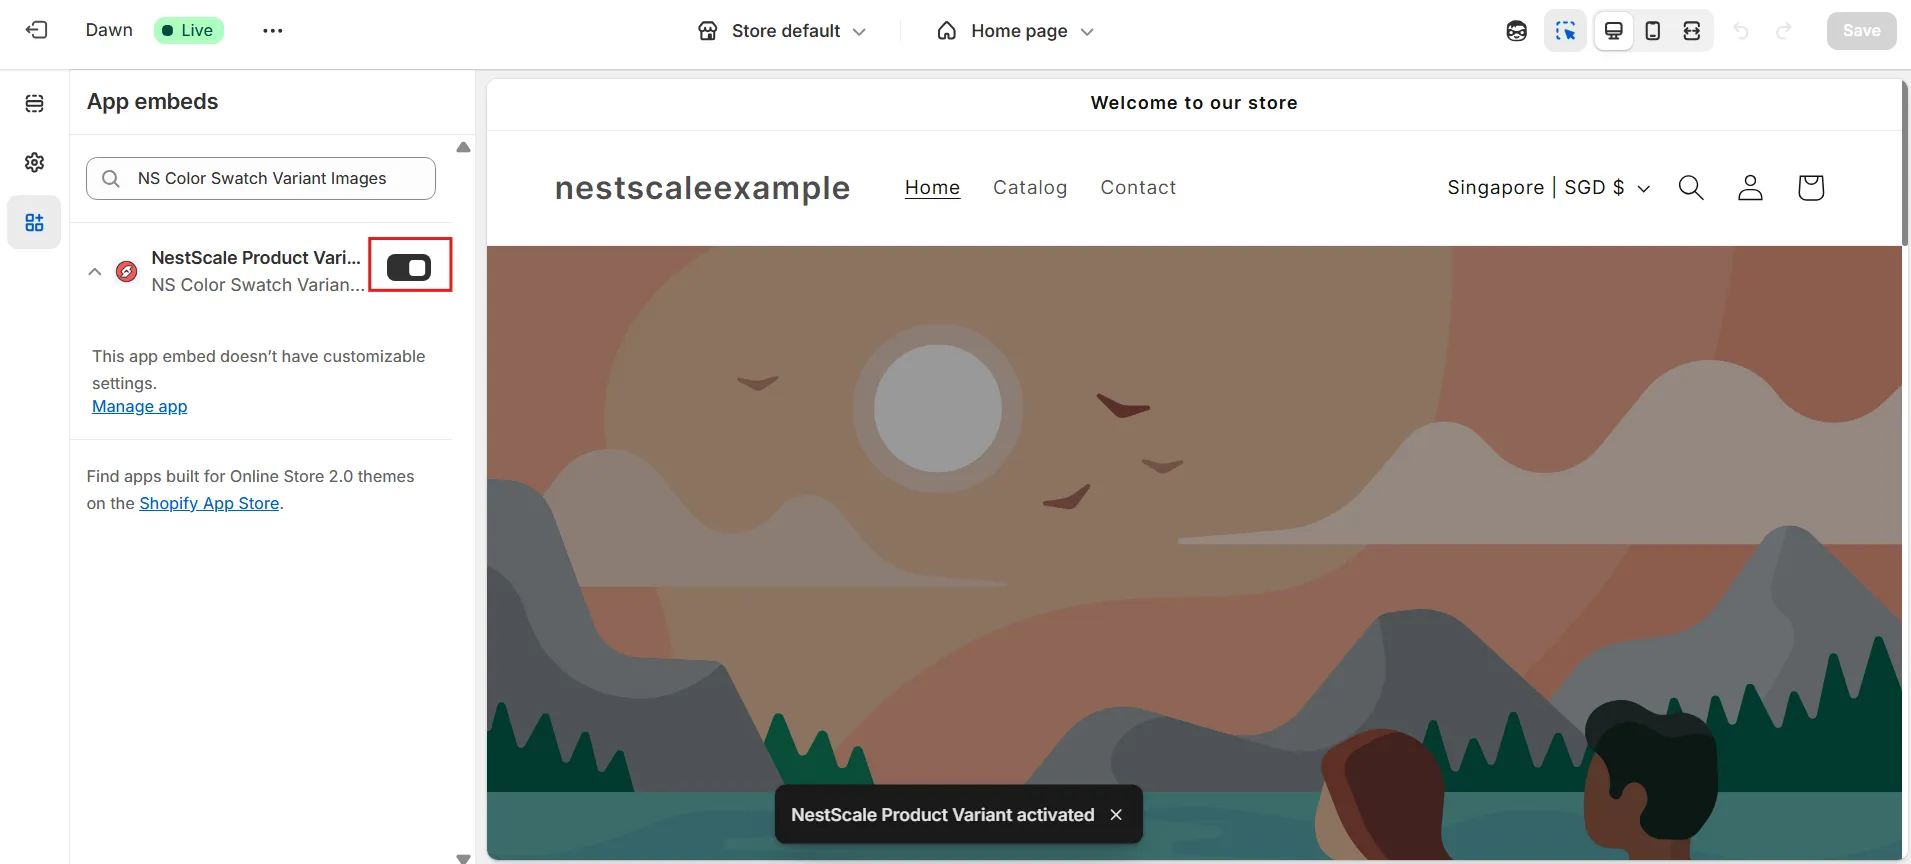
4. You’ll be redirected to the Shopify theme editor. Here, just toggle ON the switch next to the app name and click Save.
Organize product images in Shopify Admin
1. Back to the Shopify Admin, go to Products.
2. Click on the product you want to set up.
⚠️ Let’s say this again: Make sure each variant has a main variant image set under the Variant section. This image will become the first image in each group when we arrange the media. (Read the first step again)
3. In the Media section, drag and drop your images so they’re grouped by variant (e.g., all pink images together, followed by all beige images, then all white images).
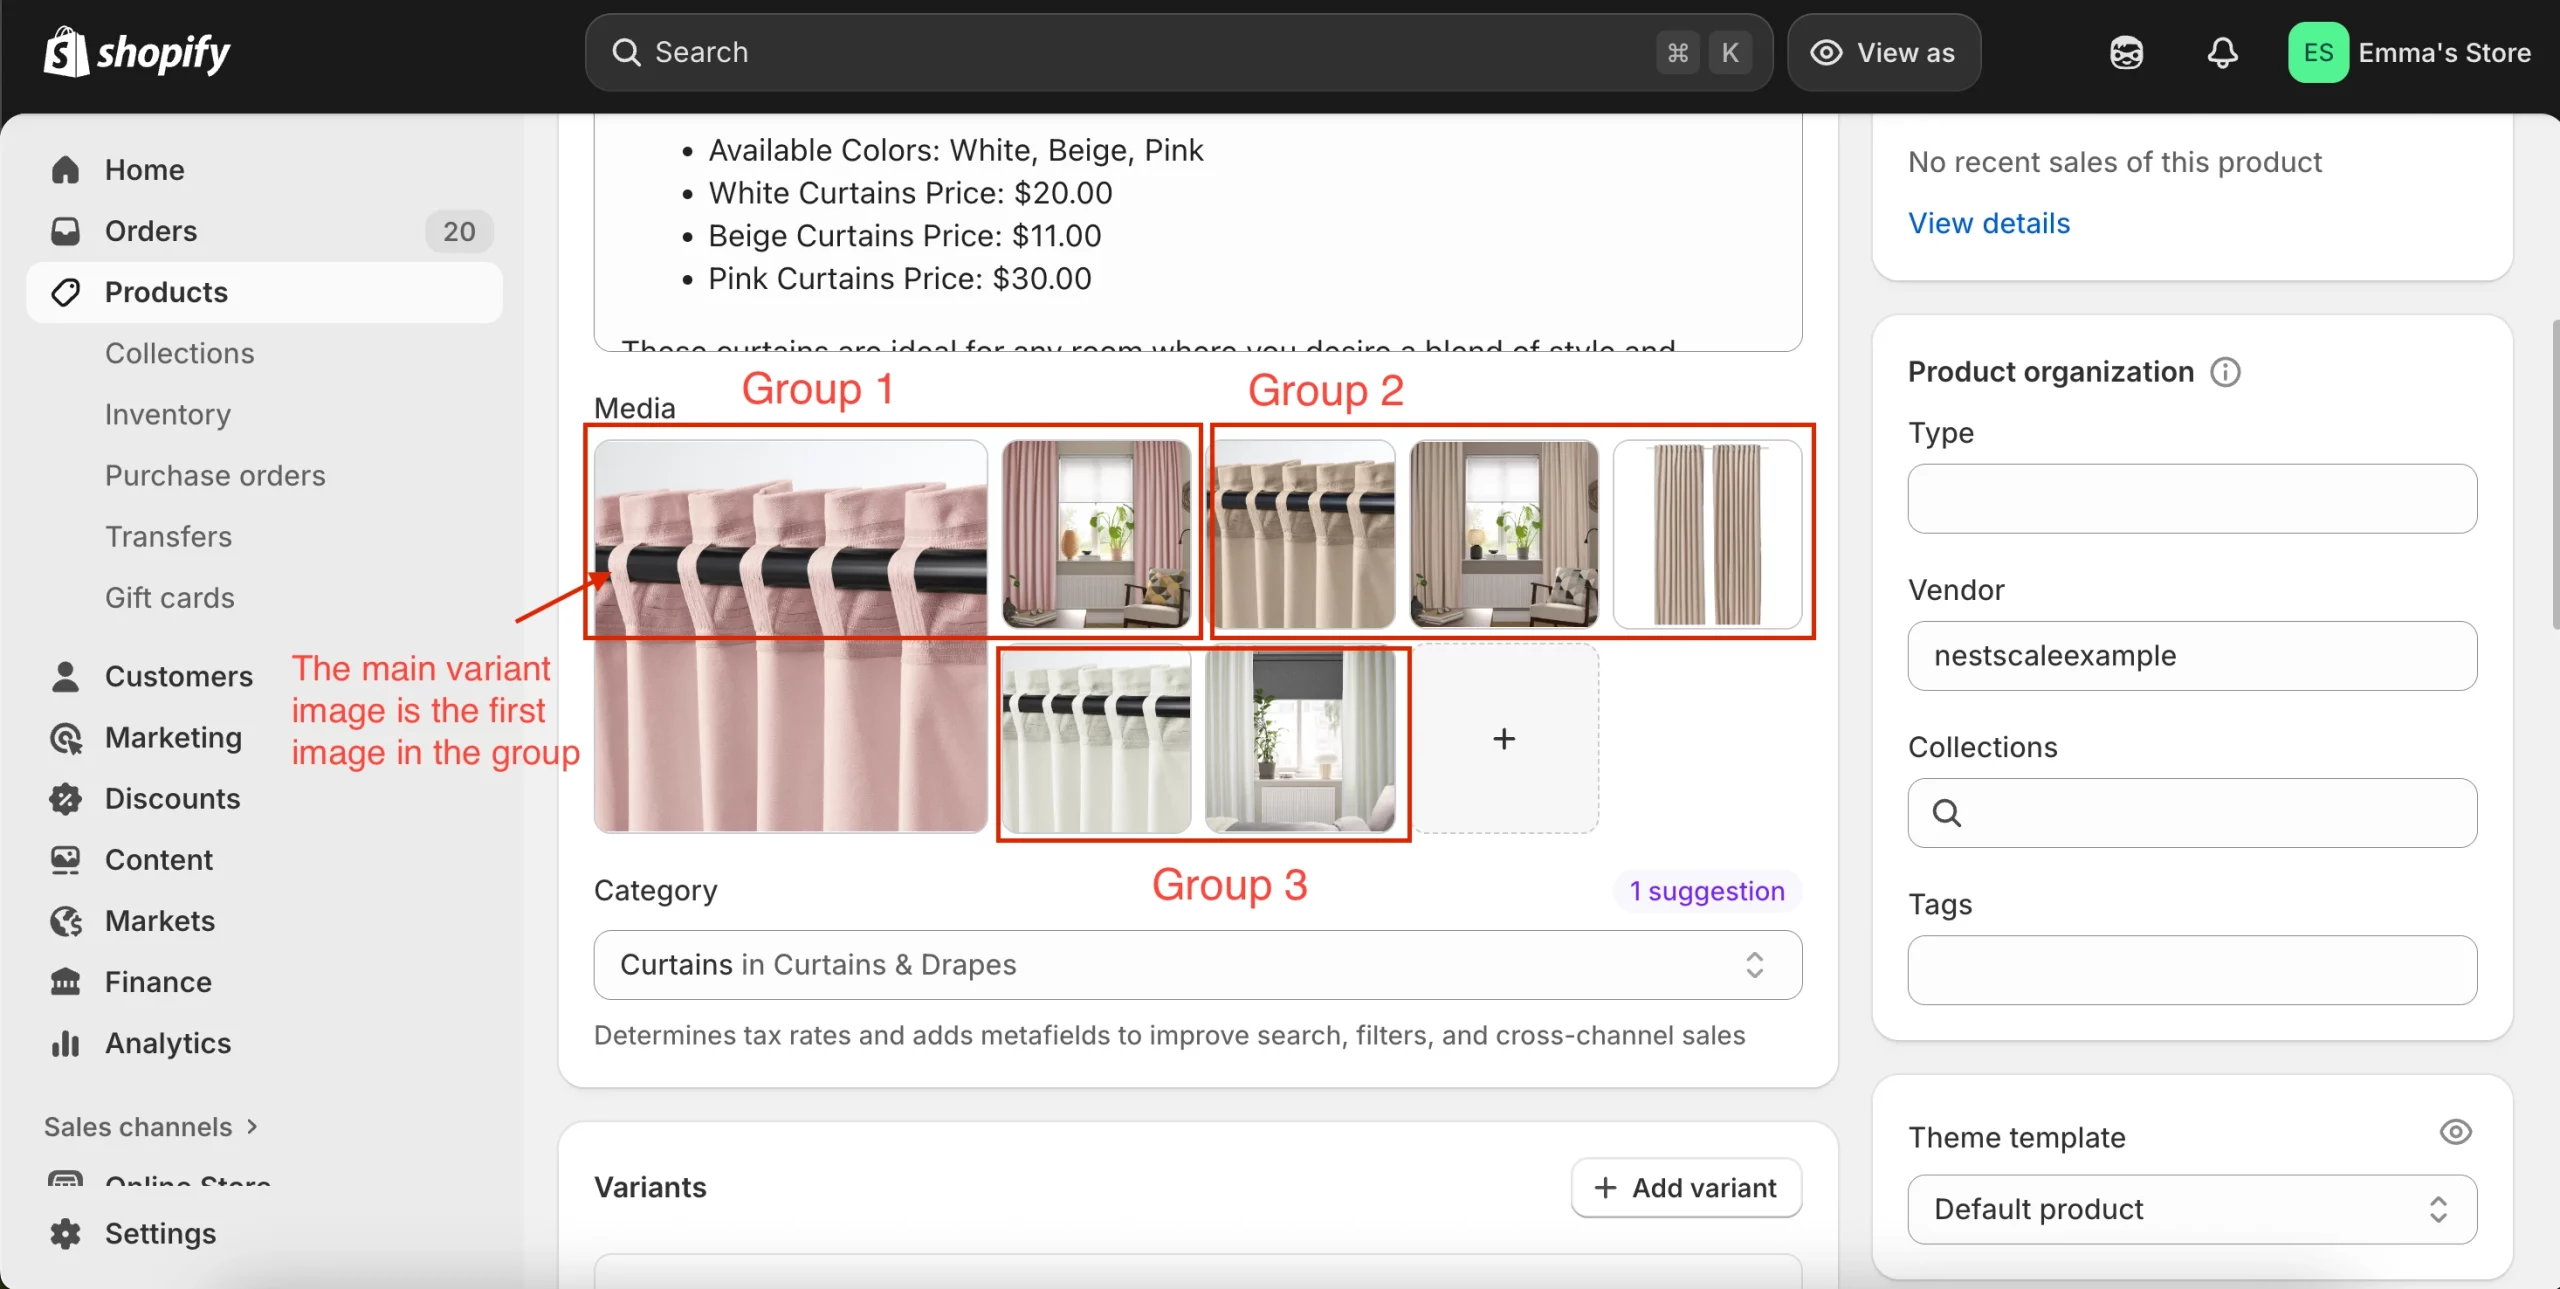
4. Make sure:
- Images from different variants aren’t mixed together.
- Each group starts with the main variant image.
5. Save your product.
6. Repeat this for any other products where you want auto-assignment to work.
Turn on variant image auto-assignment in the app
1. Go to NS Color Swatch Variant Images > Variant Image.
2. Click Theme Setting, select the theme you’re using, then turn on Enable auto-assignment. Confirm the update.
For example, if you’re using Horizon like in my example, just add that theme here.
Don’t see your theme listed? Message the support team through the chat bubble, they’ll help right away.
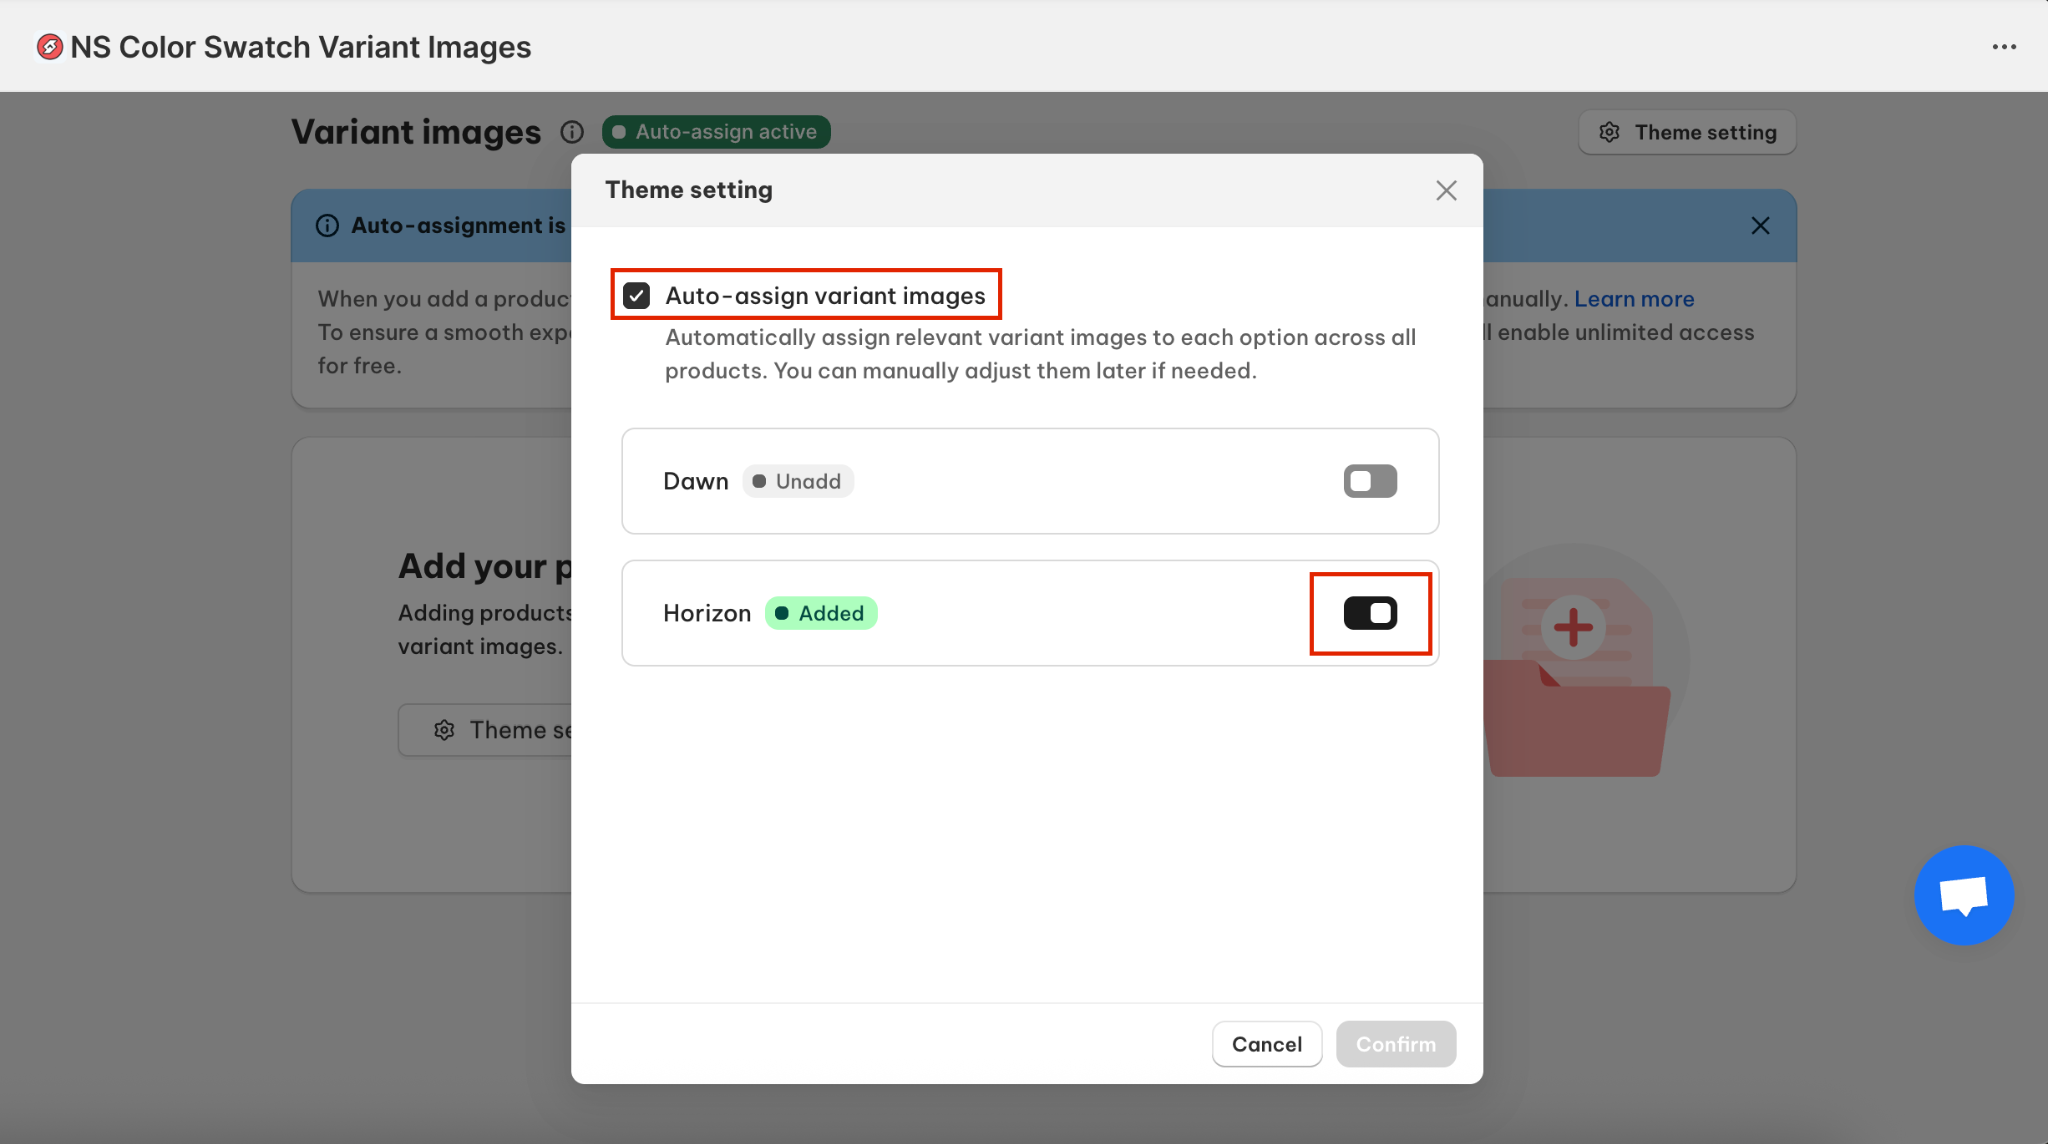
After turning on auto-assignment, you can still manually adjust variant images whenever you want. Just add the product inside the app and customize each variant individually.
Now, let’s look at the manual option.
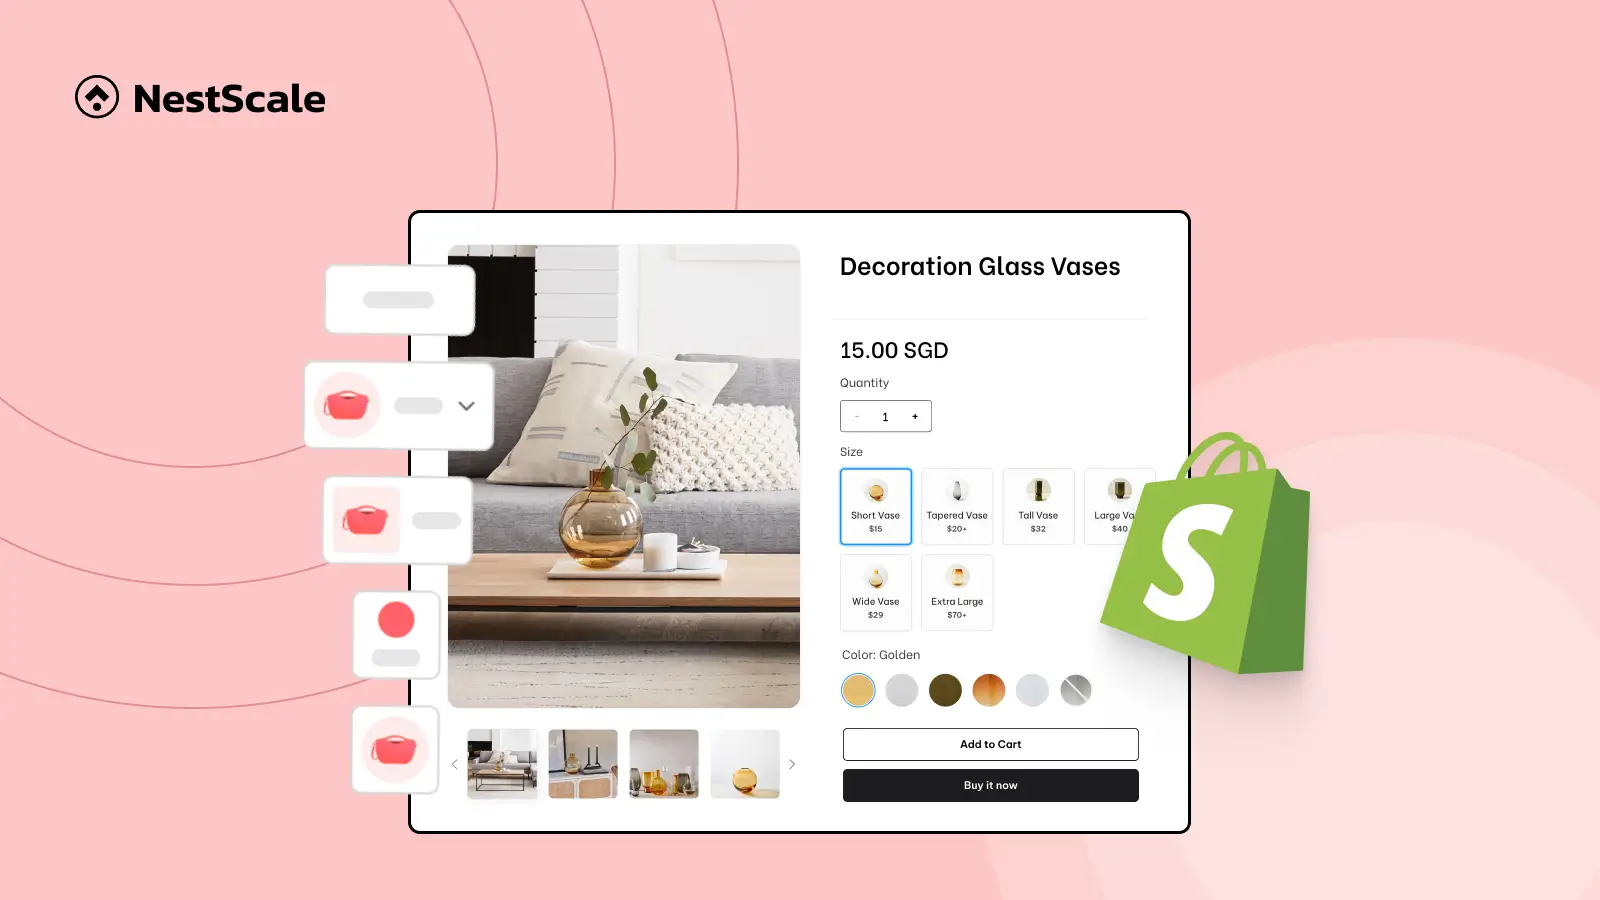
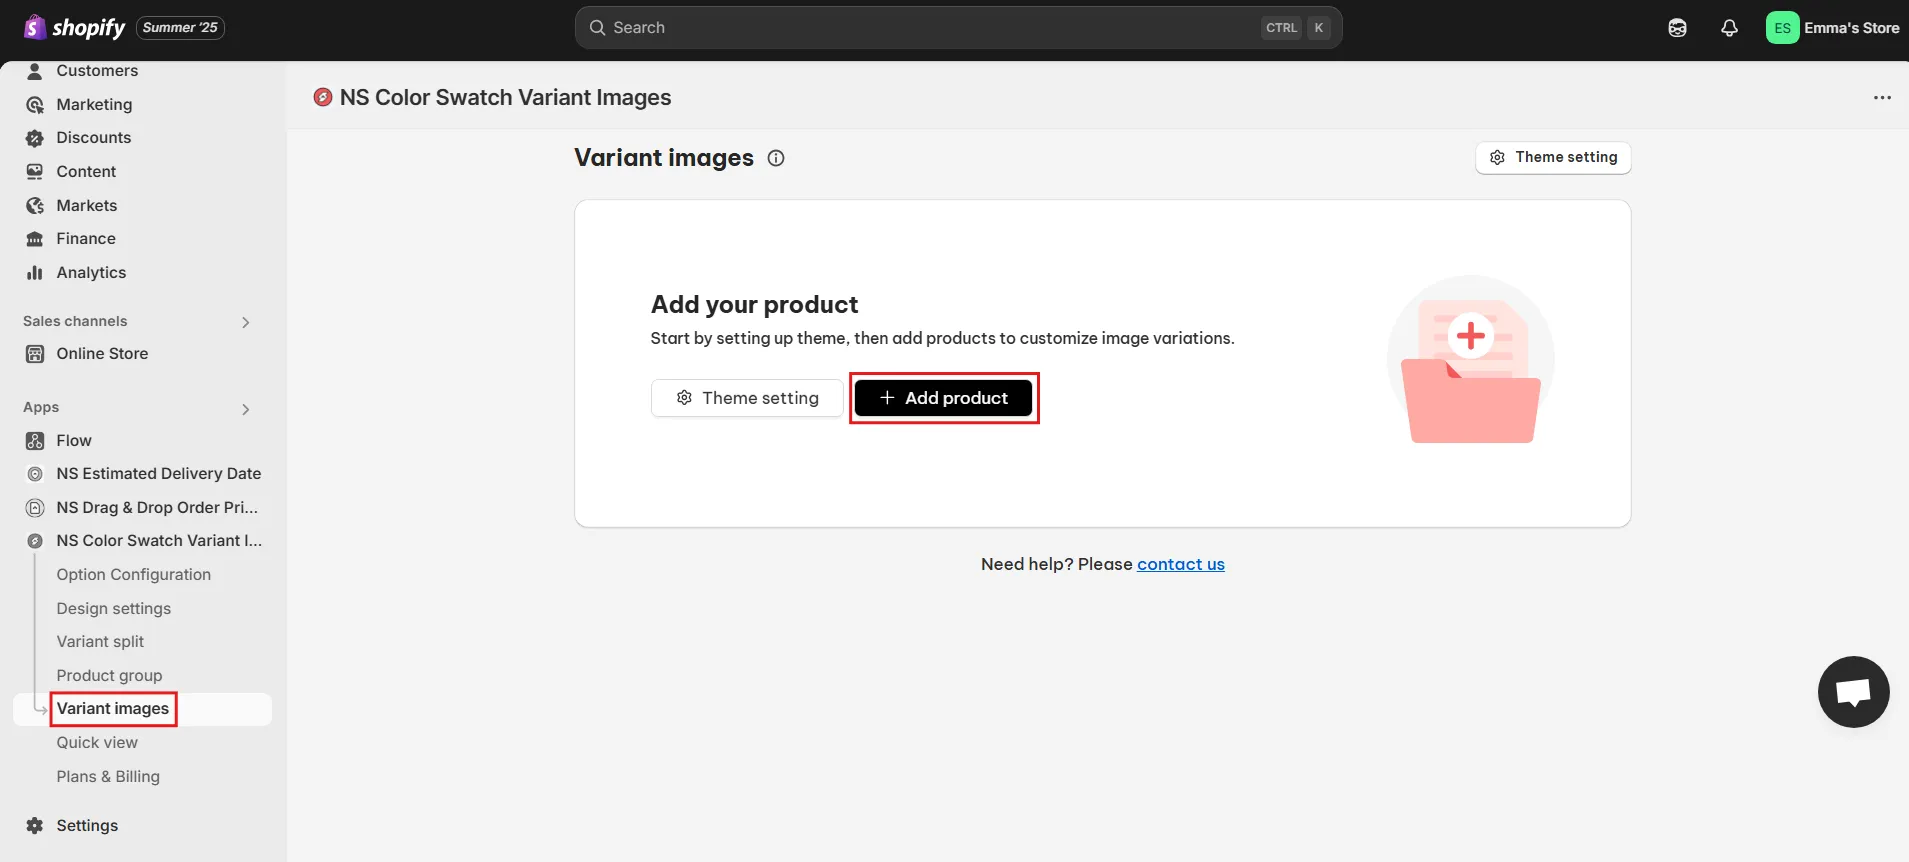
Step 3: Show/ hide specific variant images on selection
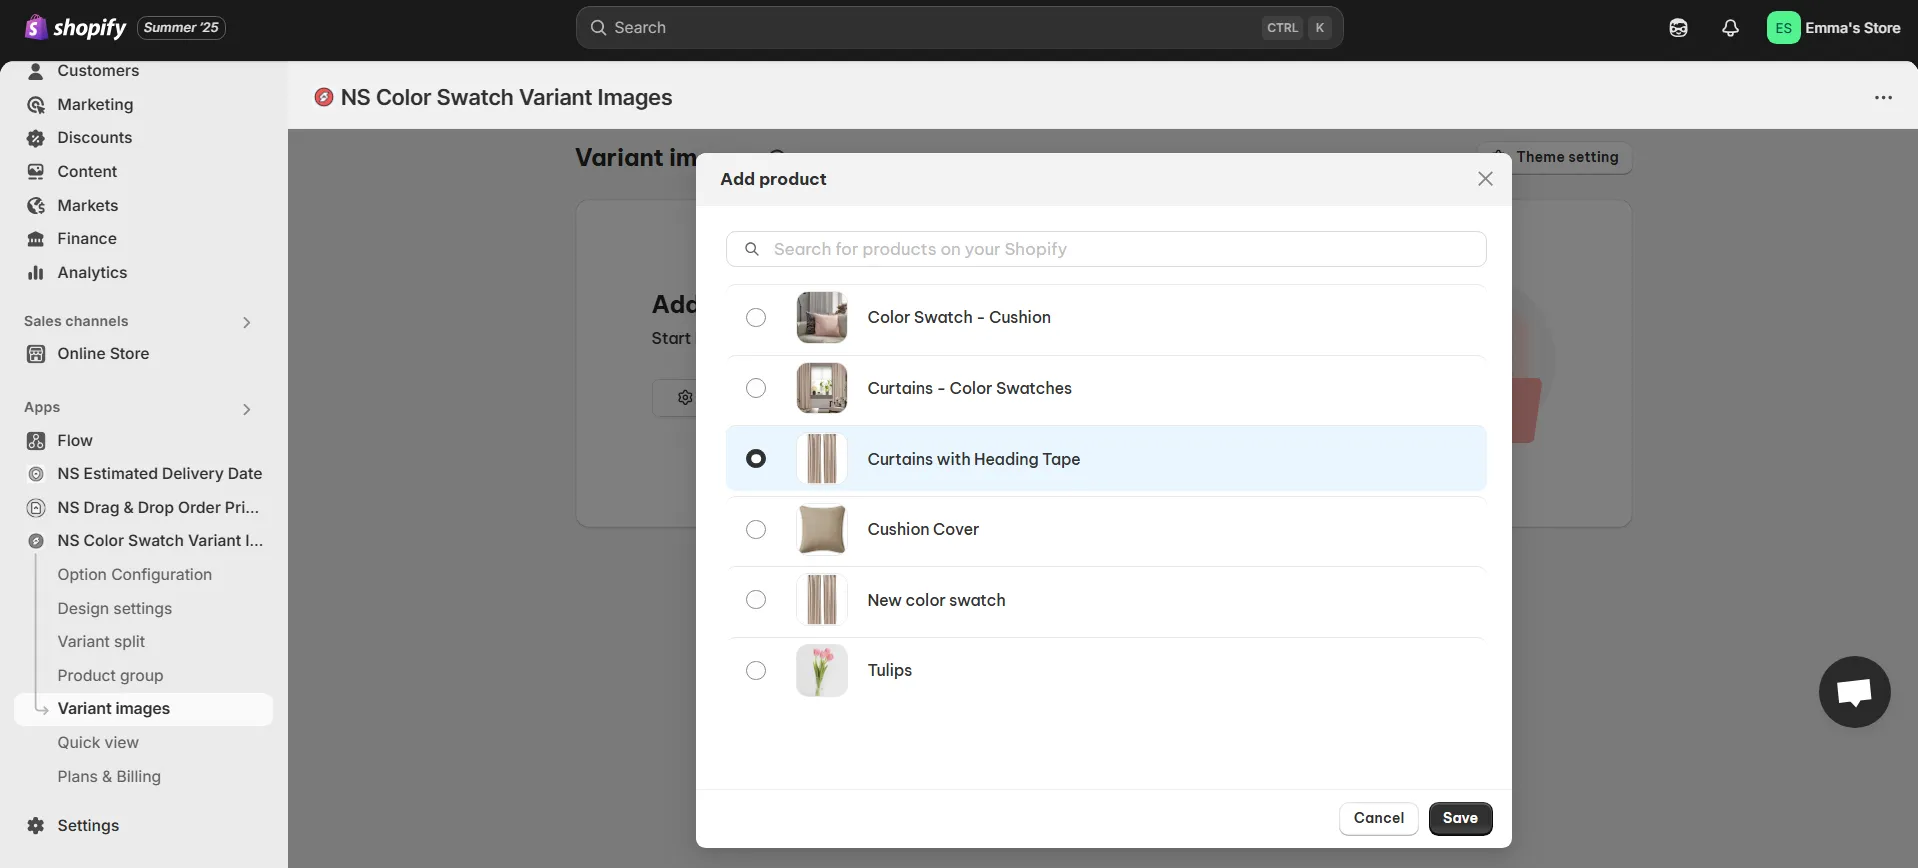
1. In Variant Images tab, click on “Add Product” to begin assigning images to each variant manually.
2. Choose the product you’d like to configure. Then, click Save.
4. Click the pencil next to the variant.
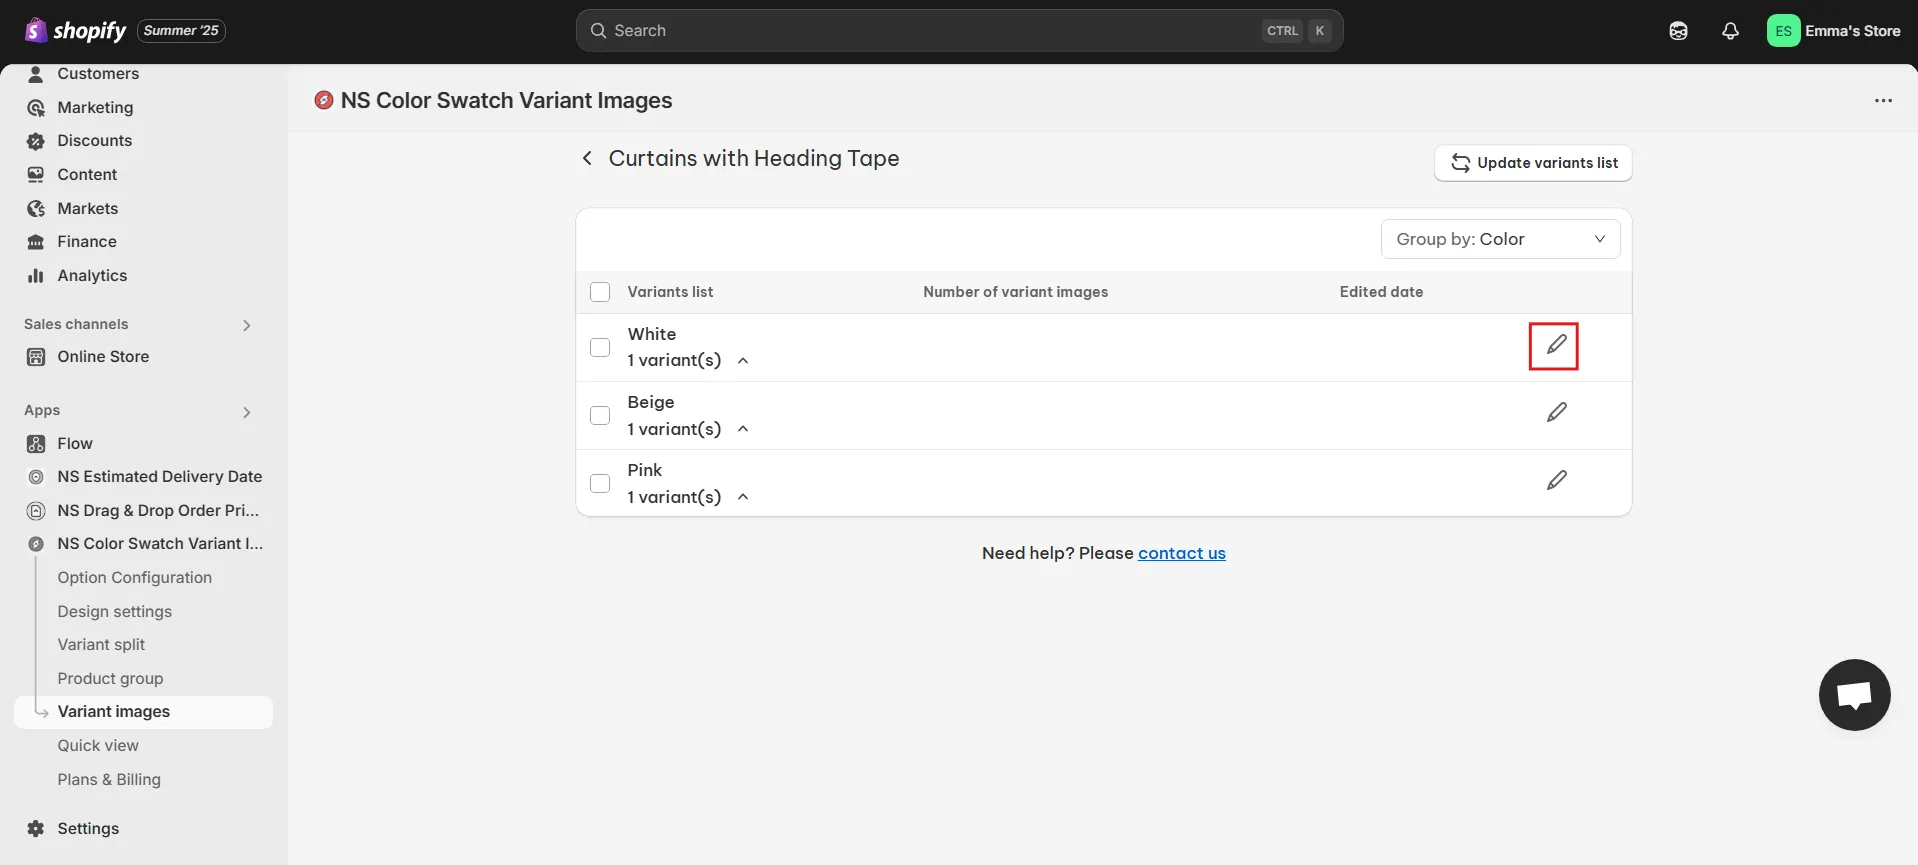
5. Select the images you’d like to show when customers click on that variant.
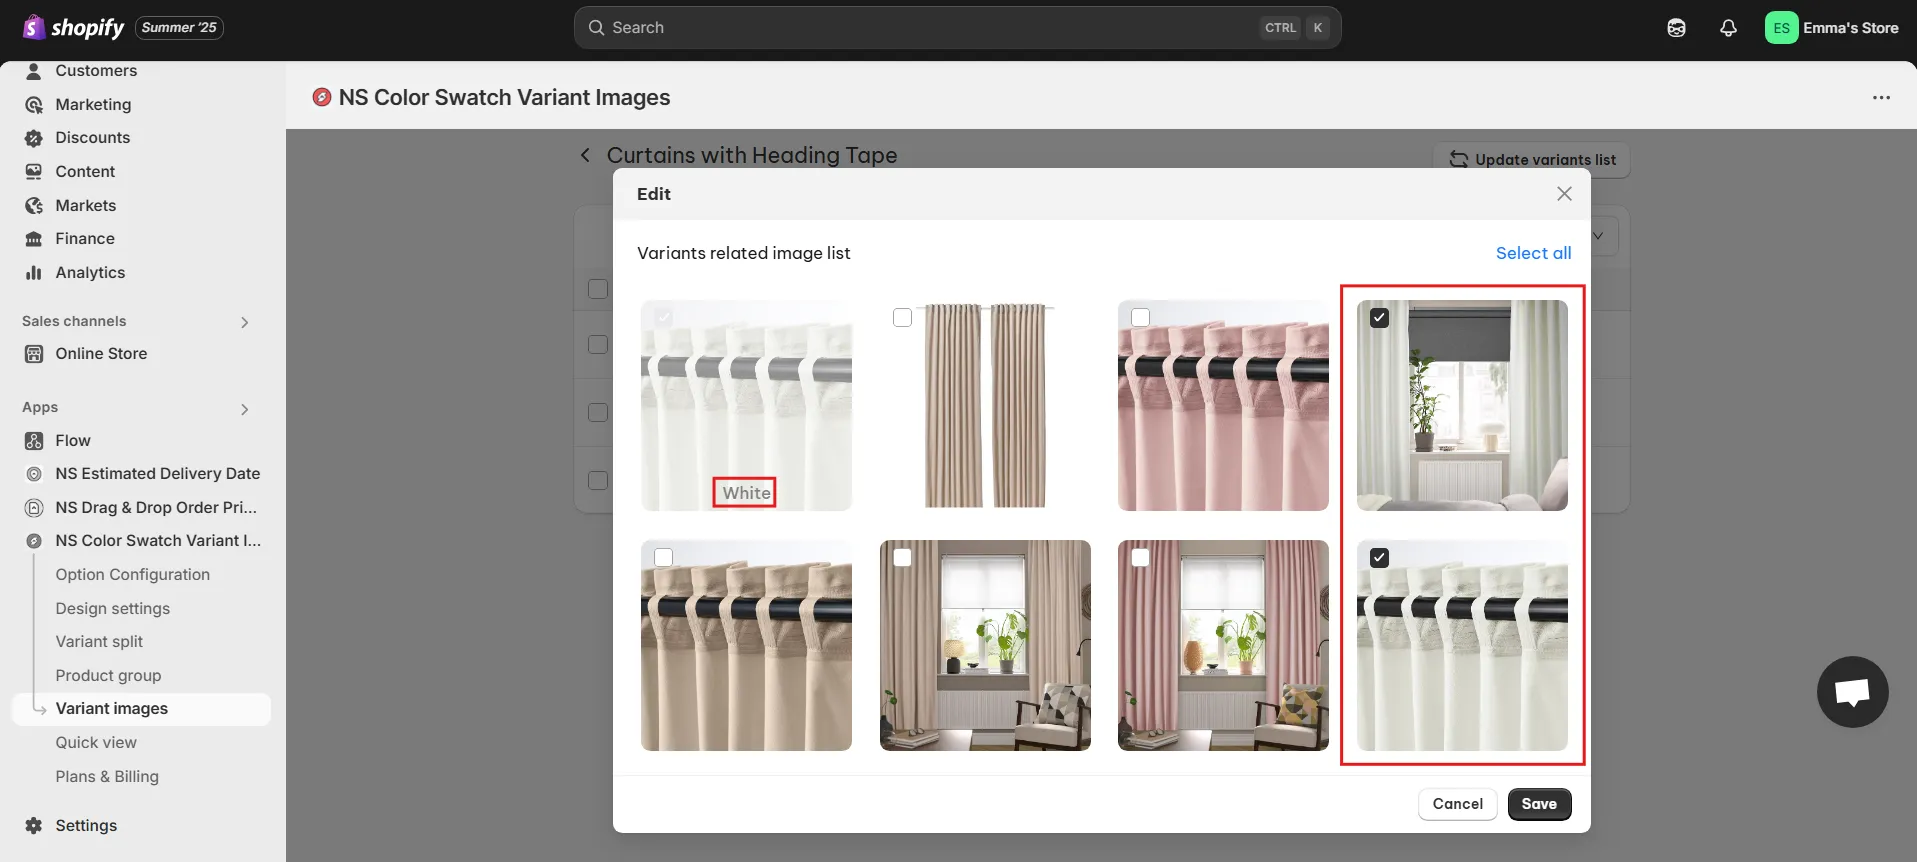
6. Click Save to publish your changes.
Repeat this for each variant until all of them display only their correct images. Once everything’s set, head to your store and check out your clean, variant-specific image gallery in action!
Video tutorial by NestScale – Show Only Relevant Variant Images on Shopify in 3 Minutes
Welcome to this quick 3-minute tutorial by NestScale! In this video, we’ll show you how to display only the relevant variant images for your products on Shopify, making your store more user-friendly and visually appealing. Let’s dive in!
👉 Related:
Shopify Conversion Rate Optimization: Best Strategies
How to Show Variants as Separate Products in Shopify? (2025 Tutorials)
FAQs
By default, Shopify doesn’t support changing product descriptions dynamically based on variant selection. However, you can achieve this in two ways:
– App-based method: Use apps like NS Color Swatch Variant Images that let you display different content for each variant.
– Custom code (advanced): You can use JavaScript to detect the selected variant and then change the description dynamically. This requires editing your theme files, so it’s best done by a developer.
There are to ways to hide a variant in Shopify:
– Temporarily: Set the variant’s inventory to 0 and uncheck “Continue selling when out of stock.” This will prevent customers from selecting it.
– Permanently: If you no longer want to offer a variant, go to the Variants section of your product and delete it. Alternatively, use apps that can help you with this if you want to conditionally hide variants based on user tags, location, or other logic.
To update or change product images:
1. Go to your Shopify Admin > Products
2. Click the product you want to edit.
3. In the Media section at the top, you can: Upload a new image
– Reorder images using drag-and-drop
– Delete old images by clicking the trash icon
4. Click Save when you’re done.