Are you finding workarounds to show the estimated delivery date in Shopify checkout? It’s challenging for most merchants as Shopify offers limited options for showing and customizing the delivery message in checkout. So, in this guide, together we’ll try some tips to fix that. Take a quick look at what we’re about to share:
- How to display and customize an accurate and clear EDD message in checkout without coding?
- How to set the EDD message flexibly without using automated delivery dates from Shopify?
- How to configure the delivery time to factor in the order processing/ handling time of your store?
Step 1: Install and set up NS Estimated Delivery Date
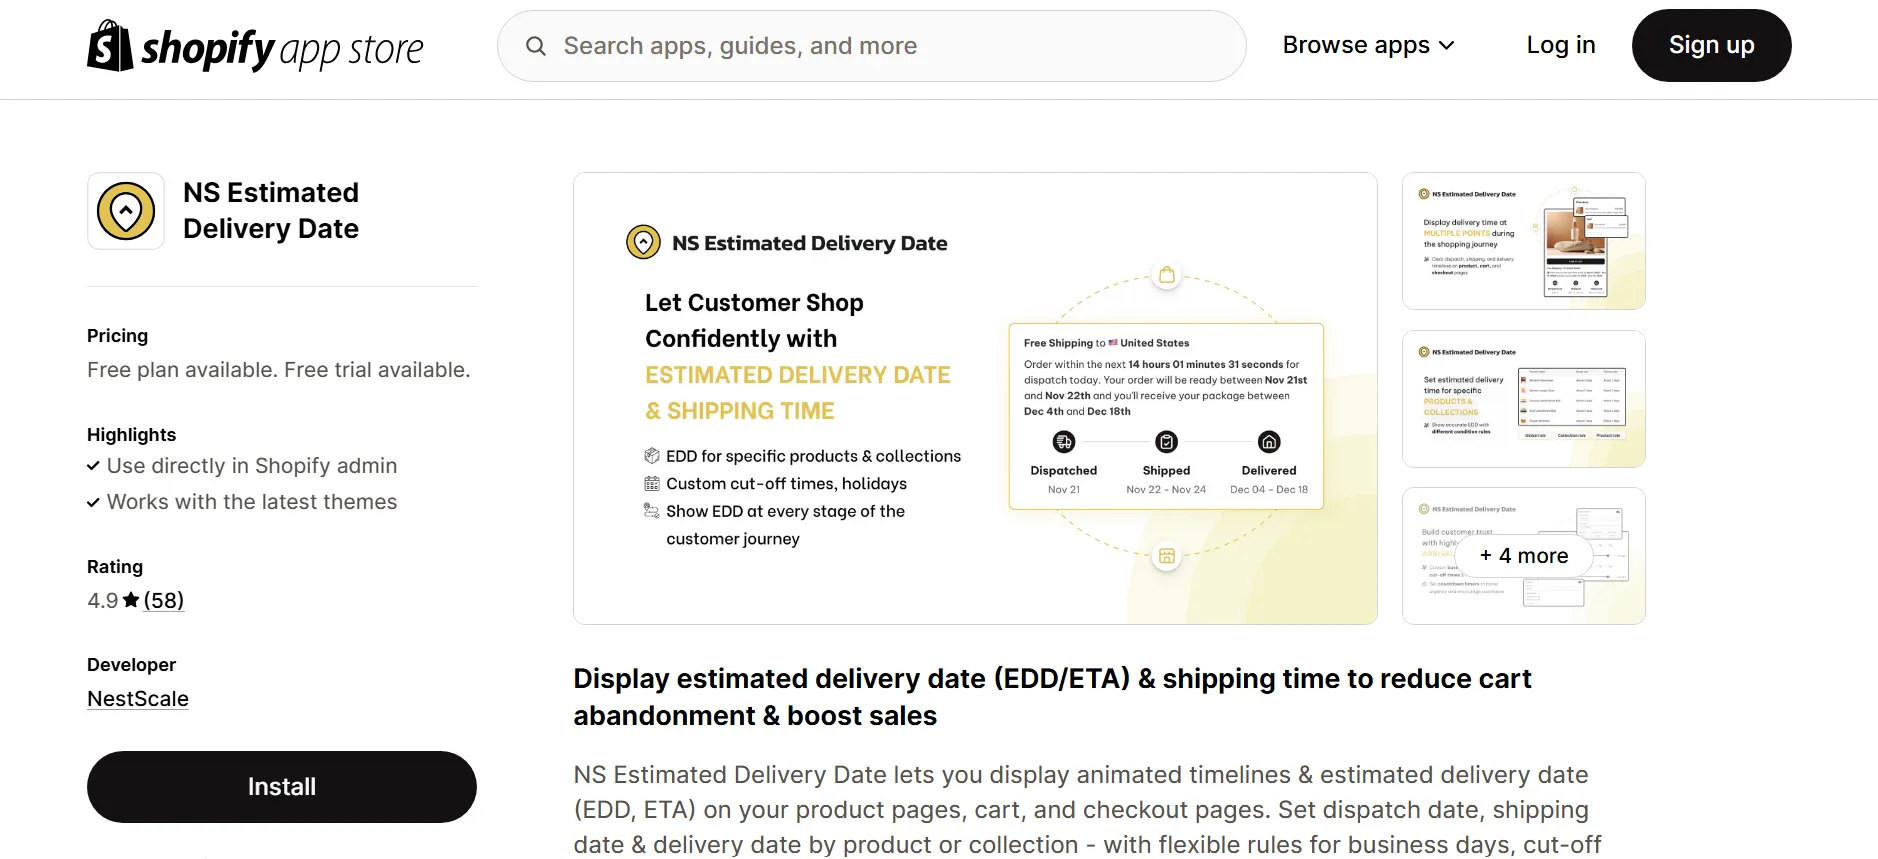
1. Visit the Shopify App Store, search for NS Estimated Delivery Date, and install the app.
2. Open the app and follow the onboarding instructions.
3. Click Add block to begin setup.
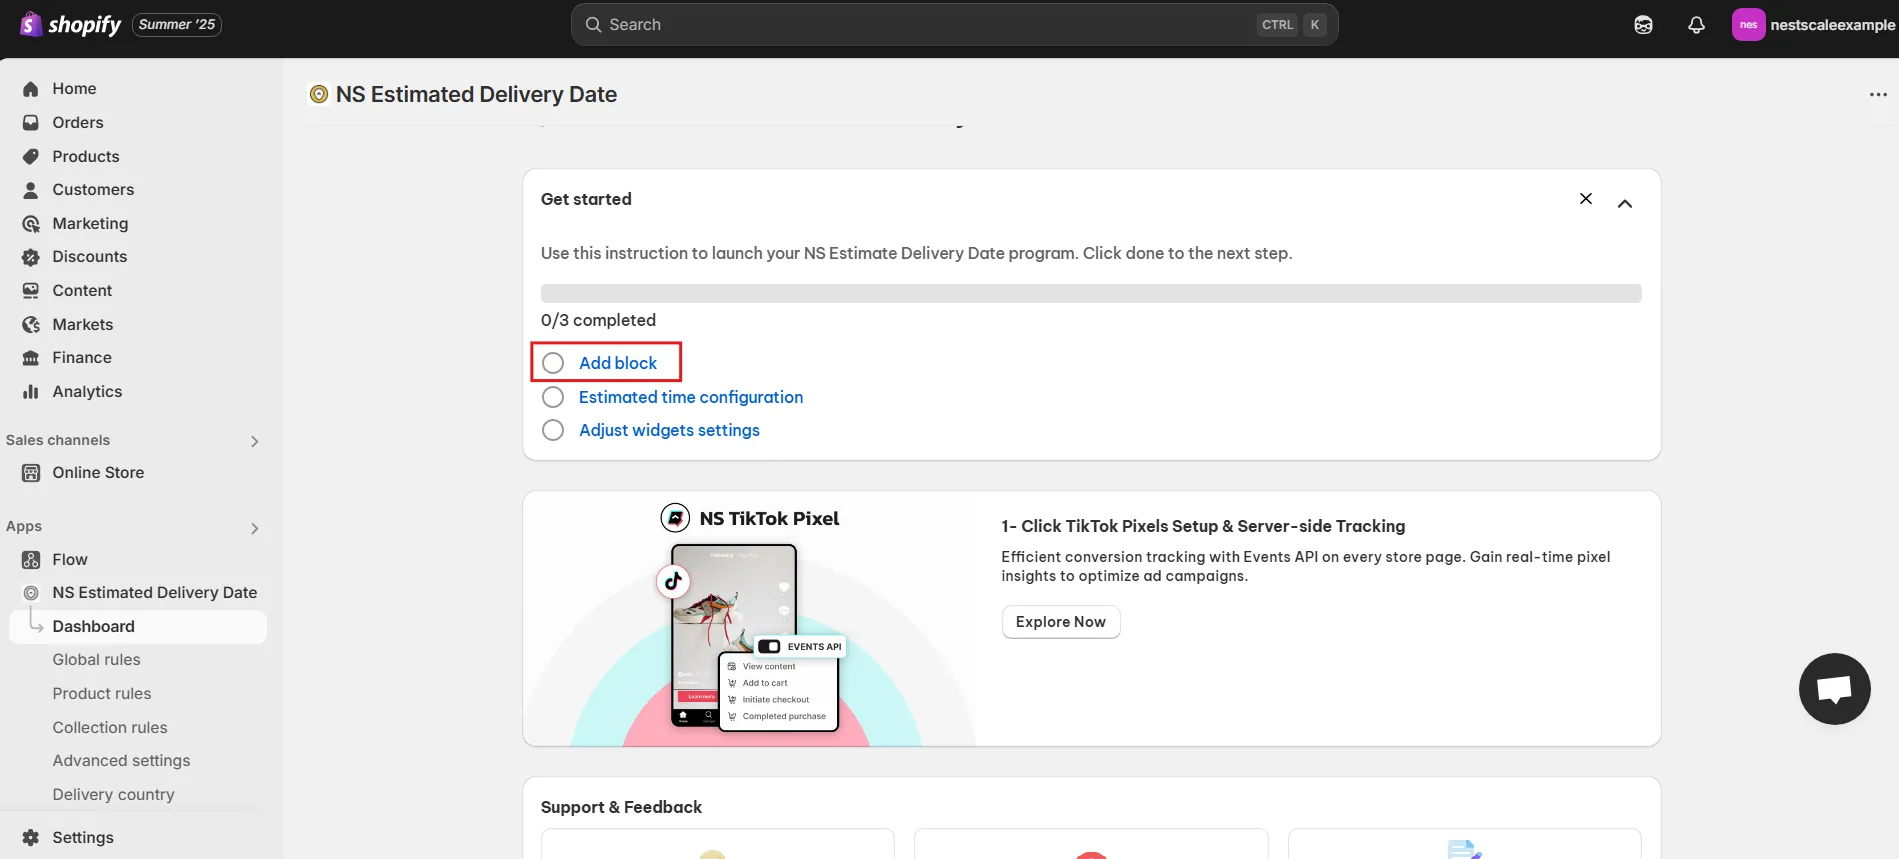
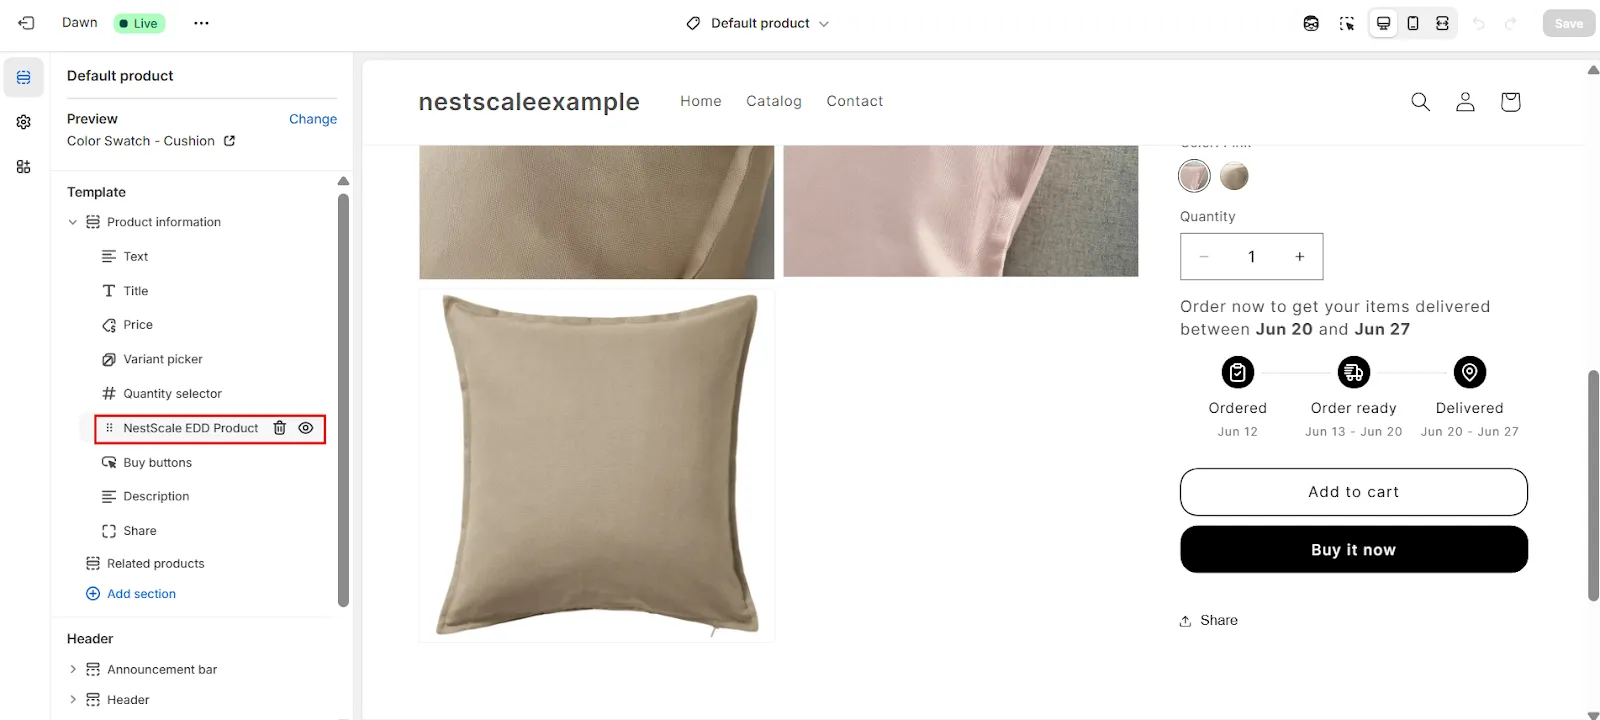
4. You’ll be redirected to the product page customization page:
- Go to Add Section > Apps > NS Estimated Delivery Date.

5. Click Save to apply the changes.
Step 2: Customize the EDD widget on product pages
Note: To display the estimated delivery date (EDD) in checkout, you must first configure EDD on your product pages.
With NS Estimated Delivery Date, you can set EDD for specific products or collections to ensure the EDD message reflects exactly what’s been configured for each item. This helps increase accuracy and prevents setting false customer expectations.
But to make it simple, in this guide, we’ll use the Global Rule (applies to all products) to help you follow along more easily.
Customize your message
1. Return to the app and navigate to the Global Rules tab.
2. Enter a custom message for your delivery estimate that matches your brand’s voice.
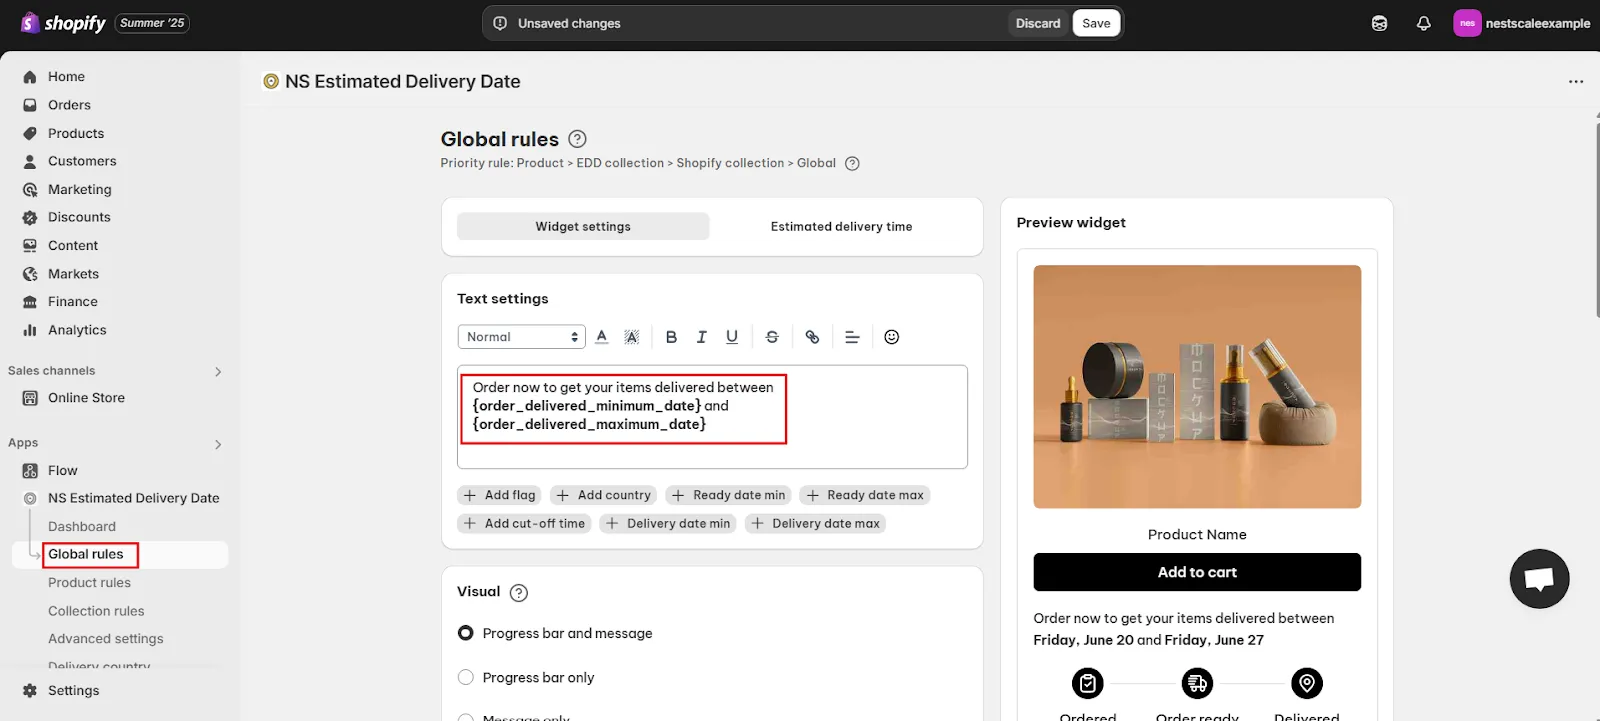
3. Enhance the message by adding dynamic elements like:
- Country flags
- Visitor country
- Countdown timer (cut-off time)
- Other contextual details
💡 The widget can include both a text message and a delivery timeline.
4. Under the Visual section, choose how the EDD should appear:
- Message only
- Timeline only
- Both (recommended for combining clarity and branding)
5. Adjust visual elements such as:
- Icons
- Text labels
Date format - Layout spacing via the Padding section
💡 Use the Preview tab to see changes in real time.
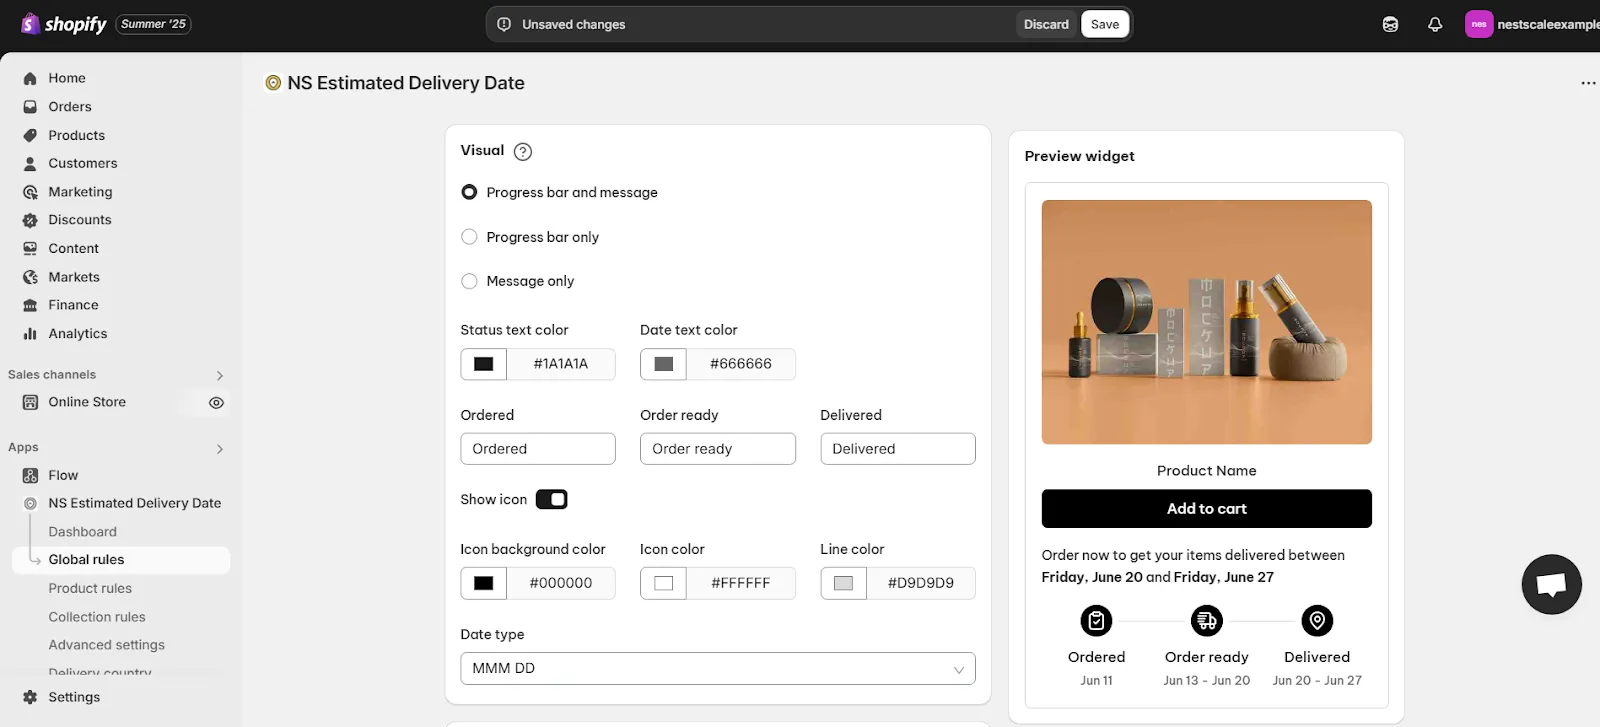
6. Under Date Format, select how you want dates to appear (e.g., DD/MM/YYYY).
7. Under Date Format, select a suitable format for displaying delivery dates.
8. From the Language dropdown, choose the display language for your EDD.

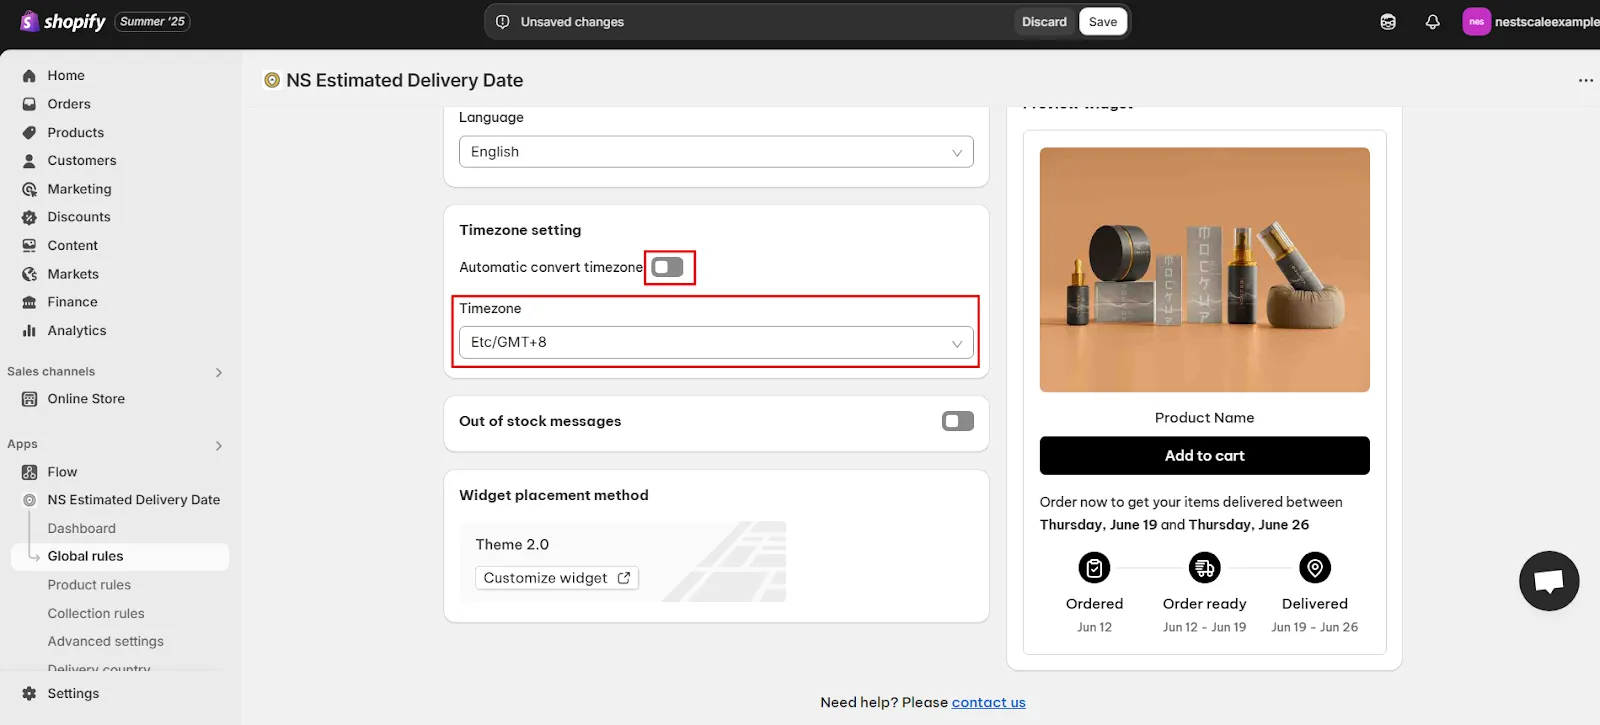
Configure timezone settings
Under Timezone Settings, choose how delivery times are displayed:
- Toggle on Automatic convert timezone for the EDD to adjust based on the visitor’s IP location.
- Or choose a fixed timezone for a consistent display across all regions.
Display a message for out-of-stock products
1. Create a custom out-of-stock message to notify customers when:
- A product will be restocked soon
- Pre-orders are available
- Fulfillment may take longer
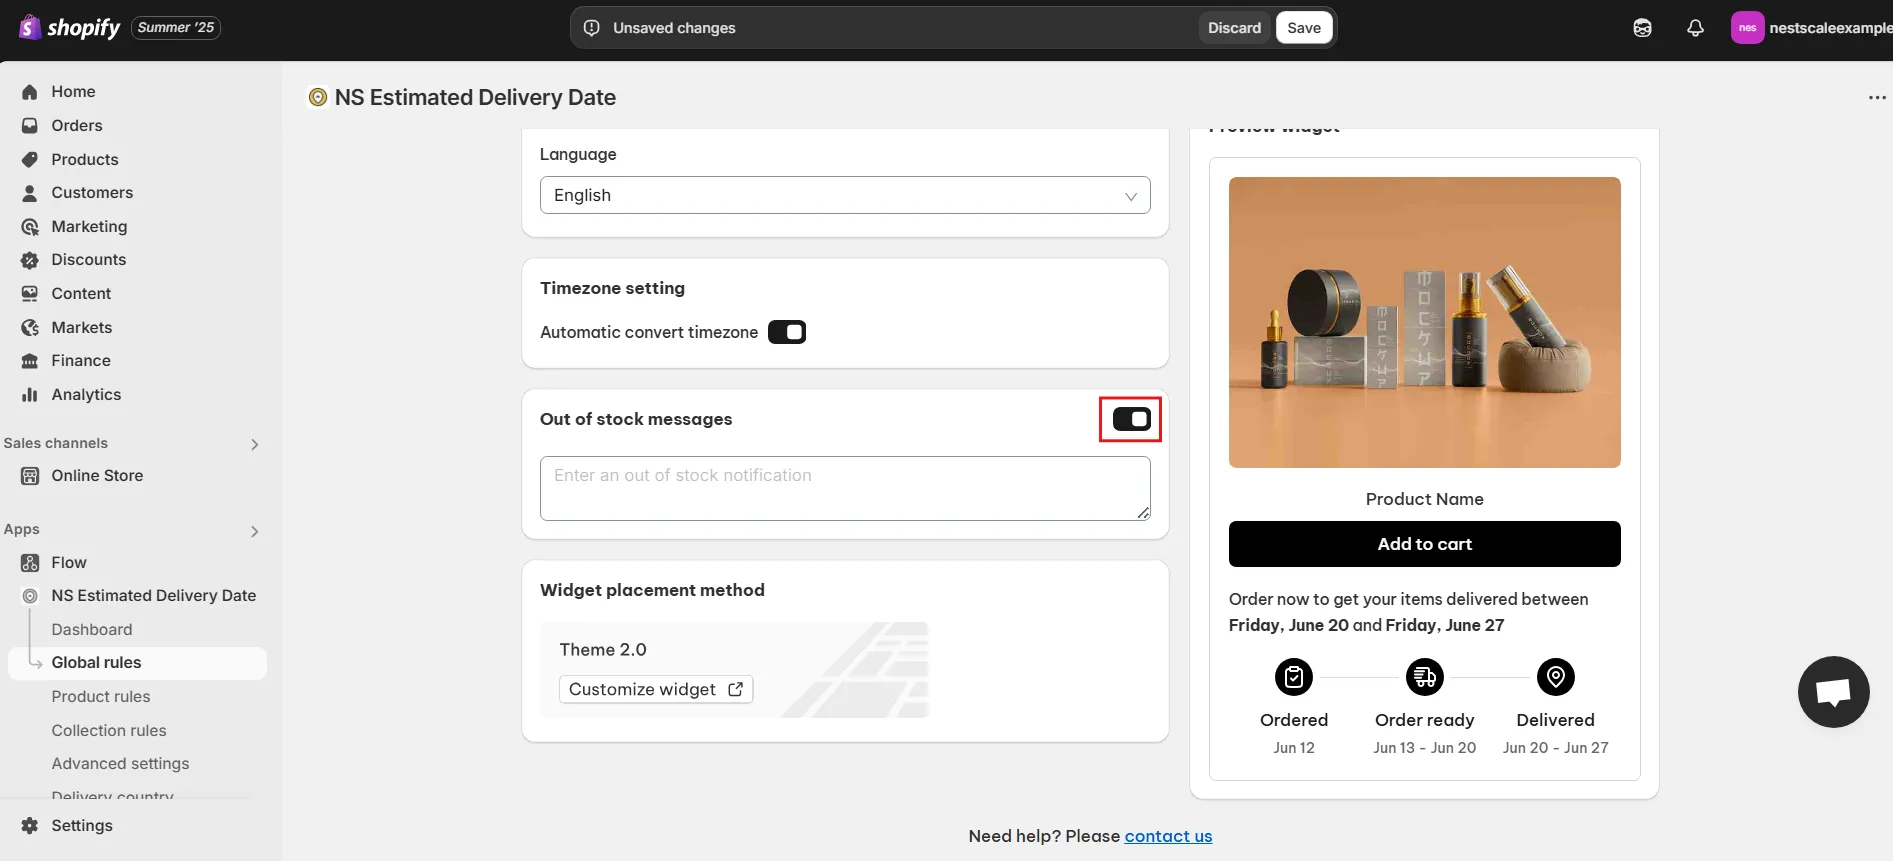
2. Click Save after setting the message.
Step 3: Set up estimated delivery timing
Set fulfillment time
1. Go to the Estimated Delivery Time section.
2. Define your delivery time range based on actual fulfillment and shipping timelines.
3. Check the box to exclude weekends or non-working days from the calculation.
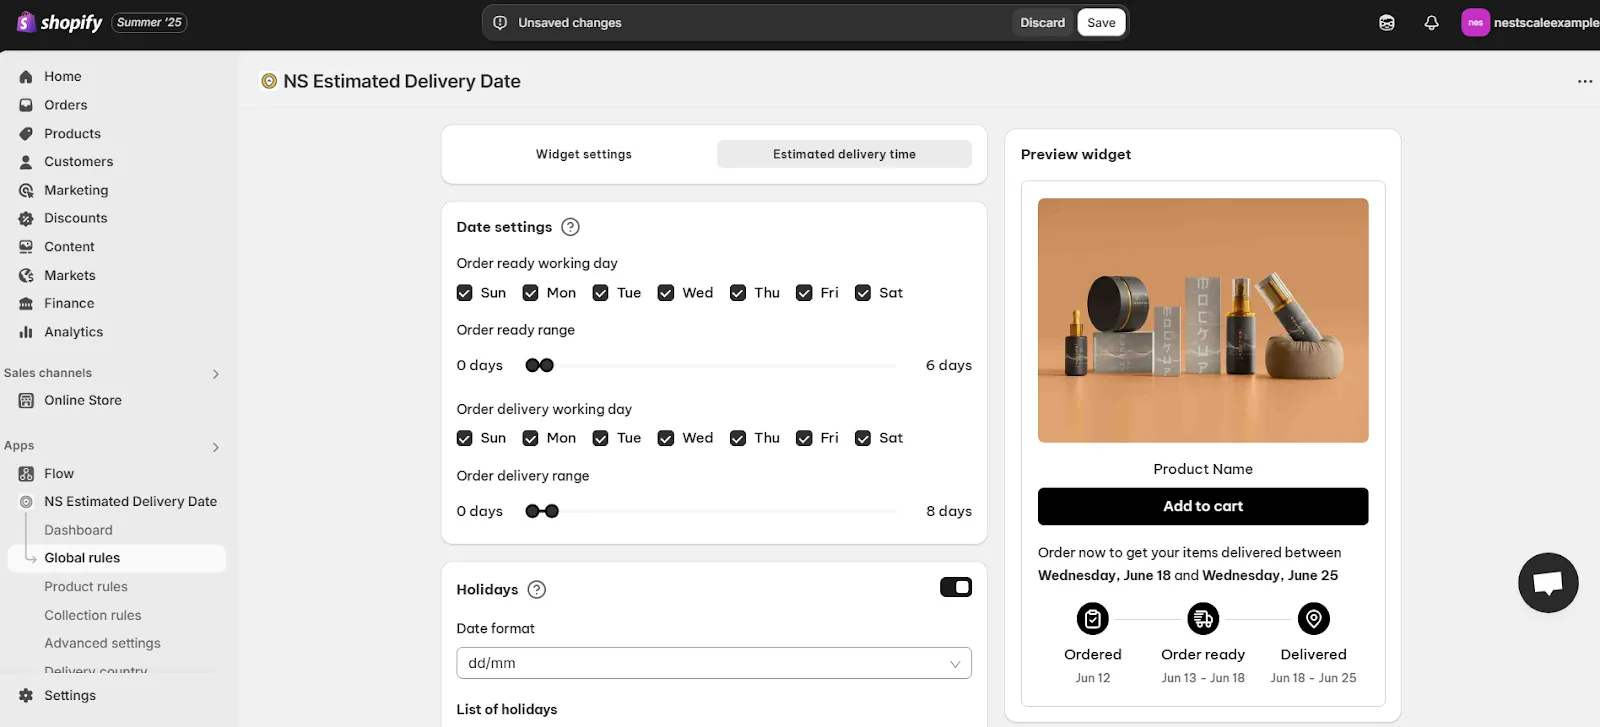
Exclude holidays
1. Navigate to the Holidays section and turn the feature ON.
2. Click Add Date, then:
- Enter the holiday name
- Select the date
- Click Done
💡 The system will skip these dates automatically when calculating estimated delivery.


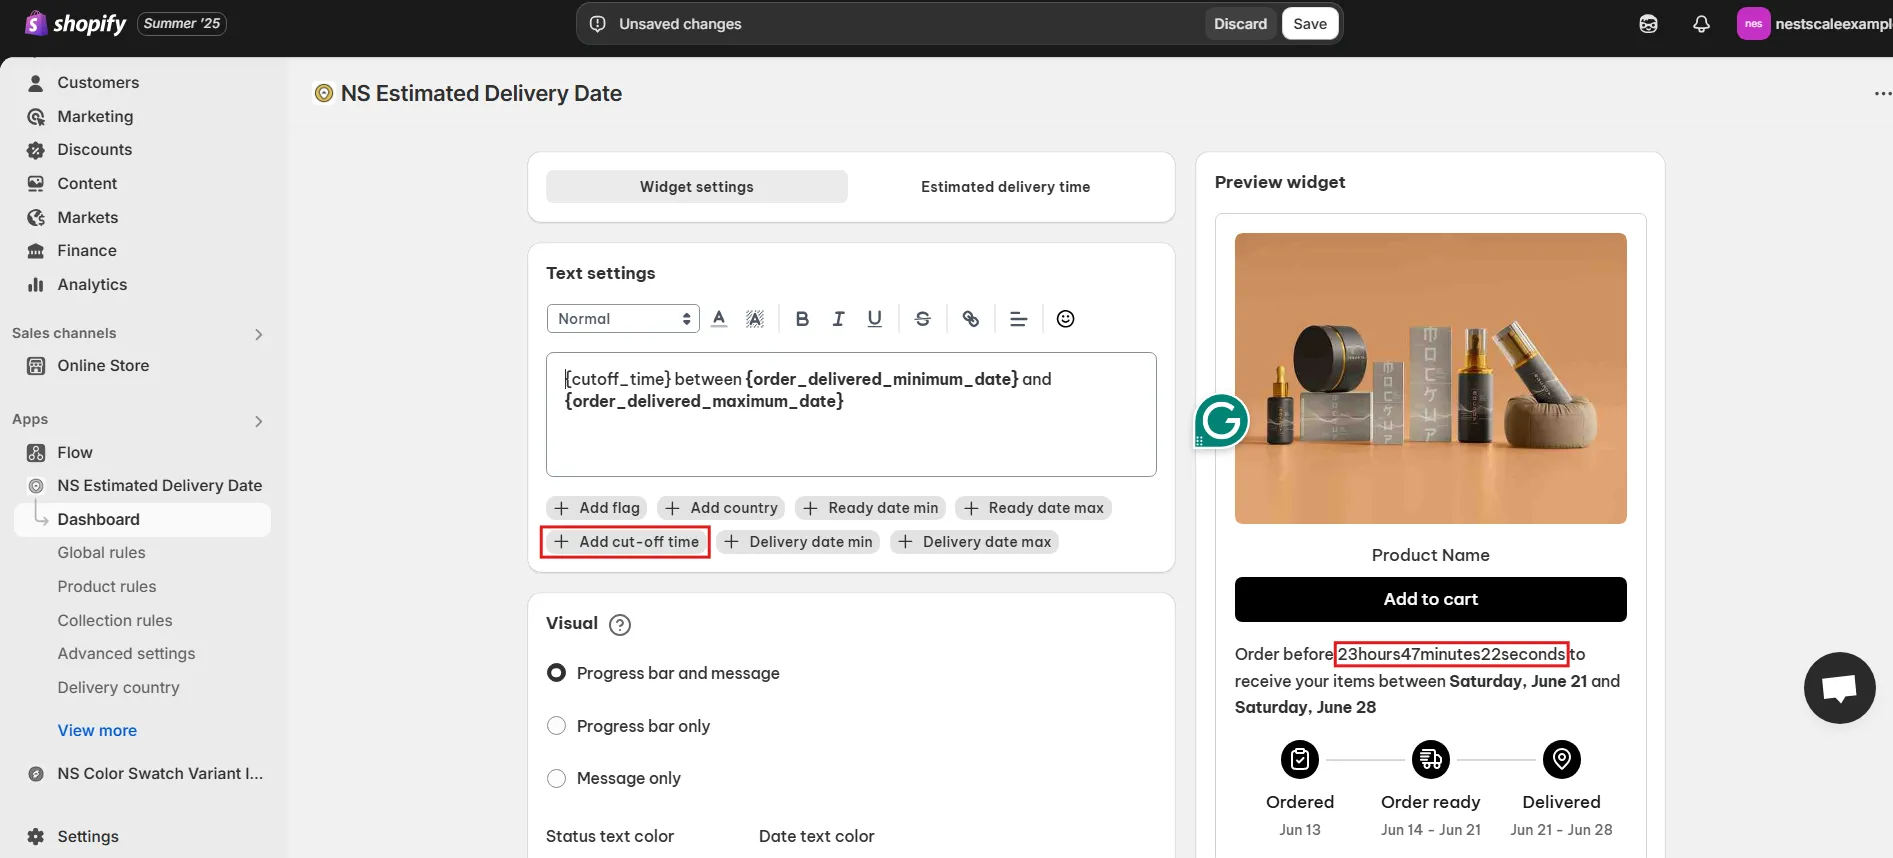
Set cut-off times
1. In the Cut-off Times section, configure a countdown timer to create urgency.
2. Customize the message and select your preferred time format.
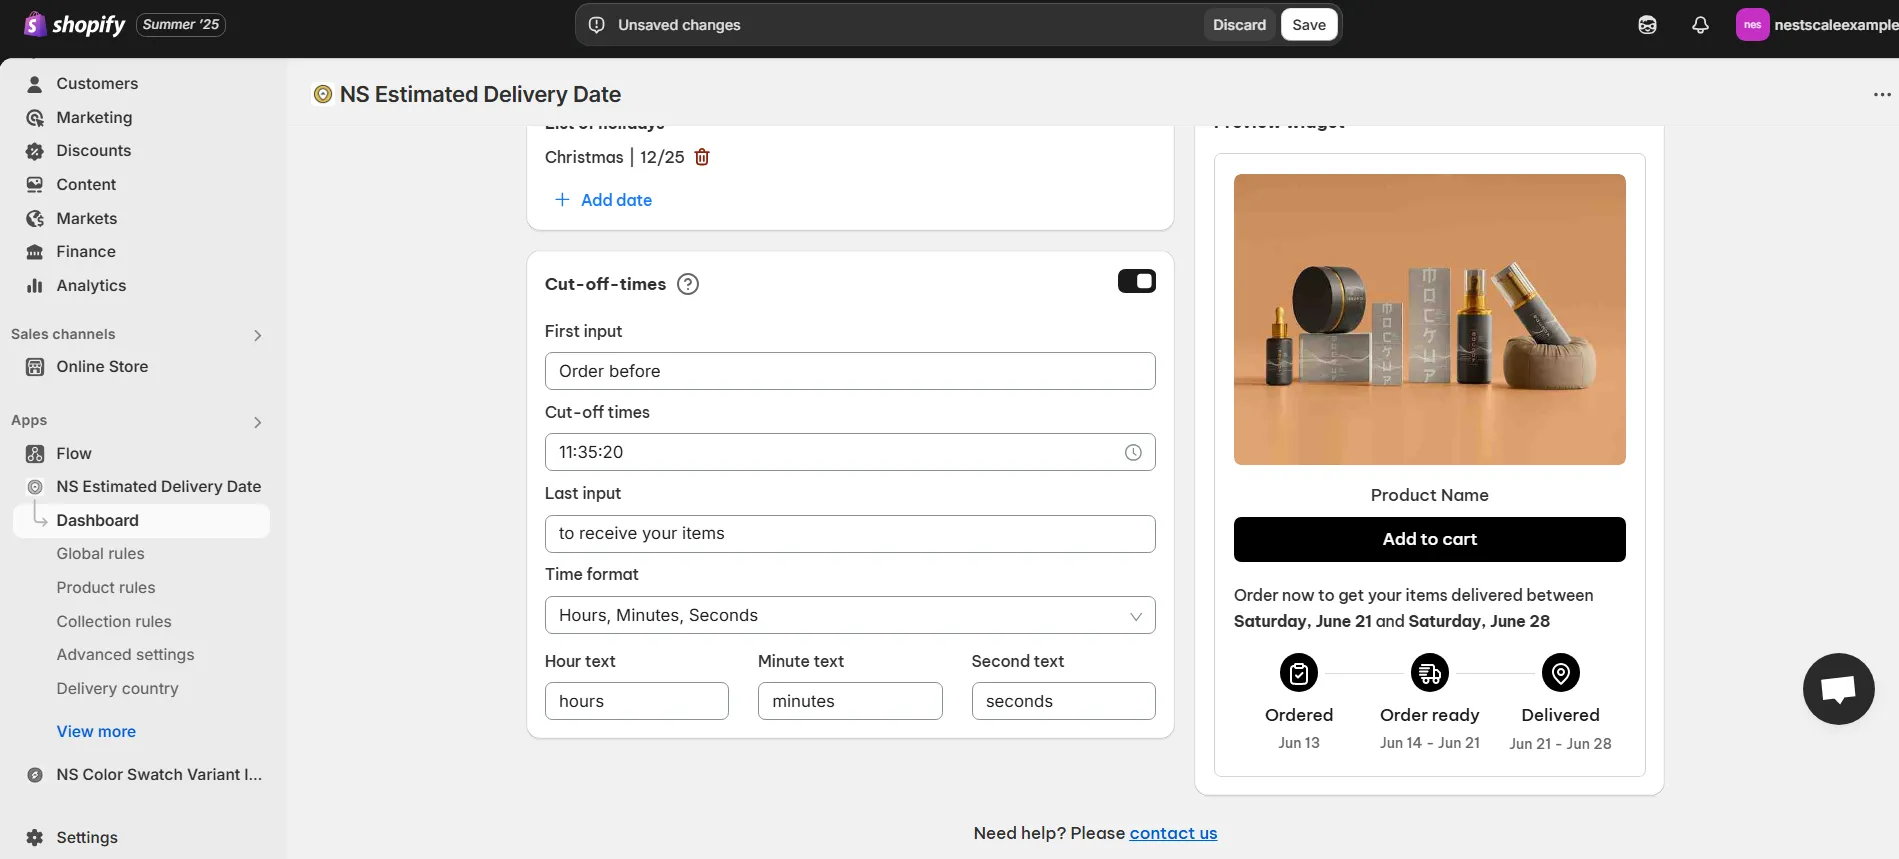
3. Click Save to apply.
3. Return to the widget settings tab, click Add Cut-off Time, and save again to finalize.
Step 4: Show EDD in Shopify checkout
Once you’ve completed your EDD setup on product pages and configured delivery timing, you can enable it on the cart and checkout pages.
🔔 Important: The delivery estimate shown at checkout will use the same timing configured for the product page. Be sure your product page setup is accurate before enabling this feature.
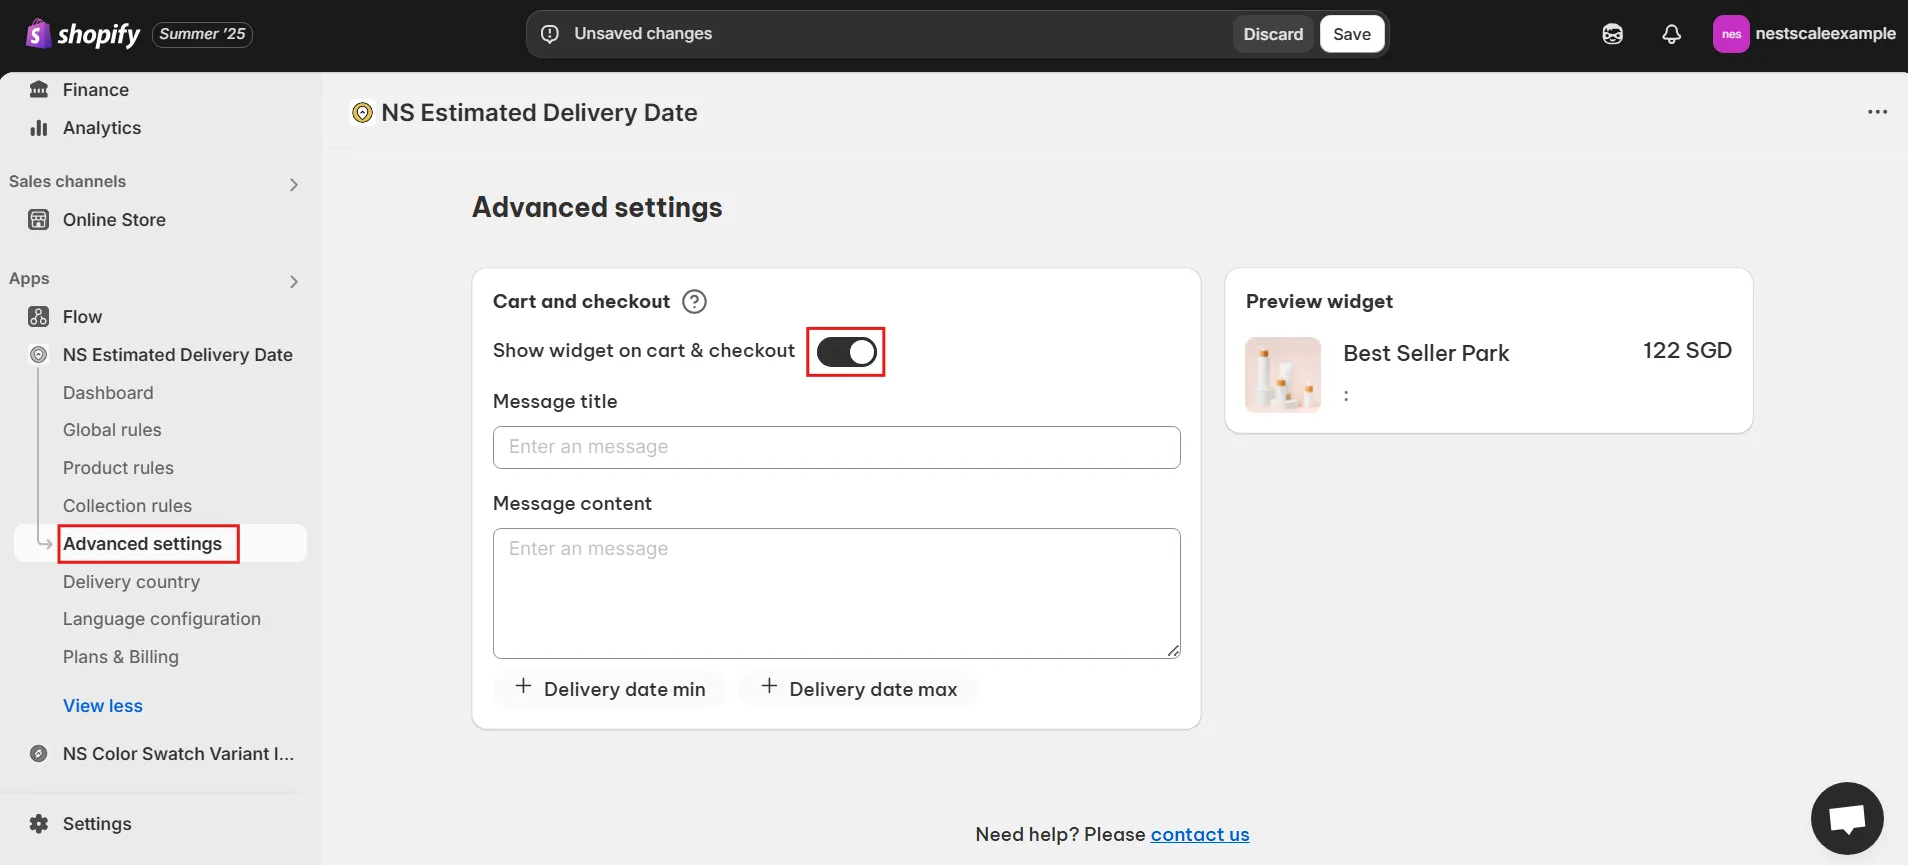
Enable EDD in cart & checkout
1. Go to the Advanced Settings tab in the app.
2. Toggle on Show widget on cart & checkout.
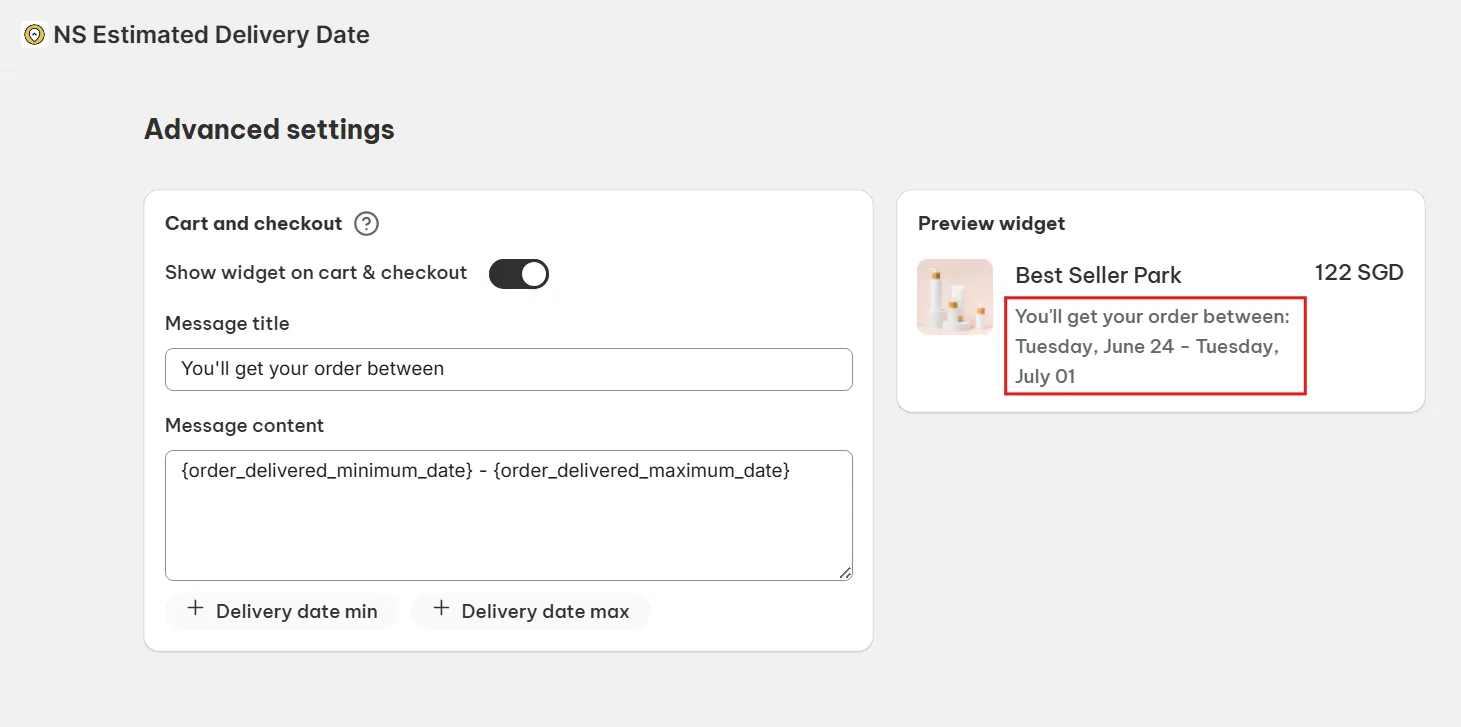
Customize checkout message
1. Edit the message displayed in the cart/checkout area.
2. This message appears under each product in the order summary.
3. Since space is limited, you should keep the message:
- Short and clear
- Focused on the delivery time range
- Easy to scan
💡 Use the Preview tool to check how the message will look in checkout.
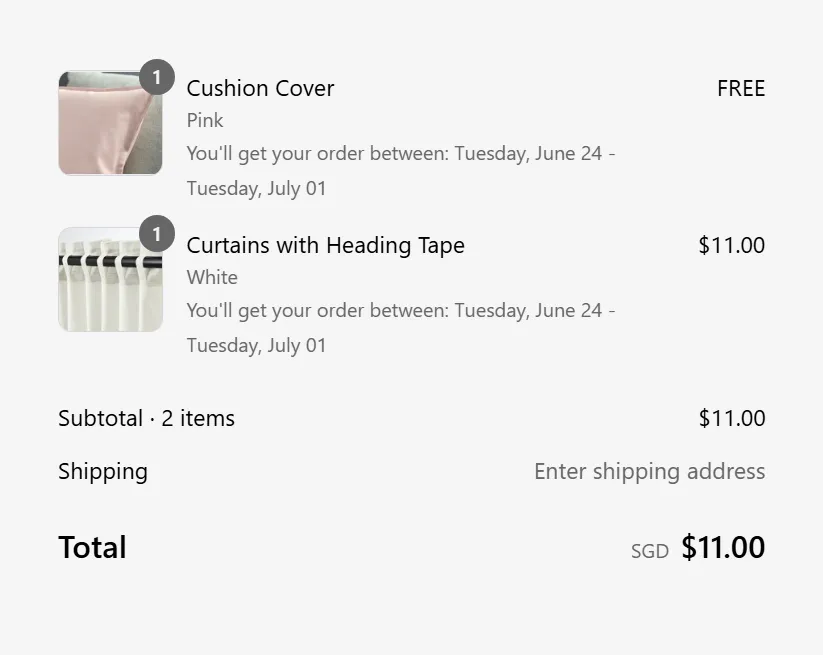
4. Click Save to confirm your changes.
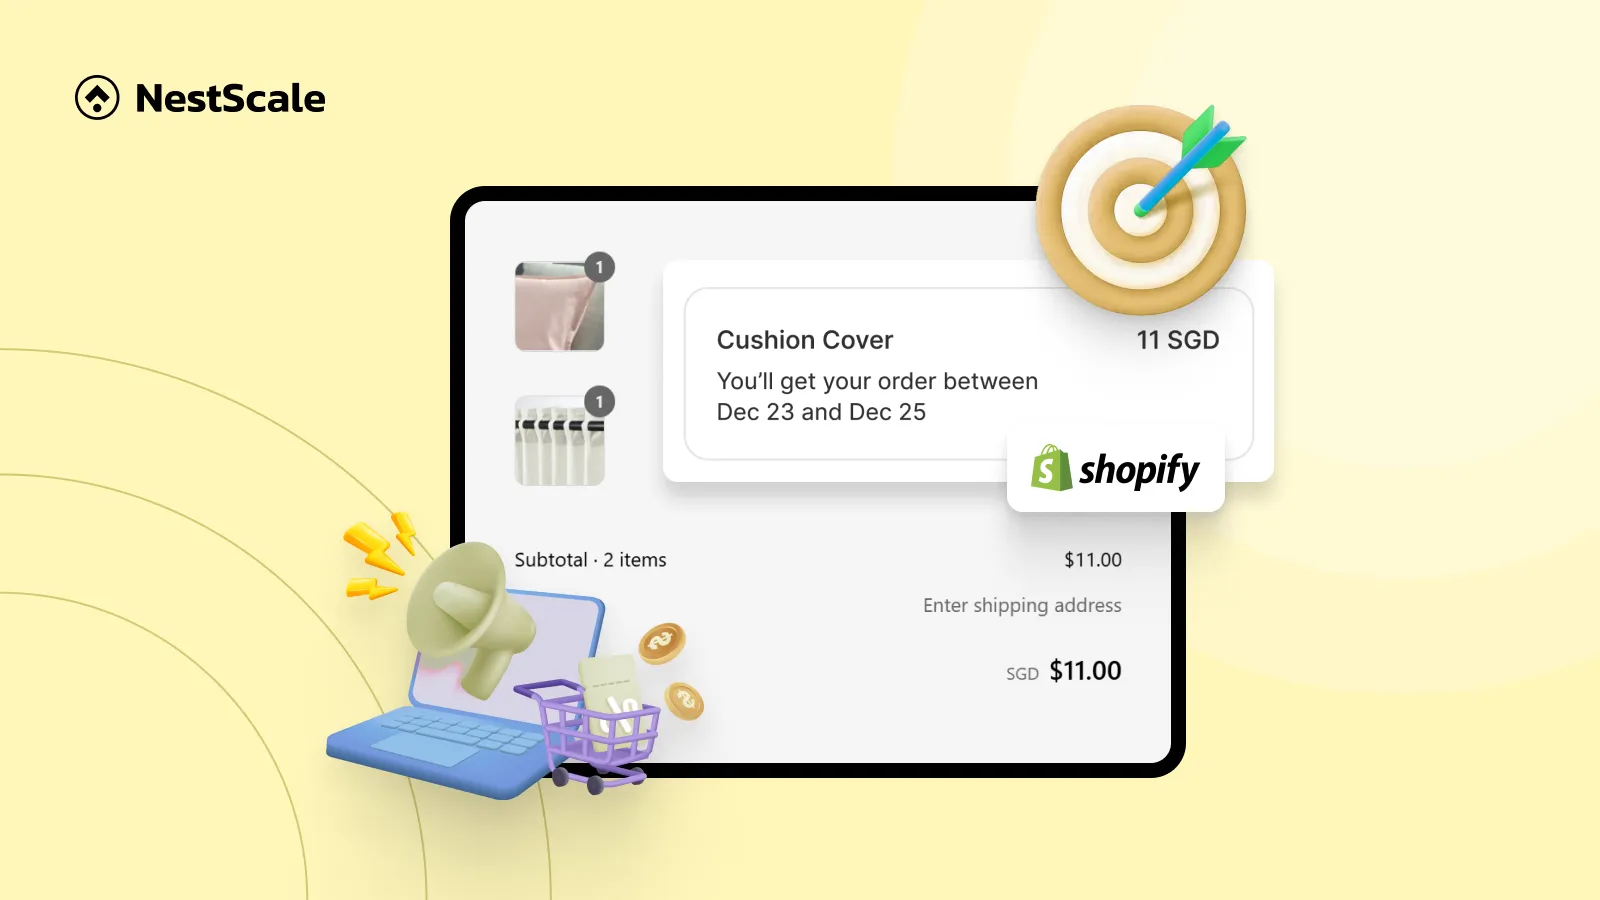
Here’s how the EDD message displays in your checkout.
FAQs
Is it possible to show the estimated delivery date during checkout before the customer completes the purchase?
Yes, but you need to use an app.
Under basic Shopify plans and typical themes (like Dawn), estimated delivery dates often do not appear on the product page or checkout before purchase; instead, customers receive delivery estimates only after purchase via email. And, Shopify’s built-in delivery dates are limited to certain countries depending on the shipping rate type you set up.
So to show EDD during checkout, you will need a Shopify app like NS Estimated Delivery Date, as we introduced in this guide. It can help you show a specific date under each product in your checkout.
How do I handle different shipping times for various products or locations when displaying estimated delivery dates?
If you have products with different shipping times, you can apply the Product Rules in NS Estimated Delivery Date to show different estimated delivery messages for each of them.
Besides, for multiple visitor locations, the app also includes an IP detector to automatically convert time to match the visitor’s current location. Additionally, you can set the delivery date range for different countries if you’re selling globally.