To simplify tracking Meta ads for Shopify stores, this month, we bring NS Meta Pixels – a code-free solution to set up multiple pixels effortlessly on your store pages.
First things first, let’s talk a bit about Meta pixels.
What is Meta Pixel? Do you actually need it?
A Meta pixel is a small piece of code that sits on your Shopify store pages and tells Meta what visitors do on your site. When someone views a product, adds it to their cart, or completes a purchase, the pixel records these actions and sends the information back to Meta Ads Manager.
This data allows you to:
- See which ads bring real sales
- Retarget visitors who didn’t complete a purchase
- Optimize ad delivery to people most likely to buy
What you put in is what you get out. With the right data feeding for Meta, you’ll start seeing more real conversions instead of blindly hoping for clicks.
Basically, you have 2 common ways to add Meta pixels to your store: theme code change and Shopify’s native Meta Pixel integration.
The first is not a preferable choice for non-tech ones, and the latter only allows you to add one pixel, not an optimal choice. So, how about trying this more efficient way? Let us introduce NS Meta Pixels.
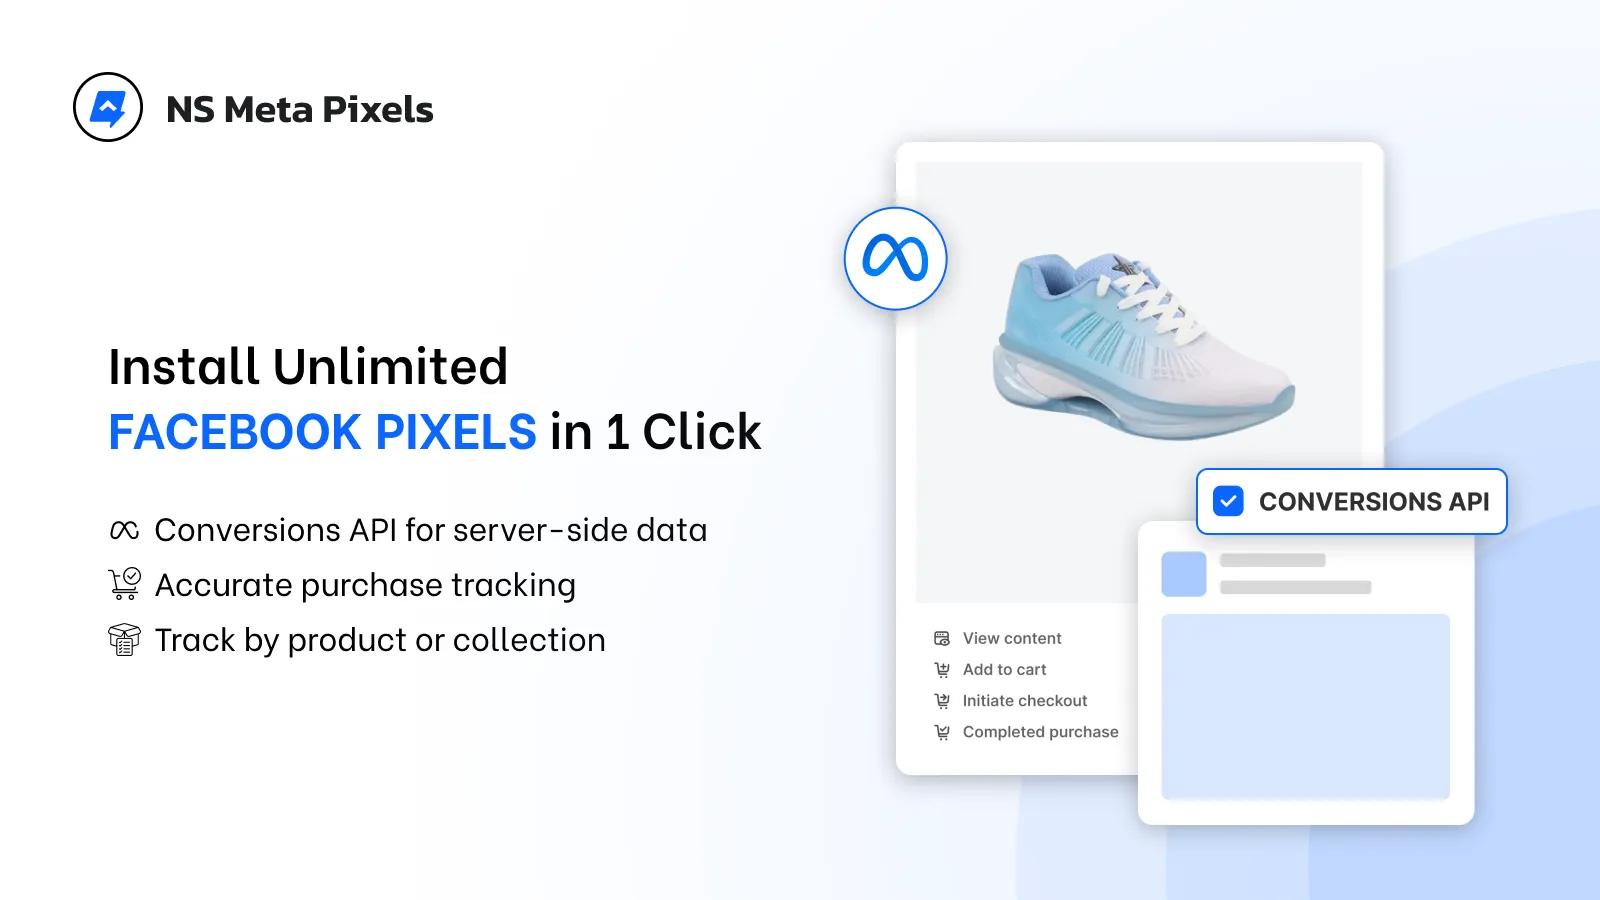
We built NS Meta Pixels to help you set up event tracking correctly on Shopify. Thereby, the data sending back to Meta are accurate for effective Meta ad optimization.
- Avoid missing purchase events: With proper conversion tracking, you’ll never miss a purchase event.
- Deduplicate events: When you use Meta pixels along with Conversions API, NS Meta Pixels sends Meta signal about the same events that happened between the two, so the action will be counted only once.
- Run high-converting retargeting campaigns: By assigning specific pixels to individual products, you can retarget users based on the exact products they’re interested in.
How to add Meta pixels to Shopify with NS Meta Pixels?
Before we start:
- To integrate Meta pixels to your store, you need to create Meta pixels in advance.
- If this is your first time with Meta pixels, make sure you create a Business portfolio from your Meta account to create Meta pixels.
Quick guide to create Meta pixels:
1. Go to Meta Events Manager.
2. From the drop-down in the right-hand corner (next to your avatar), choose your business portfolio.
3. Click Connect data > Web > Next > Create new dataset > Name your dataset > Create.
Now, let us guide you through 3 simple steps to connect Meta Pixels to Shopify with NS Meta Pixels app.
Step 1: Activate NS Meta Pixels
1. Go to the Shopify App Store and search for NS Meta Pixels or use the link below.
2. Click Install to add the app to your Shopify store.
3. Follow the onboarding steps to activate the app.
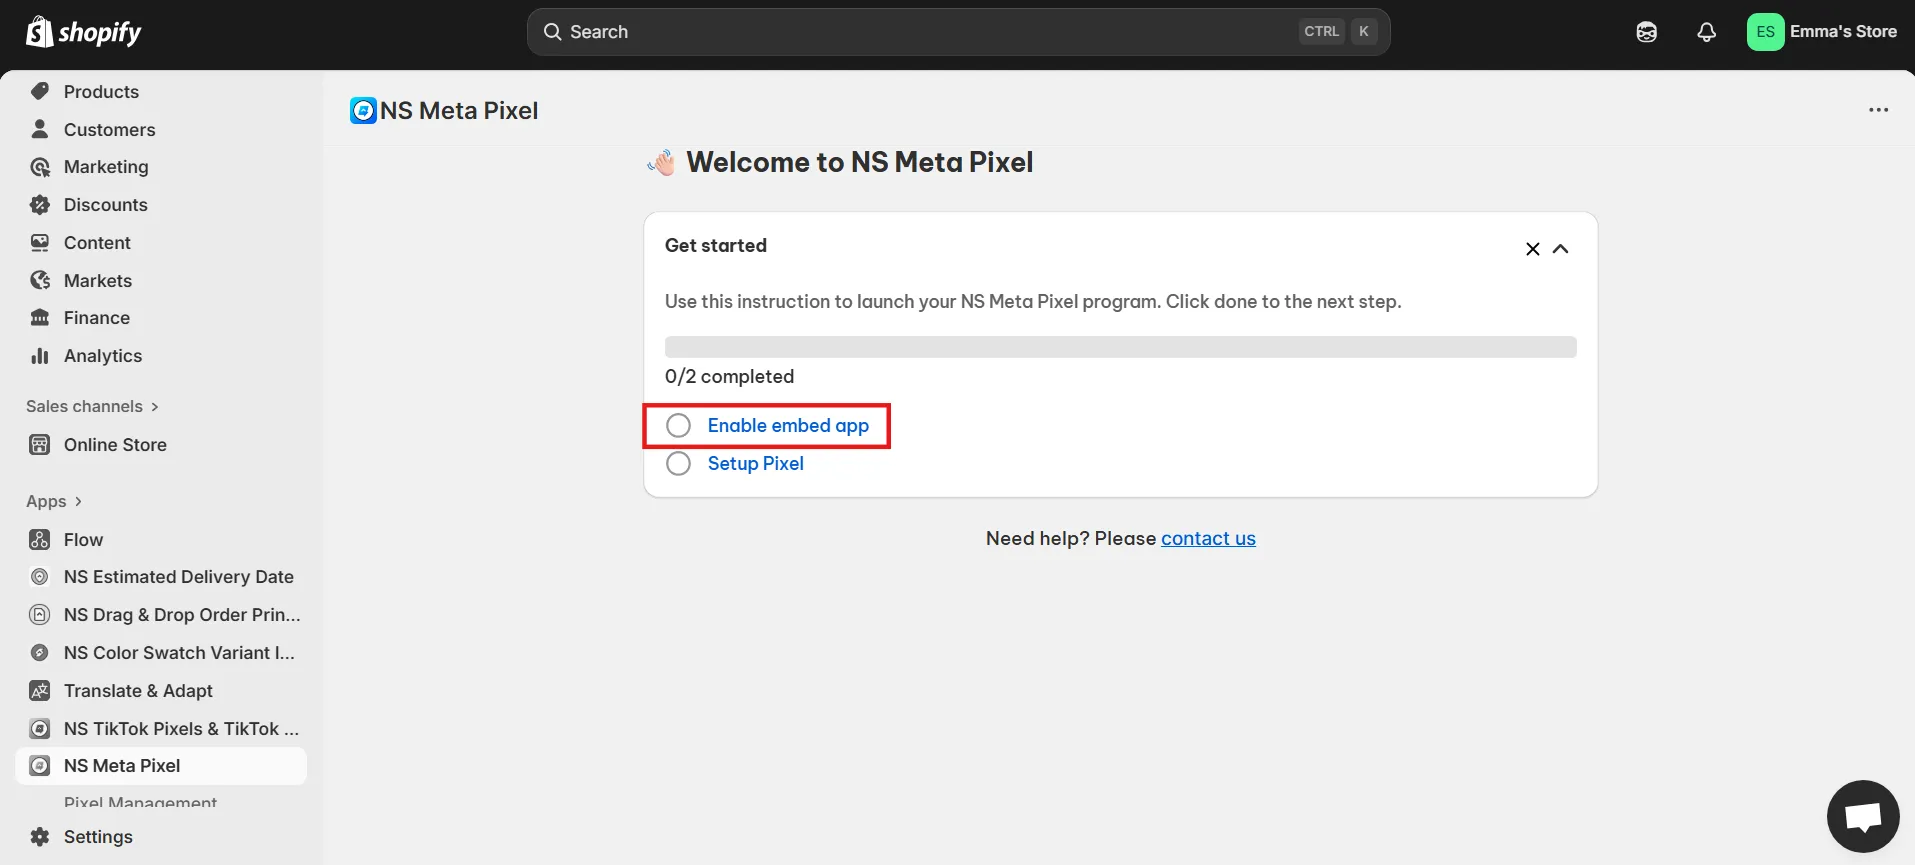
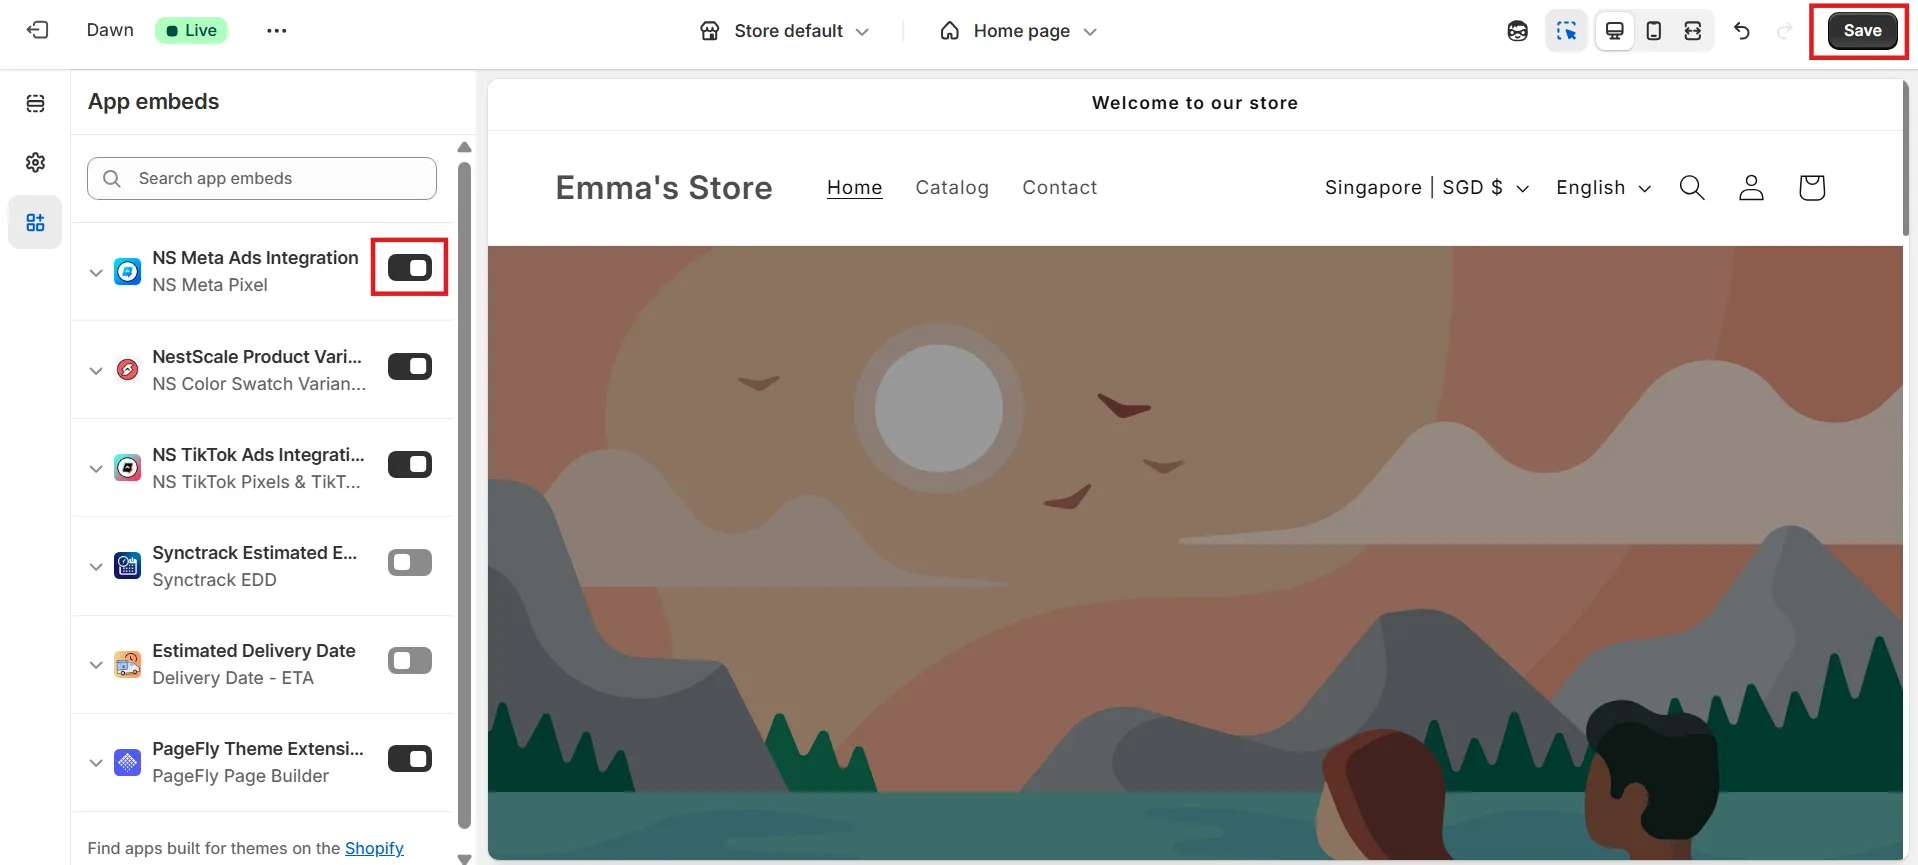
4. In app embeds, toggle ON the button to embed NS Meta Pixels, then click Save.
Step 2: Install Meta pixels
1. From the app menu, go to Pixel Management and click Add Pixel.
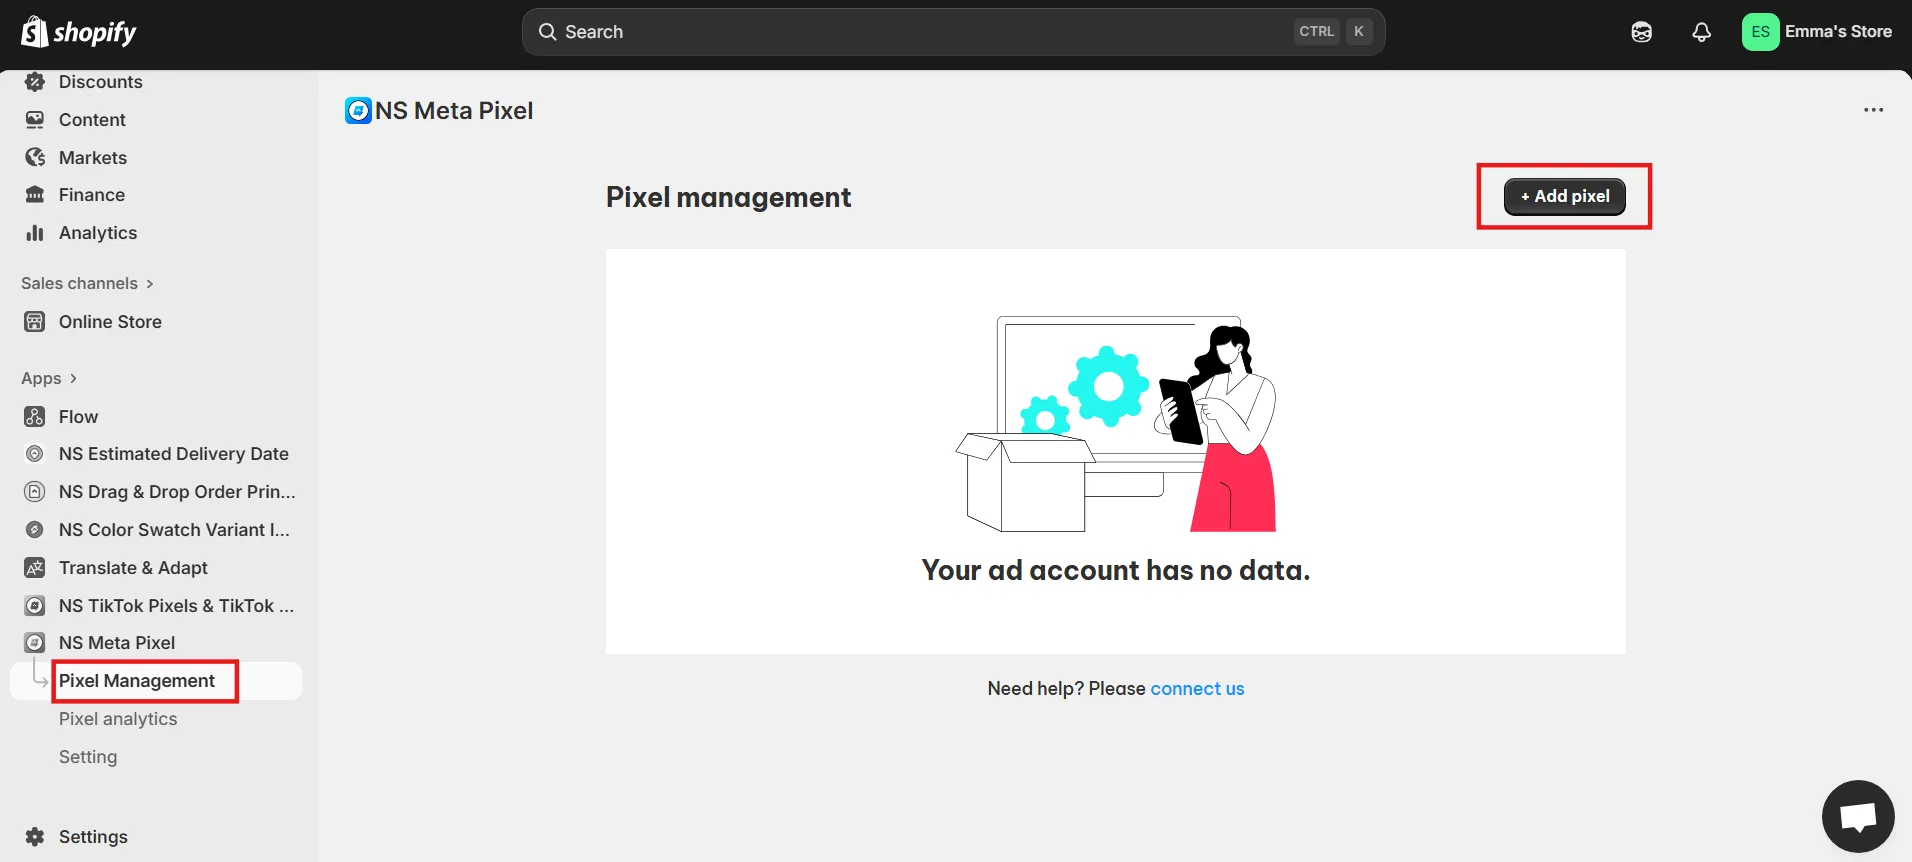
2. Enter a Pixel Name and paste your Pixel ID.

3. Choose a location where you want to track.
- Entire Store: Track all products across your store.
- Collection: Assign the pixel to up to 5 specific collections.
- Products: Assign the pixel to up to 5 individual products.

4. Select your Meta ad account timezone to align reporting.

Step 3: Enable Conversions API
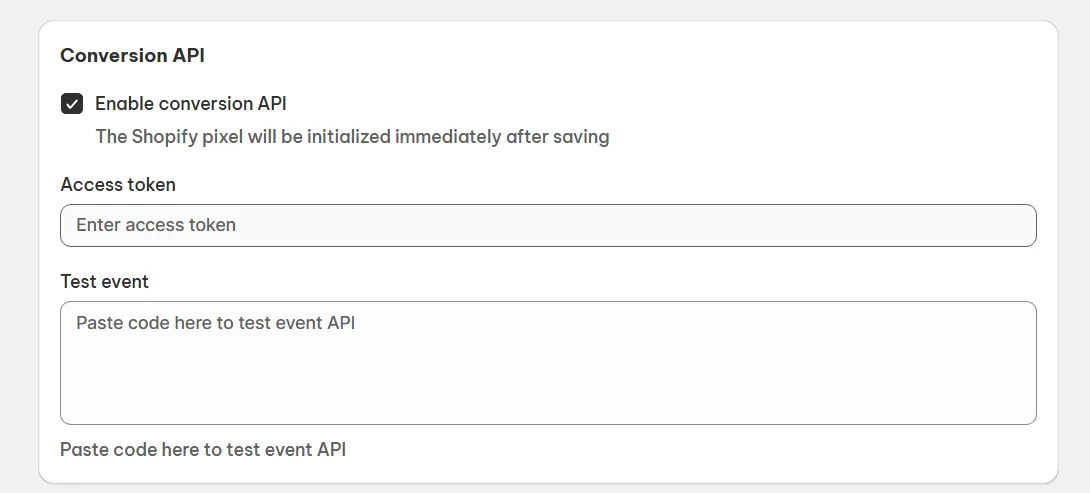
1. Check the box to enable Conversions API with your Meta pixel.
2. Paste your Access Token and Test Event Code provided in Meta Events Manager, click Save.
Your Meta pixel is now active.
*To verify:
- Go to your store and perform actions (viewing a product, adding to cart, or checking out).
- Then open Meta Events Manager to confirm that these actions are being tracked correctly.
With NS Meta Pixels, there’s no limit to the number of pixels you can add. Simply repeat the steps above to create and assign as many pixels as you need for your Shopify store.
Hopefully, this guide helps. If there are any challenges during the setup process, feel free to drop us a message in the in-app live chat. We’ll get back to you as soon as possible!


