Google Analytics 4 (GA4) is a powerful tool that helps you track and measure your business success. But with so many updates since the switch from Universal Analytics (UA) to GA4, it’s no surprise that many Shopify merchants find the setup process a bit confusing.
If you’re feeling stuck, don’t worry – you’re not alone! In this guide, I’ll walk you through how to set up goals in GA4 and use them effectively to measure success and optimize your marketing efforts.
What Are goals in GA4?
Update February 2025: In Universal Analytics, goals were used to track specific user interactions like purchases, sign-ups, and page visits. However, with the transition to GA4, goals have been replaced by key events, offering greater flexibility and deeper insights into customer behavior.
Key differences between goals and GA4 Key Events:
- No predefined goal types – Unlike Universal Analytics, GA4 doesn’t have built-in goal templates (e.g., destination, duration, or pages per session). Instead, it uses an event-based tracking system for more flexibility.
- More granular tracking – GA4 allows you to track multiple interactions within a single user journey, leading to more precise attribution.
- Better cross-device and cross-platform tracking – With its event-driven model, GA4 provides a unified view of user behavior across websites and mobile apps.
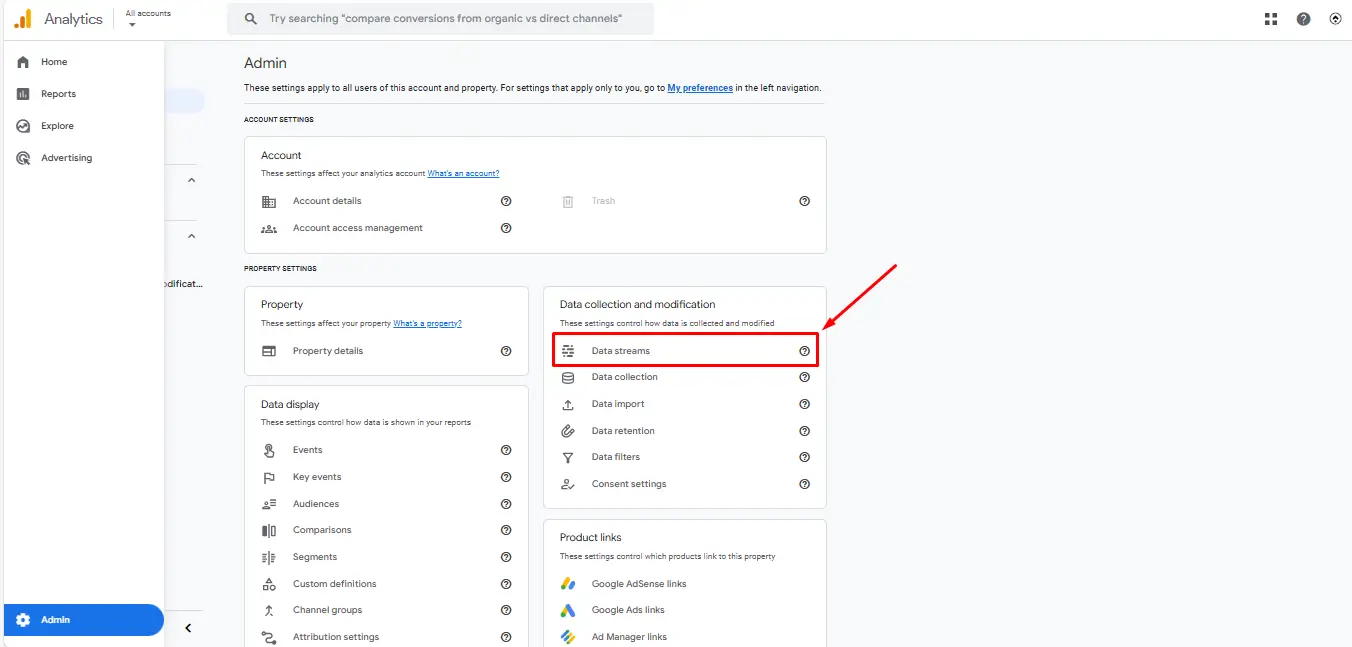
Step 1: Enable Enhanced Measurement events
GA4 automatically tracks several events through Enhanced Measurement, minimizing the need for manual setup. To make sure these events are enabled:
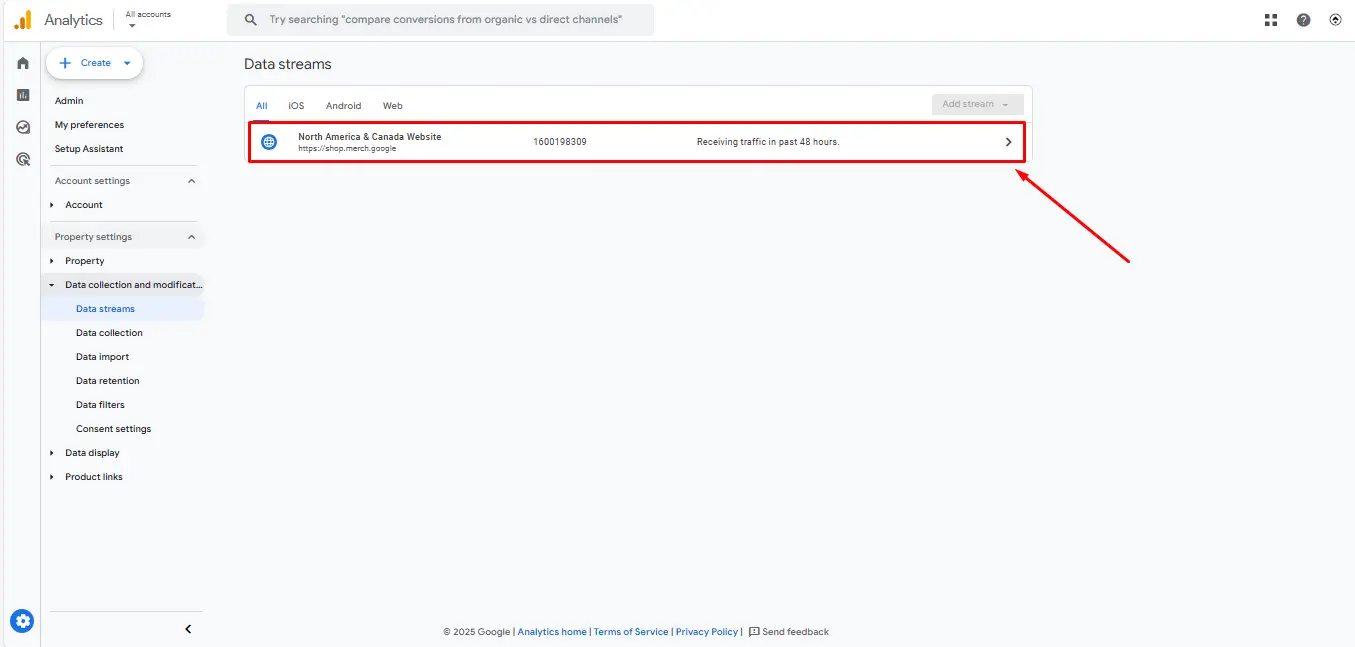
1. Go to GA4 Admin Panel → Click Data Streams under Property settings.
2. Select your Shopify store’s data stream.
3. Scroll down to Enhanced Measurement and toggle it on if it’s disabled.
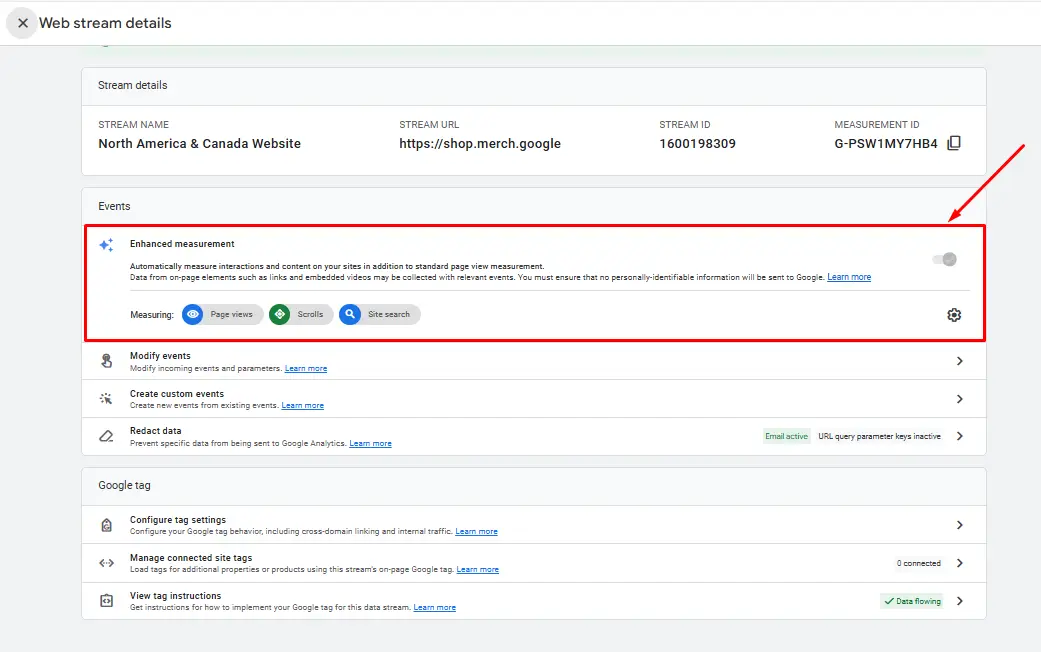
4. Click Configure tag settings to customize which events you want to track.
Key Enhanced Measurement Events for Shopify merchants:
- Page views – Tracks when users visit any page on your site.
- Scrolls – Triggers when a user scrolls at least 90% of a page.
- Outbound clicks – Tracks when users click on external links.
- Site search – Logs searches made within your Shopify store.
- Video engagement – Captures when users interact with embedded videos.
- File downloads – Logs when users download files from your site.
While Enhanced Measurement covers many essential interactions, you may need to track additional user actions specific to your business. If so, check out our guide on setting up custom events to track conversions that matter most to you.
Step 2: Identify Key Events to track
To get the most value from GA4, start by identifying the customer actions that matter most to your business. For Shopify merchants, common conversion events include:
- Purchase: Completed orders.
- Add to cart: When a customer adds a product to their cart.
- Begin checkout: When a customer starts the checkout process.
- Subscribe: When users sign up for newsletters or memberships.
- Contact form submission: When users send inquiries through a contact form.

Step 3: Mark events as Key events
Once you’ve set up your events, mark them as conversions to track them effectively.
- Go to GA4 Admin Panel → Click Events.
- Find the event you want to track (e.g., “purchase”).
- Toggle the switch under “Mark as conversion.”
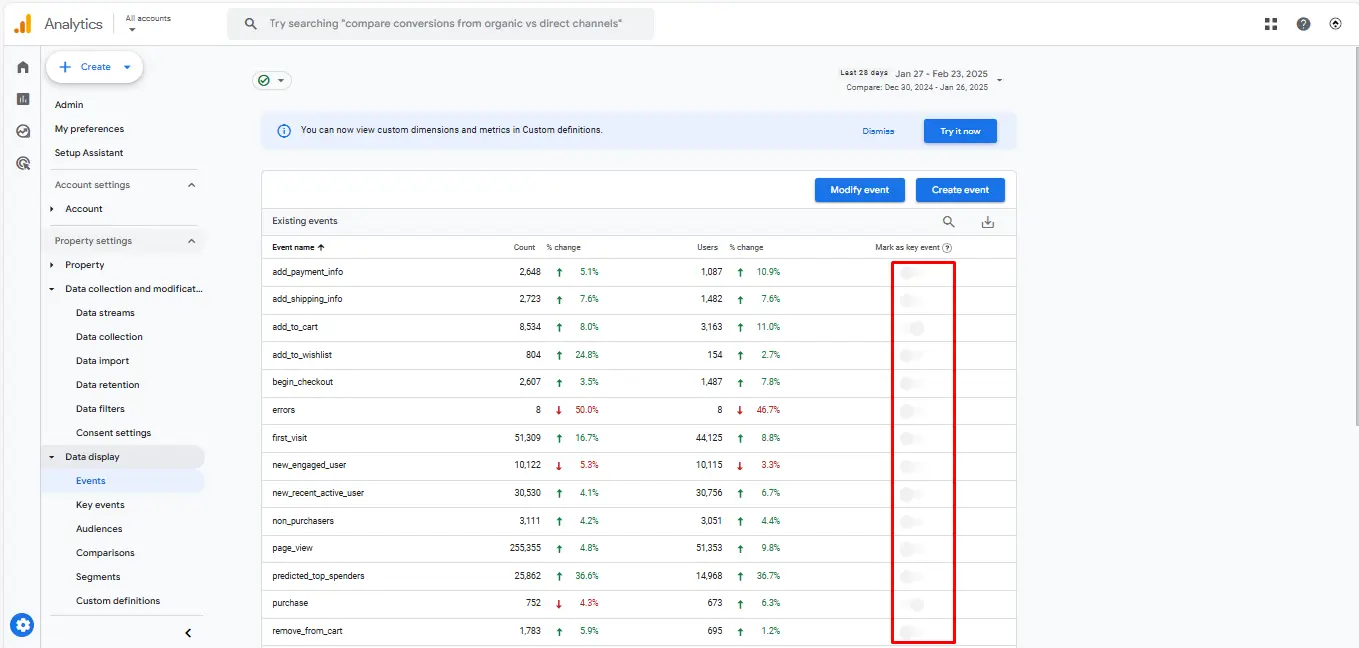
GA4 will now log this event as a conversion in reports.
Step 4: Verify your goal tracking
Before relying on your data, test your conversion tracking setup.
- Use DebugView: Go to Admin → DebugView in GA4 and perform the tracked actions (e.g., complete a test purchase) to see if events fire correctly.
- Check Realtime reports: In Reports → Realtime, you can verify if GA4 logs the conversion when you trigger it.
Step 5: Analyze and optimize performance
Once conversion tracking is set up, use GA4’s reports to gain valuable insights:
- Engagement → Events Report – Tracks the performance of your conversion events.
- Monetization → Ecommerce Purchases – Analyzes product sales and revenue.
- Advertising → Attribution Model Comparison – Evaluates ad performance across different attribution models.
- Explore (Custom Reports) – Build tailored reports to analyze specific user actions and behaviors.