In a data-driven world, the more data you have, the more accurate your decisions will be. Sounds right, doesn’t it? Well… only halfway. Here’s the real truth: The more accurate data you have, the better your decisions will be.
Collecting behavioral and interactive data from your customers is great for making decisions that truly resonate with your business – especially in eCommerce. But sometimes, your vision gets blurred by your own actions.
This is what we call internal traffic. It might make your numbers look bigger and more promising, but on the downside, it can distort your insights and lead you astray.
That’s why we want to filter it out – simply and accurately. In this guide, we’ll walk you through three easy ways to clean up your data and get a clearer picture for better marketing analysis.
What is Internal Traffic in GA4?
Internal traffic in GA4 refers to visits from your own team, office locations, or any other sources that aren’t actual customers. This includes employees, developers, agencies, and even third-party testers.
The problem? These visits can skew key metrics like page views, engagement rate, and conversion rates – ultimately leading to inaccurate analysis.
Why filtering internal traffic matters
Before we dive into the technical steps, let’s quickly cover why filtering out internal traffic is a must:
- More accurate analytics – Internal visits can inflate page views and engagement rates, leading to misleading insights.
- Better ad performance tracking – If your team frequently visits your site, they might trigger ad impressions and events that don’t reflect actual customer interactions.
- Cleaner conversion data – Filtering out internal traffic ensures your sales and lead conversions are tracked correctly.
- Optimized marketing attribution – Keeping internal traffic out of NestAds and GA4 means better cross-platform attribution and more reliable data.
Option 1: Exclude internal traffic based on your IP address
Step 1: Identify Internal traffic
1. Go to Admin > Data Streams and select your data stream.
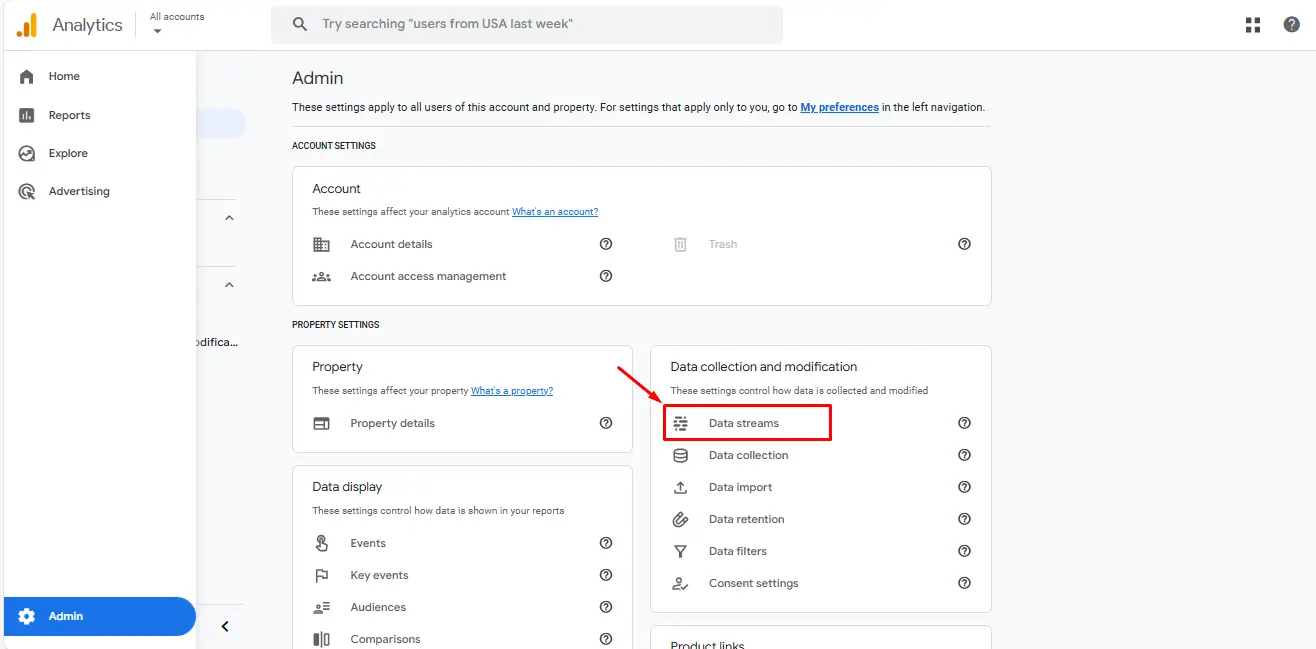
2. Click Configure Tag Settings.
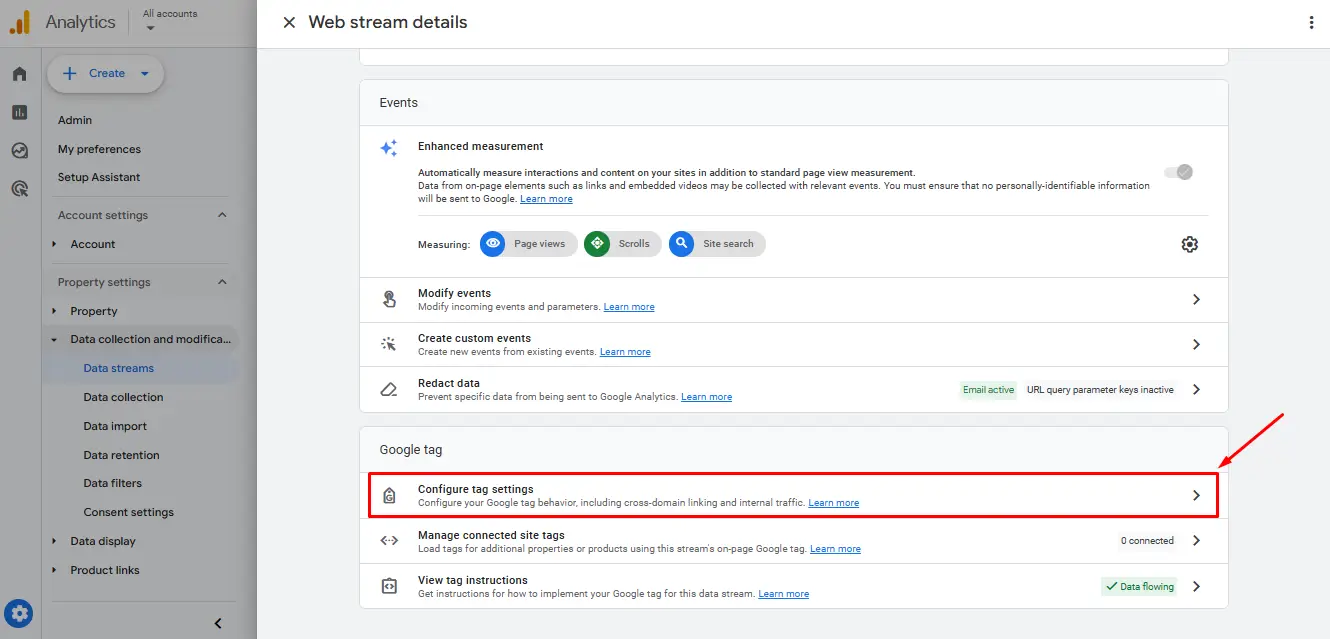
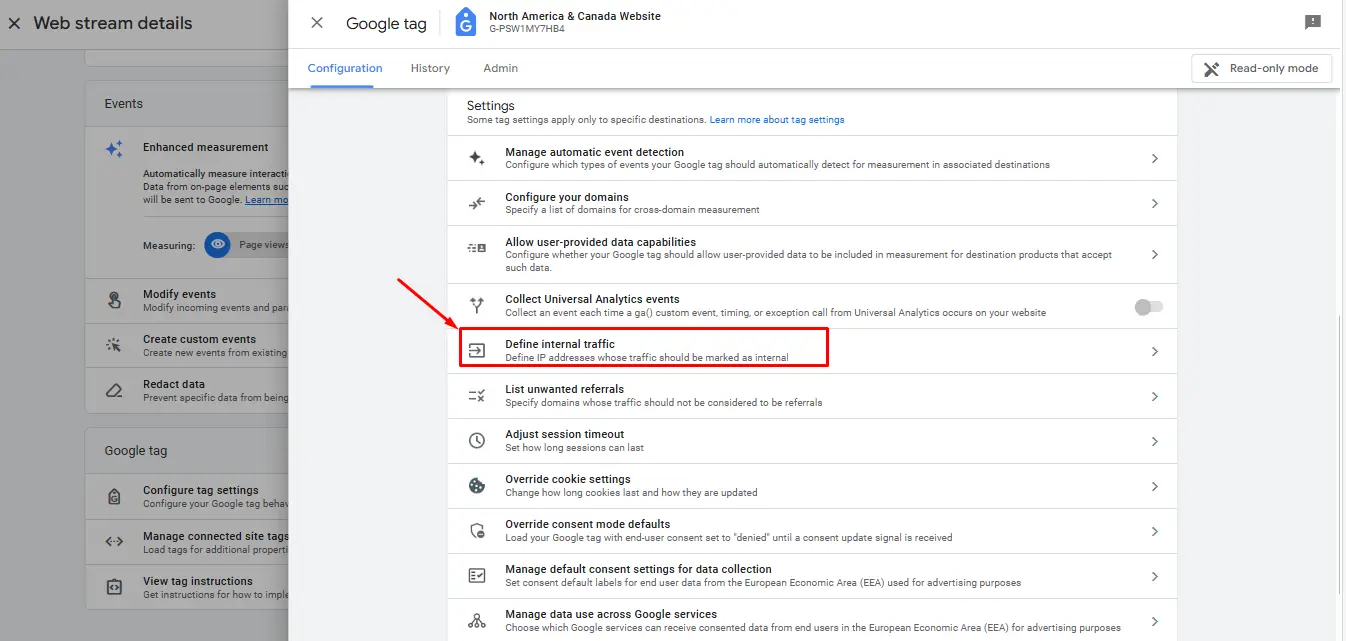
3. Click Show More, then select Define Internal Traffic.
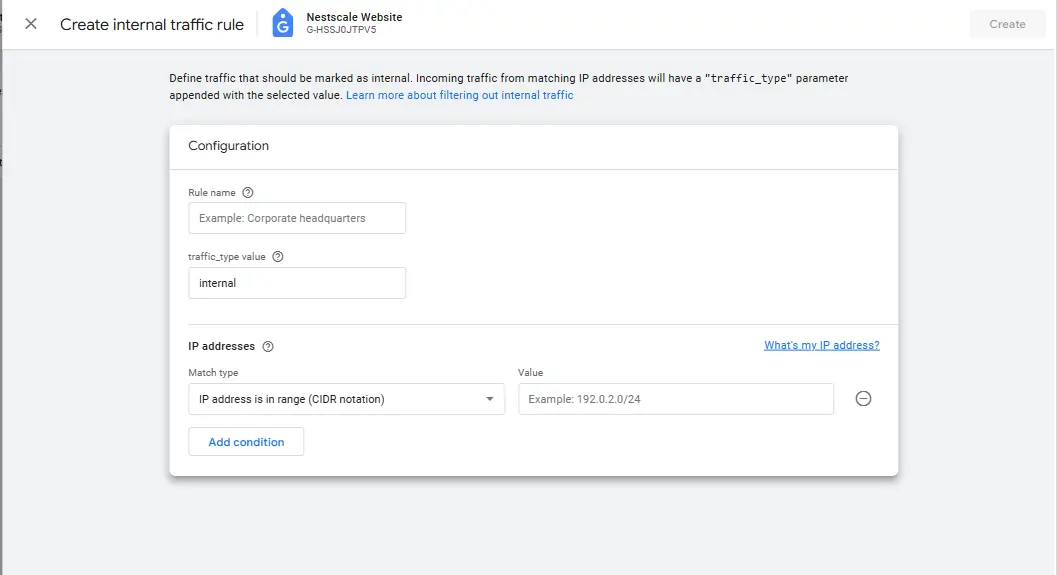
4. Click Create.
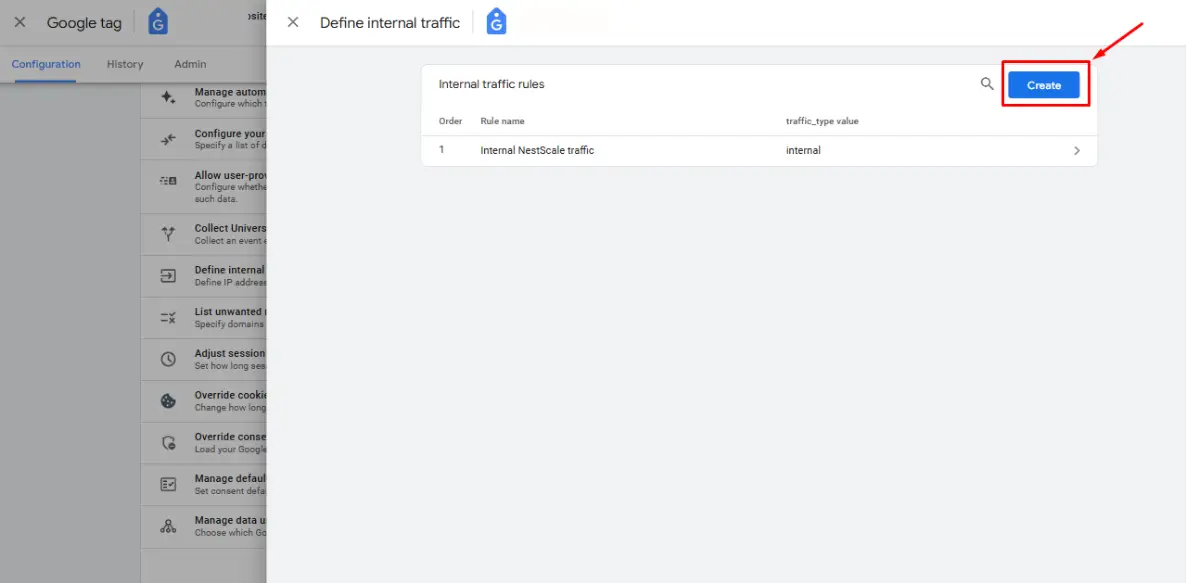
- Enter a name for the rule.
- Enter a value for the traffic_type parameter (default is “internal”, but you can assign a custom label).
- Under IP Address > Match Type, select an operator (e.g., Equals, Begins With, or use Regex for multiple IP ranges).
- Under IP Address > Value, enter your IP or range of IPs (both IPv4 and IPv6 supported).
- Click Create.
Step 2: Create a Data Filter
Once internal traffic is defined, set up a filter to exclude it from reports.
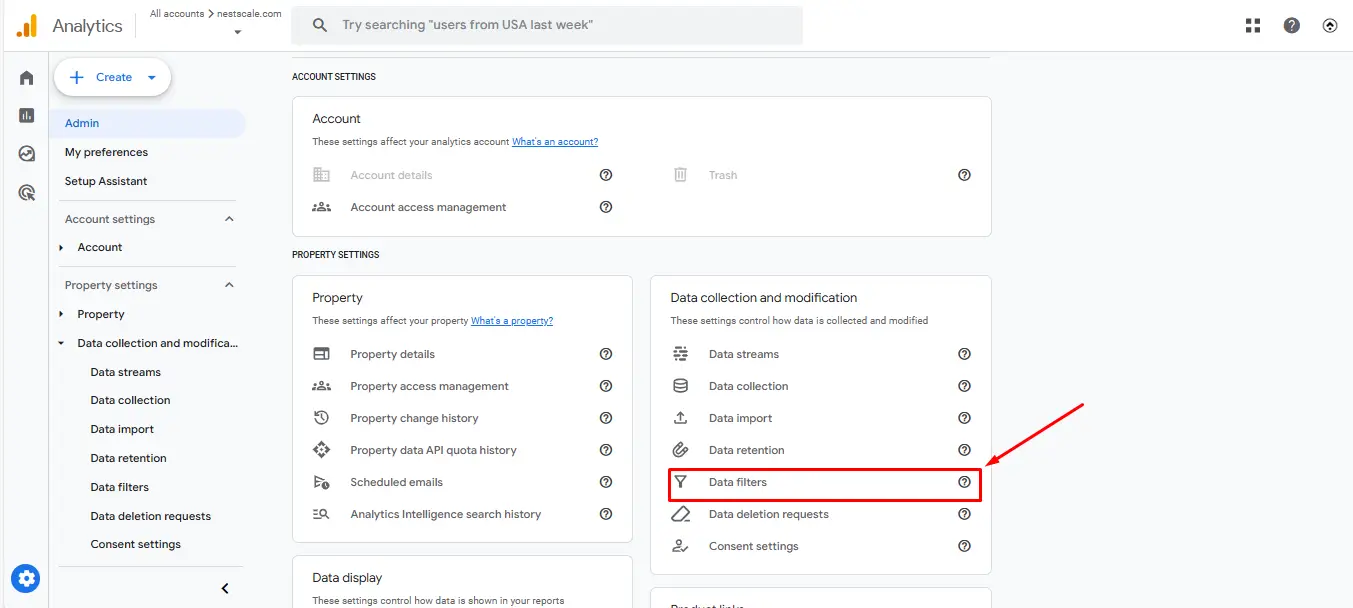
1. Navigate to Admin > Data Collection and Modification > Data Filters.
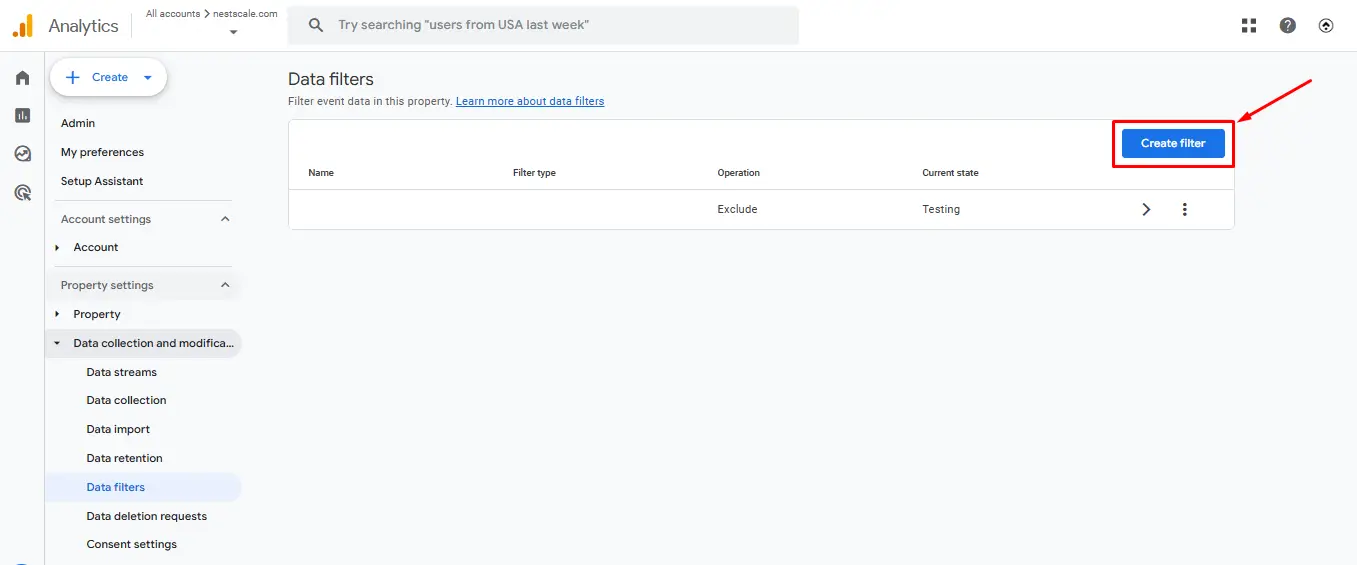
2. Click Create Filter.
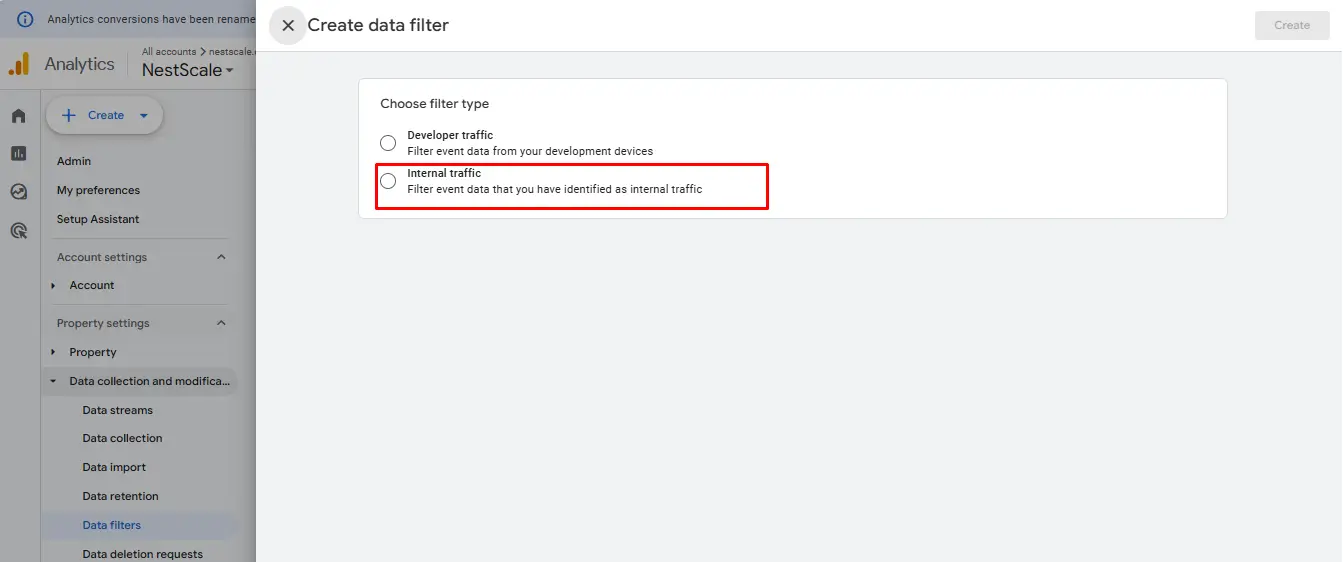
3. Choose Internal Traffic.
- Enter a name for the data filter.
- Select Exclude to remove events where the traffic_type parameter matches your rule.
- Choose a Filter State:
- Testing: Data is marked but not removed. We recommend you use this option, as you can later on adjust the filter without letting it interfere when you test your events within DebugView. This allows you more dynamics and monitoring ability.
- Active: Data is permanently excluded.
- Inactive: No filtering applied.
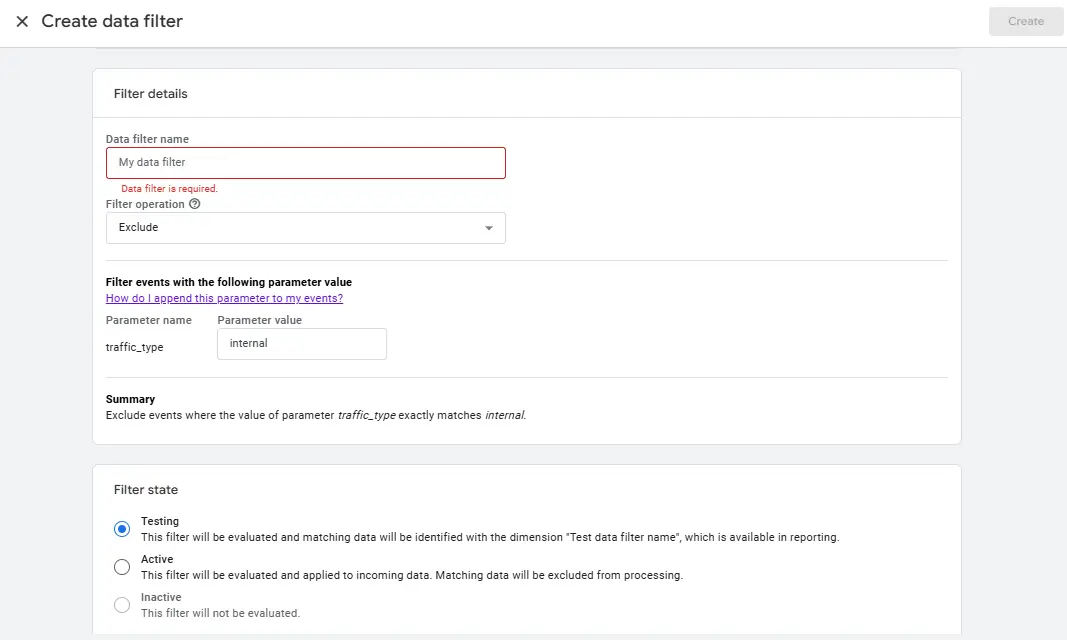
4. Click Create.
Option 2: Exclude internal traffic using the data layer
If exclusion by IP isn’t the most optimal choice for your team (e.g., your team has dynamic IPs or remote teams), you have the second option is to add a data layer to tag internal users.
How to implement data layer-based filtering?
Modify your website’s GTM script to push an internal user variable:
window.dataLayer = window.dataLayer || [];
window.dataLayer.push({
    'event': 'internalUser',
    'userType': 'internal'
});- In Google Tag Manager (GTM):
- Create a new Variable: Select Data Layer Variable, set the name as userType.
- Create a Trigger: Set it to fire when userType equals internal.
- Apply this trigger to exclude specific tags.
- In GA4, create an Event Parameter for userType.
- Apply a Data Filter in GA4 to exclude userType = internal.
Option 3: Use browser extensions to filter internal traffic
If configuring GA4 isn’t an option, browser extensions can block internal visits.
Recommended extensions
- Google Analytics Opt-out Add-on – Prevents GA4 from tracking your visits.
- Block Yourself from Analytics – Lets users define which websites should exclude their visits.
- Tag Assistant (by Google) – Debugs and validates GA4 tracking setup.
How to use a browser extension?
- Install a GA4 blocking extension.
- Add your Shopify store domain to the exclusion list.
- Confirm by checking GA4’s real-time reports.
How to verify that the filter is working?
To confirm that your internal traffic is being filtered correctly:
- Open GA4 and navigate to Reports > Real-time.
- Visit your website from an internal location.
- Check if your visit appears in the real-time report.
- If it doesn’t appear, the filter is working.
- If it does, double-check your setup and IP address.
Final thoughts
Filtering internal traffic in GA4 may seem like a small step, but it’s a crucial one for Shopify merchants who rely on accurate ad tracking and marketing attribution. Whether you’re using IP-based filtering, data layers, or browser extensions, cleaning up your analytics ensures better data integrity and sharper insights.
Looking for more guidance on ad tracking and analytics? Stay tuned for more insights to help you fine-tune your marketing strategies!